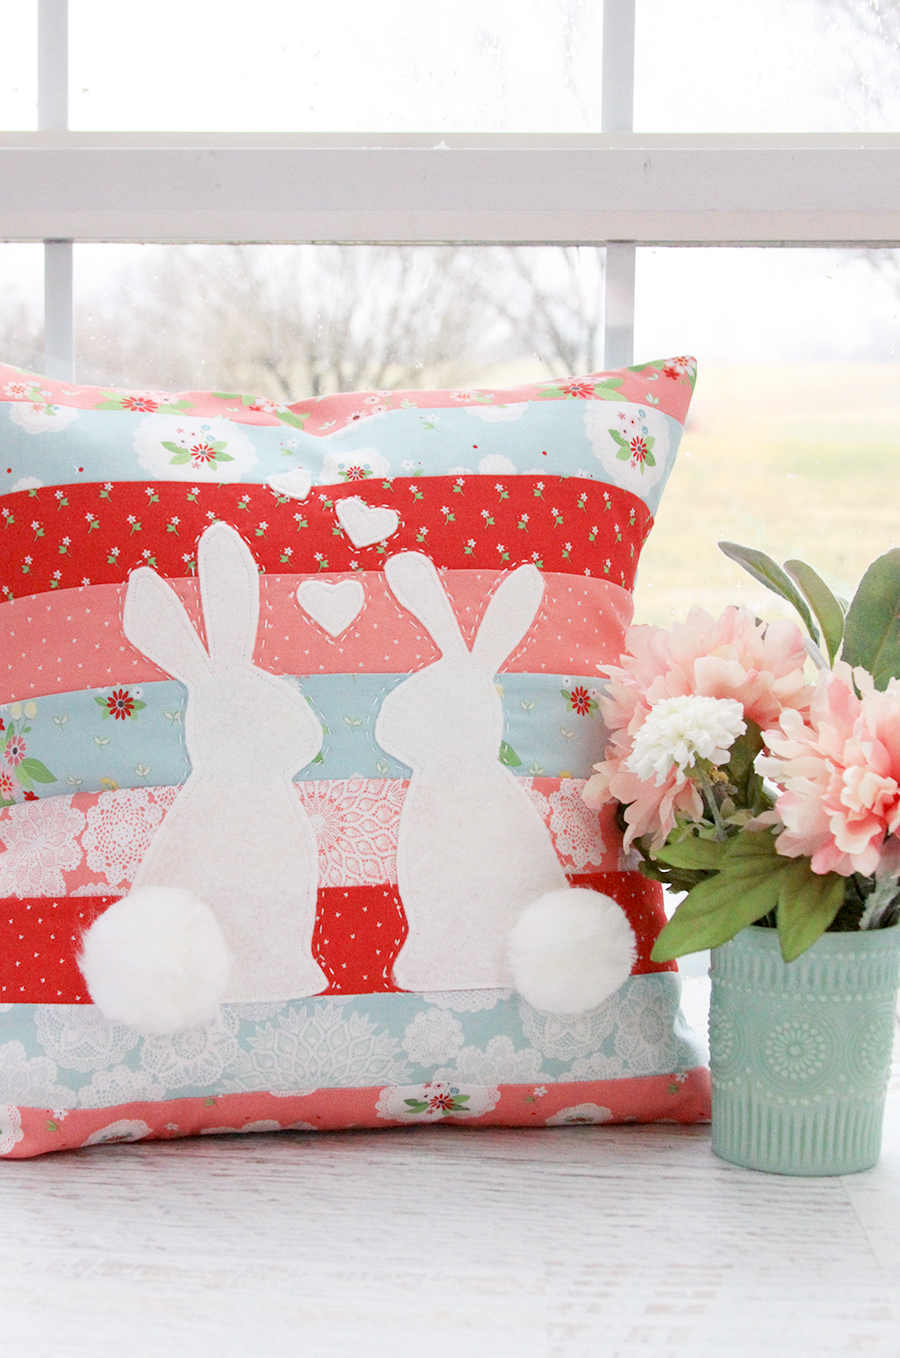
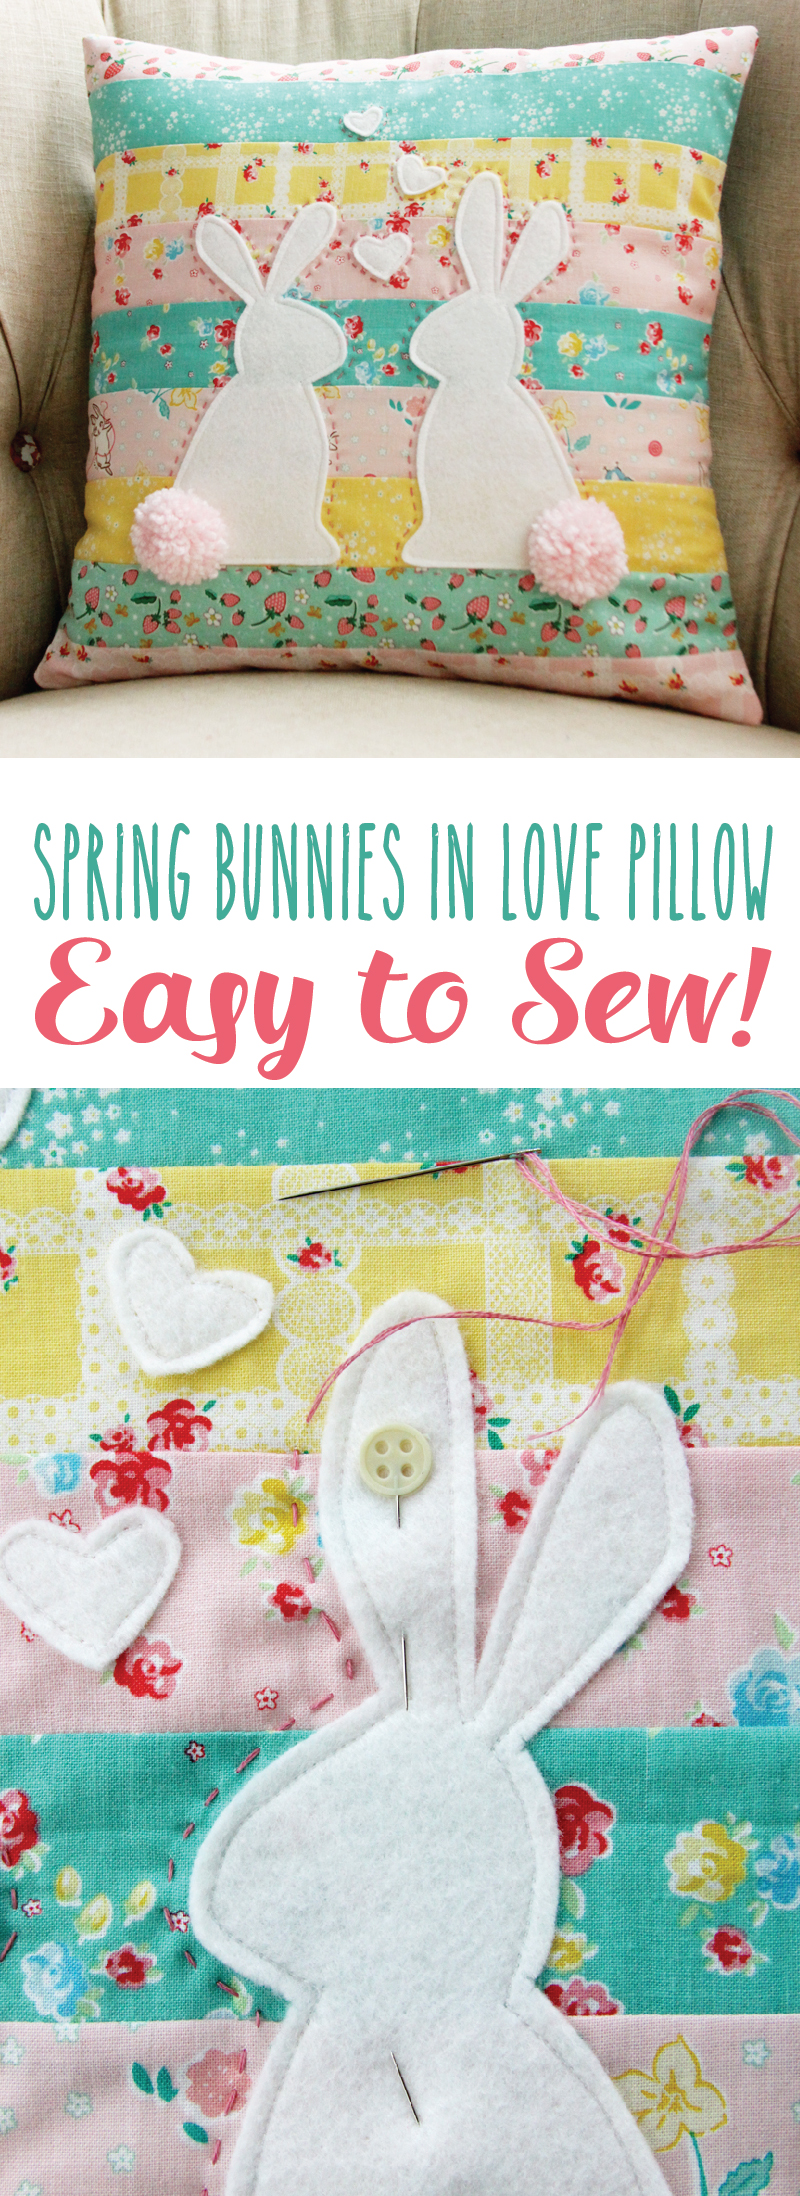
Add some color and cuteness to your decor with this Spring Bunnies in Love pillow! I’ve made up two versions – the newest is the one above made up in Vintage Keepsakes fabric!
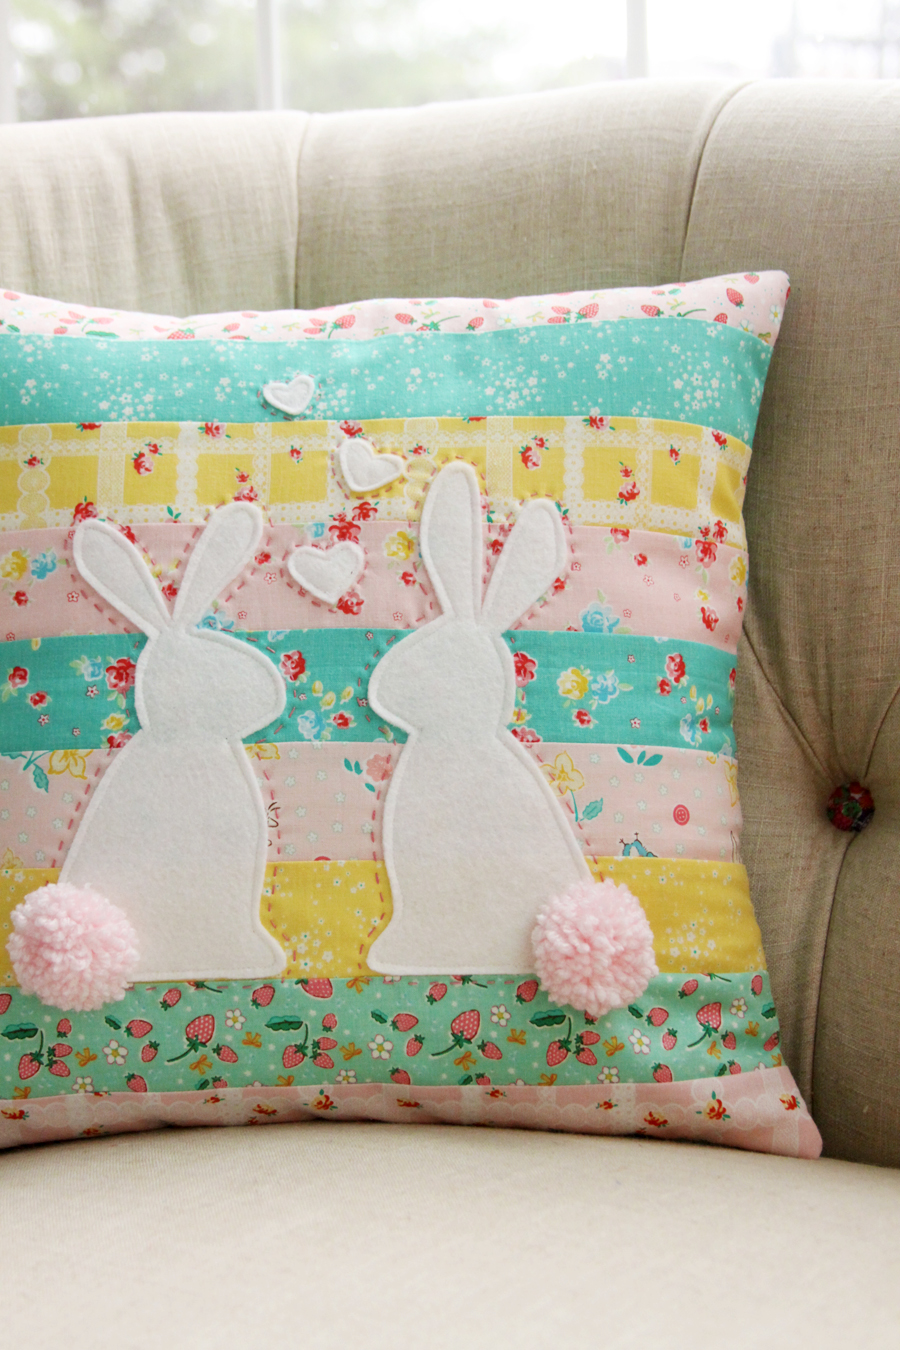
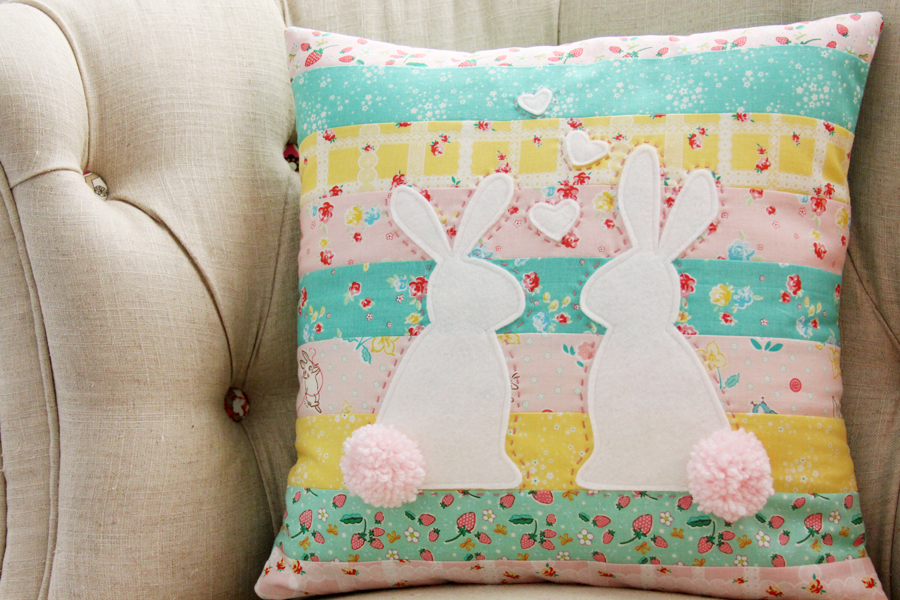
I’m having a blast sewing up all these Spring projects this week! The house is looking so bright and cheery! I couldn’t resist another project with the Bunnies and Blooms line of fabrics and I love how it looks in this pretty pillow.
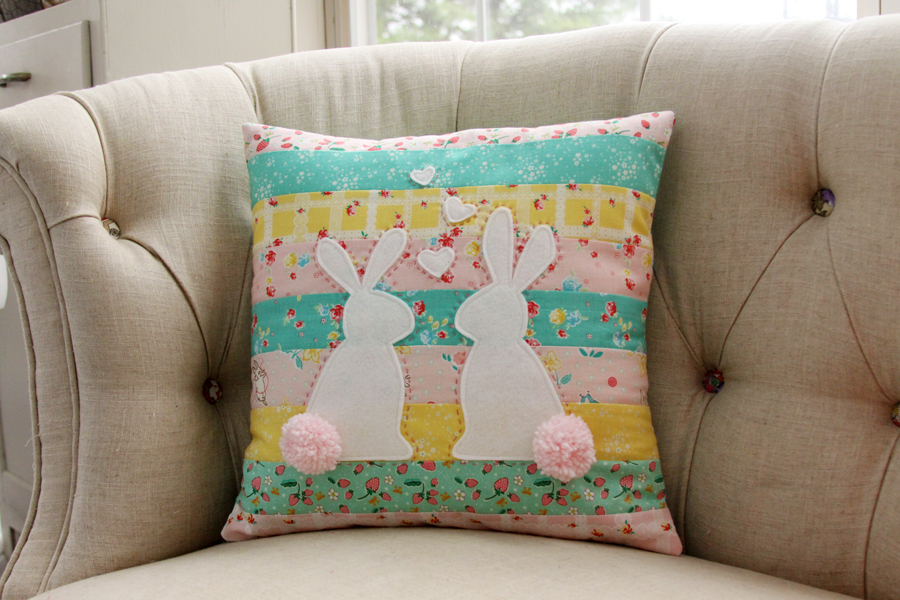
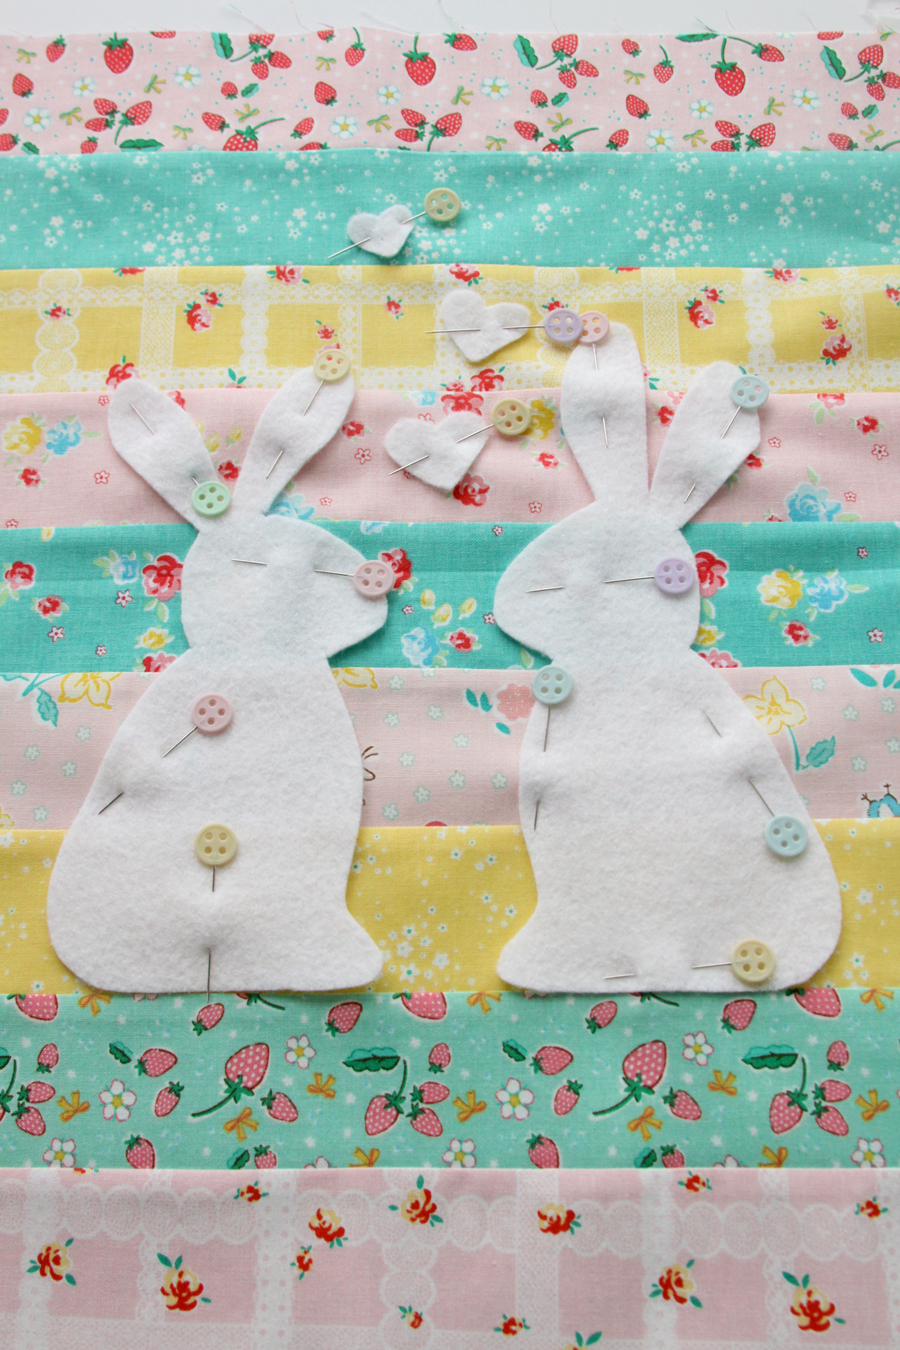
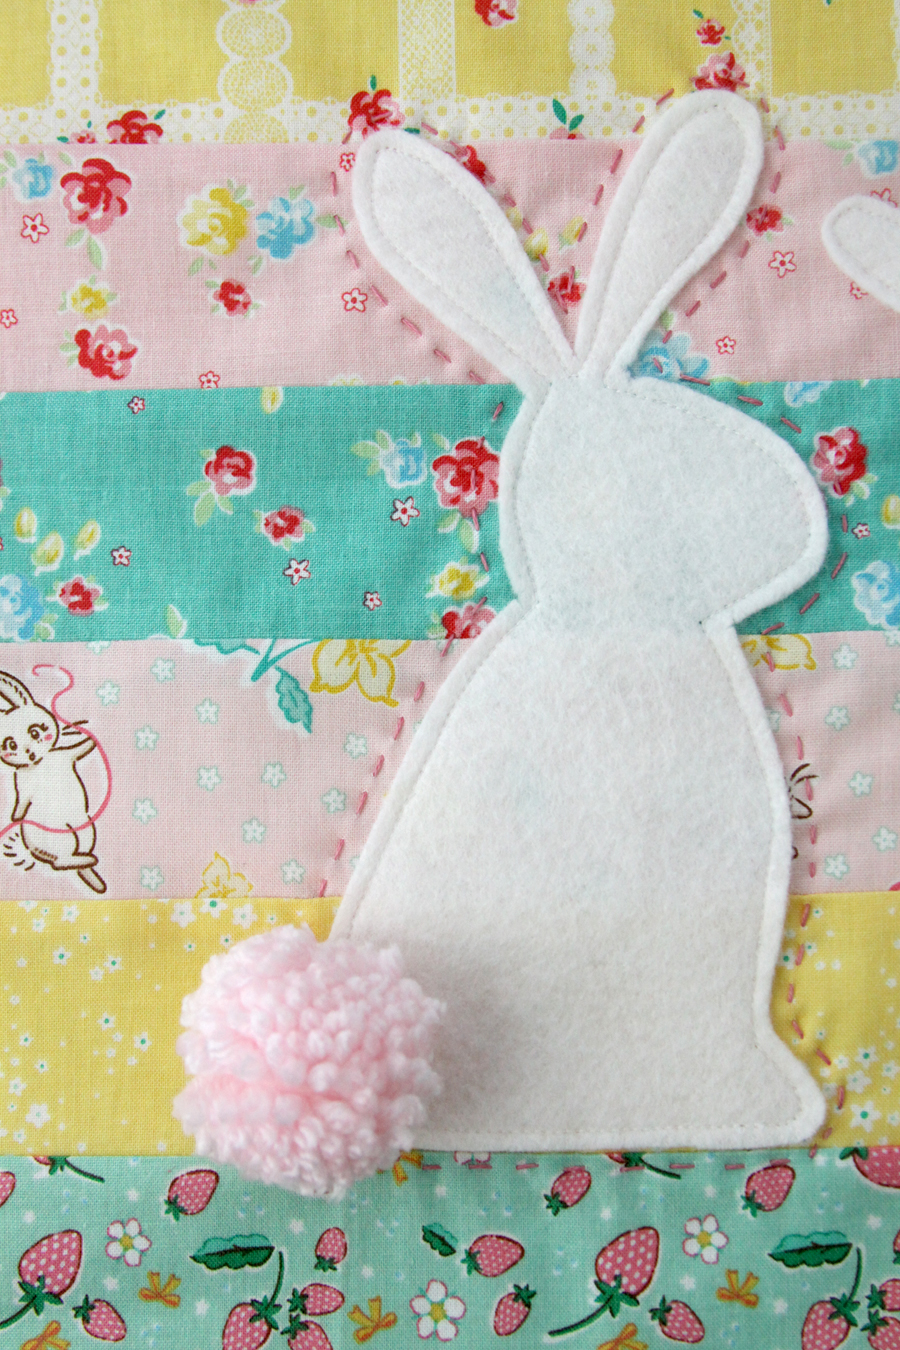
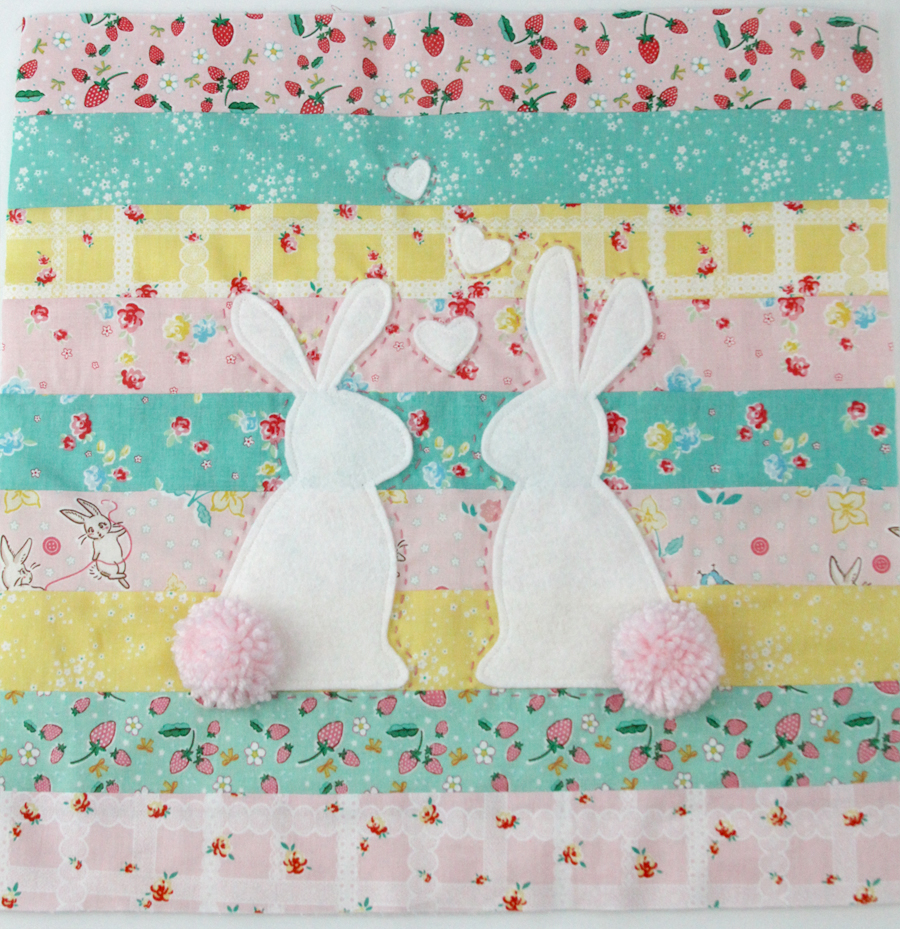
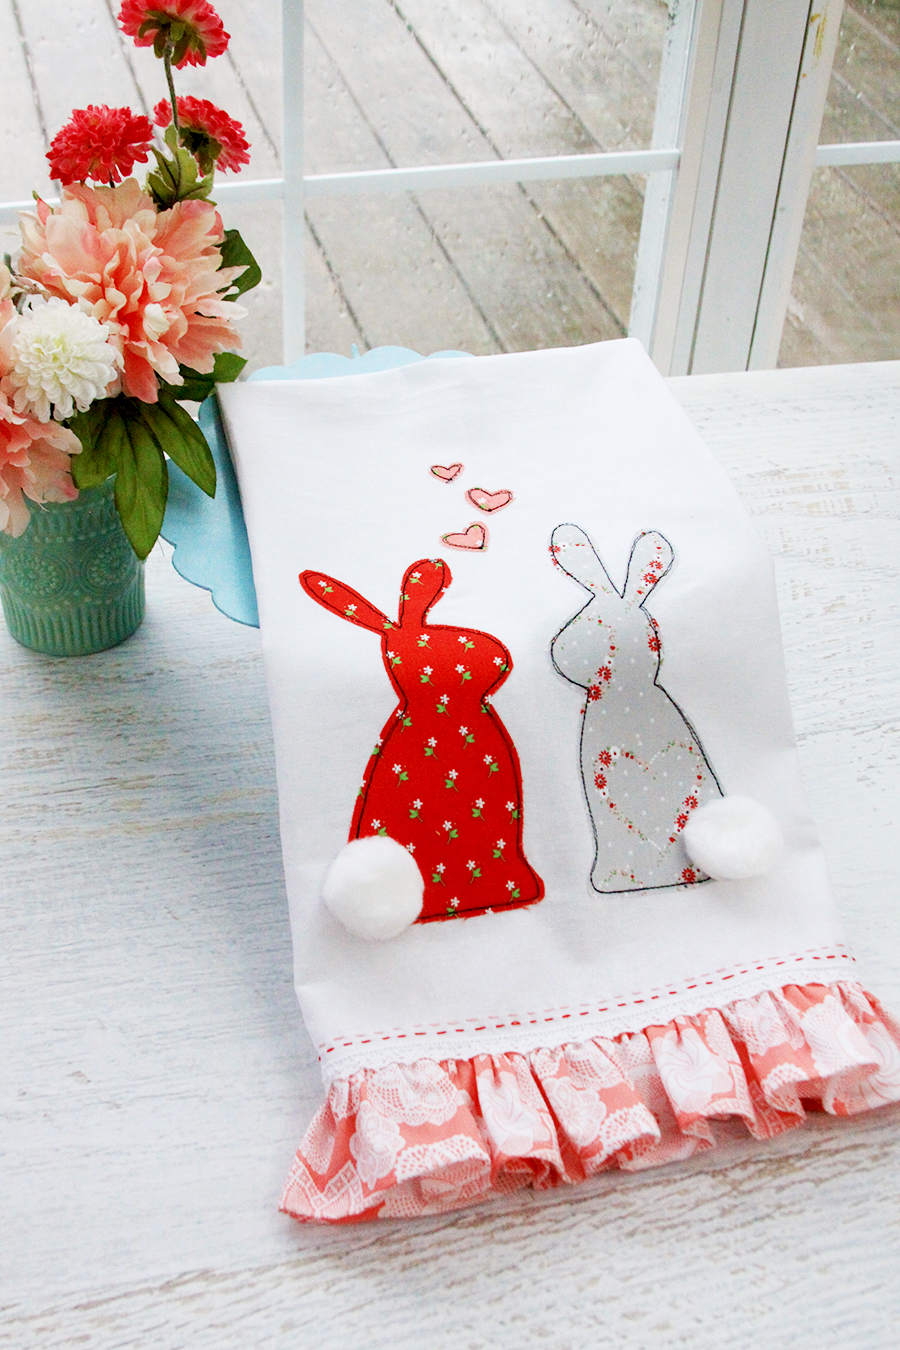
I used the same pattern design as my Bunnies in Love dishtowel – instead of the bunnies being the prints though I made them from a pretty wool felt and used the prints as a colorful background. I had to keep the fluffy pom pom tails though – they looked too cute.
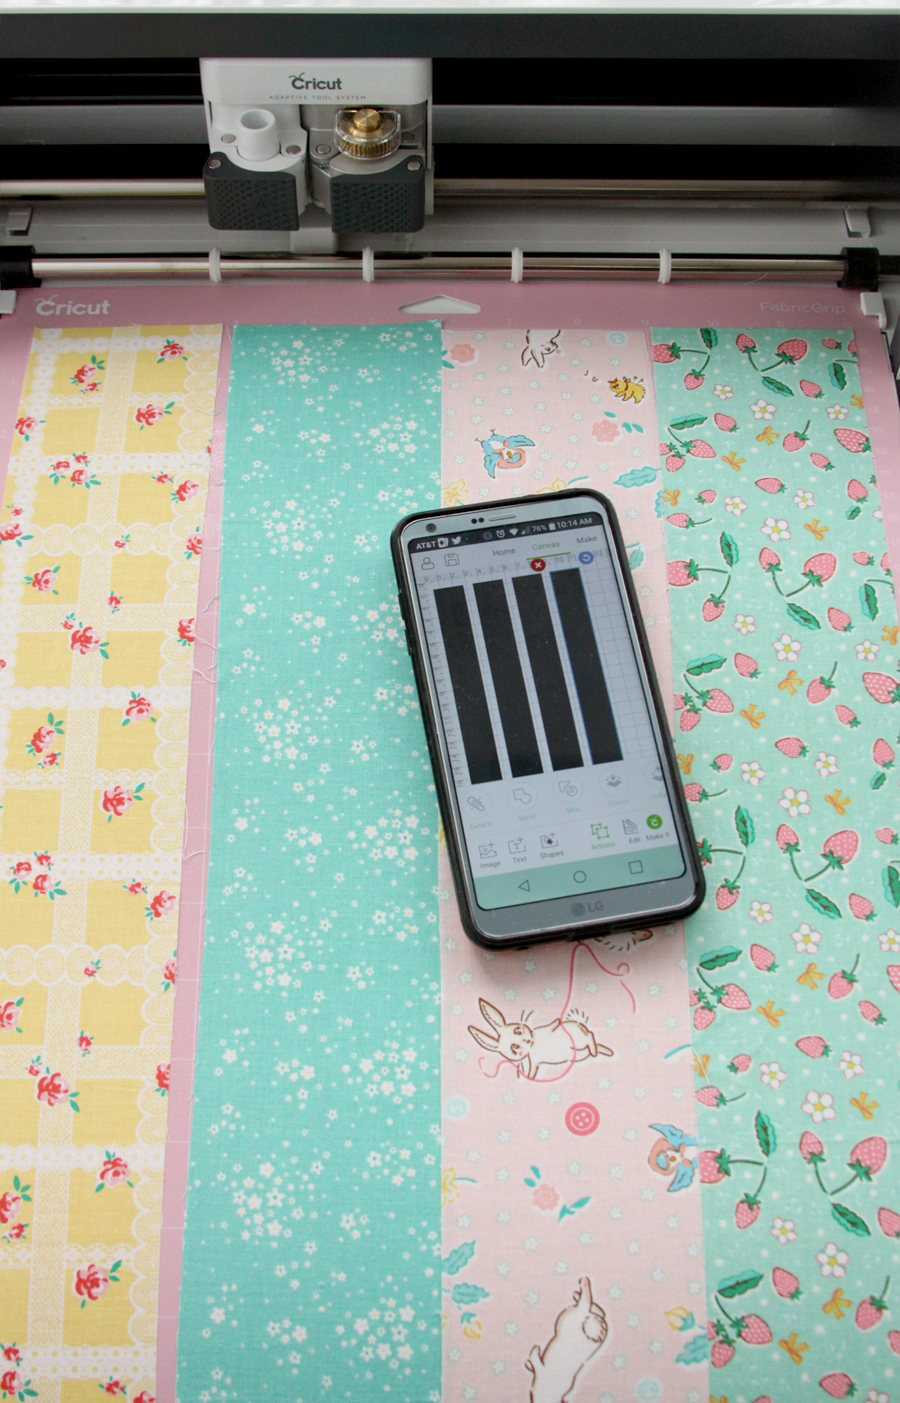
I decided to give my new Cricut Maker a go at cutting out the materials for the pillow – just to see how well it would well it would handle the felt. I already knew it could do the detailed cuts on cotton fabric but I wasn’t sure how well it would do with the felt – especially those little hearts. But it was awesome!!
I’ve also made this up without the Cricut – cutting everything out with a rotary cutter and scissors. Both worked great!
Here’s what you’ll need to make your own pillow!
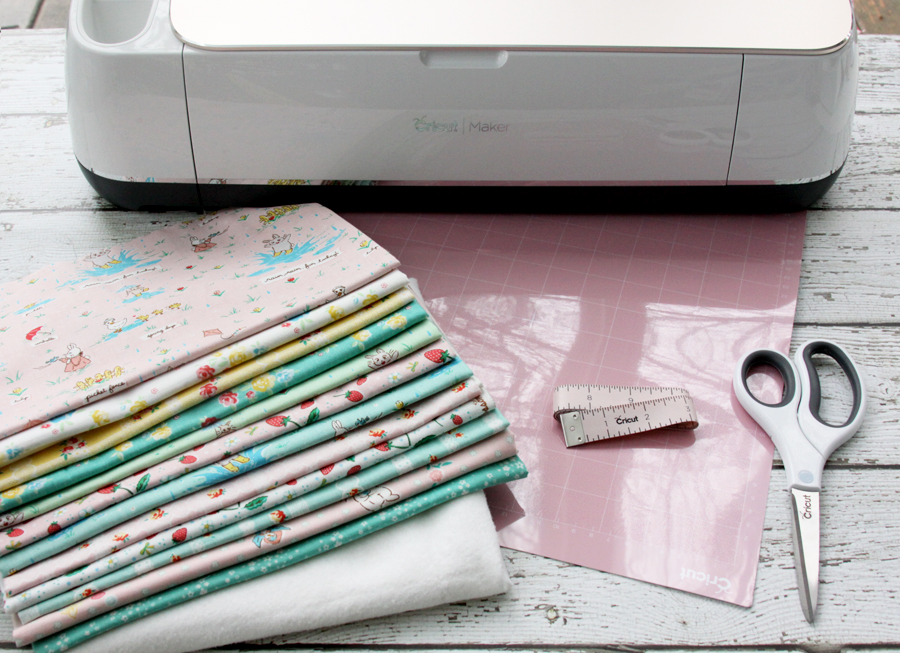
- Cricut Maker and Fabric Mat
- 11″ x 9″ piece of white wool felt
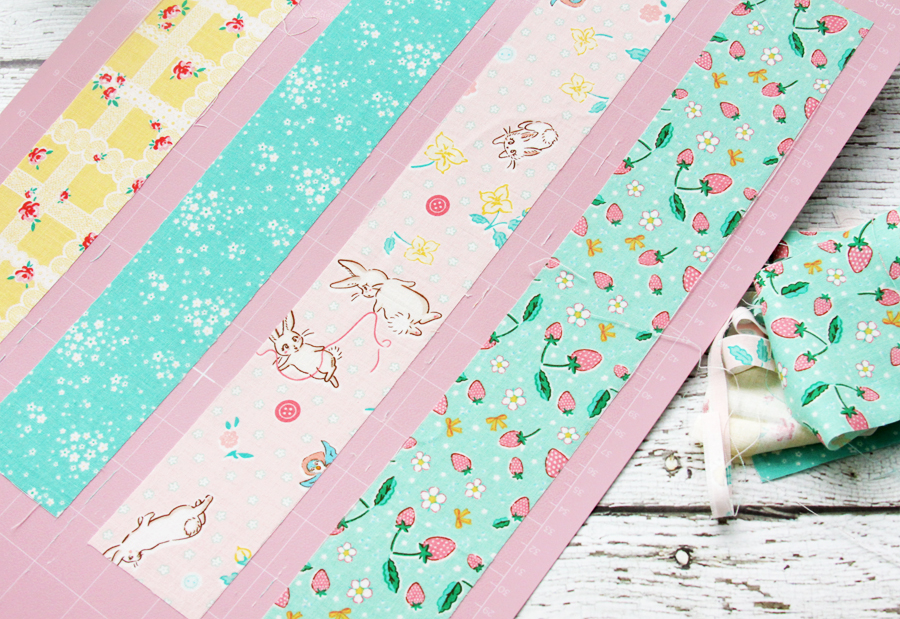
- 9 fabric strips – I used the Bunnies and Blooms line from Riley Blake
- 1/2 yard for back of pillow
- 16″ x 16″ pillow form
- Coordinating embroidery floss
- 16″ x 16″ piece of thin cotton batting or fleece
- Coordinating yarn for pom poms
- If you don’t have a Maker, click here for the Printable pattern to cut out yourself. If you have a Maker, follow the instructions below to download and use the image in Design Space.
Cricuit Instructions
In order to make this in the Cricut Design space you will need to download the file here and save it to your computer. (Downloads are for personal use only.) If you are cutting out the design you’ll need to enlarge it just a bit. The design should measure almost 7 1/2″ x 10″ when printed out.
To upload the image into Design Space, login in then select New project. Over on the left side choose Upload . It will take you to the page where you can choose Upload Image. Choose your file from your computer and it will save it into your My Projects section.
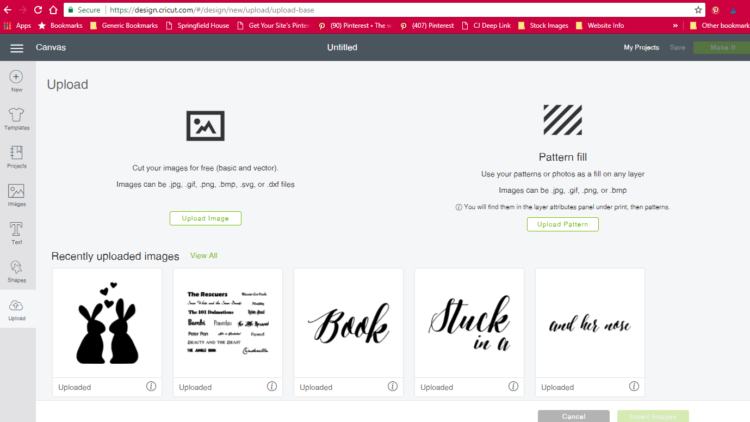
Once you upload the image you’ll need to size it to 7.3″ wide by 9.684″. Click the image once it’s in the design canvas and you will see the measurements up above the canvas. Enter 7.3 into the width and it should adjust the height. As long as it’s close to that it will be great, the bunnies don’t have to be exactly that size – you just want them to fill most of the space on the pillow front. Center the image over where you’ll place your felt on the mat. I recommend saving your project at this point.
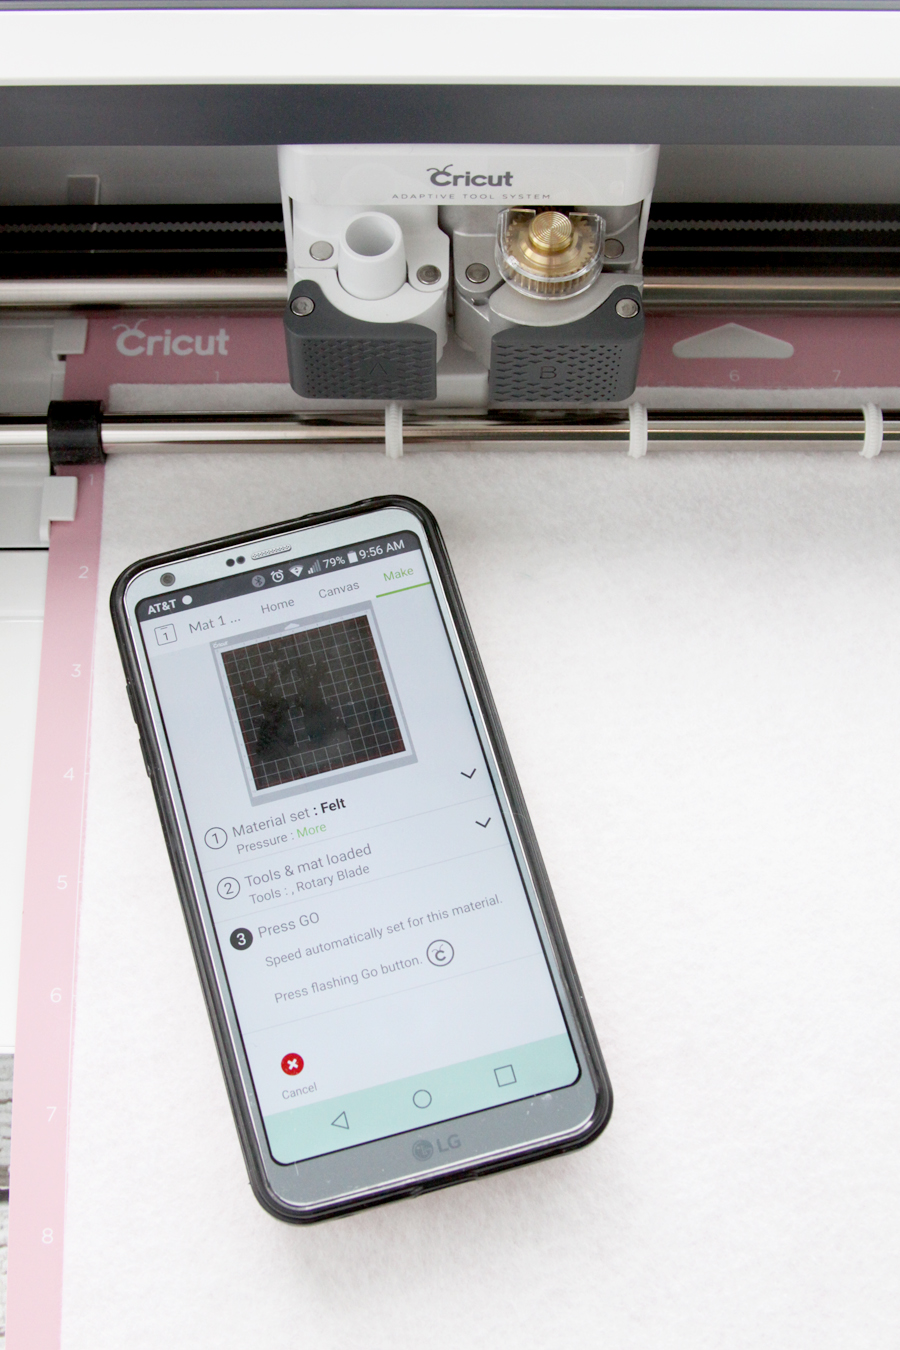
Once I’d uploaded my image and saved my project, I did everything through the Cricut Design Space App – it makes it sooo easy since it connects to the machine through Bluetooth.
Place the piece of felt on the fabric cutting mat and make sure it’s nice and smooth.

Load the file in the Design Space app and cut out with the rotary blade. When I selected felt as my fabric, it recommended I use the knife blade. I changed that to the Rotary blade in the app and also changed it to the “more” pressure cut, just to be safe.
Cut out the bunnies with the machine. Let me tell you – remove the extra felt around the bunnies and watch them stay on the mat, perfectly cut out, is pretty delicious.
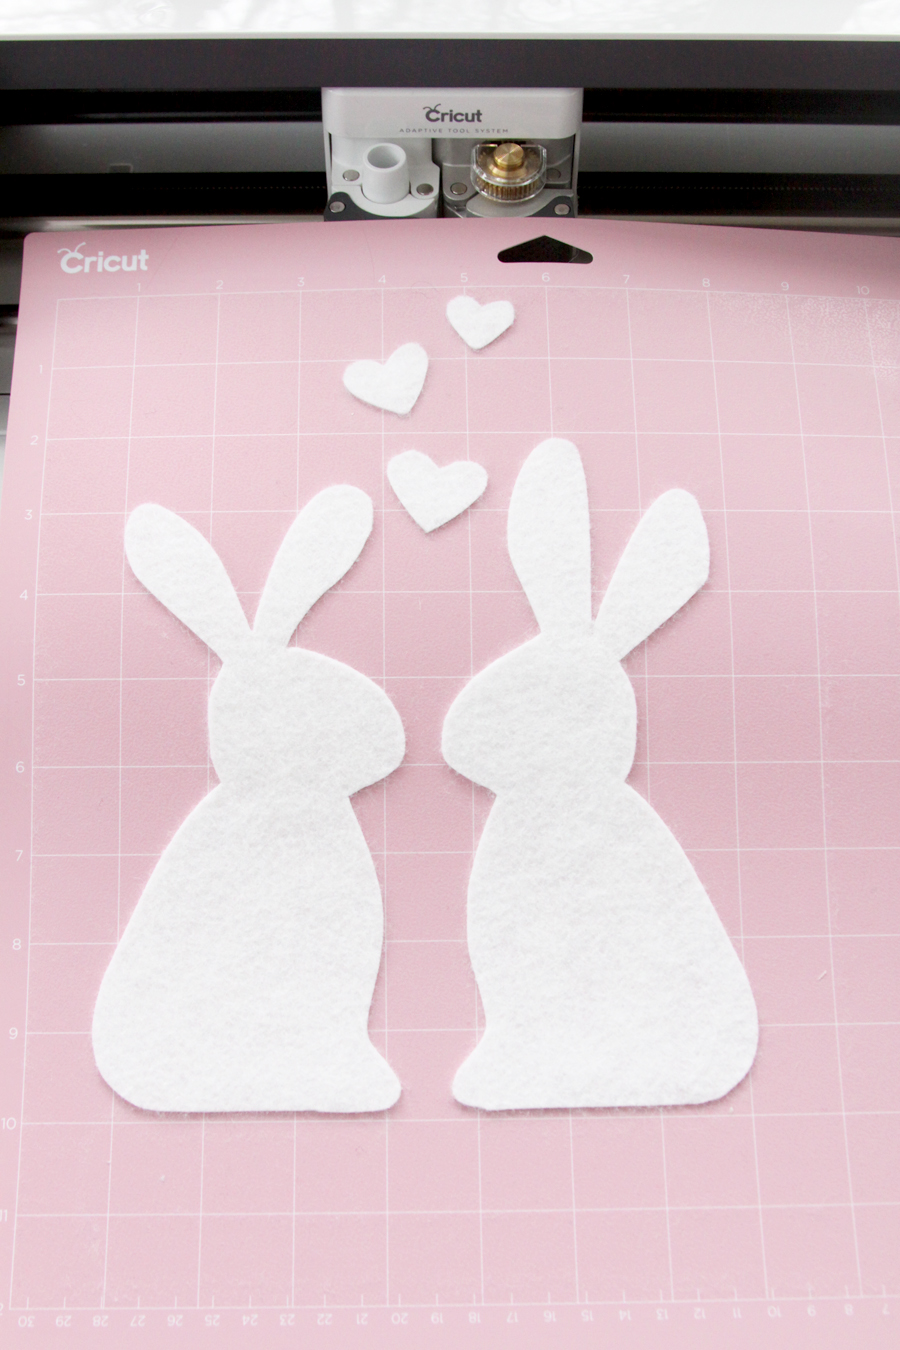
Carefully remove them from the felt. Make sure you don’t stretch out the felt as you do. Lay those aside and cut out your fabric strips.
You can use a rotary cutter and mat, or you can use the Maker to cut them out. The strips are 2 1/4″ x 16″ and you’ll need 9 strips. It’s simple to set up the rectangles in the Design Space app and place them where your fabric strips (slightly larger than the cut size) are on the mat. You’ll need the 12″ x 24″ mat for these.
Cut out the strips and remove them carefully as well.
Cutting fabric out by hand instructions
You can follow the steps above and just cut everything out by hand too!
Cut 9 strips 2 1/4″ x 16″ with a rotary cutter and mat. You can also use fusible webbing for the bunnies if you’d like! Iron fusible webbing to one side of the wool felt blend and then iron the bunnies in place on the pieced fabric before sewing on.
Assembly Instructions
Once your strips are cut, sew them together along the long sides. Press the seams towards the bottom of the panel.

Lay your felt bunnies and hearts on the panel and pin in place. Now a lot of the time I’m using felt and fabric, I put a fusible adhesive on the back of the felt. That would work here as well, but sometimes when you’re ironing felt over fabric with seams, the “bumps” of the seams can be seen, even through the felt. This way the felt isn’t ironed on and you will have a smooth look to the bunnies.
Sew around all the felt pieces, about 1/8″ from the outer edges.
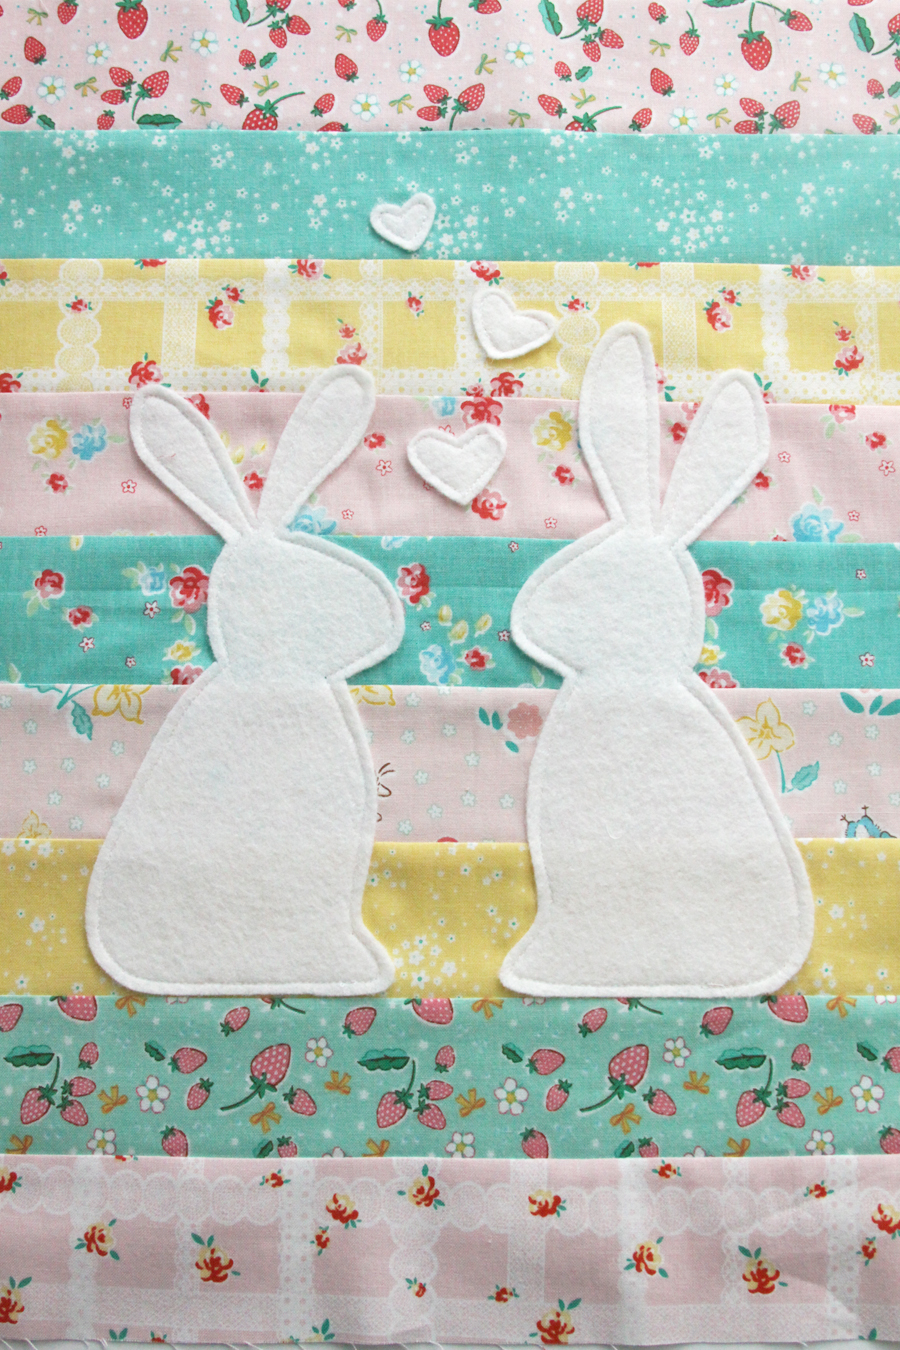
Place the pillow front on top of the batting piece and pin in place. Stitch around the felt shapes with 3 strands of a coordinating color of embroidery floss. Use a running stitch to help quilt the design.
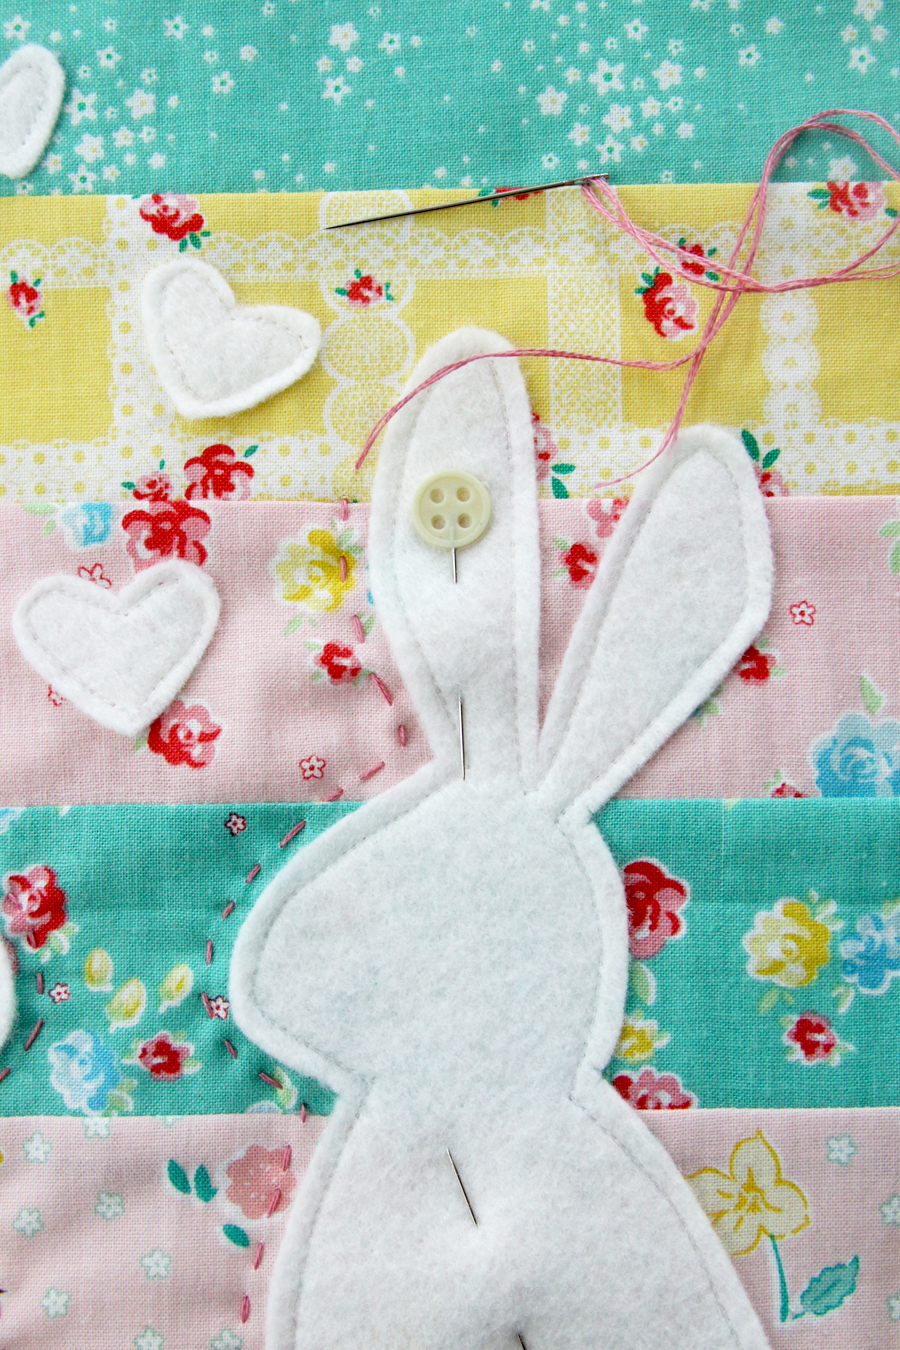
Create 1″ pom poms out of the coordinating yarn and sew them in place on the bottom of the bunnies.
Now your pillow front is all set!
Cut the back of the pillow fabric into two pieces – 16″ x 12″ and hem the top of one piece and the bottom of the other piece. Overlap the pieces to form a 16″ square, so the fabric piece on top is the one that has the bottom edge hemmed. Place the pillow front right sides together with the back and pin. Sew around all four sides of the pillow and clip the corners. Turn the cover right side out and press, then place in the pillow form.
So cute right?!
You can view the video tutorial I filmed Live with Missouri Star here!

You might also like:


thanks for the idea in using some scrap strips for a bunny pillow. This is so cute and springy. :) Thanks for sharing.
Ohhh I am so excited to try your rabbit design! I have been using my Cricut to cut out all of my shapes for my Caluco Garden quit by Lori Holt. It works so well to screen shot the shape from the digital pattern and cuts perfectly every time.
This is a gorgeous cushion, I love this design. x
So so cute. Thank you for the tutorial. I just ordered a pom pom maker from Amazon 2 days ago, so this is perfect timing.
Oh my goodness! Your bunny pilow is so cute. I’m ordering the R. BLake fabric ASAP! Thank you for sharing your talents and creativity!!!
Dear Bev, I tried to open your design but it says it was saved as Private. Could you re-save it as Public?
Thanks so much for your darling pillow!
Jan
Hi Jan,
I’m sorry for the mixup! I’ve adjust the post to reflect that I can’t save the file as public since it has an uploaded file in it. You will need to download the image and upload it to your Design Space. Please let me know if you need any help with that!
That is such an easy fix to get the sweet bunnies! Thanks so much!
I don’t know how to get the bunnies pillowcdownload. I love this
I always love the colors you choose and those bunny tails are so cute!
Cute! Have been interested in the cricut maker machine, so thanks for the info as well.
What is the seam allowance for the strips?
I am wondering that too.
Sorry about that! The seam allowance is 1/4″!
Anything bunny related gets me every time. The pillow is so adorable.
Such a cute pillow for Easter decor! Sharing on Fb tomorrow and Pinning. I’d like to give this a try on my Cricut! Thanks for sharing with us at Merry Monday. Hope to see you next week.
This pillow is adorable. It’s perfect for Easter or spring décor. Thanks for sharing on Sunday’s Best.
Well honestly, this could not be any cuter if it tried!
Wonderful adorable pillow Bev., have printed out post and bunnies for which I sure do thank you. Don’t think will make this this year but will have it in my to sew file. Maybe make pillow without bunnies,some other accent on it. Wish I could find all the gorgeous fabric you used, so pretty and happy.
Happy Spring and Easter
How can I get the pattern for this bunny pillow?
Hi Maureen – if you click this link it will open the pattern. Then you can save it to your computer or print it directly from there. https://flamingotoes.com/wp-content/uploads/2018/03/Bunnies-in-Love-Pillow-Pattern.pdf
What a cute pillow! I love it!
Absolutely adorable! I love both the fabric and the felt bunnies. Thanks for sharing at #HomeMattersParty
This is so cute! I love the fabrics you used as well. I’m a bit obsessed with felt at the moment so for me it
s a winner
This is so cute, the bunnies are adorable and I love the fabrics you chose. So nice.
This is absolutely darling as well! I love the fabrics you used, and the felt bunnies with pom pom tails are perfect! Thanks for sharing with SYC.
hugs,
Jann
I love the shabby cottage look of your sweet bunny pillow Bev.
Thank you for sharing this project at Create, Bake, Grow & Gather this week at Shabby Art Boutique. I’m delighted to be featuring it at tonight’s party and pinning too.
Happy Easter!
Absolutely beautiful. Perfect for a nursery. Thank you for the pattern
I’m new to this site. I stumbled upon it by accident and am so happy I did. I love the bunny pillow and embroidered tennis shoes. I’m planning on making both for my grandchildren and giving them as Easter gifts.
I’d like to make this–will the pattern work with a Brother Scan and Cut? thanks
I watched your live tutorial with Missouri Star this morning, thank you! I might have missed it, but is there a link to download a PDF of this pattern so that I can print it out? Also, a PDF of the bunnies? I will be cutting them out by hand, not a Cricut. Thank you!
Love the pillow. If you don’t have the Cricut can you still make the pillow? Thank you for sharing.
Thank you for sharing this! I am going to adapt it to a wallhanging for my mom’s door at assisted living.
I love this idea!!! I cannot wait to make these!!
Super cute bunny pillow. So perfect for spring decorating.
Happy Crafting,
Kippi #kippiathome
ADORABLE PROJECTS! THINKING SPRING! THANKS FOR SHARING!
Such a cute pillow, thanks for sharing.
These pillows are so adorable. I love that bunny towel, too!
Hi Bev,
I love the Bunnies in Love pillow and can’t wait to get started making some for my granddaughters and friends. But I’ve looked everywhere and can’t seem to find the Bunnies and Blooms fabric. Can you tell me where I can find it? It’s so cute. Thanks!
Bev W
So cute!!! Pinned it to my spring board (https://www.pinterest.com/babychaser/spring/).
Here from Oh My Heartsie.
Blessings,
Babychaser
How CUTE! Thanks for sharing at The Mark and Jan Show #LetsParty!
I love this so cute Bunny pillow I just finished it and it turned out wonderful. It was so easy to make.
I wish I could add the picture I took of it… thank you so much…
My Granddaughter loves her bunny pillow. Thanks for the pattern in the cute idea! Wish I could post a picture.
Where can I find the Bunnies in Bloom fabric?
That fabric collection is from last year so it will be a little harder to find. You might try a search on Etsy – the last time I looked there were some shops on there that still had some!
Thank you. I will check there.
Hi Bev,
The pillow is so cute!! I just finished making mine for Easter. Thank you so much for the pattern. I am tucking it away to save for later as well!
Thanks again!!
Fun and done! Not as pretty as yours, but not bad for my first pillow, and first appliqué. Plan to make a few more ASAP. Still searching for the Bunnies and Blooms to do like your first one. I had to use felt instead of felted wool. It’s thin and I can see the color strips through the bunnies . Thanks for the great instructions.
Thanks so much for sharing such a cute bunny pattern!
I’m still trying to download bunnies as an SVG file but can’t seem to do it. I have a cricut maker I got for Christmas and have made some mug rugs with it but would love to do the bunnies thank you for your help m
I tried to download the JPG to my cricket deign space the option to download a cut version shows up as a black box. I do not pay monthly fees to have the back ground removed. Do you have a work around? Thank you!!
Cute pattern! Thanks for the tutorial.
I think the cost of the Background remover is if you want the image to be automatically removed. You should be able to CLICK inside the top of the image and it will remove the background, don’t click inside the bunnies – leave them solid. When you click continue you should see just the bunnies and hearts, not a black box. I hope that helps.
this is so cute. Thank you Bev McCullough.