This sweet hoop originally appeared on Crafts Unleashed. Reposting it here so you can see it too! :)
Is it toasty where you live? It has been such a hot spring and summer here in CA! I am loving all this sunshine though, especially since I only have a couple more weeks here in CA. Though I hear that I will be getting quite a bit of sunshine in Tennessee too – so this cute hoop will fit in perfectly in our new home too!
Embroidery Hoop Art is so fun to make up for different holidays and seasons! It’s so super easy to change up the hoops and they are so lightweight and small that they don’t take up a ton of storage space either!
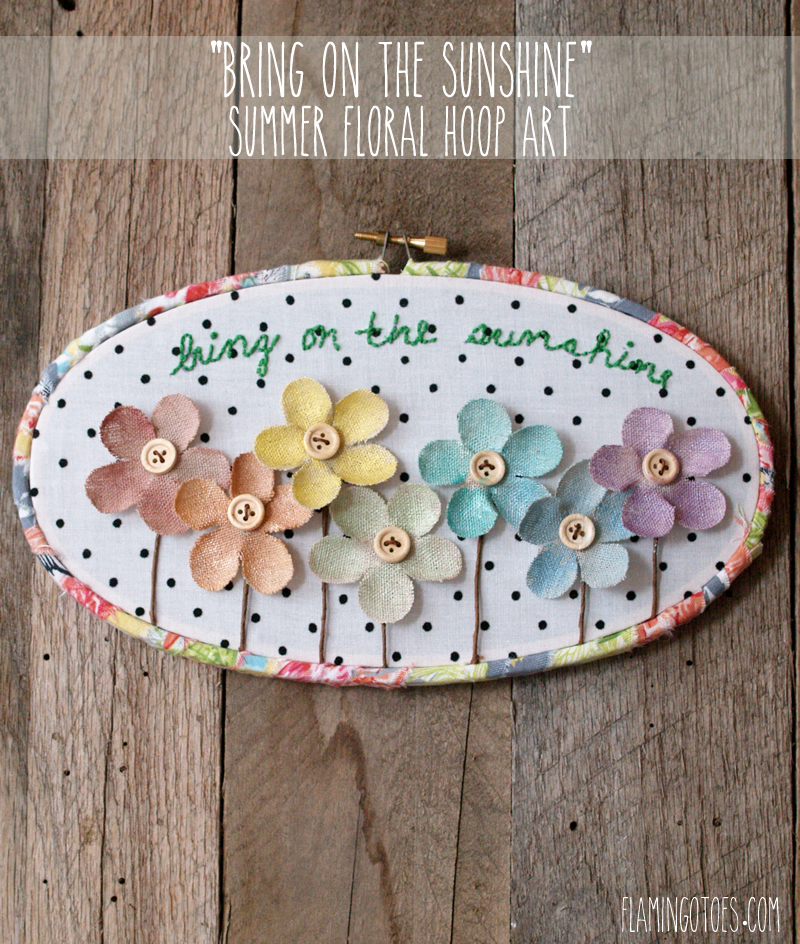
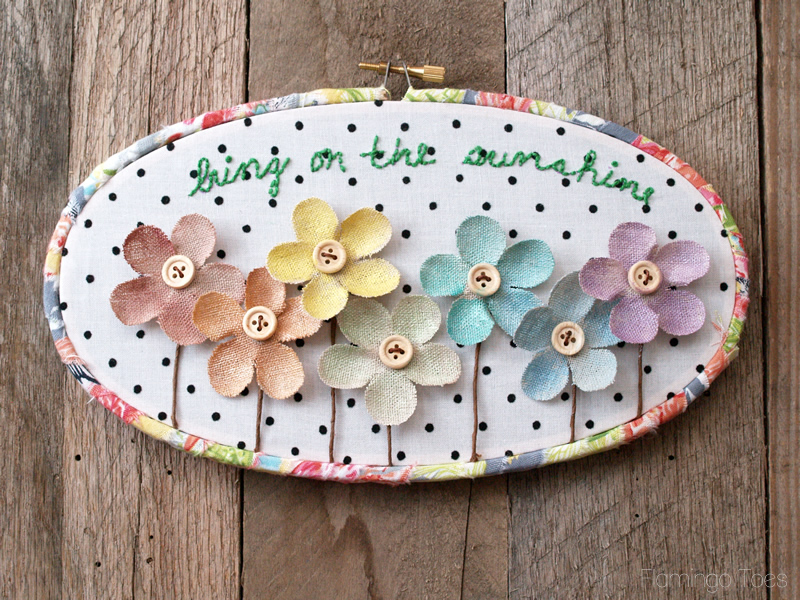
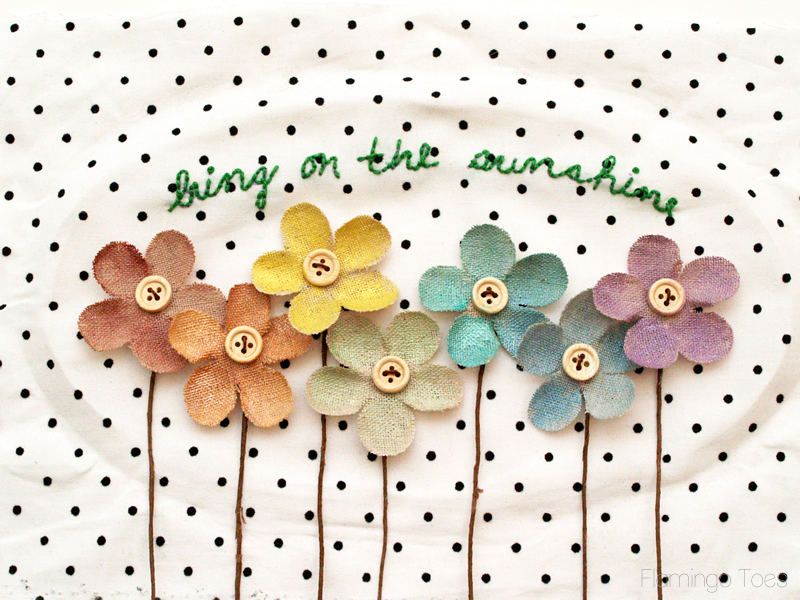
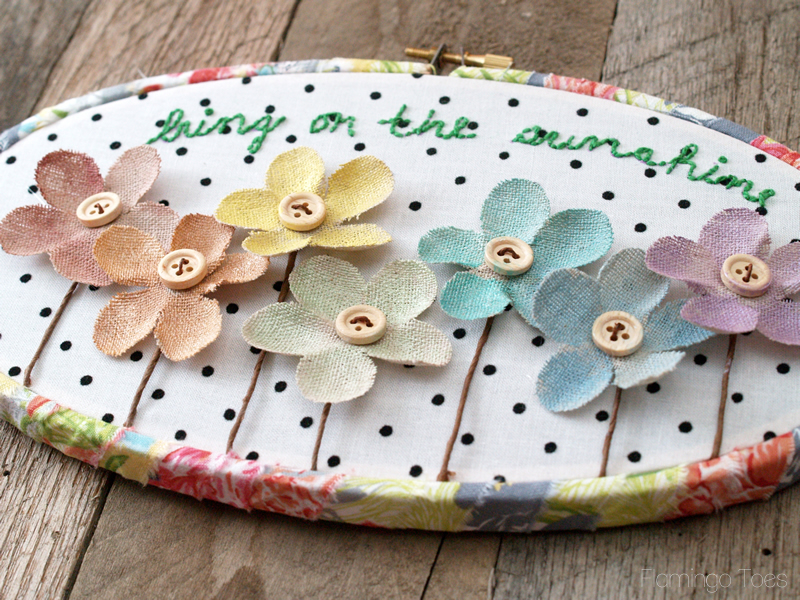
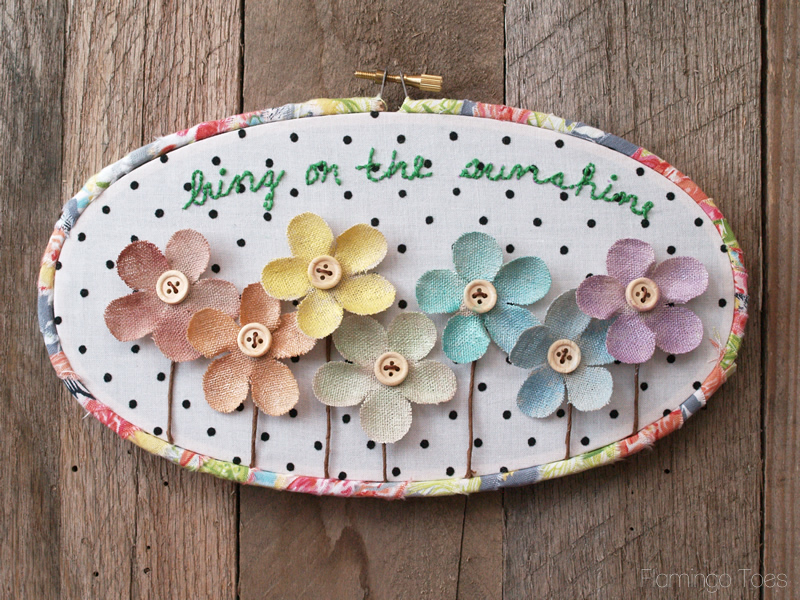
This sweet Bring on the Sunshine Summer Summer Floral embroidery hoop art is easy to make and a perfect way to add a little Summer style to your home!
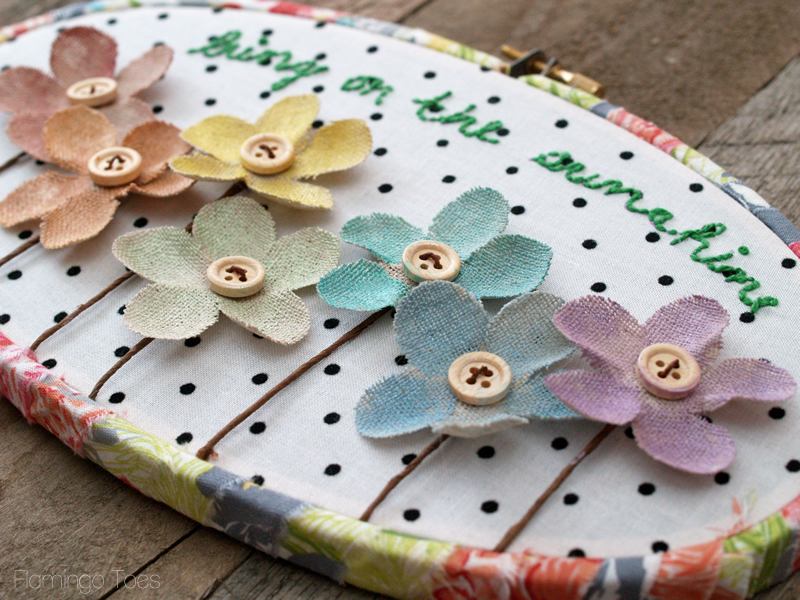
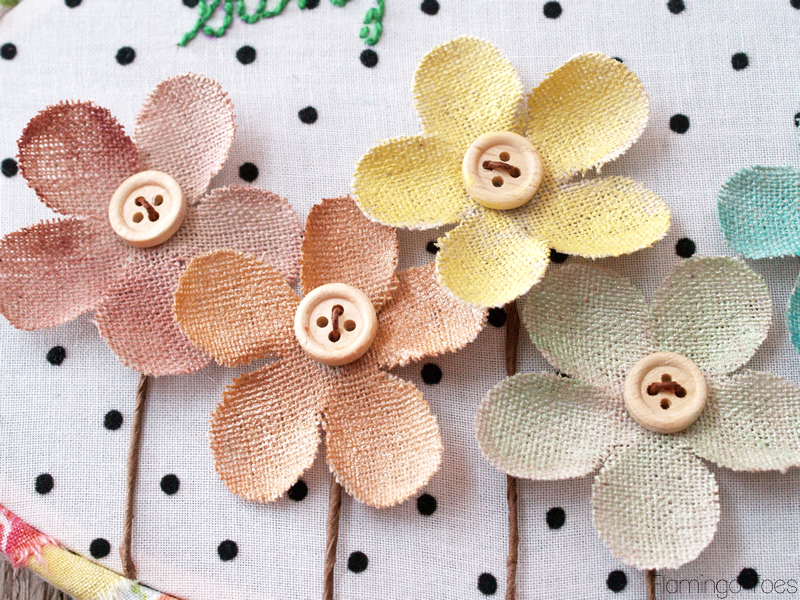
The embroidery is a simple back-stitch and the flowers are cute little pre-made linen flowers painted with some fun pearl watercolors. So easy!
Isn’t it sweet?
Here’s your materials list:
- 5.5 x 9 inch Oval Wood Embroidery Hoop
- Wired Linen Flowers
- Pearlescent Watercolor Paint Set
- Embroidery Floss
- Disappearing Ink Pen
- Fabric (for background and wrapping hoop)
- Paint Brush
- Hot Glue
Begin by separating the linen flowers.
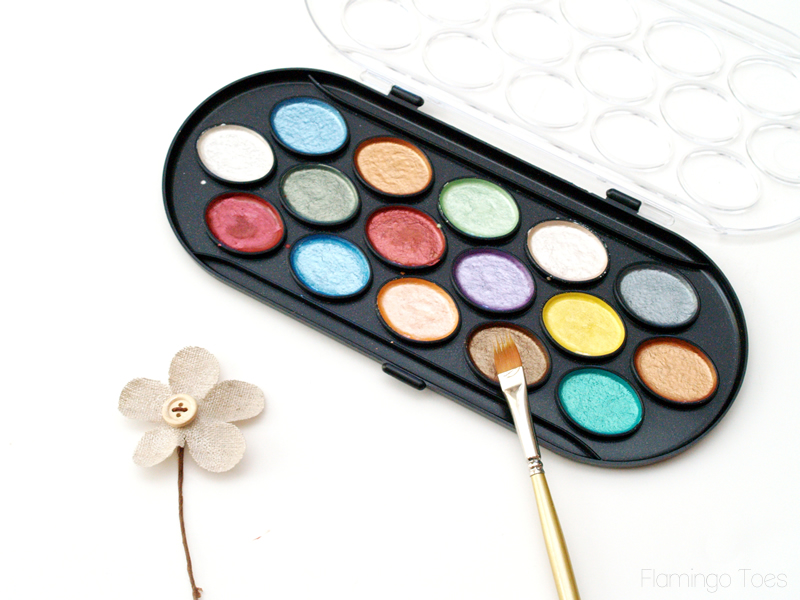
Add some water to the watercolors and lightly brush the linen flowers with the paint.

You don’t want to get the linen super wet, it will lose its shape. Keep painting on light coats until your flowers are the colors you’d like.
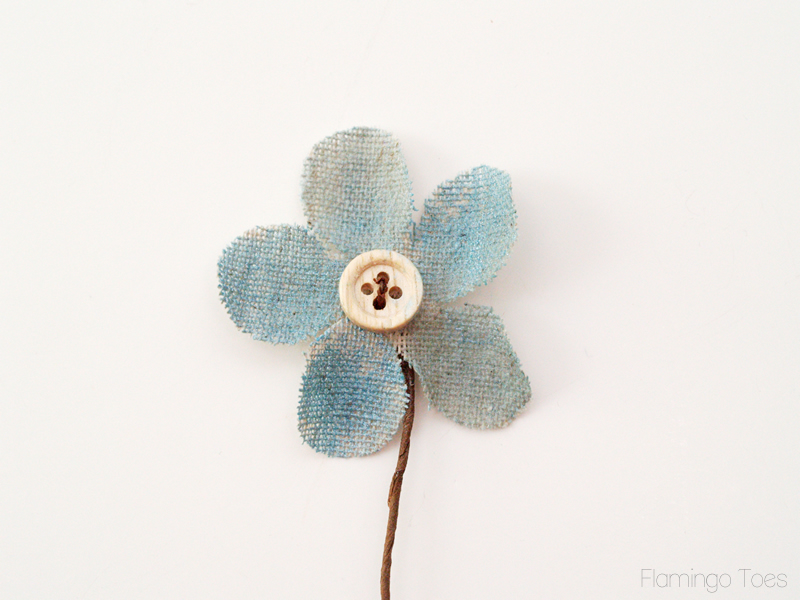
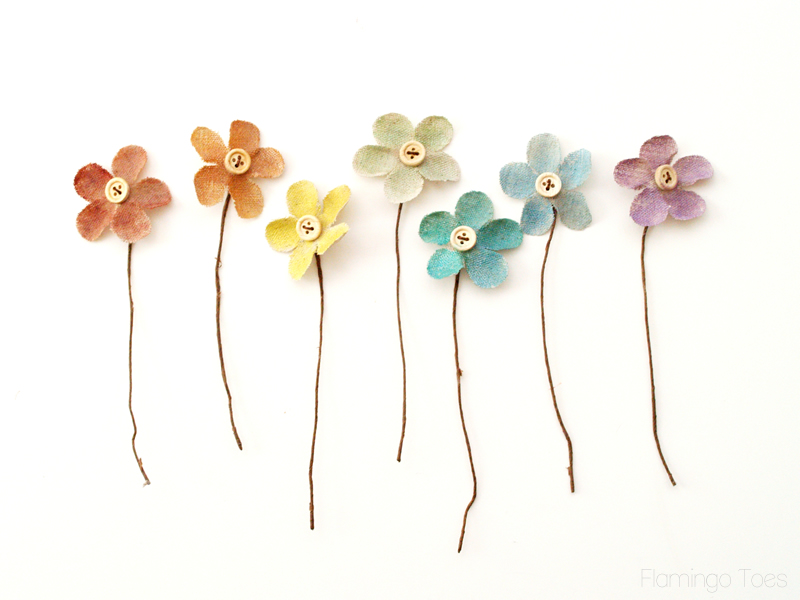
Continue painting flowers until you have as many as you’d like for your embroidery hoop. I love the pearl sheen the paint gives the flowers.
Place your background fabric in the embroidery hoop. Use a disappearing ink marker and write out your phrase. I wanted mine to have a handwritten look, but you could also choose a font you like and print out the phrase and trace it onto your fabric.
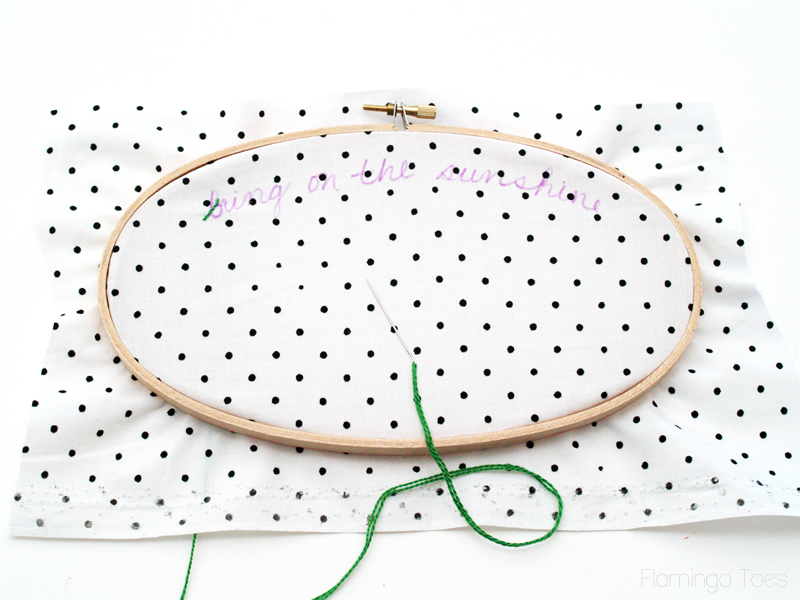
Outline all your letters with a backstitch. If you need a tutorial for that, there is one on my blog on the Embroidery Tips page!

Take your fabric back out of your embroidery hoop. Using the lines in your fabric from the hoop, lay out the flowers they way you’d like them. Glue the flowers in place with hot glue.
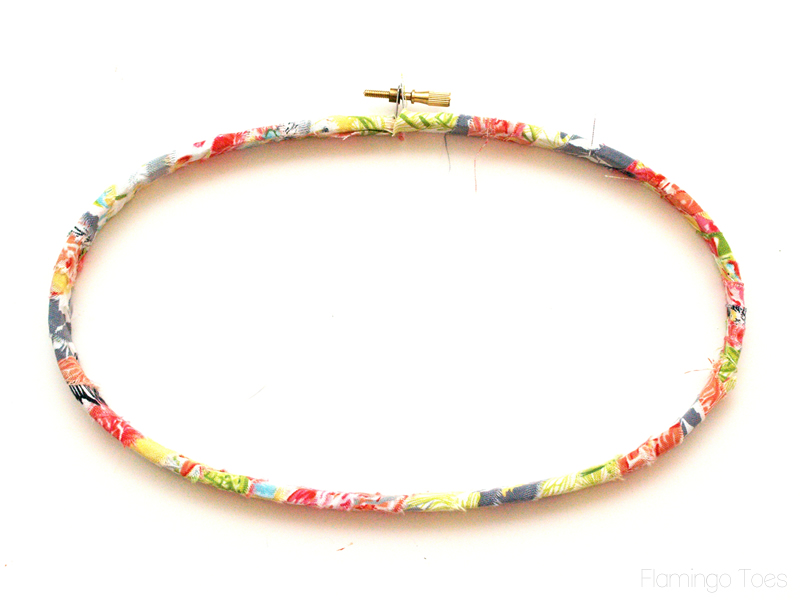
Cut strips of a colorful fabric and wrap your outer hoop with the fabric. Glue the ends down.
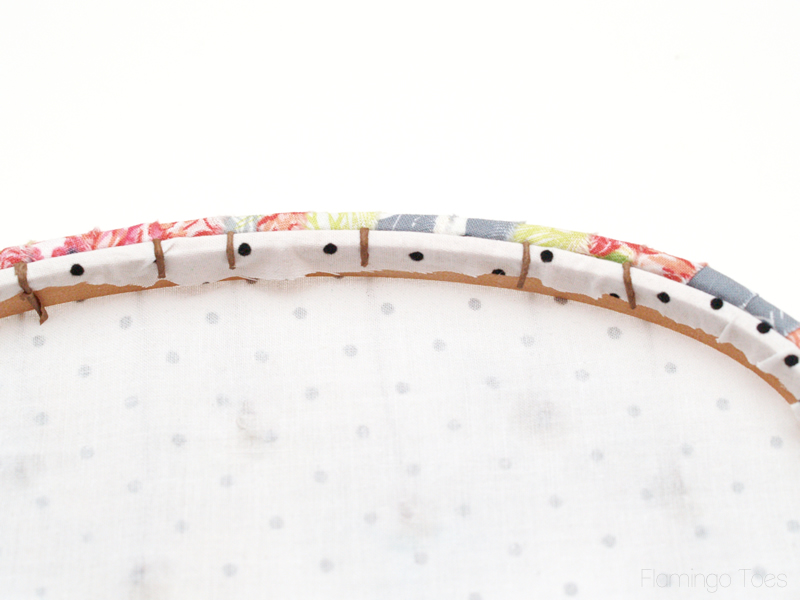
Place the fabric in the embroidery hoop, making sure the fabric is tight and the stems of the flowers are straight. Trim the fabric all the way around and glue the fabric to the inside of the hoop. Trim the stems of the flowers (using utility scissors or wire cutters) and fold the stems to the inside.
And that’s all there is to it!
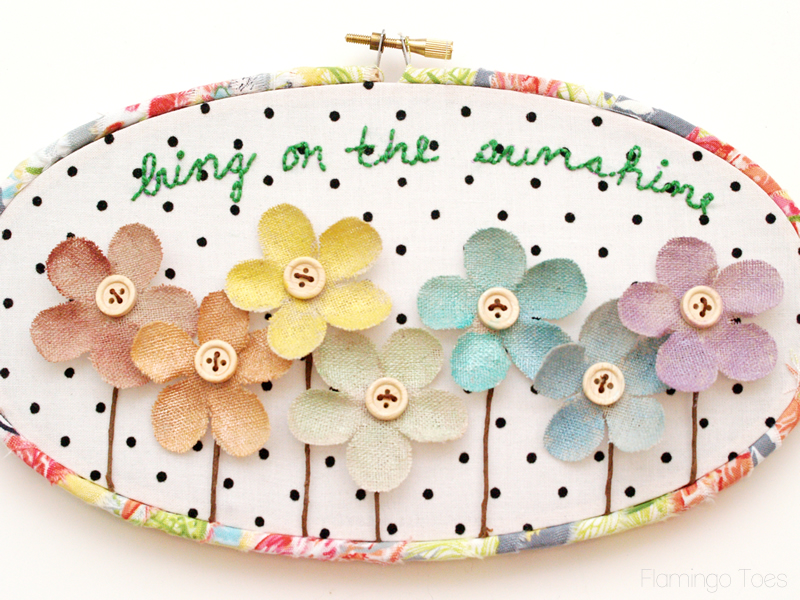
I love the way the little rainbow of flowers look. But it would be super cute with them painted just a couple colors – ooh or even in an ombre pattern!
I hope you give this summer embroidery hoop art a try!
If you want to check out some other hoop art projects, you might like these!


I really like the creative stitchery. I love to see that people still enjoy doing handwork now days. I’m so glad that you are keeping it going. Beautiful blog!
It’s so loverly! Jo from Anne’s Attic – Design http://fulcolbaxia.wordpress.com
This is just adorable, Bev! I think it was an ingenious idea to paint the petals with the watercolors. They turned out great! And I love the embroidery hoop wrapped with the fabric. SO cute!
I really liked the way you created a perfect cute hoops.Your idea of writing in your own handwriting is awesome and inspired me to make one for my door too.
This is so beautiful Bev! I shared it on FB yesterday and everyone else agrees :) http://www.facebook.com/CraftsbyAmanda/photos/a.353593675216.349539.323548680216/10154298067280217/?type=1
Eek Amanda!! You are the best! I was wondering where all the fabulous FB traffic was coming from – I should have known it was you! :) Thank you so much for sharing!!