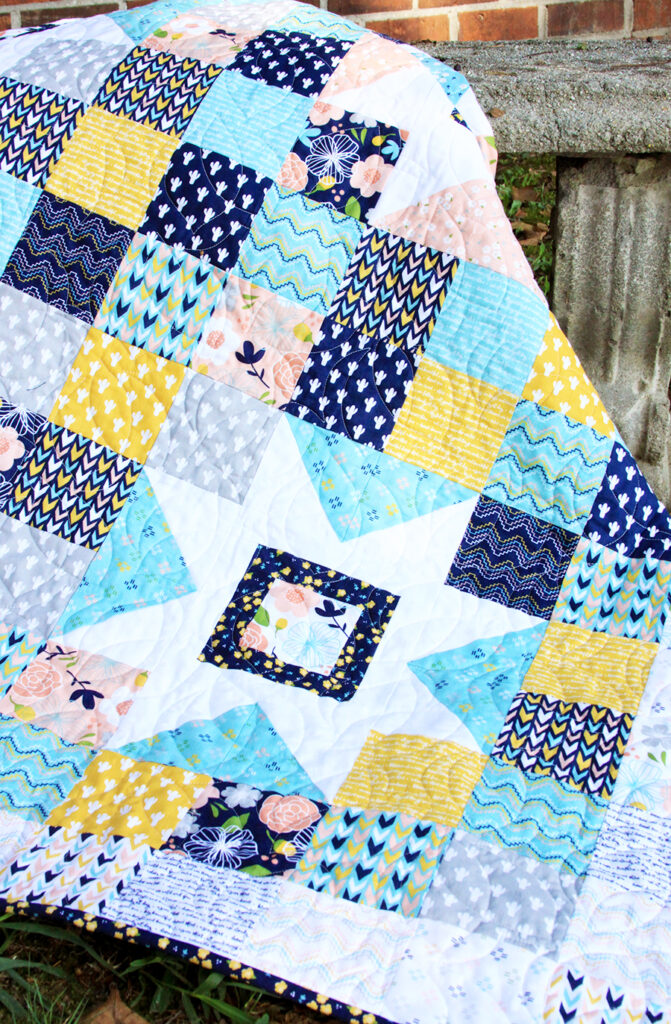
There is something so fun about a patchwork quilt!! I love the scrappy look you get with a patchwork quilt – even if you’re using fabrics all from the same collection you get this fun colorful look!
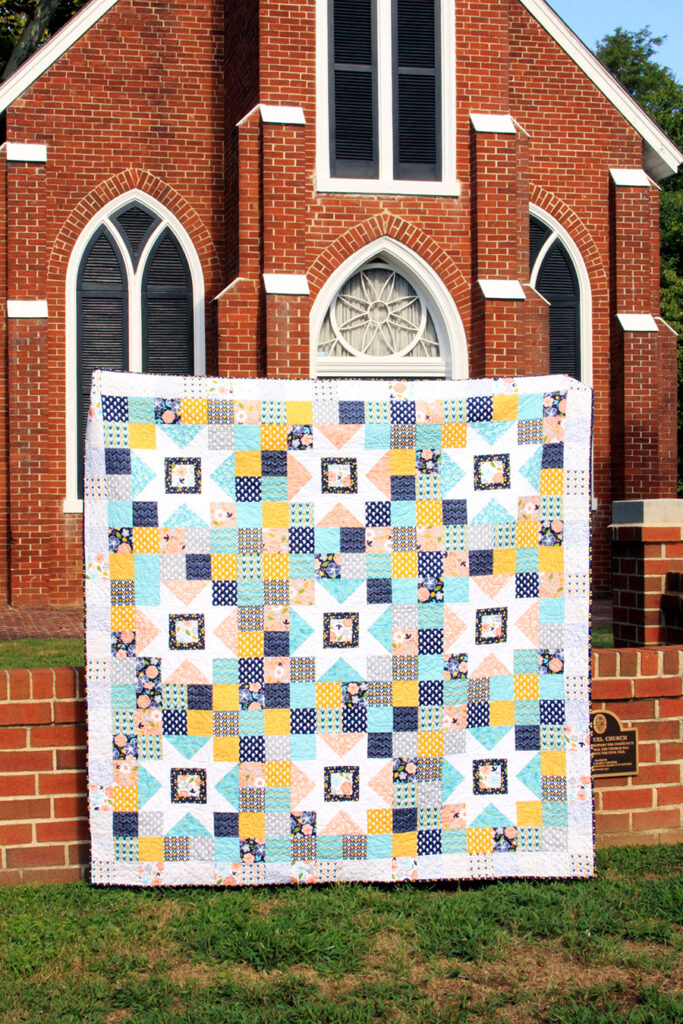
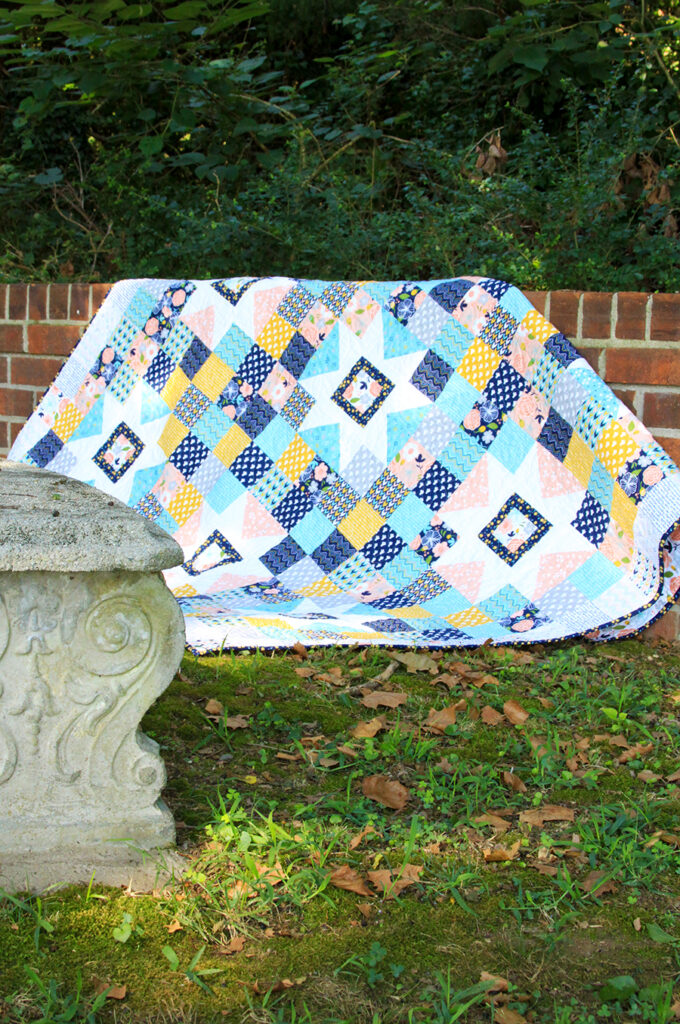
This Starry Skies quilt is made with Simple Simon and Co‘s latest collection, Azure Skies. It has fun geometric prints, pretty florals and the cutest little cactus print!

This quilt is based on a mini quilt I made up last year. I thought it would be fun repeated and made up into a full quilt! It’s the same as the mini quilt, except for a little low volume patchwork border I added around the quilt. I thought it really looked fun!
Here’s what you’ll need to make up your own!
Starry Skies Quilt Tutorial
If you would like to purchase an Ad-Free PDF Printable version of this pattern for a low cost – click here! The pdf version of the pattern also comes with a handy coloring guide so you can plan your fabric and color layout!
Finished Quilt Size: 68″ x 68″
Materials: (contains affiliate links)
- 1/4 yard of 21 prints – I used a 1/4 yard bundle of Azure Skies
- 3/4 yard of solid fabric for stars – I used Riley Blake Solid White
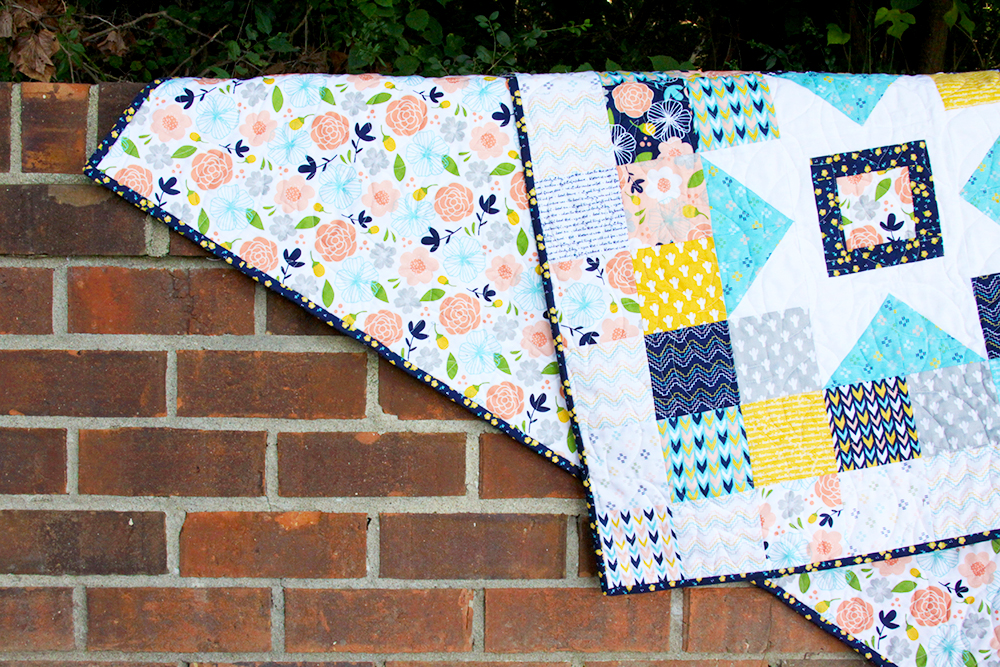
- 3/4 yard fabric for binding – I used Azure Skies Floral Navy
- 5 yards Backing fabric – I used Azure Skies Main White
- Batting
Cutting:
- For center of star prints – cut 9 squares 3 1/2″ x 3 1/2″
- Choose fabrics for star points. I used 4 prints and repeated a few of them – two peach and two aqua prints. Cut a total of 36 – 4 3/8″ squares for the star points.
- For fabric border around center square of star (I used the same border for all squares, the Azure Skies Floral Navy) – cut Eighteen – 1 1/2″ x 3 1/2″ pieces,
Eighteen – 1 1/2″ x 5 1/2″ pieces - From remaining dark prints cut 216 – 4″ squares
- From low volume squares (light color prints) cut 76 – 4″ squares
- I think you could use 7 charm packs for this instead of the yardage but I’m not sure how the ratio or dark and light prints would work out. I haven’t tested it but wanted you to know it was an option! :)
- From solid background fabric cut:
- 2 strips 4 3/8″ x WOF (Width of Fabric) – subcut this into 18 4 3/8″ x 4 3/8″ squares
- 7 strips 1 1/2″ x WOF – subcut into eighteen 1 1/2″ x 5 1/2″ pieces and eighteen 1 1/2″ x 7 1/2″ pieces
Make 9 large patchwork star blocks.
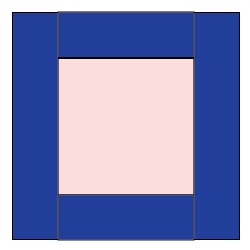
For each block, start with the 3 1/2″ center block. Sew the fabric border pieces to this block by sewing the 1 1/2″ x 3 1/2″ pieces on the left and right sides and the 1 1/2″ x 5 1/2″ pieces on the top and bottom.
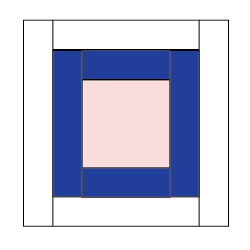
Sew a 1 1/2″ x 5 1/2″ background strip to the top and bottom of the square and a 1 1/2″ x 7 1/2″ background piece to the left and right sides of the square.
Make four half-square triangles sets with the four white squares and four print squares that are 4 3/8″ each.
To make half square triangles for the sides of the star:
- Place a white fabric square right sides together with the print square. Draw a diagonal line with a marking pen from one corner to the opposite corner.
- Sew a 1/4″ seam on either side of the marked line.
- Cut down the marked line to separate the square into two triangles.
- Press the triangle open into a square shape and trim off the seam ends. Square should be 4″ x 4″.
- To form the sides of the star, sew the two squares together with the prints touching each other.
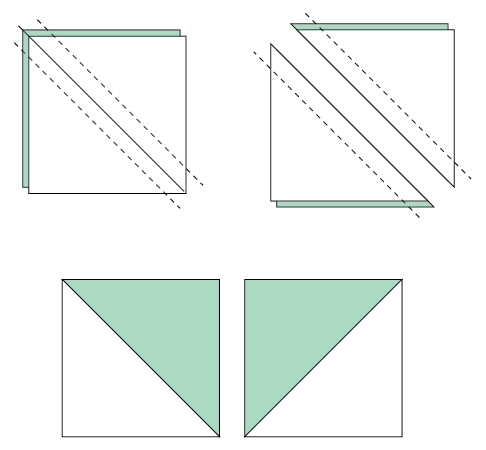
Repeat for three more squares to make the other sides of the star.
Sew two star sides to the center panel, with the white fabric next to the center piece. Press the seams.
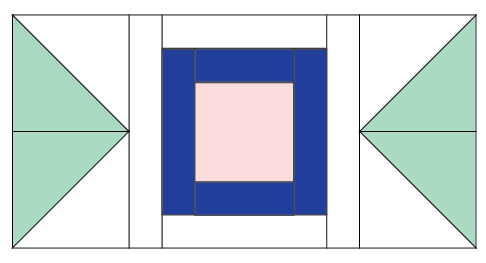
For the top and bottom star sections, sew a 4″ print square on either end of the star piece section. Make sure the section that will be below the center panel is facing the correct way. Sew the top and bottom rows to the center panel and press the seams.

Layout your patchwork squares for the border. Sew together the four squares that make up the left and right sides and press the seams. Pin to the center panel, matching seams and sew to the left and right sides.
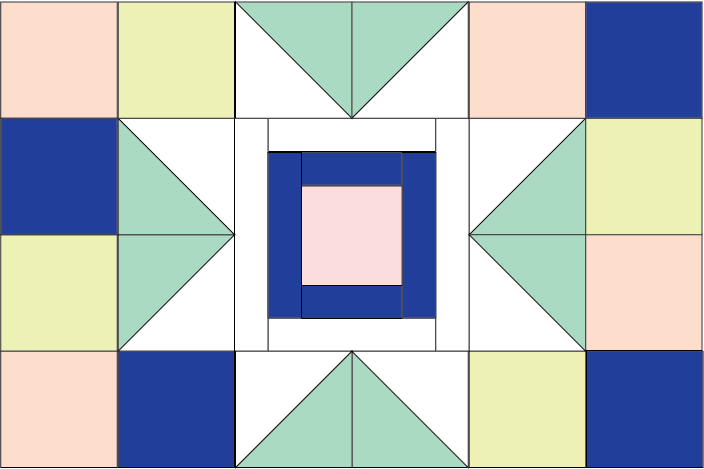
Sew together the top and bottom rows, press the seams and sew to the top and bottom of the panel, matching seams as you go.

Create 9 of these patchwork blocks. Sew together the blocks in three rows of three.
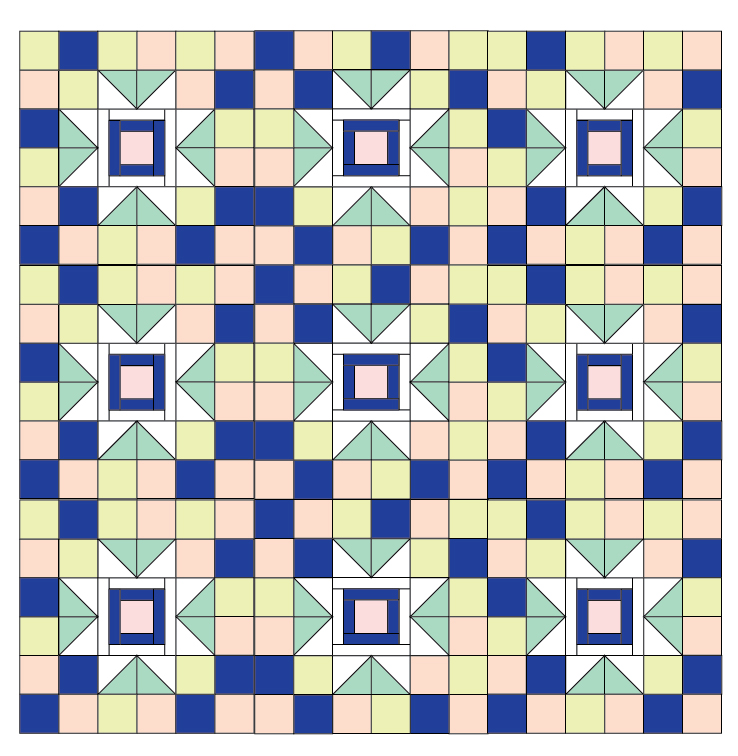
Sew together the low volume prints in two rows of 18 and 2 rows of 20. Sew the rows of 18 on the left and right sides and the rows of 20 on the top and bottom.
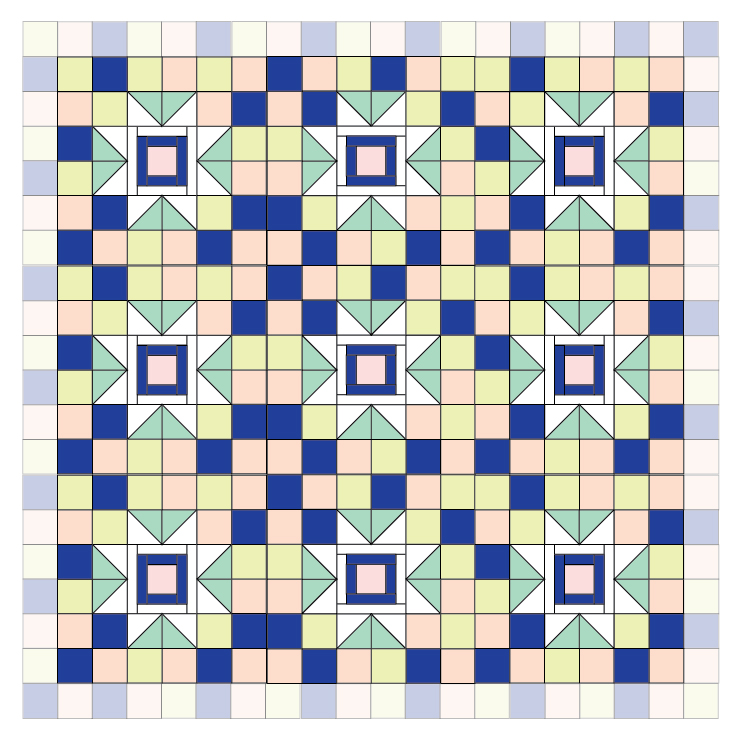
Quilt and bind as desired!!

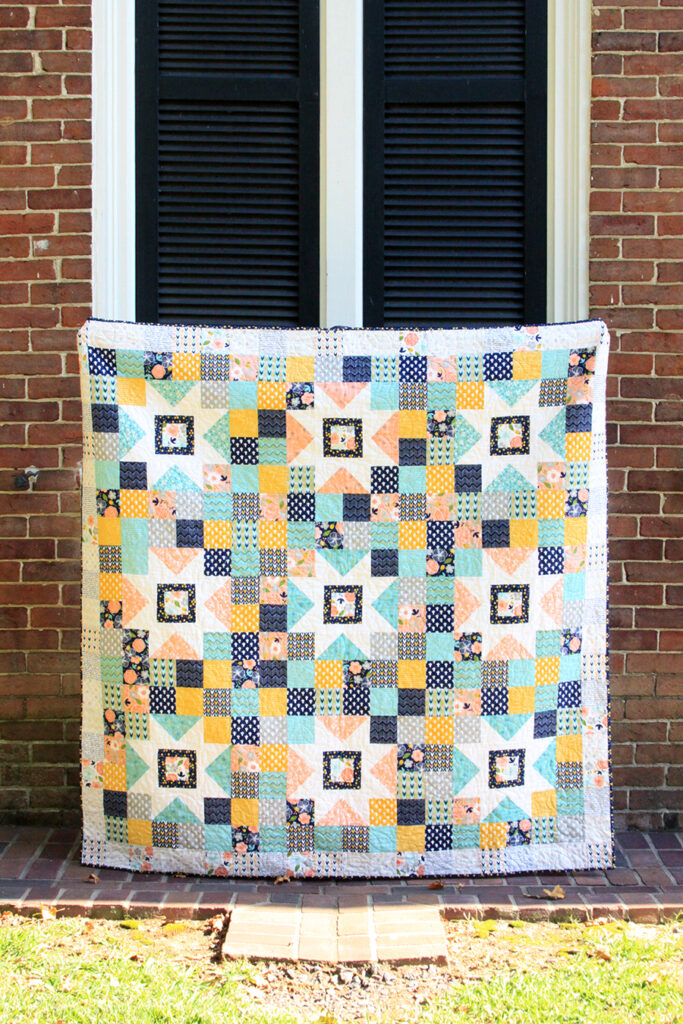
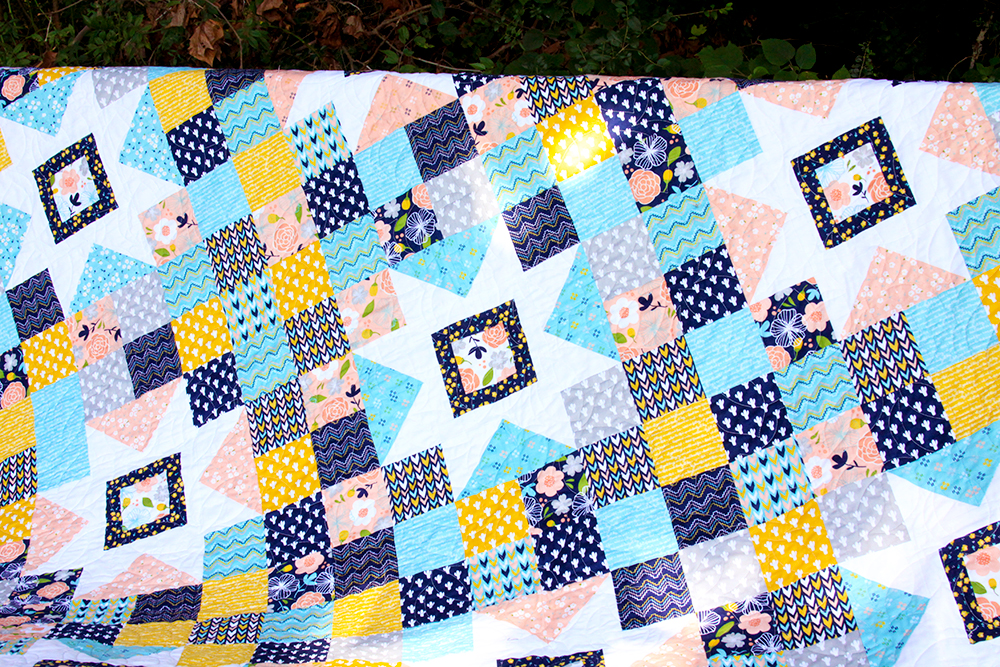
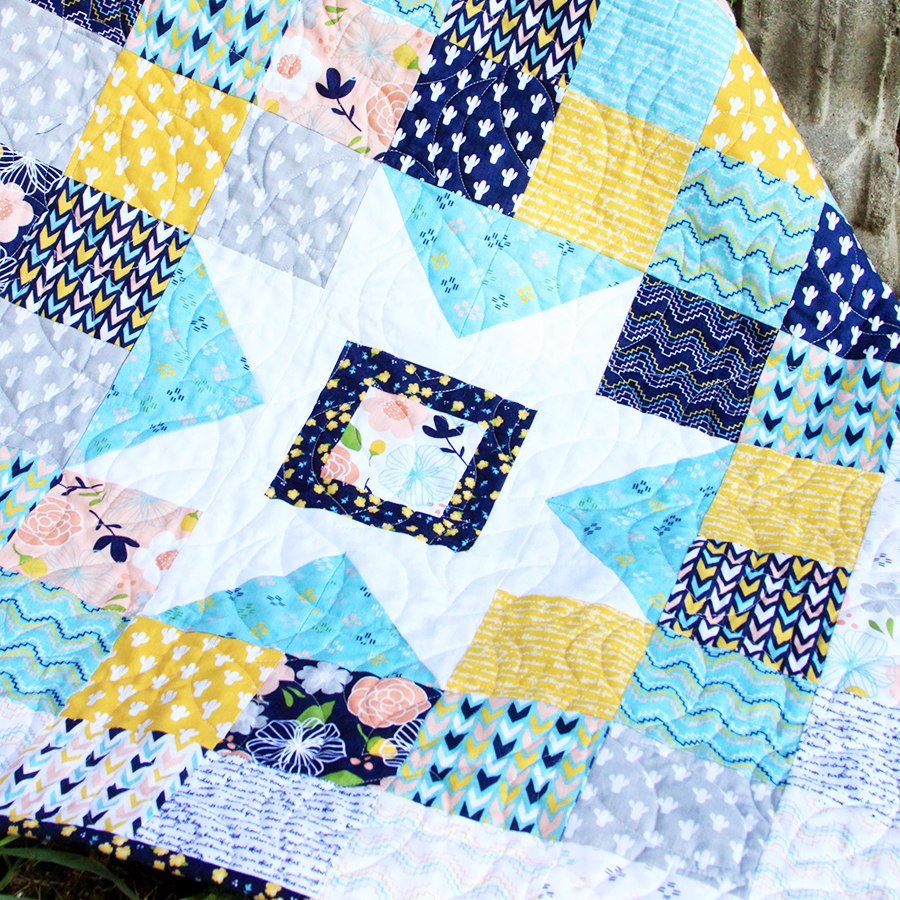

I just love how scrappy and fun it turned out – and how the stars really pop in the center! I can’t wait to hear what you think too!


Love everything about this quilt! The pattern is so cute and friendly user for me! . The colors are perfect! Thanks
Beautiful quilt. Is this available as a PDF?
Hi Portia! I’m so glad you like it! Thanks for your question as well – I was just finishing that up this morning. You can find a low-cost PDF version of the pattern in my shop here! https://flamingotoesshop.com/collections/pdf-quilt-patterns/products/starry-skies-quilt-pdf-pattern-download
I would be interested in an option to print as pdf. Thanks.
Hi Nancy!
You can find a low-cost PDF version of the pattern in my shop here: https://flamingotoesshop.com/collections/pdf-quilt-patterns/products/starry-skies-quilt-pdf-pattern-download
Thank you!
Love the pattern and fabrics!!
I love this! Does it need 1/4 yards for the cutting instructions to work out, or would fat quarters be ok?
Hi Laurie!
I’m so glad you like the quilt! I think fat quarters would work – I think it’s depend on the collection too though. If it has a lot of light prints you might not be able to get that contrast between the light border and darker center – if that makes sense. Numbers wise though, I think it works! (I’ve not tested it though so I can’t be 100% on that.) I’d love to know if you make it up!
Thank you for the helpful reply!
Lovely quilt. It one to put on my to make quilt list. Thanks for sharing with us.
What a lovely quilt, thanks for sharing it with us!
Thank you so much Bev, I love the pattern and the quilt!
Love it ! Thank you!
OH MY GOSH! this is so beautiful & looks so fun to make! I’m in love with this fabric line – the colors and prints so fun! thank you for sharing!
What a beautiful quilt, and thank you SO much for your generosity in sharing the pattern and tutorial! Love the colors you used to make this, too, so will be duplicating it for the most part — and THIS one I will keep. I routinely give away 98% of all quilts I make, but LOVE this one, just for me. Thanks again for the tutorial and for such a lovely blog!