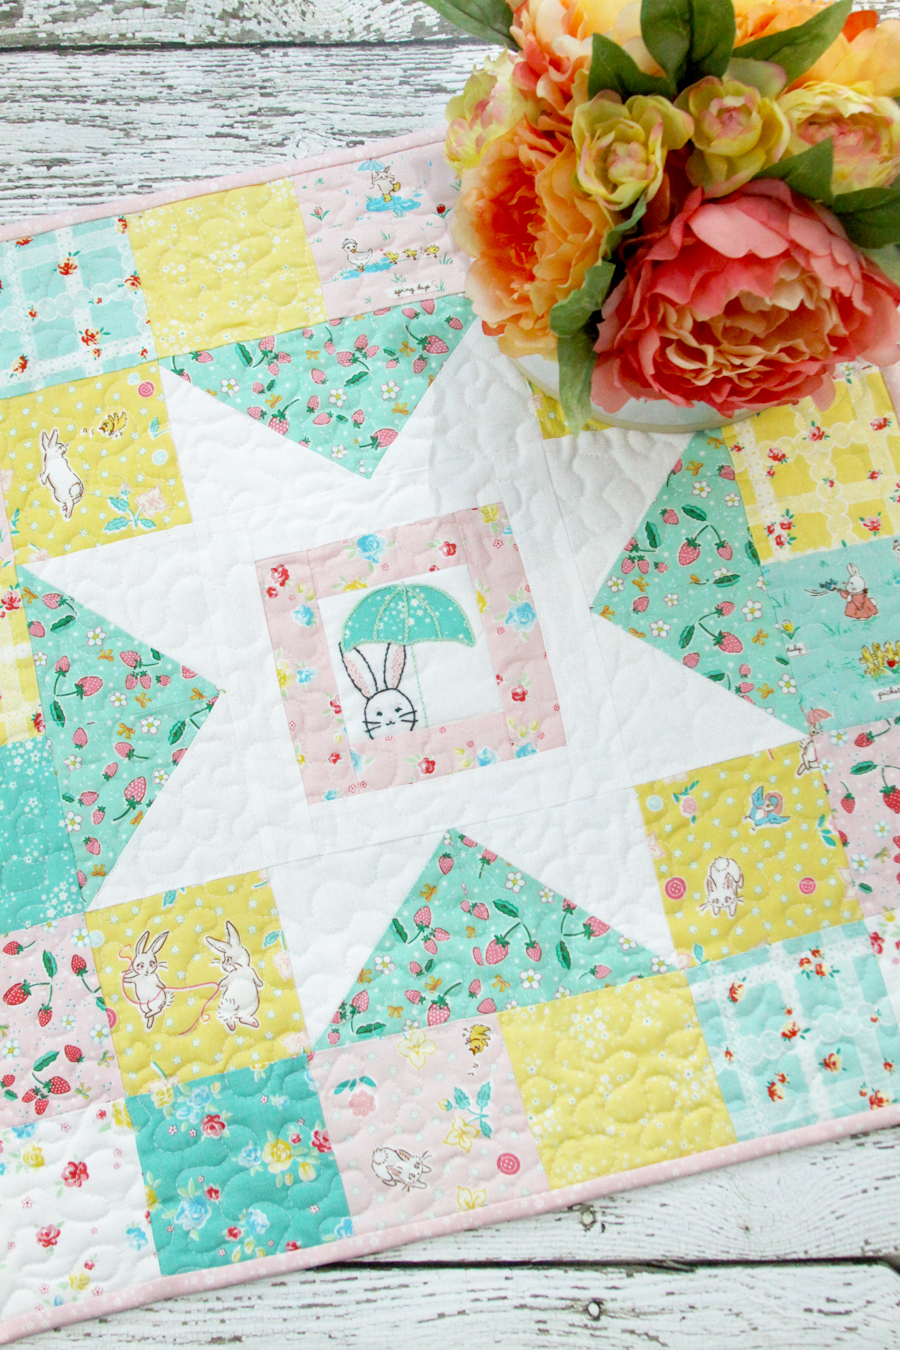
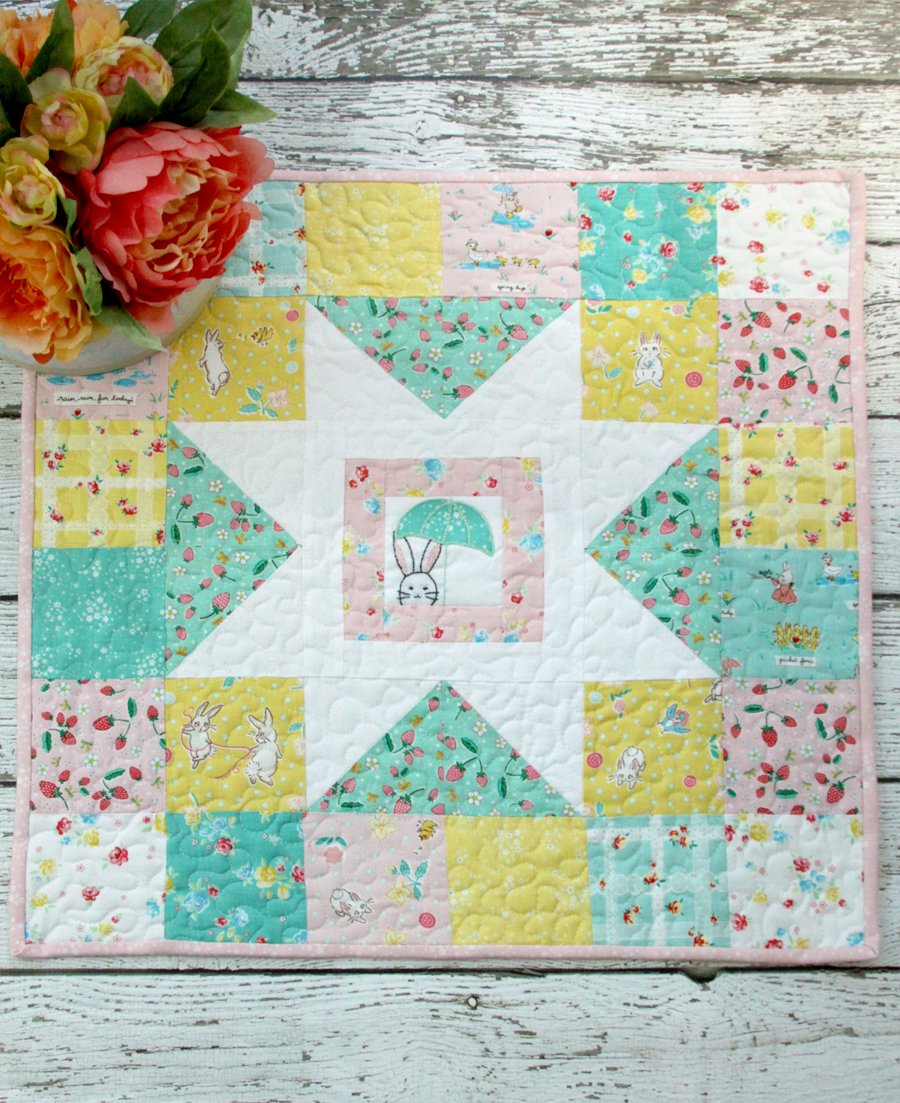
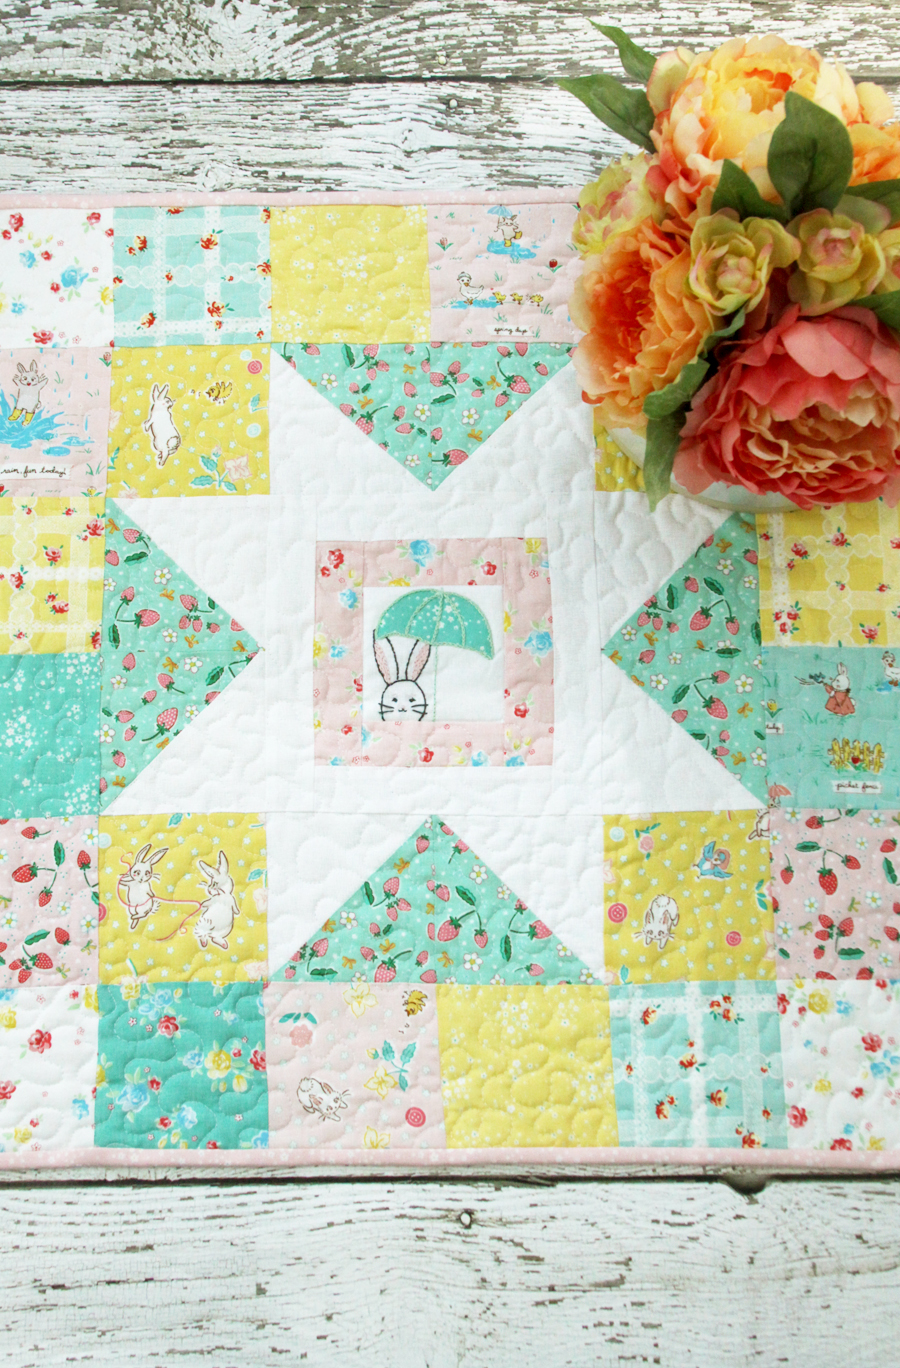
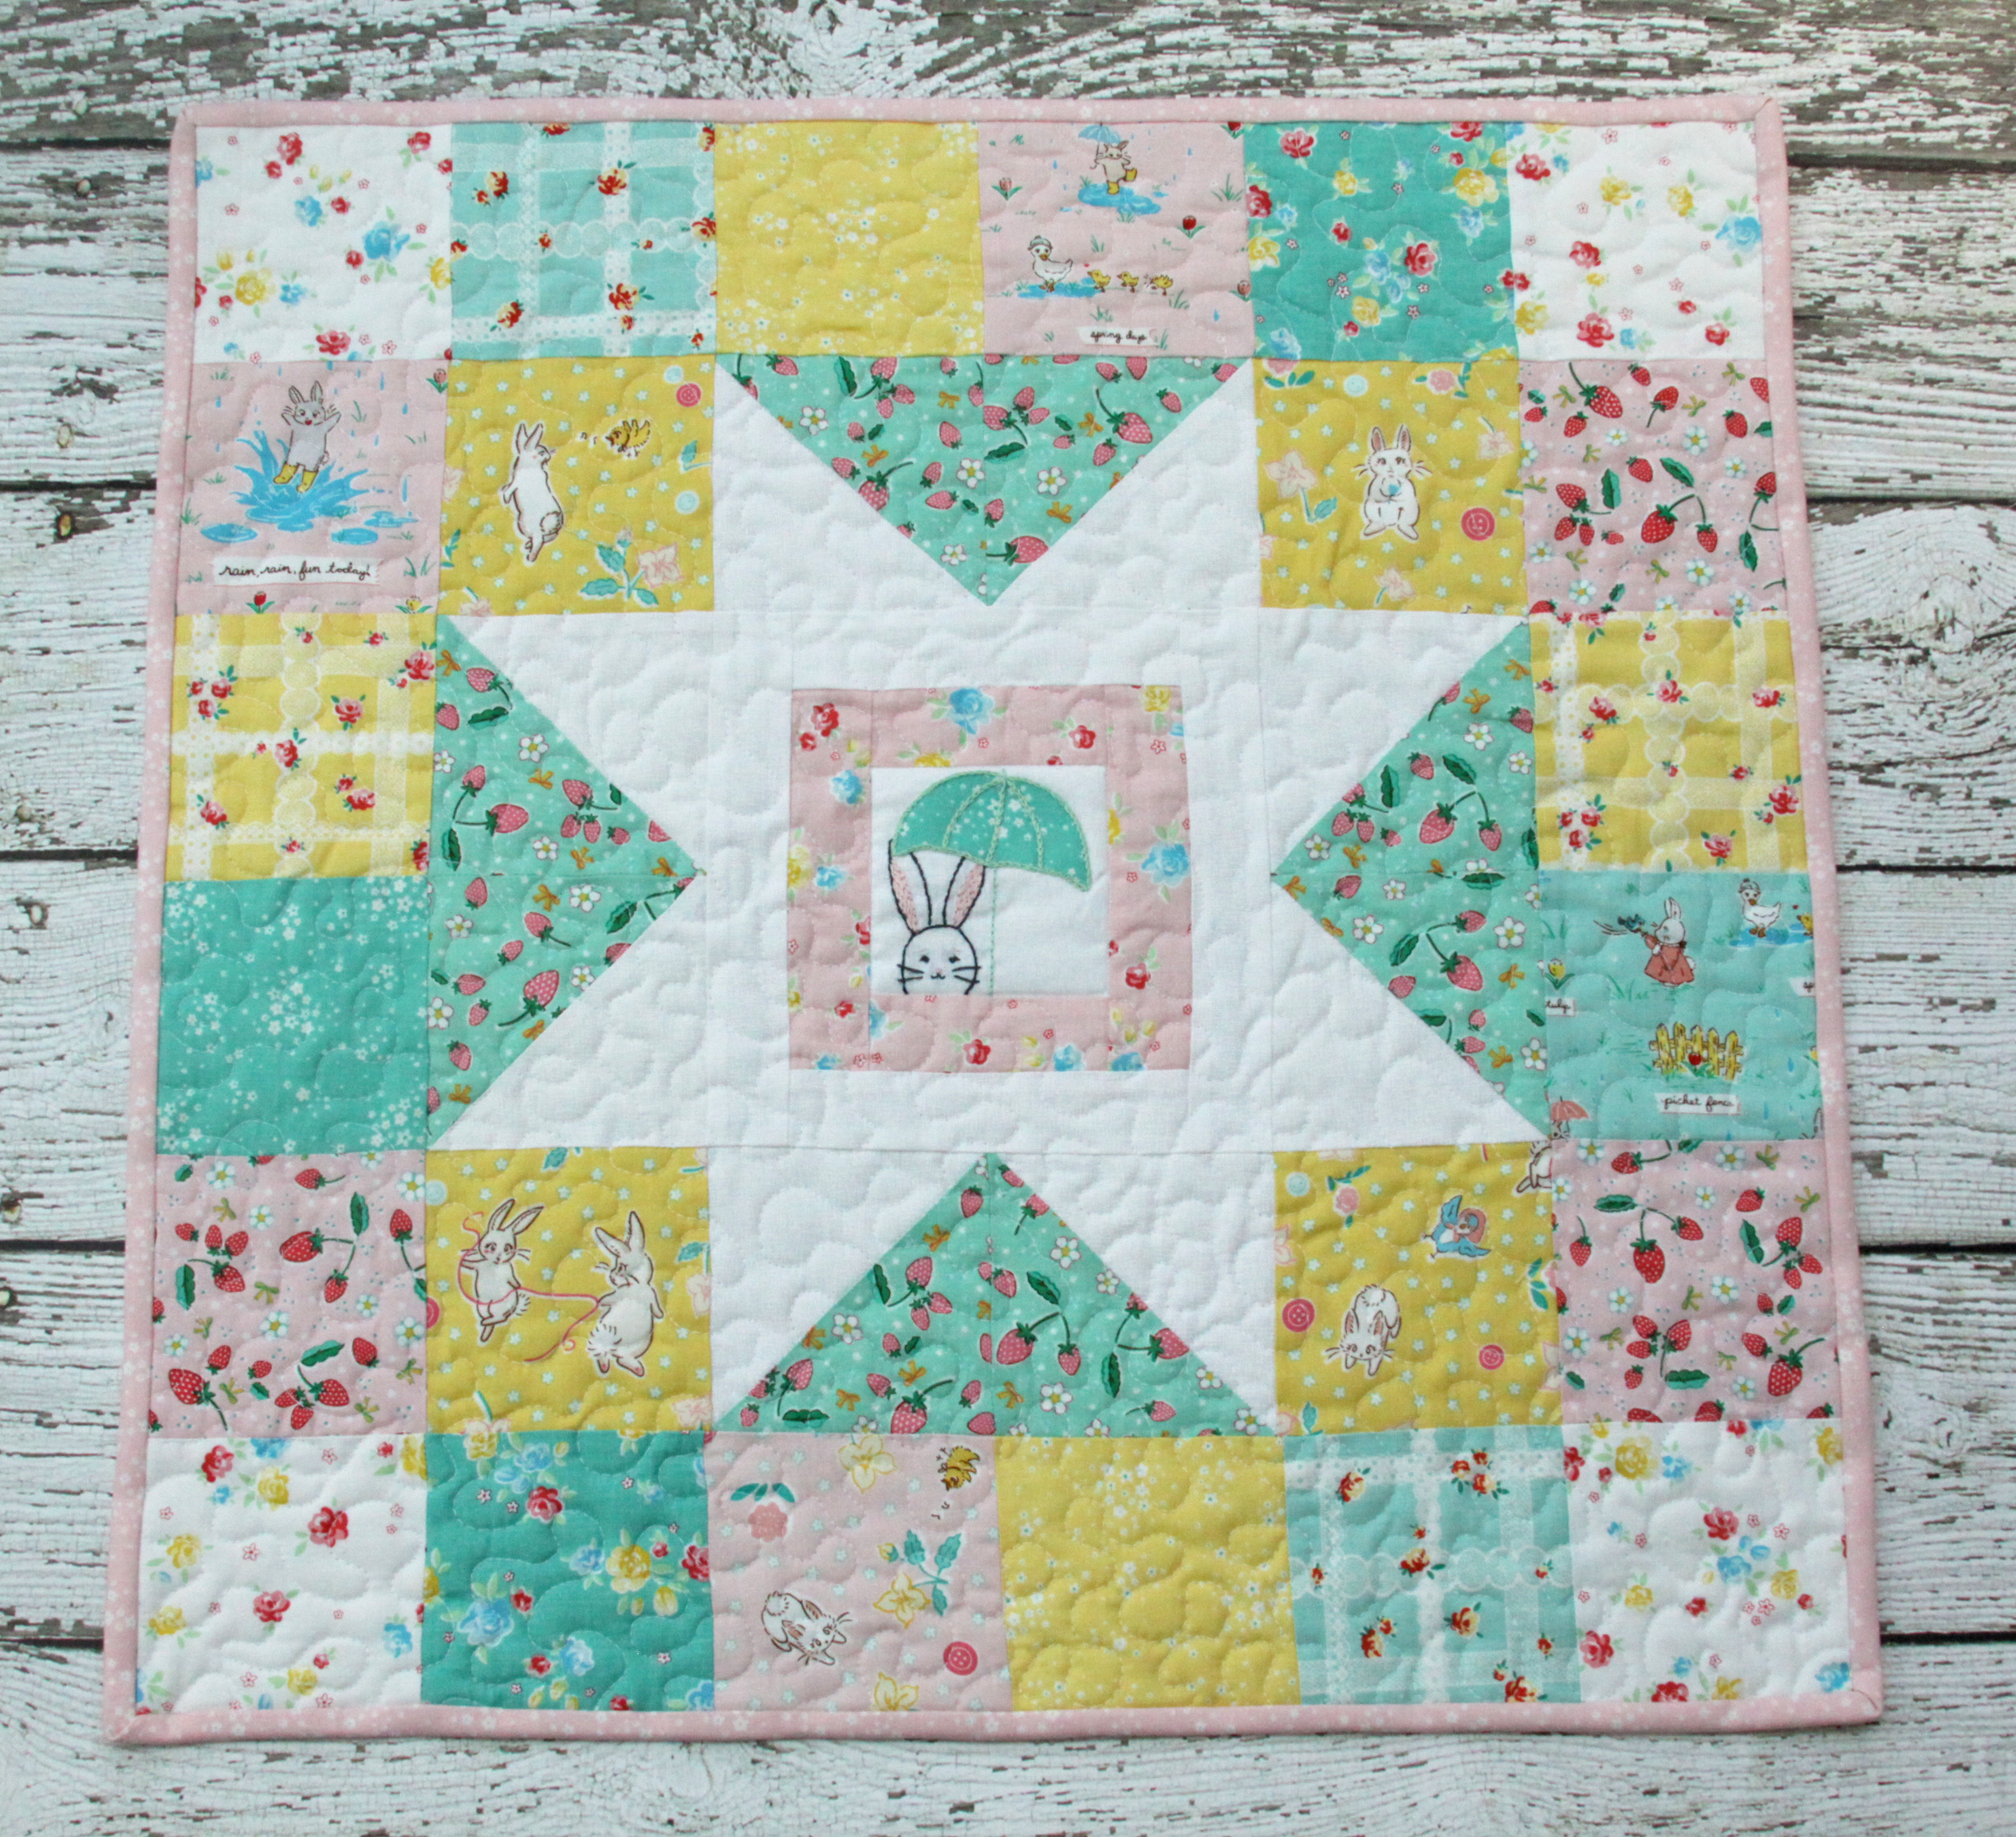
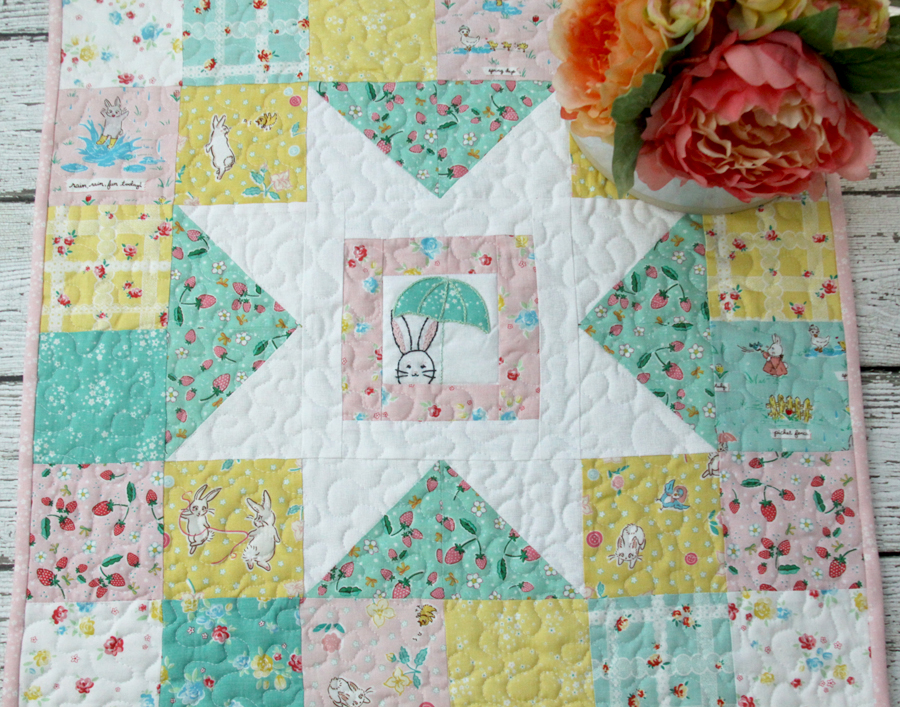
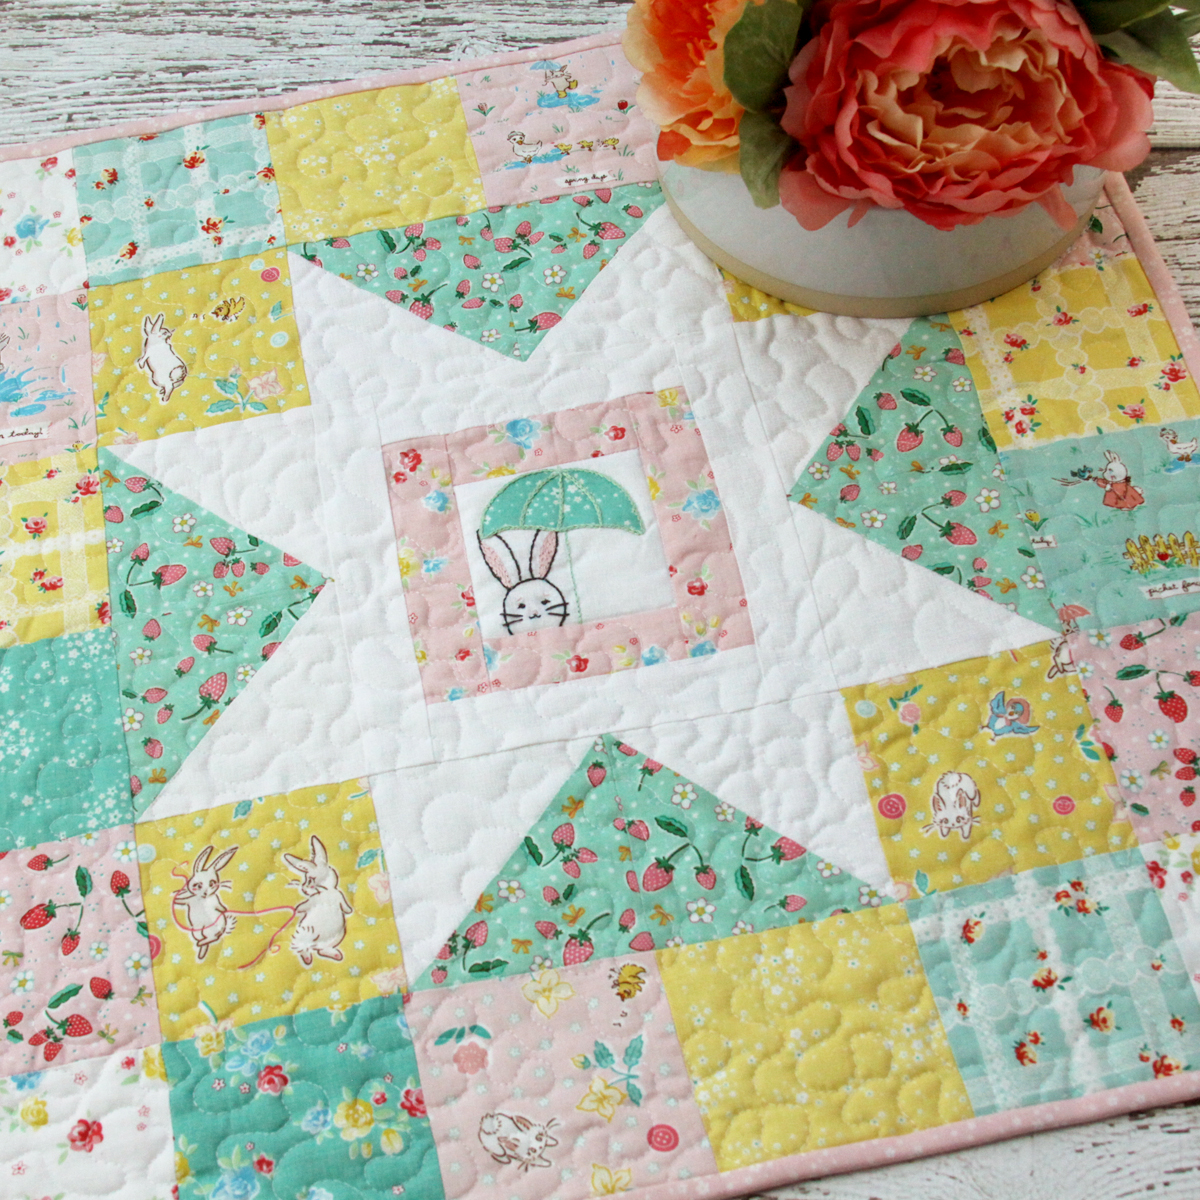
This new Spring Star Mini Quilt made with Bunnies and Blossoms fabric is such a pretty way to decorate for Spring!
Last fall I had the chance to meet Lauren Nash of Transient Art at Quilt Market in Houston and see her brand new line, Bunnies and Blossoms. And I just fell in love – with Lauren and the fabric! I couldn’t wait to get my hands on it – it’s all pretty florals, darling strawberries, lace and the cutest bunnies you’ve ever seen. It’s the perfect fabric for Spring so I thought a mini quilt or table topper would be perfect.
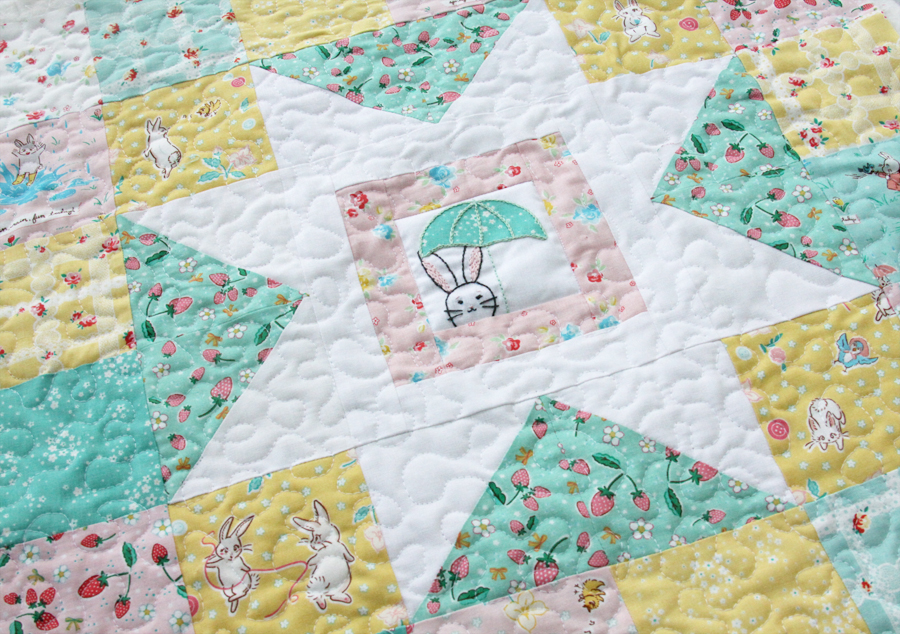
Since the bunnies on the main prints are playing games and splashing in puddles, I thought it would be cute to add a little bunny with an umbrella embroidered in the center square. If you don’t embroider, it would be darling with one of the little bunnies fussy cut in the center too!
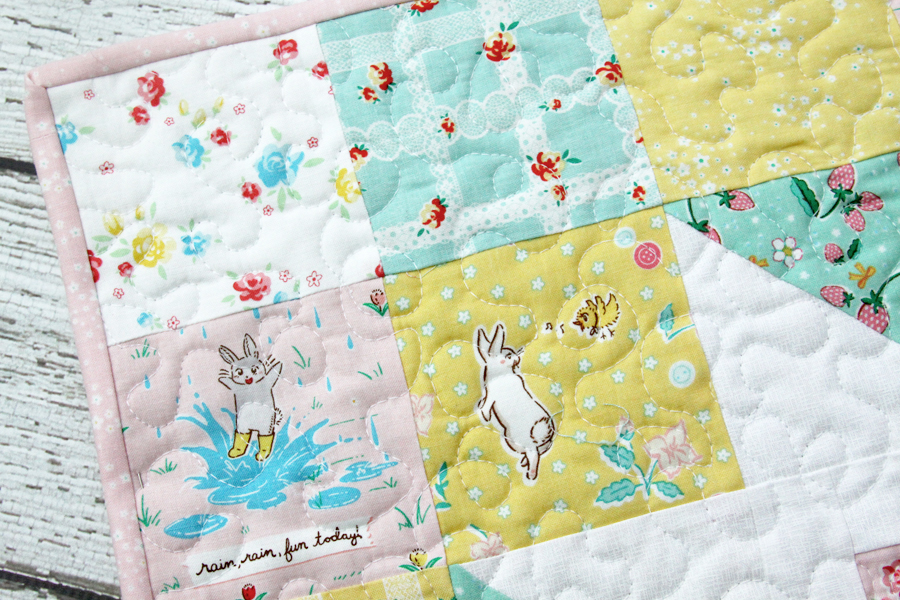
I love the vintage feel the prints and colors have too. I can’t wait to make more things with it!
So let’s dive in!
Finished size: 21″ x 21″
Here’s what you’ll need:
- Riley Blake Bunnies and Blossoms Fat Quarter Bundle
- 1 yard Teal Bunnies Blossoms print
- 1/4 yard Riley Blake Mini Hashtag White fabric
- 24″ square piece of cotton batting
- Small piece of HeatnBond fusible adhesive
- Bunny and Umbrella embroidery pattern
- Embroidery hoop
- Embroidery floss – gray, pink, green
- Marking Pen
Cut out of your fabrics the following:
- From white fabric – One – 6″ square, Four – 4 3/8″ squares, Two – 1 1/2″ x 5 1/2″ pieces, Two – 1 1/2″ x 7 1/2″ pieces
- From Teal Bunnies Strawberries print – Four – 4 3/8″ squares
- From Pink Bunnies Blossoms print – Two – 1 1/2″ x 3 1/2″ pieces, Two – 1 1/2″ x 5 1/2″ pieces
- From Yellow Bunnies Main – fussy cut (if desired) Four – 4″ squares
- From Pink Bunnies Floral – cut Four 2 1/4 strips for binding
- From remaining assorted fabrics – Twenty – 4″ squares
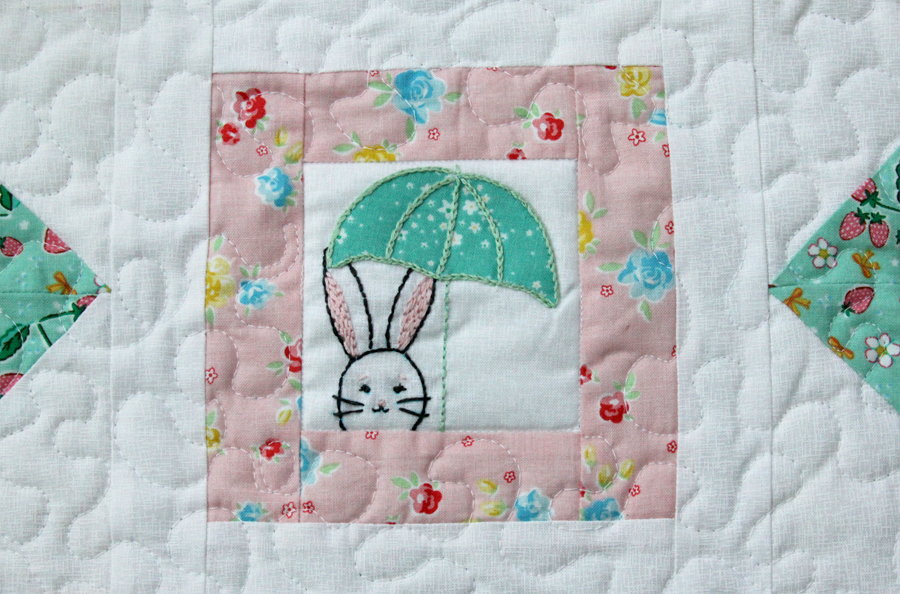
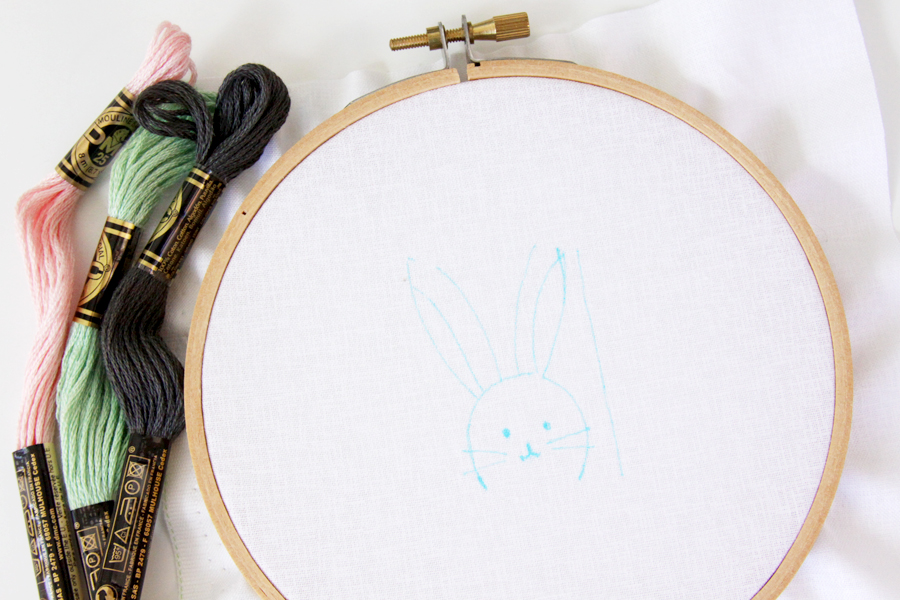
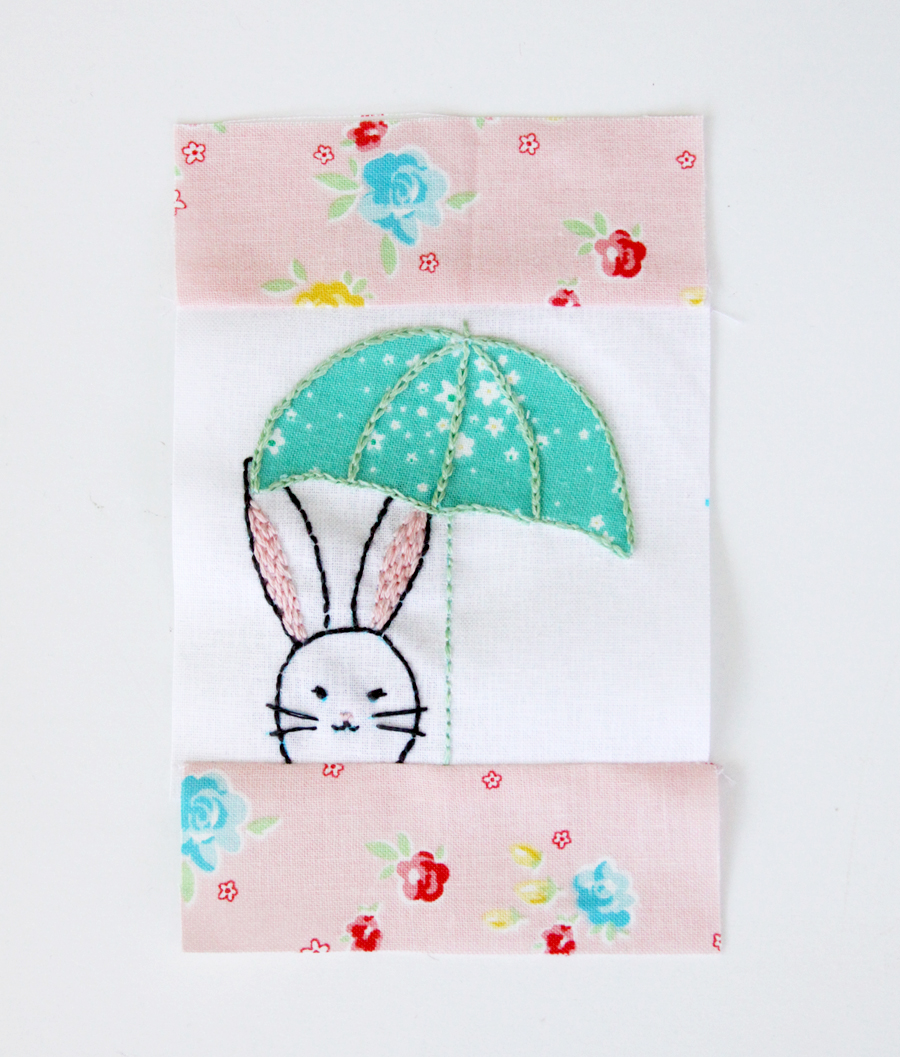
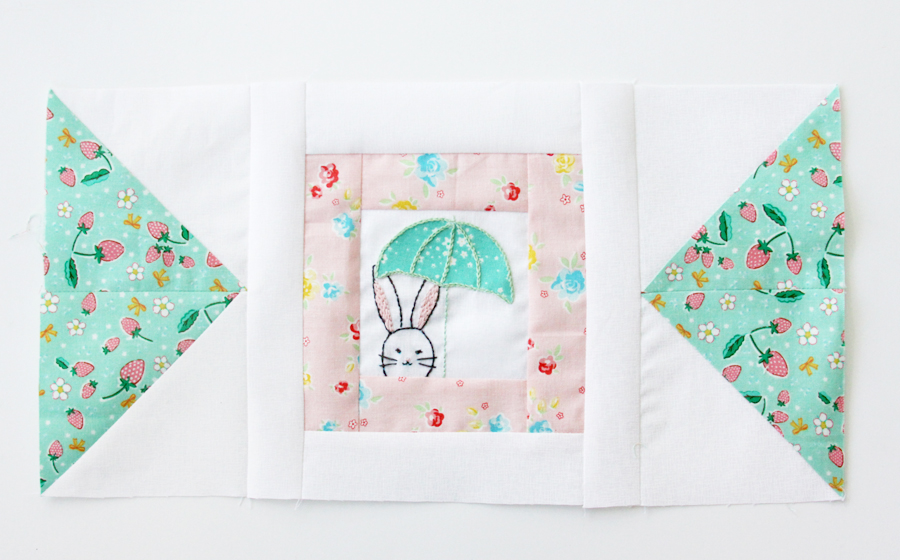
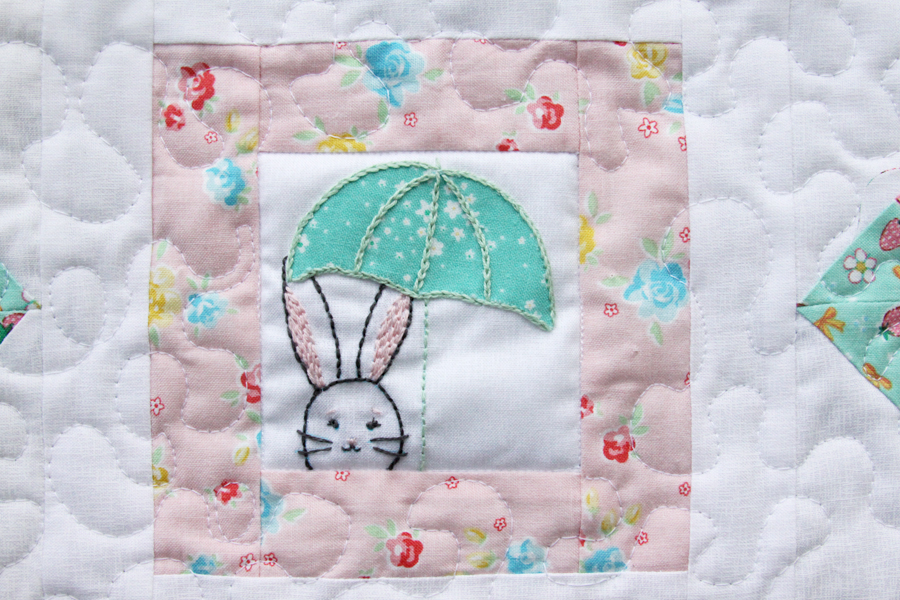
Begin by tracing the bunny embroidery pattern in the center of the white square. Don’t trace the umbrella, just the handle.
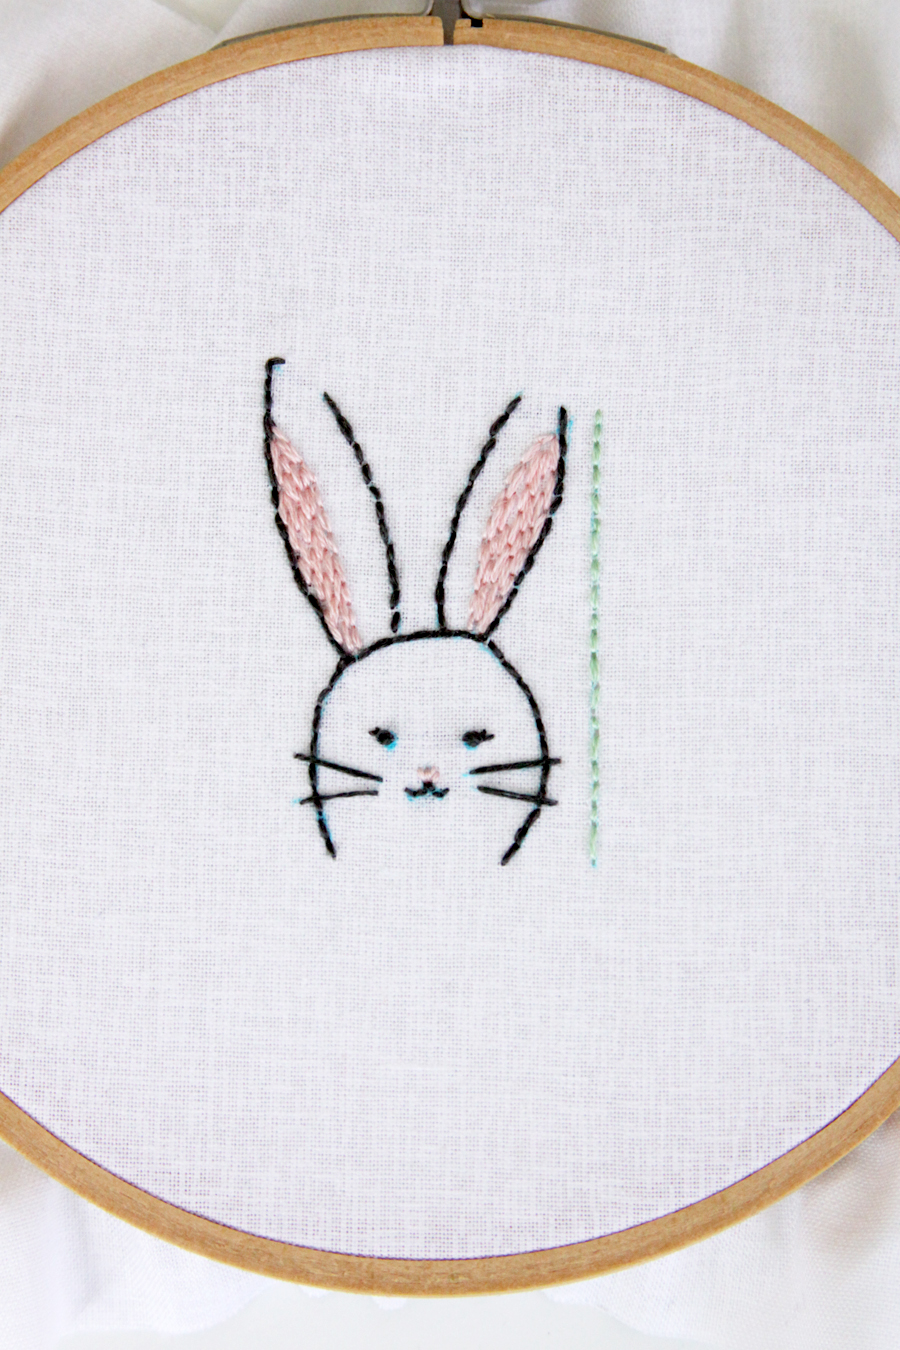
Stitch the bunny with a back stitch. Using three strands of floss, fill in the ears with pink back stitches in a basket-weave type pattern. Use french knots for the eyes and straight stitches for the whiskers. Fill in the nose with pink satin stitches and stitch the handle of the umbrella with green back stitches. Switch to 1 strand of gray floss and add eyelashes to the eyes and small pink eyebrows above the eyes.
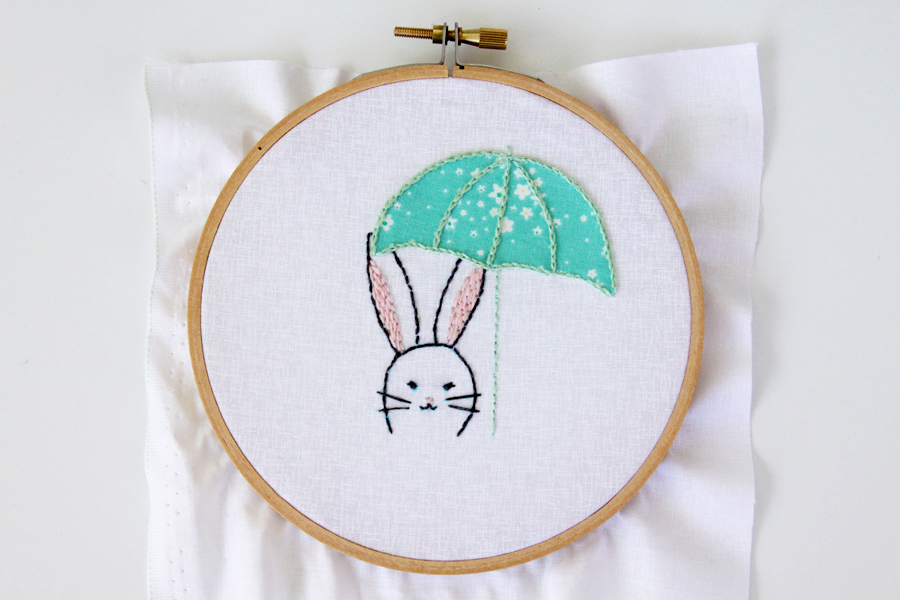
Remove the fabric from the hoop. But out a square of the Teal Bunnies Floral print and iron the fusible adhesive to the wrong side. Cut out the umbrella shape, remove the paper backing and press in place on the fabric according to the pattern. Stitch along the outside of the umbrella and down the curved lines with chain stitches.
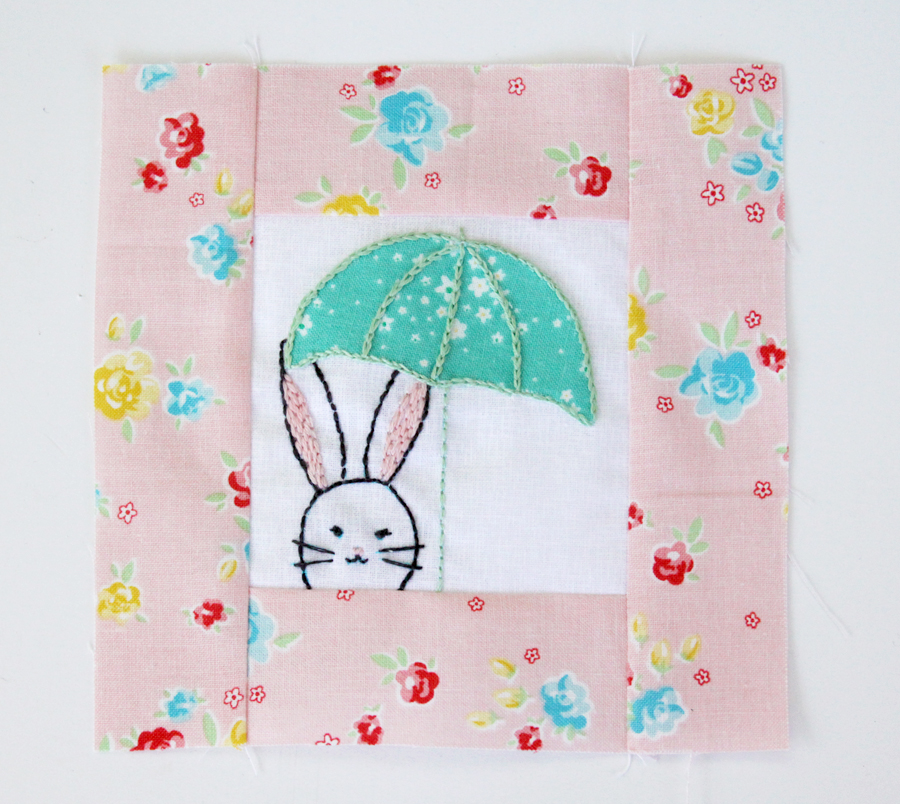
Carefully cut out the embroidery into a 3 1/2″ square. Cut the bottom edge first, with the embroidery just under 1/4″ from the bottom edge. Cut the top edge next. Then, centering the design, cut out the two side edges. Sew the 1 1/2″ x 3 1/2″ pink fabric strips to the top and bottom edges of the square. Press the seams away from the center.
Sew the two 1 1/2″ x 5 1/2″ pink strips on the left and right sides of the piece. Press the seams away from the center.
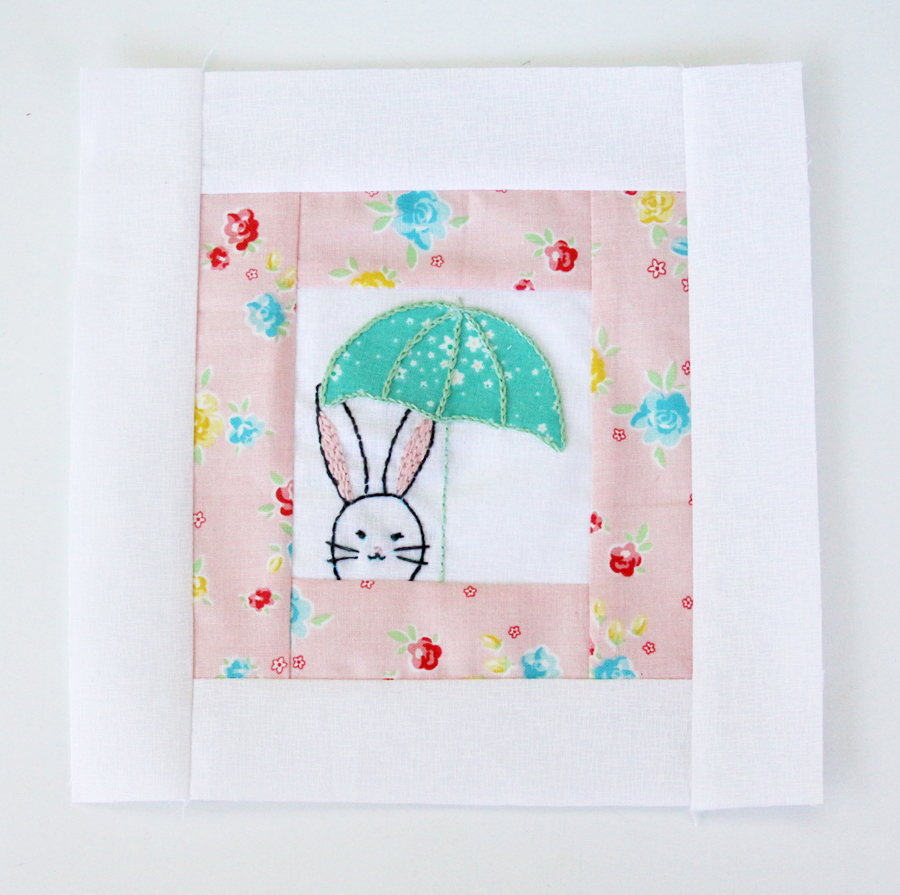
Repeat the strips sewing with the white fabric strips, sewing the top and bottom pieces on first, pressing, then the side pieces.
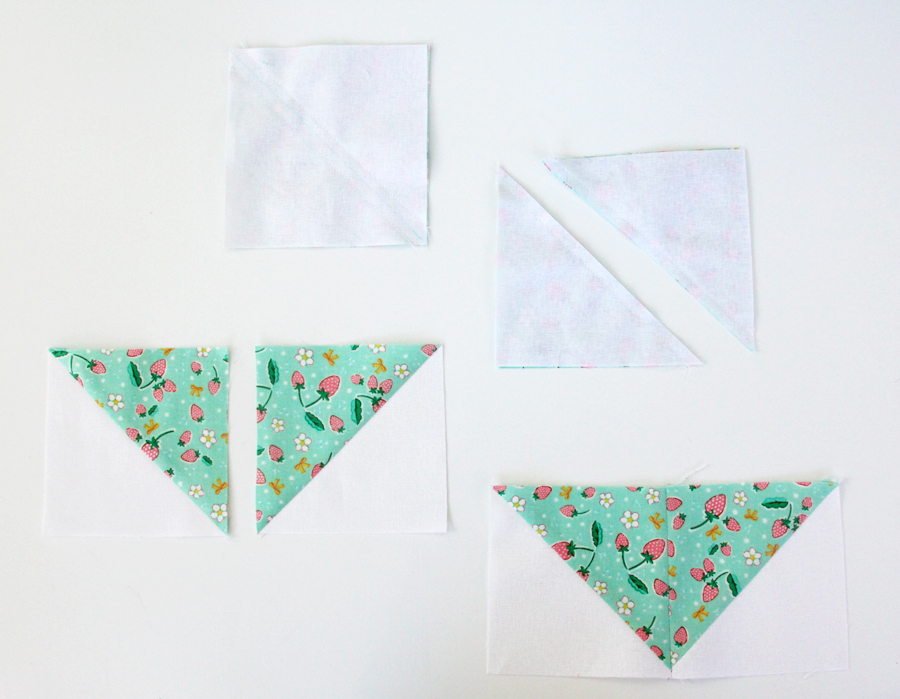
Make four half-square triangles sets with the four white squares and four teal strawberry squares that are 4 3/8″ each.
To make half square triangles for the sides of the star:
- Place a white fabric square right sides together with the teal strawberries print square. Draw a diagonal line with a marking pen from one corner to the opposite corner.
- Sew a 1/4″ seam on either side of the marked line.
- Cut down the marked line to separate the square into two triangles.
- Press the triangle open into a square shape and trim off the seam ends.
- To form the sides of the star, sew the two squares together with the prints touching each other.
Repeat for three more squares to make the other sides of the star.
Sew two star sides to the center panel, with the white fabric next to the center piece. Press the seams.
For the top and bottom star sections, sew a yellow bunnies print square on either end of the star pieces. Make sure the section that will be below the center panel is facing the correct way.
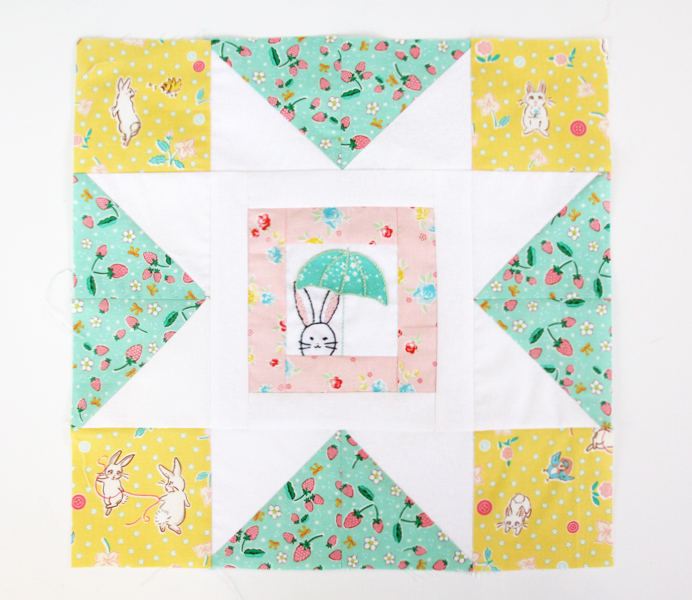
Sew the top and bottom rows to the center panel and press the seams.
Layout your patchwork squares for the border. Sew together the four squares that make up each side and press the seams. Pin to the center panel, matching seams and sew to the left and right sides.
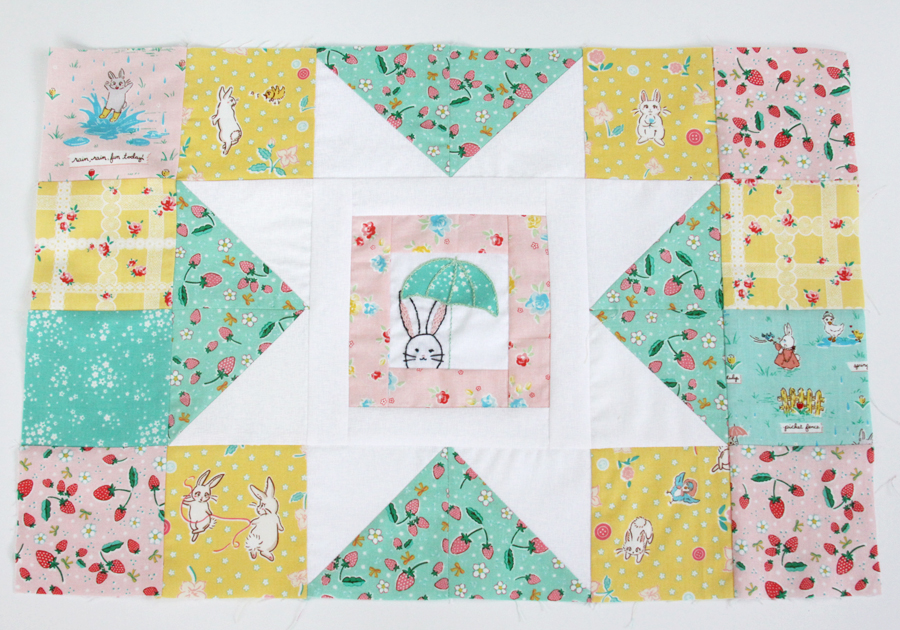
Sew together the top and bottom rows, press the seams and sew to the top and bottom of the panel, matching seams as you go.
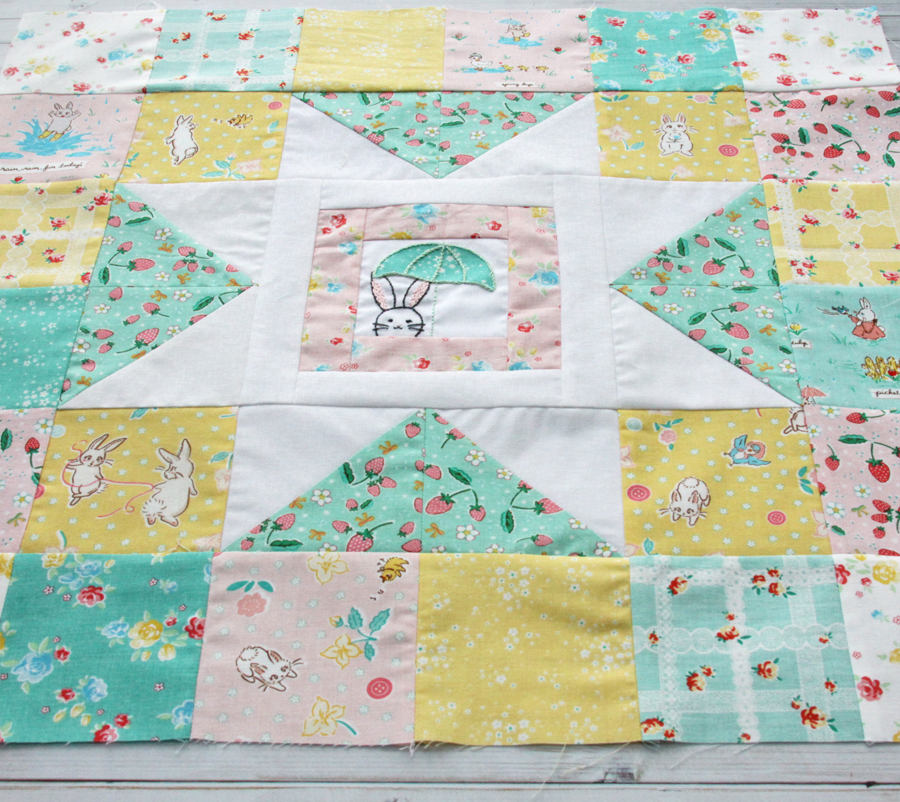
Quilt and bind as desired.
I used a free motion quilting over the whole quilt except for the embroidery panel, which I outlined in the ditch of seams.
Bind the quilt and then you can show off your cute new project!
I’m going to use mine as a table topper for my kitchen table – it will be so cute and cheery for Spring!
You can find Bunnies and Blossoms in stores now!


Thanks for the cute bunny mini quilt and your tutorial. Your patterns and tutorials are wonderful.
How sweet is this! Now to have it completed by Easter! Thank you for sharing!
Bev-I just love all of your projects!! May I ask – what color thread did you use to quilt this Spring Star Mini Quilt??
Thank you!
Hi Becky – thank you! I used white thread for the entire project.
Bev, you make the cutest things. I love that bunny!
Most of my work is quilting and I noticed that you and I have the same taste in fabric.
Another thing- we redid our kitchen cabinets from oak to white and it makes the whole
kitchen open up! A few months ago you had a post about that. We had a painter do them as it wasn’t something I wanted to touch :)
Thanks for all you inspiration.
Oh that bunny fabric is just adorable!! And you really brought your project to life with the addition of the embroidered bunny. Thanks for sharing!
Fantastic Bev and love seeing the step by step, so sweet! thanks for sharing on craft schooling Sunday!
Oh, how pretty this little quilt is. The fabric is darling and your little embroidery is so very sweet. How lovely to visit your beautiful place; it has added many a smile to my day.
I love the colors of your mini quilt, and the embroidery is wonderful, such details!! But I love all of your work!!
Thank you for sharing on Oh My Heartsie Girls Wonderful Wednesday #omhgww, your post is being featured this week and will be will also be pinned on this week on Pinterest and shared to Facebook.
Please join us to share again!!
Now I hope you enjoy the little boost, and stop by again to share.
Have a great week!
Karren
This mini quilt is adorable Bev. Love the colours!!
Thank you for sharing the tutorial at Create, Bake, Grow & Gather at Shabby Art Boutique this week. I’m delighted to be featuring it at tomorrow’s party and pinning too.
Hugs, Kerryanne
Thanks so much for sharing such a darling quilt! Love your blog too!
What size is the finished project?
Hi Laura!
Thanks for pointing out that wasn’t in the post! It’s 21″ x 21″ finished and I’ve added that in before the materials section as well. Thanks!
Requesting permission to use your pattern for an adult education beginning quilting class for our community. I expecct to make 5 -8 copies.
That is fine, thank you for asking! Please don’t charge for the pattern.