Today we are continuing our fun Embroidery Basics series with another stitch tutorial -the Satin Stitch!
We are having a fun stitch along with this sweet Floral Embroidered Bouquet Sampler. We are taking each stitch one week at a time and this week we are covering the Satin Stitch!
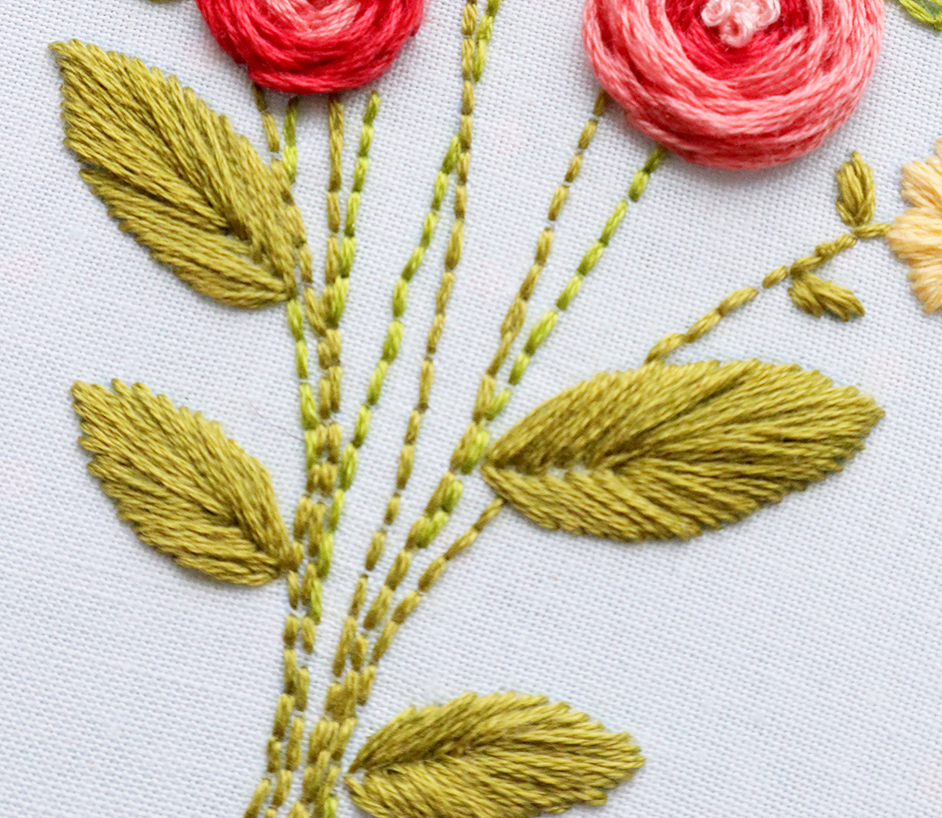
The Satin Stitch is a gorgeous stitch that is perfect for filling areas with smooth rows of stitches. This gives the design a full look with lots of texture! You can use this on any open areas – lettering, leaves, flowers, or any other element you want to be completely filled with stitching.
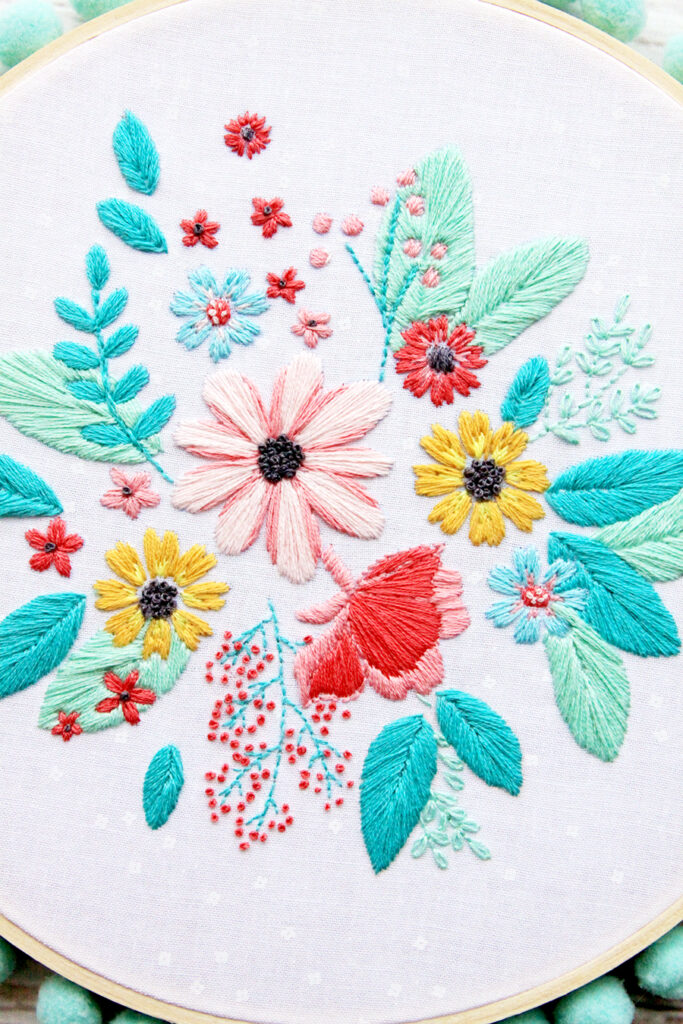
On the Singing in the Rain Floral hoop above, the leaves and most of the flowers were made with satin stitches. It’s a great way to have a lot of color in a design as well!
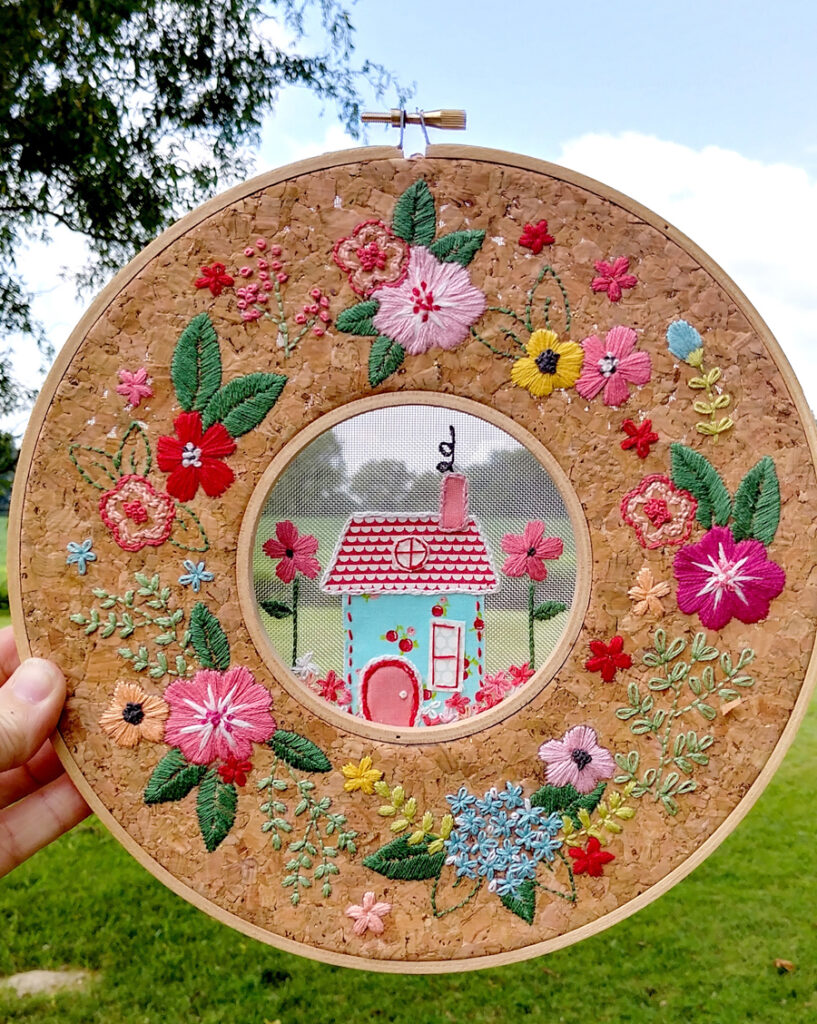
This Home Sweet Home Hoop in a Hoop has quite a lot of satin stitching on the leaves and florals. This really helps the stitches to pop against the cork.
This week in the Sampler Bouquet we will be stitching down the leaves! Here are the other links so far in the series.
Embroidery Basics – Satin Stitch
To Stitch a Satin Stitch:
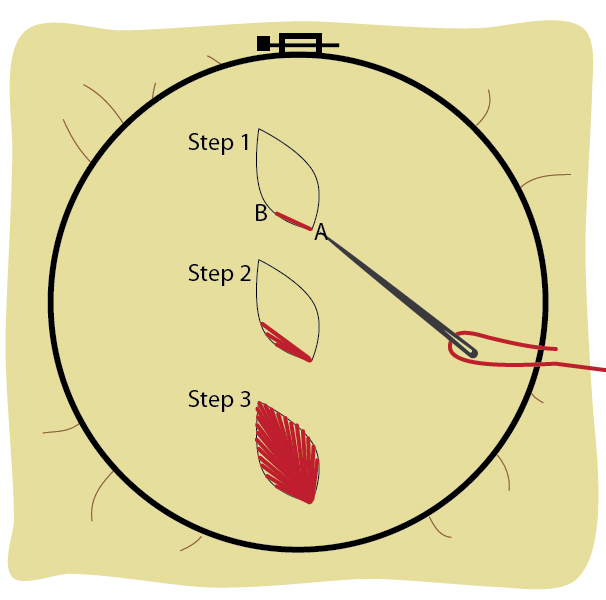
- Thread your needle. Starting on one corner or side of your design, Bring your needle up from back to front at point A, then take a short stitch along the edge of the design at point B.
- Continue filling the open space by placing the stitches next to each other, lengthening or shortening the stitches to follow the design.
- Fill the entire area with straight stitches, angling the thread to follow the design elements.
- Tips – keep the stitches flat against the fabric but don’t pull so tightly so the fabric pulls. Follow the design in the ways that make the most sense for the element. If it’s a leaf, start and the bottom and stitch from one side to the other. If you are stitching a round flower, stitch from the center out to the edges in a circle.
View the video tutorial of the Satin Stitch here:


Excellent ❣️❣️❣️