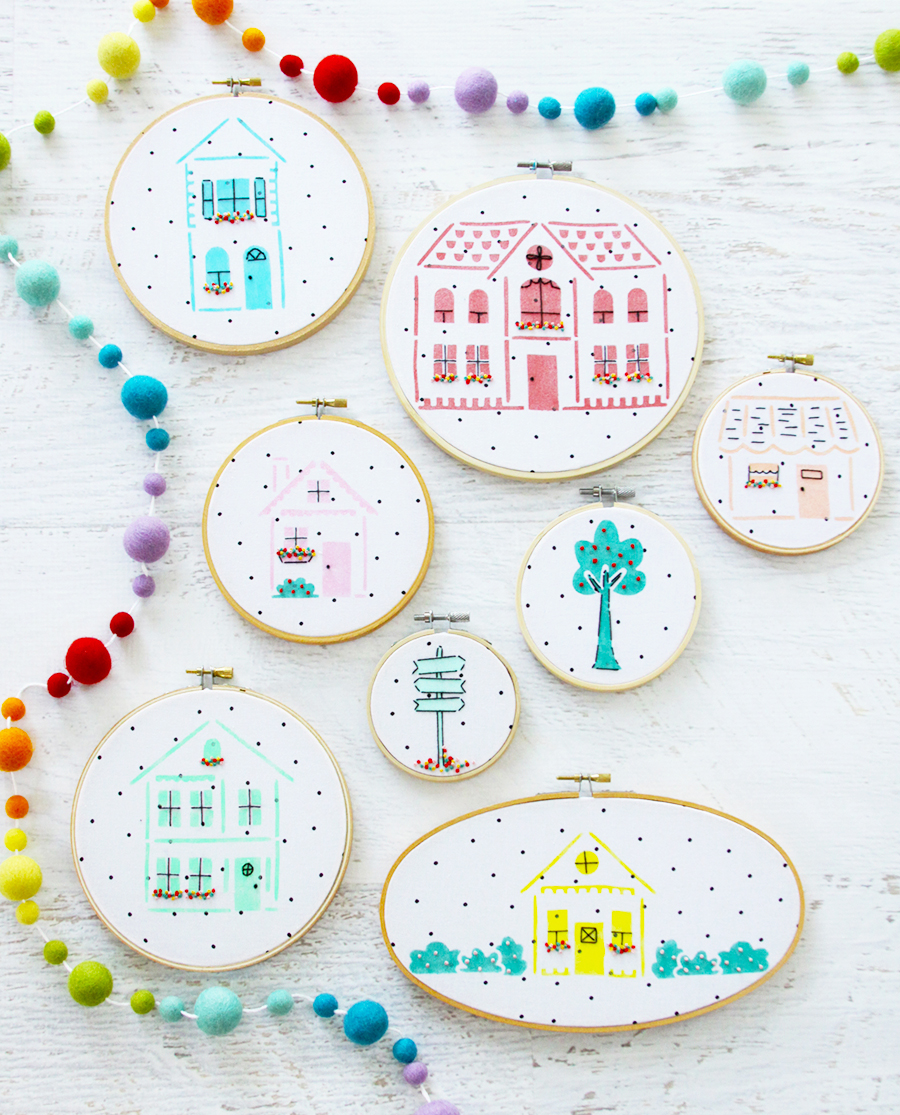
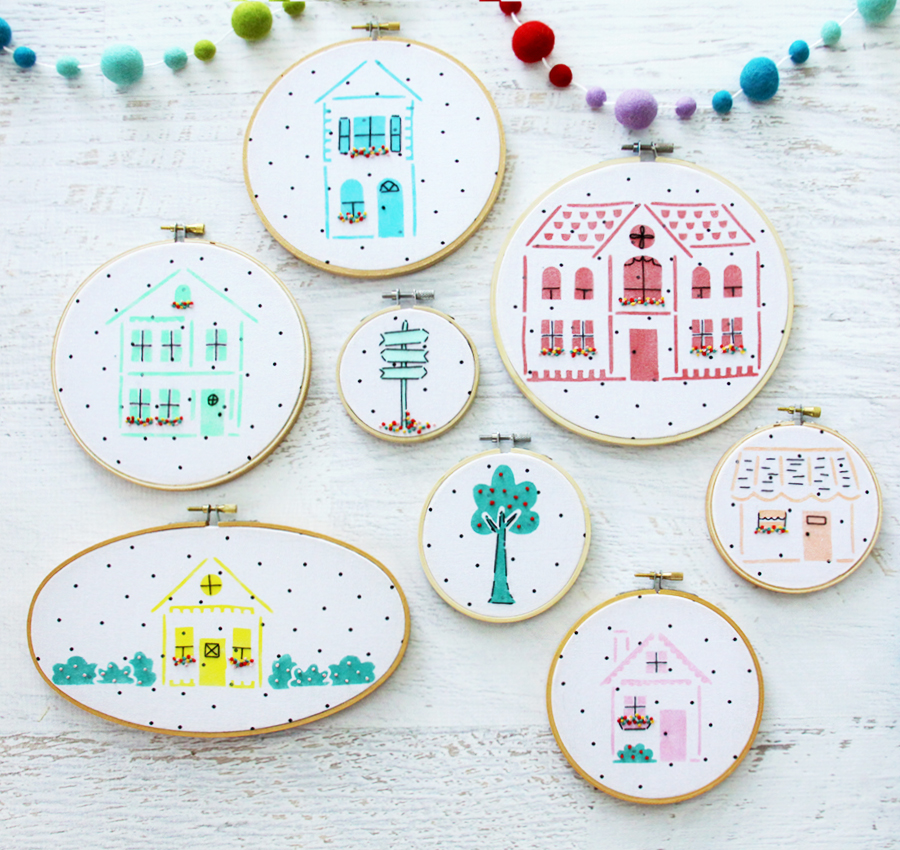
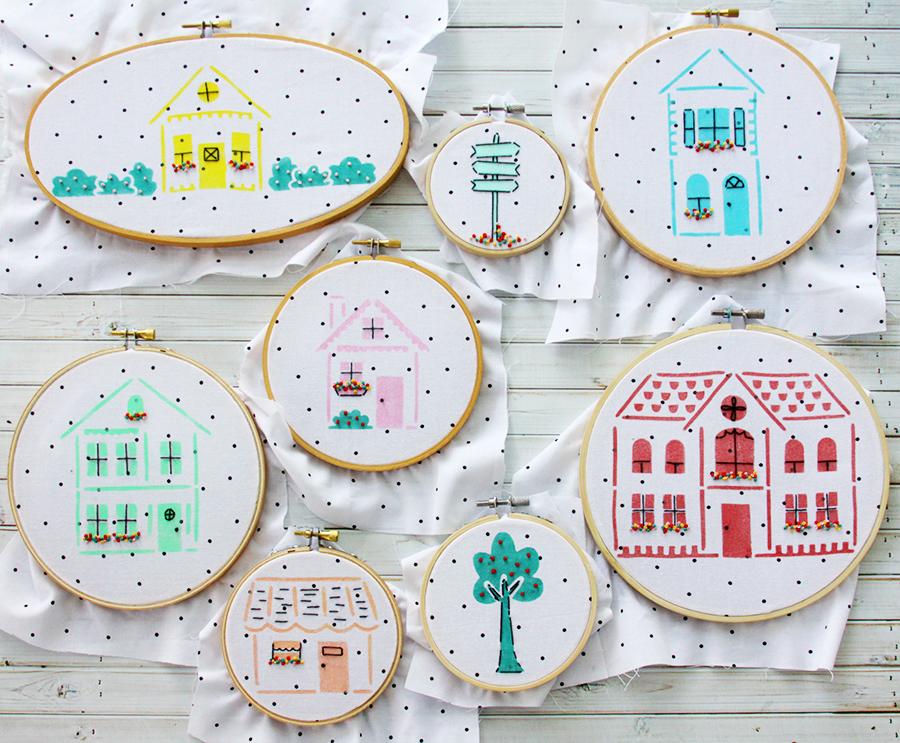
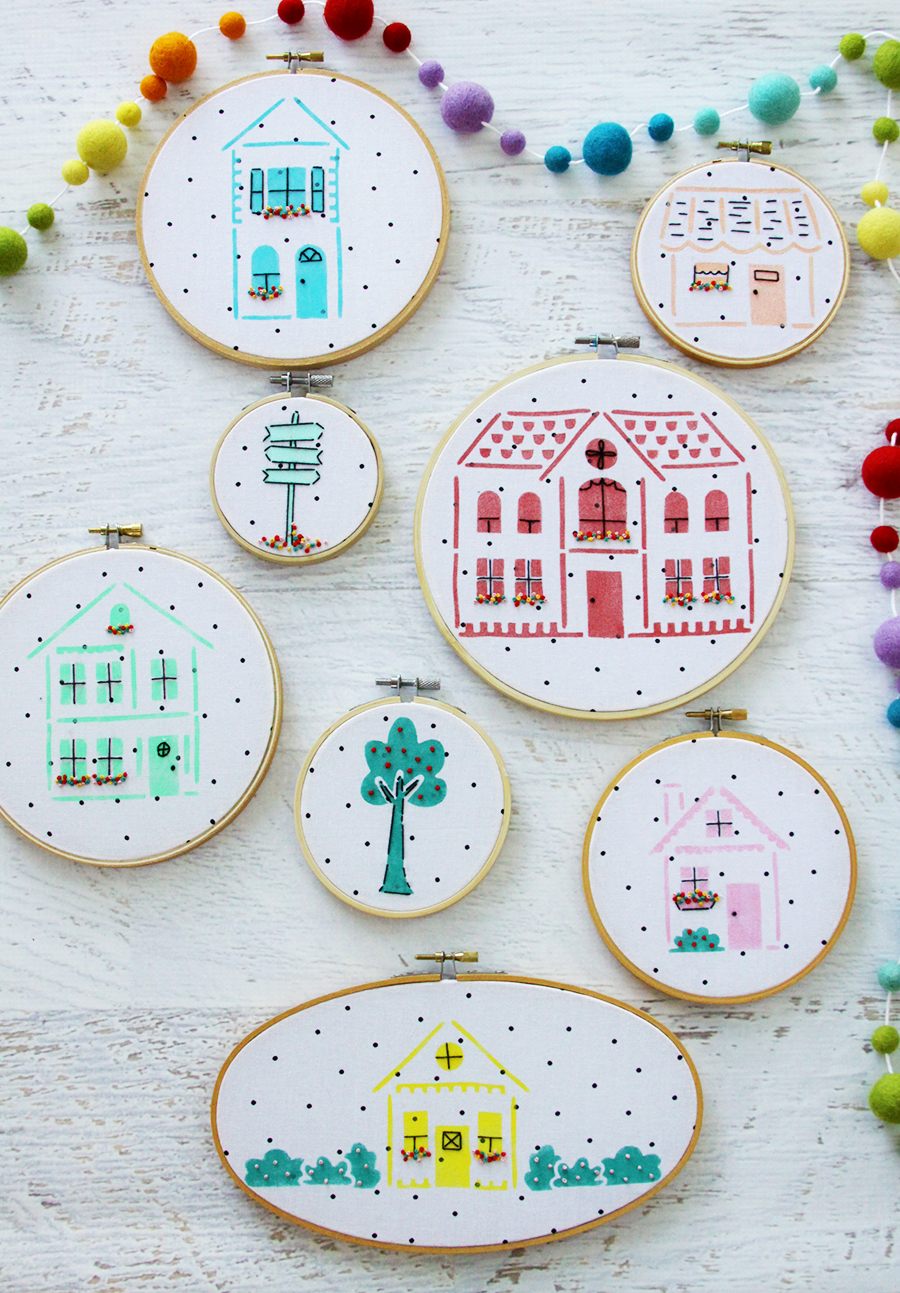
I love projects with lots of color and this Stenciled Neighborhood Embroidery Hoop Art Gallery was so fun to create! I don’t always have a lot of time to stitch an entire project but I love how this little painted village looks with just a few touches of embroidery as highlights.
It was so simple to make up too! I used the new Martha Stewart Adhesive stencils and Multi-Surface paints and I love how the bright colors work so well together for these little houses. I think they would look so cute as a gallery wall in a kids room or anywhere you’d like a colorful little neighborhood!
Stenciled Neighborhood Embroidery Hoop Art Gallery
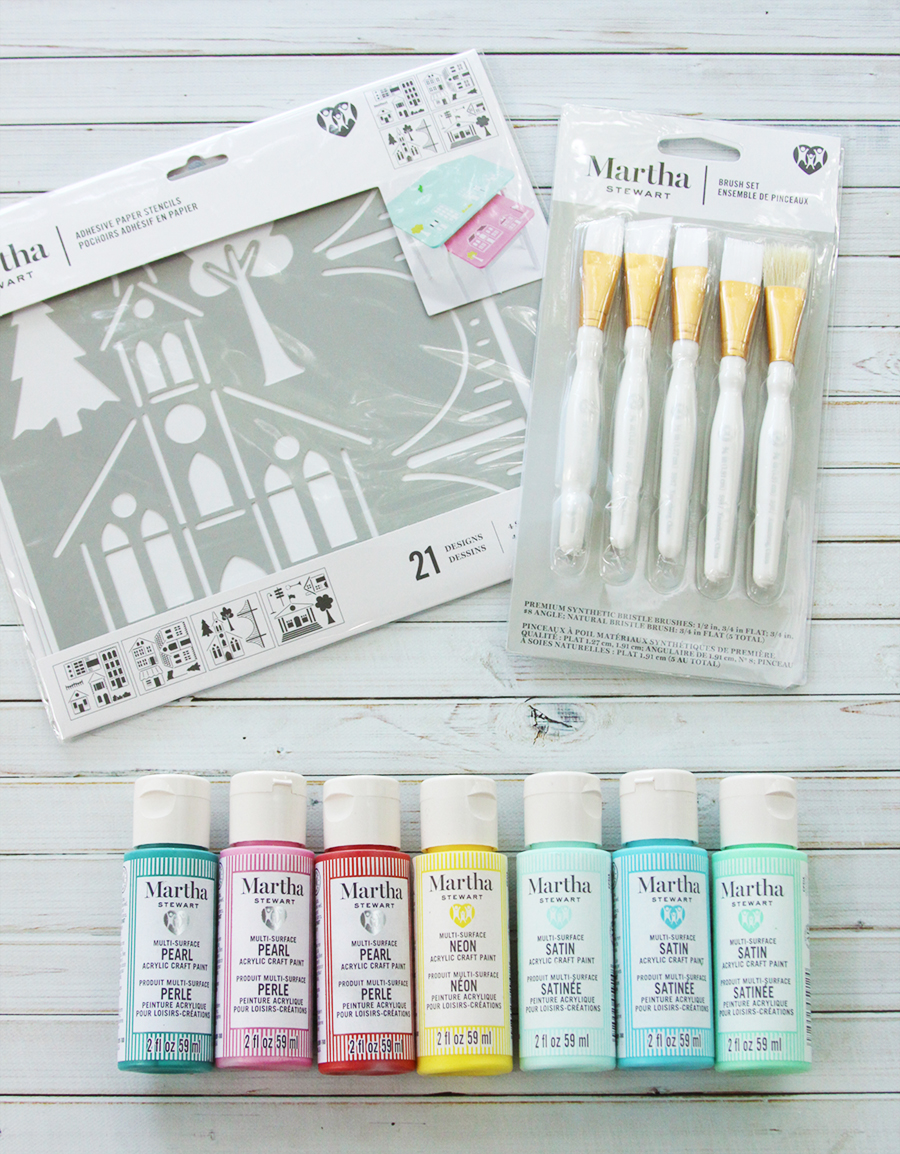
Materials:
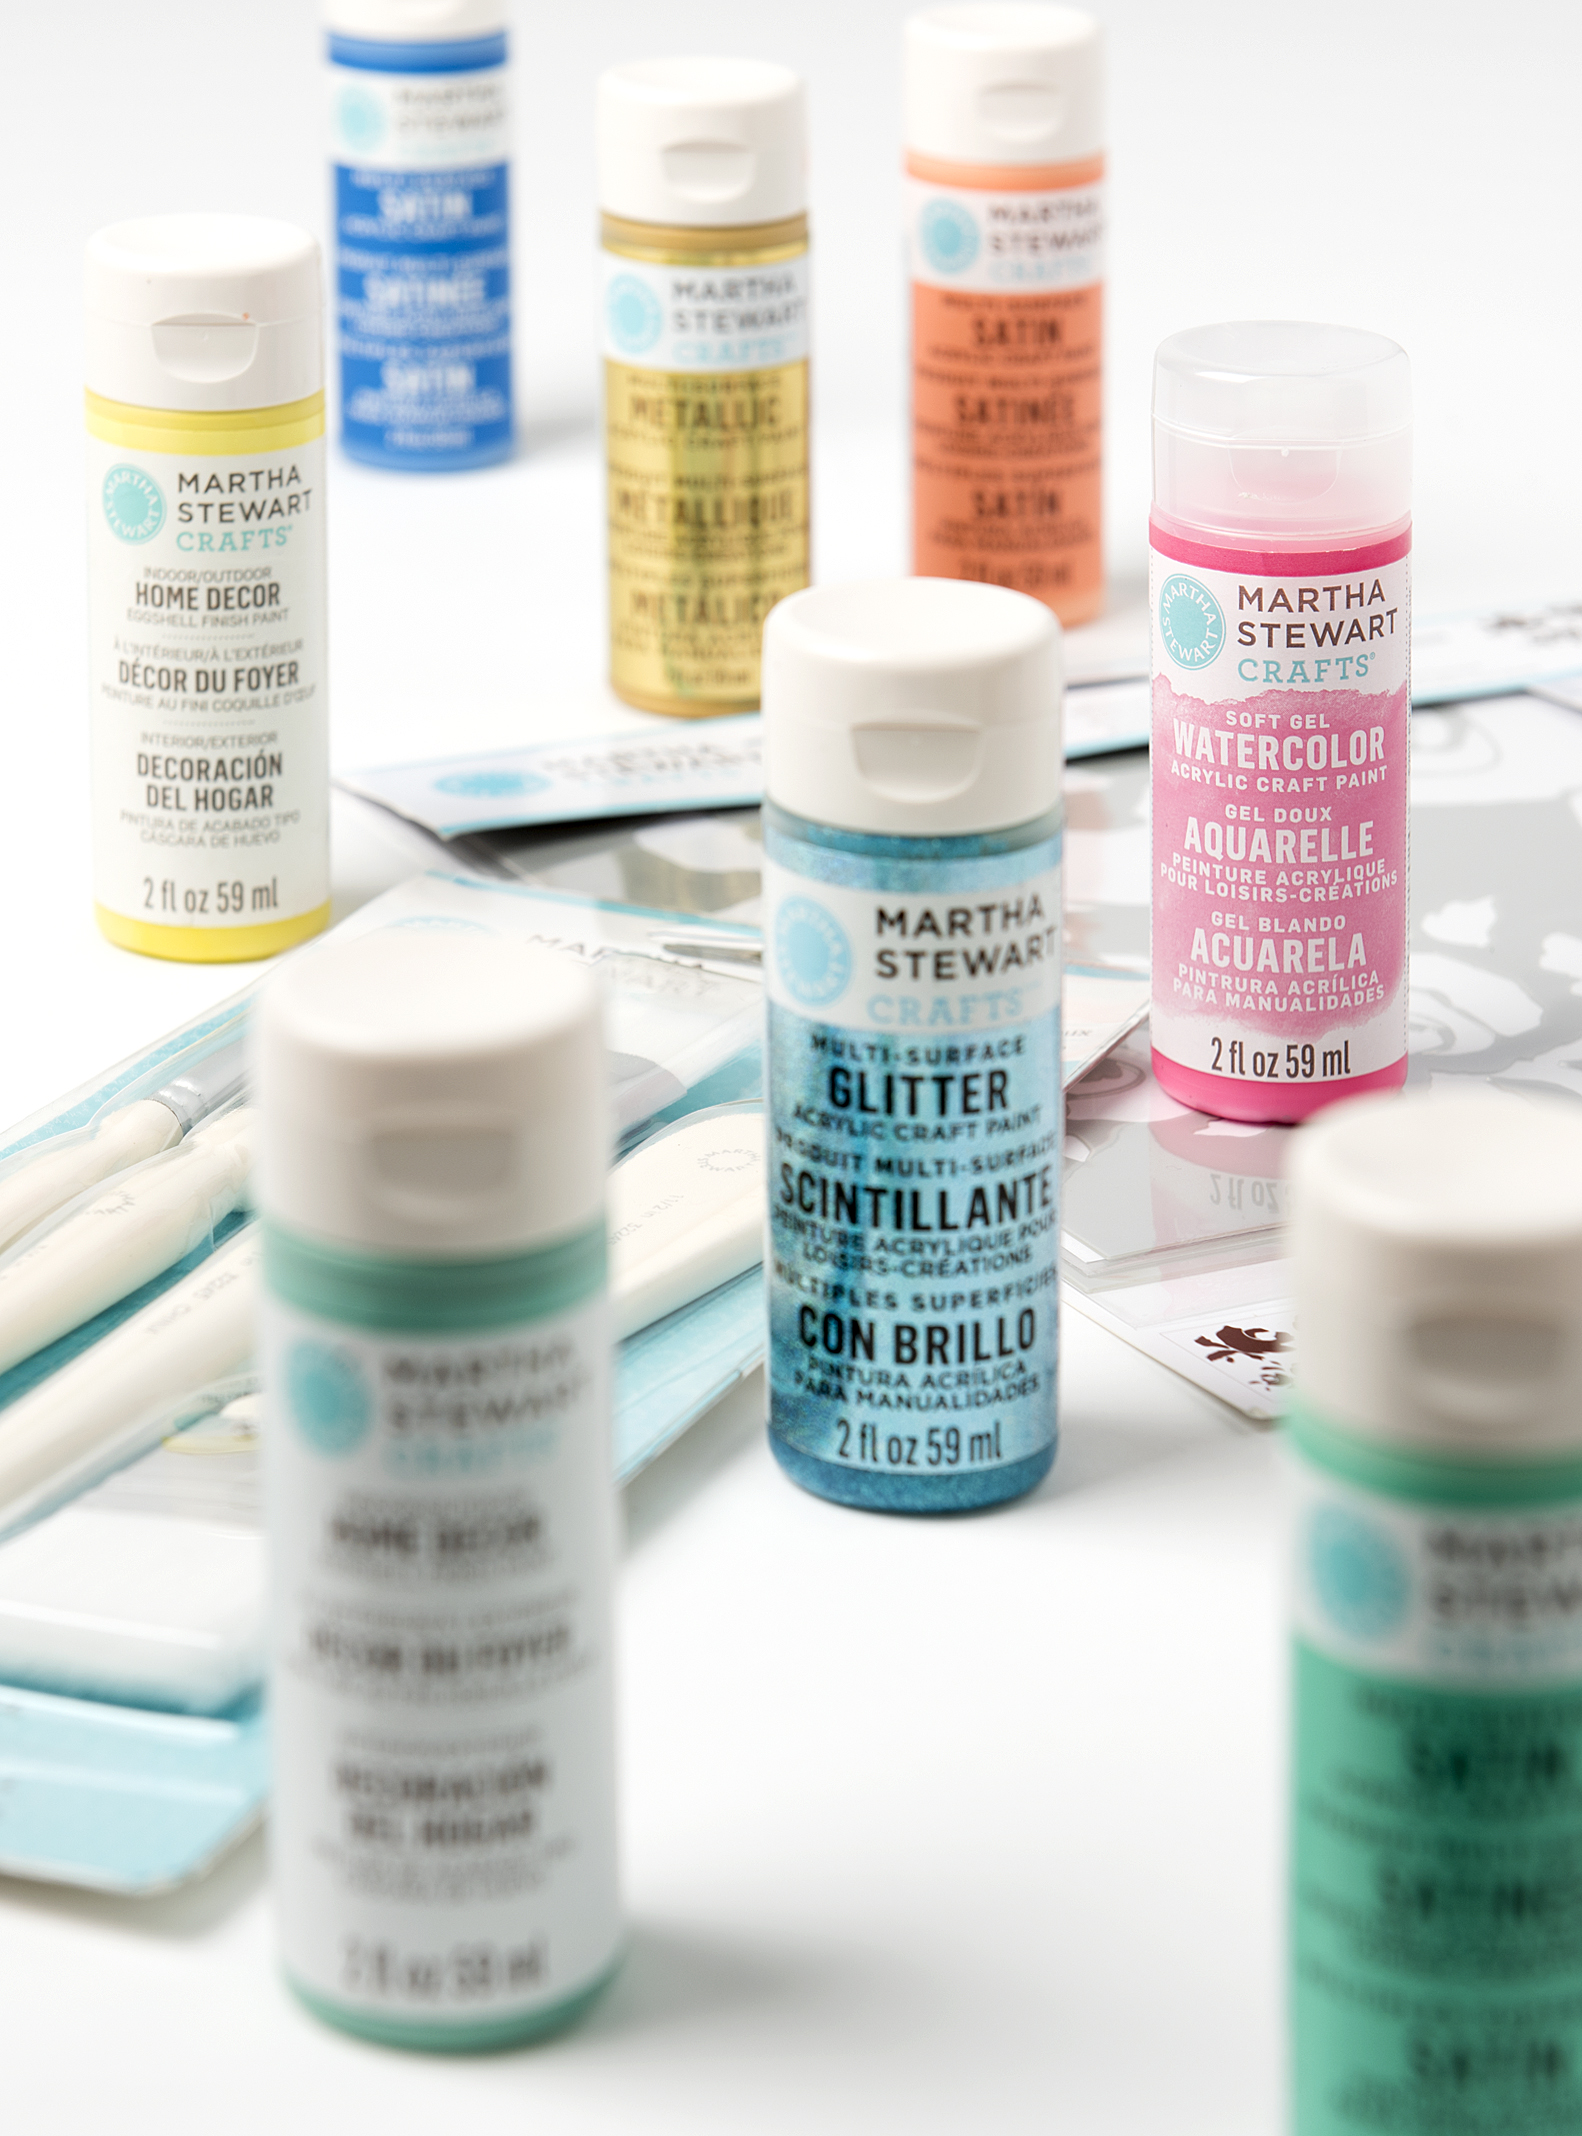
- Martha Stewart Multi-Surface Paint – comes in a variety of finishes including satin, glitter, pearl, metallic, neon, and glow-in-the-dark. I used the satin and pearl and neon for these – All Martha Stewart products are exclusively at Micheals!
- Martha Stewart Village Stencil
- Martha Stewart Brush and Stencil Set
- Stencil Tape
- Fabric with simple background
- Variety of embroidery hoops
- Hot Glue
- Coordinating Embroidery Floss
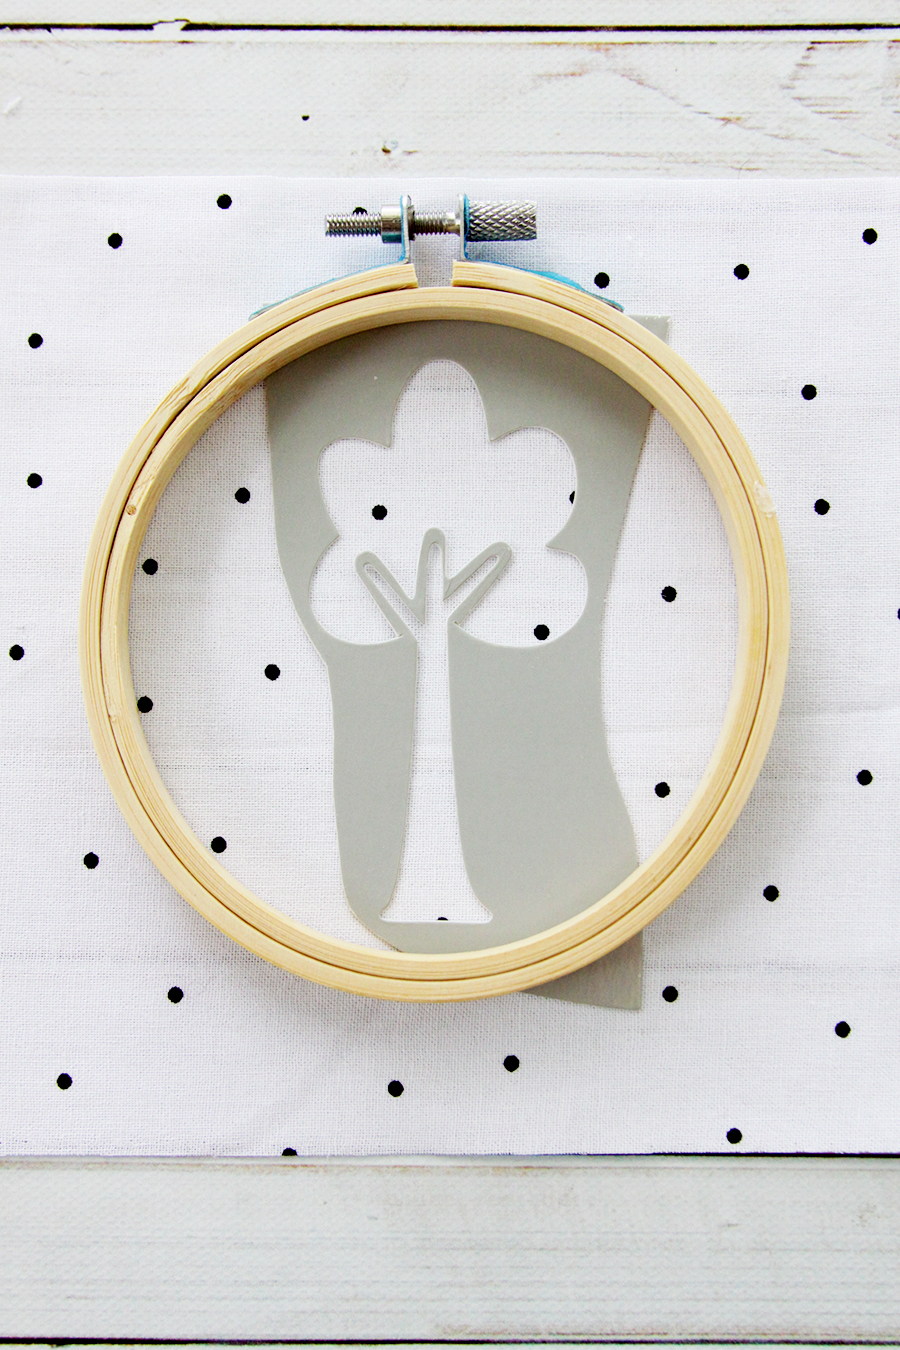
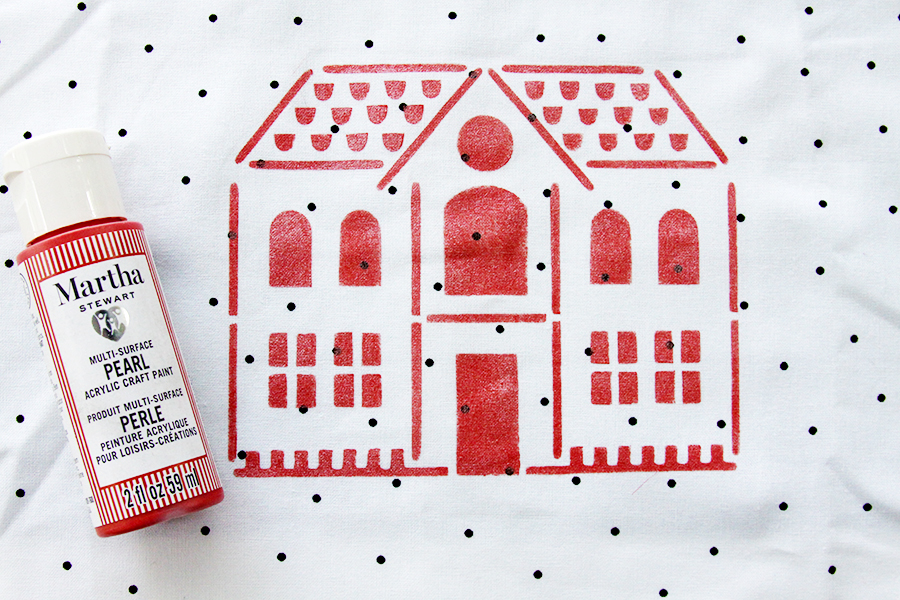
The Village stencil has so many cute little houses and other details. It is perfect for using to create this little gallery wall. I also love that the stencils are adhesive. You can put them right onto your surface and it makes it so easy to stencil. The paints come in 80 different colors and since they are Multi-Surface they can be used on wood, tin, ceramic, glass or fabric!
To begin with, plan out which of the designs from the stencil set you are going to use and then decide what size embroidery hoop you’ll use with them. I used a variety of different sizes including and oval hoop. Once you have your design planned, cut out the background fabric about 1 or 2″ larger than the hoop.
Remove the backing from the stencil and place it on the fabric. If your stencil is close to the edge you’ll want to add a little stencil tape to make sure you don’t get any paint outside the design.
Stencil inside the design with the stencil brush. Make sure you have a nice even coverage in the color.
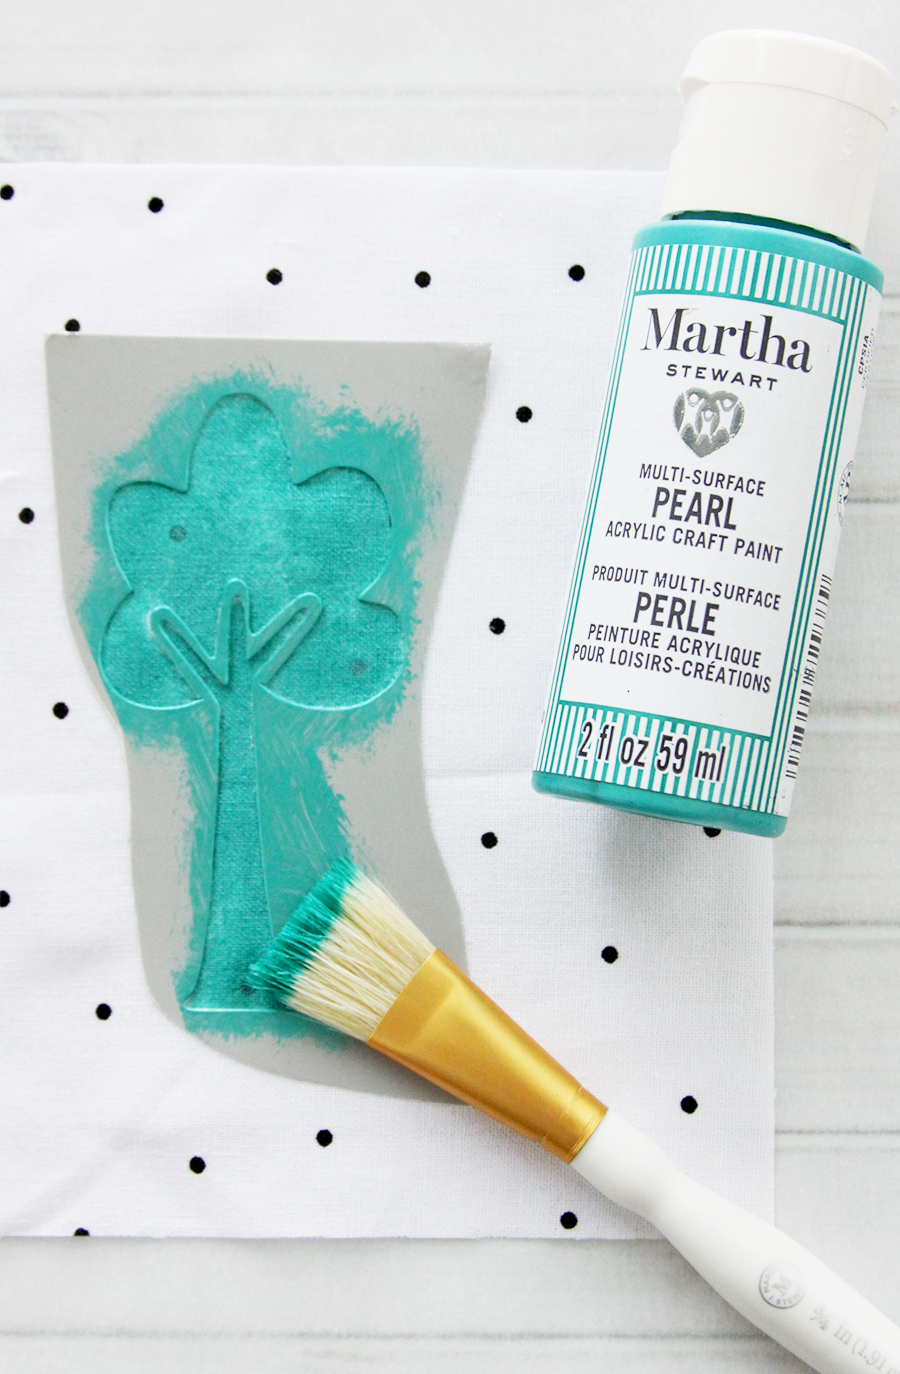
Remove the stencil. You can reuse these – the pack comes with a glossy blank sheet that you can use for storing the stencils.
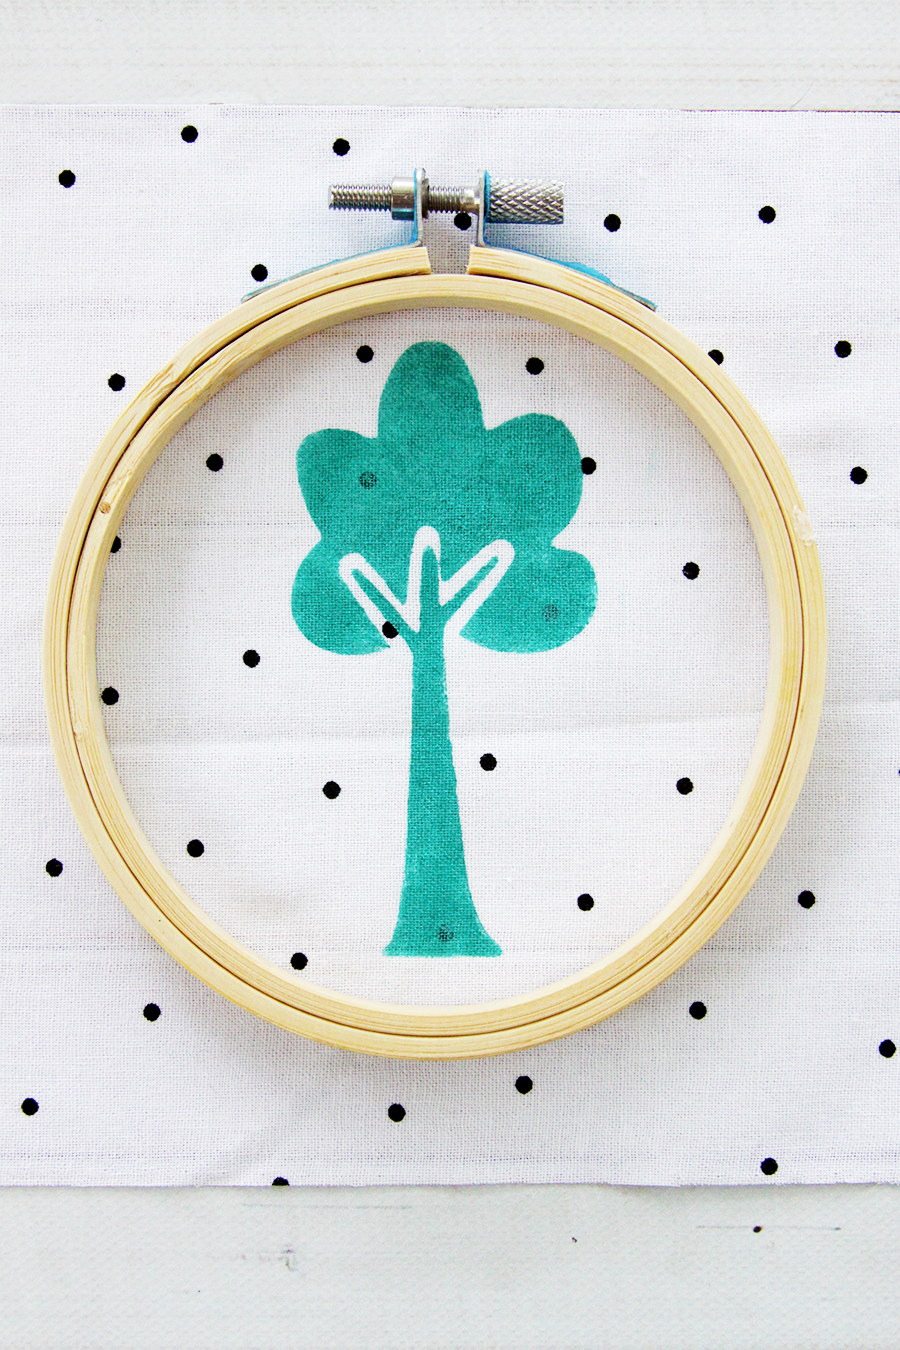
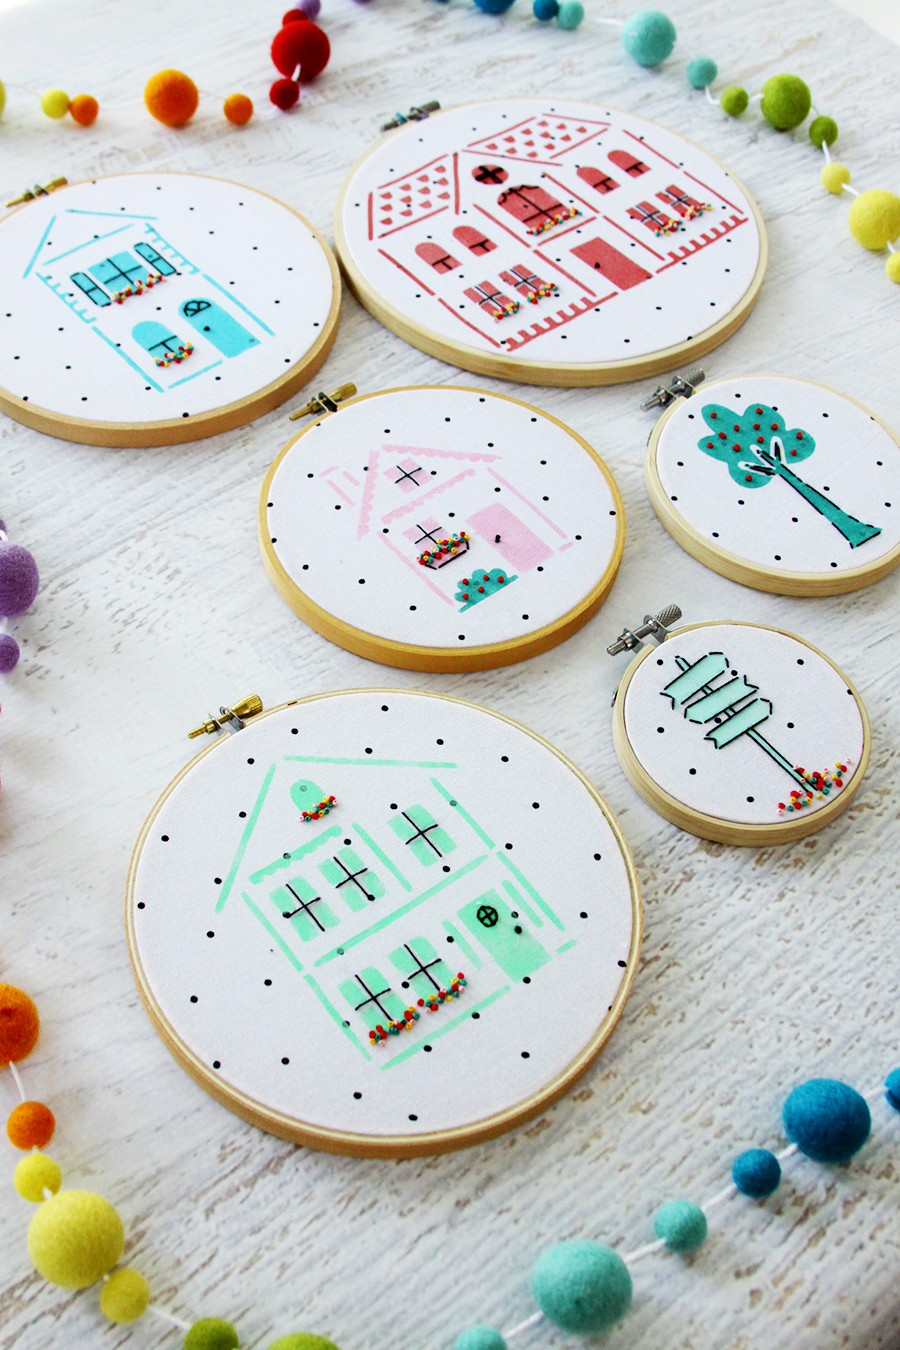
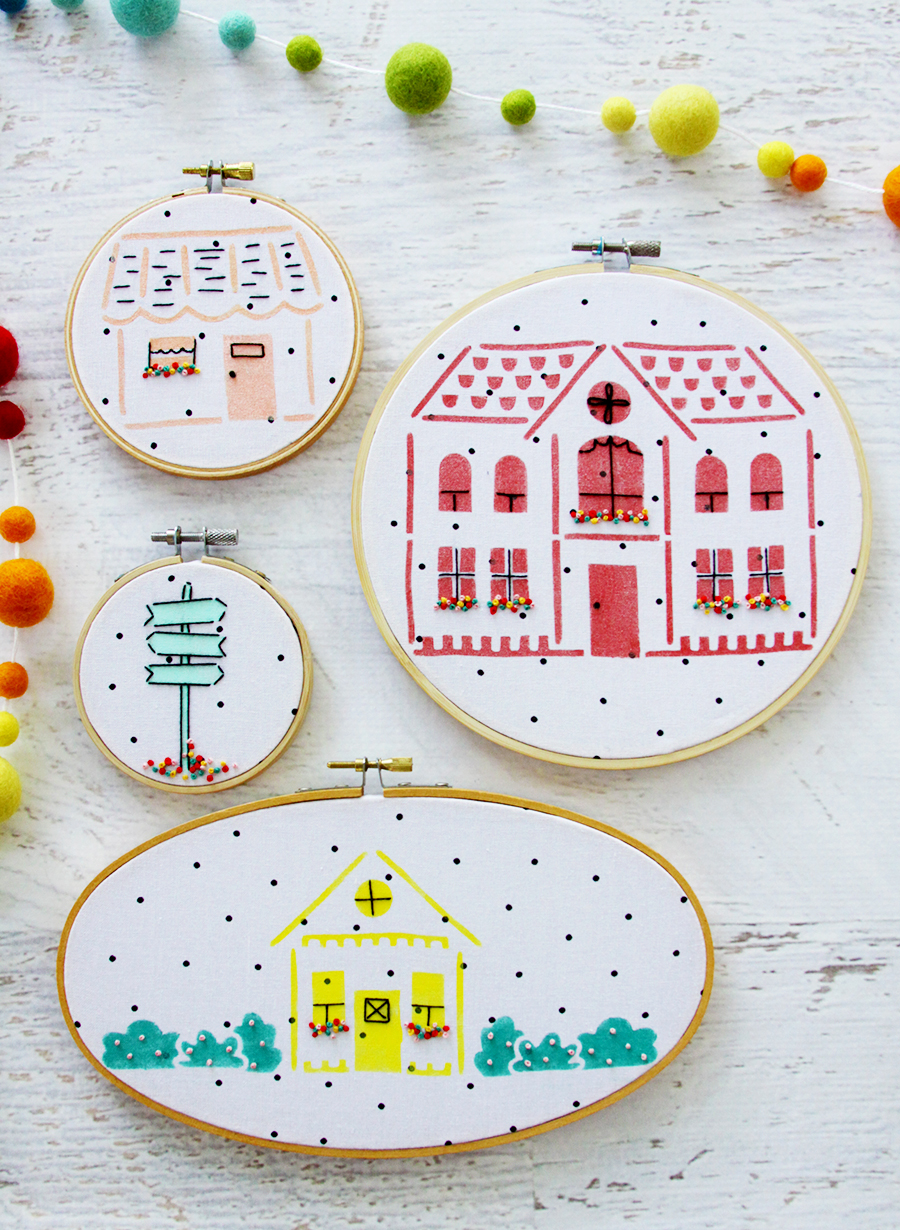
Continue painting your houses or other elements on pieces of fabric until you have as many hoops painted as you’d like for your gallery wall. You can see the pretty pearl sheen on this one!
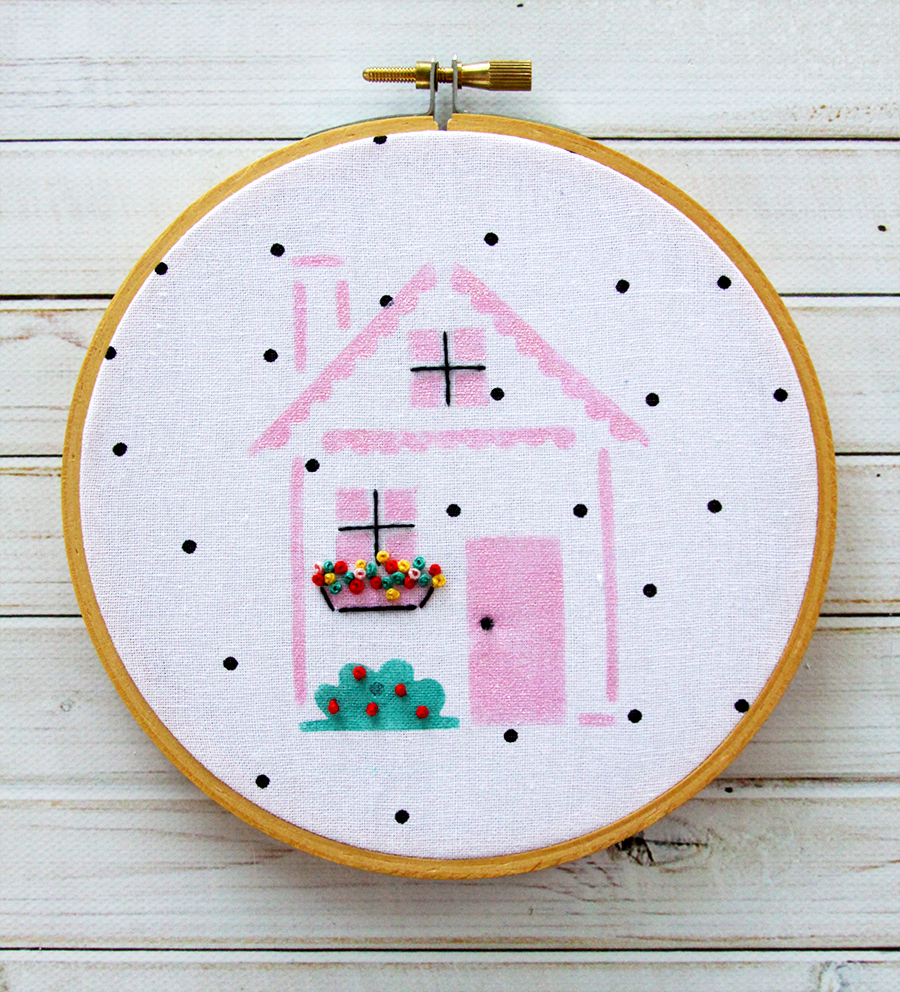
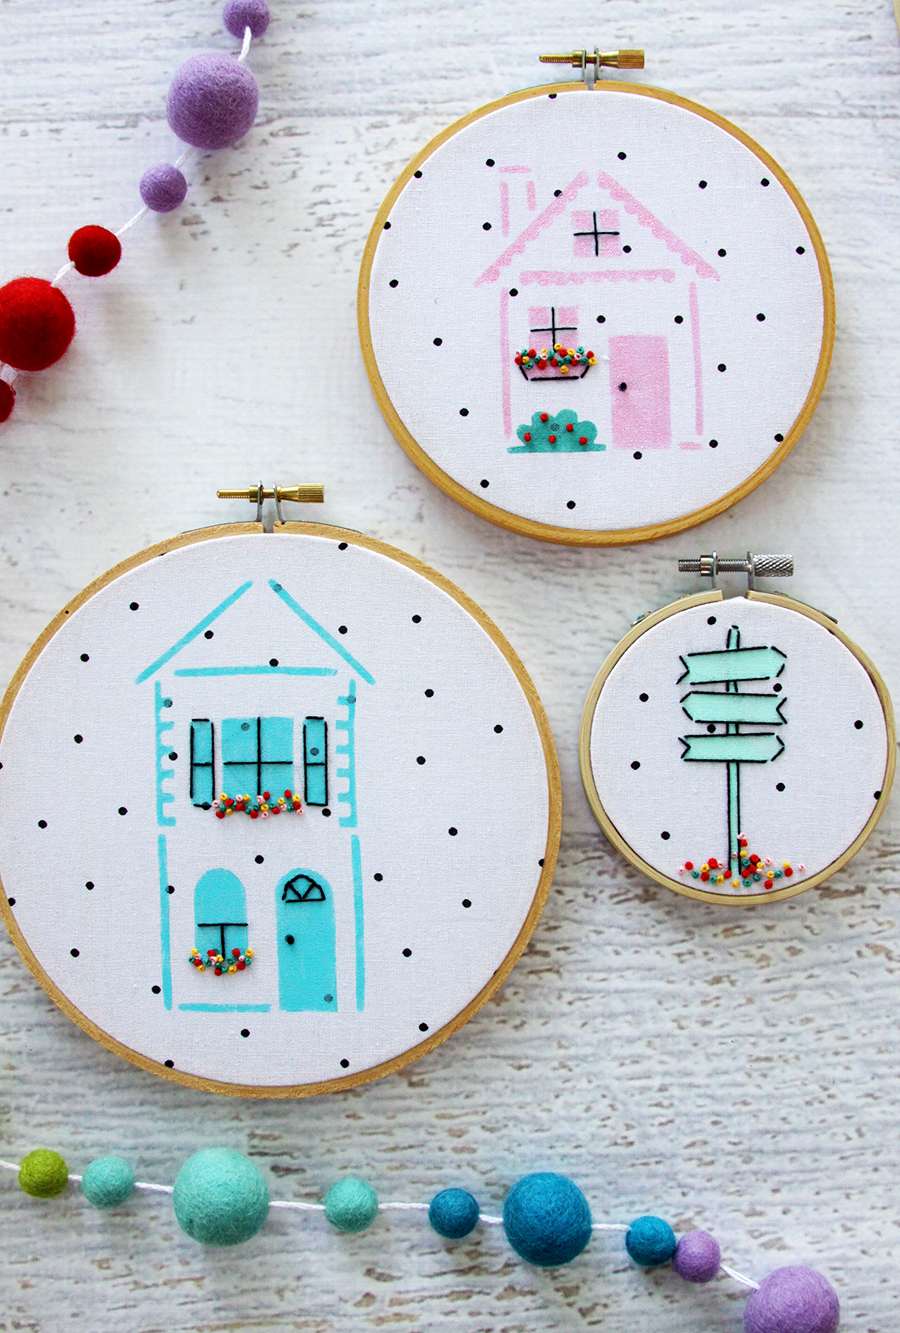
You can also combine multiple elements in one hoop like this one with the house and little shrubs on either side. For this one, I wanted the shrubs to be symmetrical so I flipped the design and stenciled through the back of the design on one side of the house and then removed the backing and used the front side of the stencil on the other side of the house.
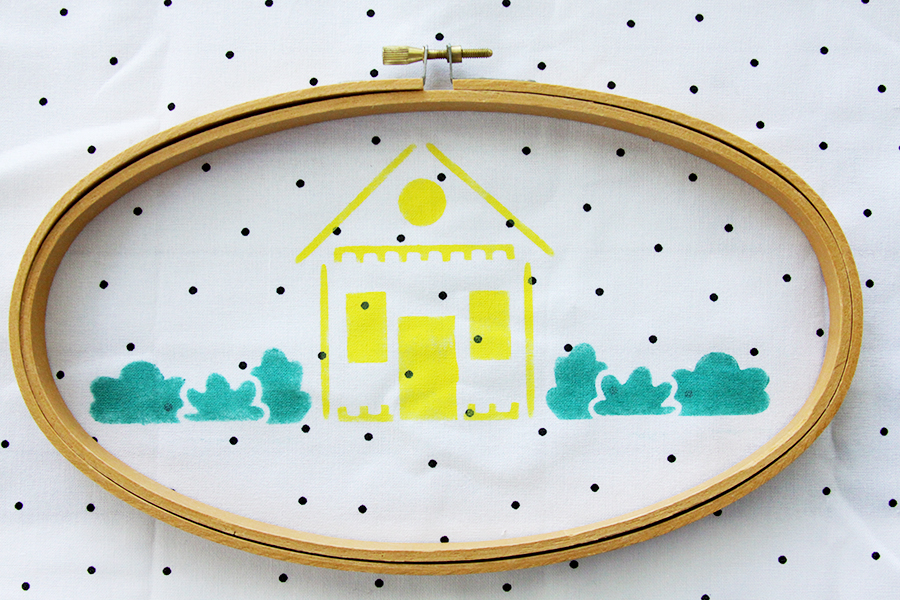
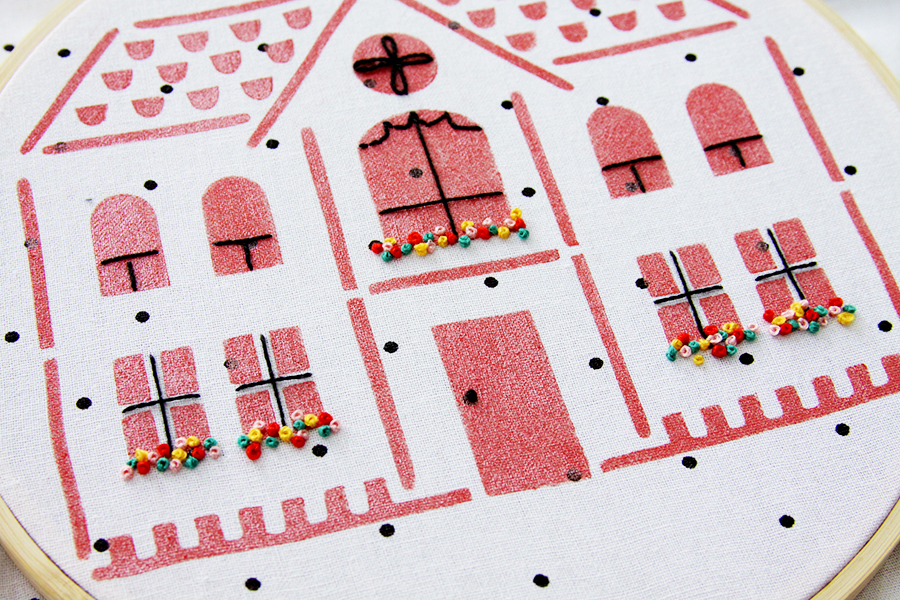
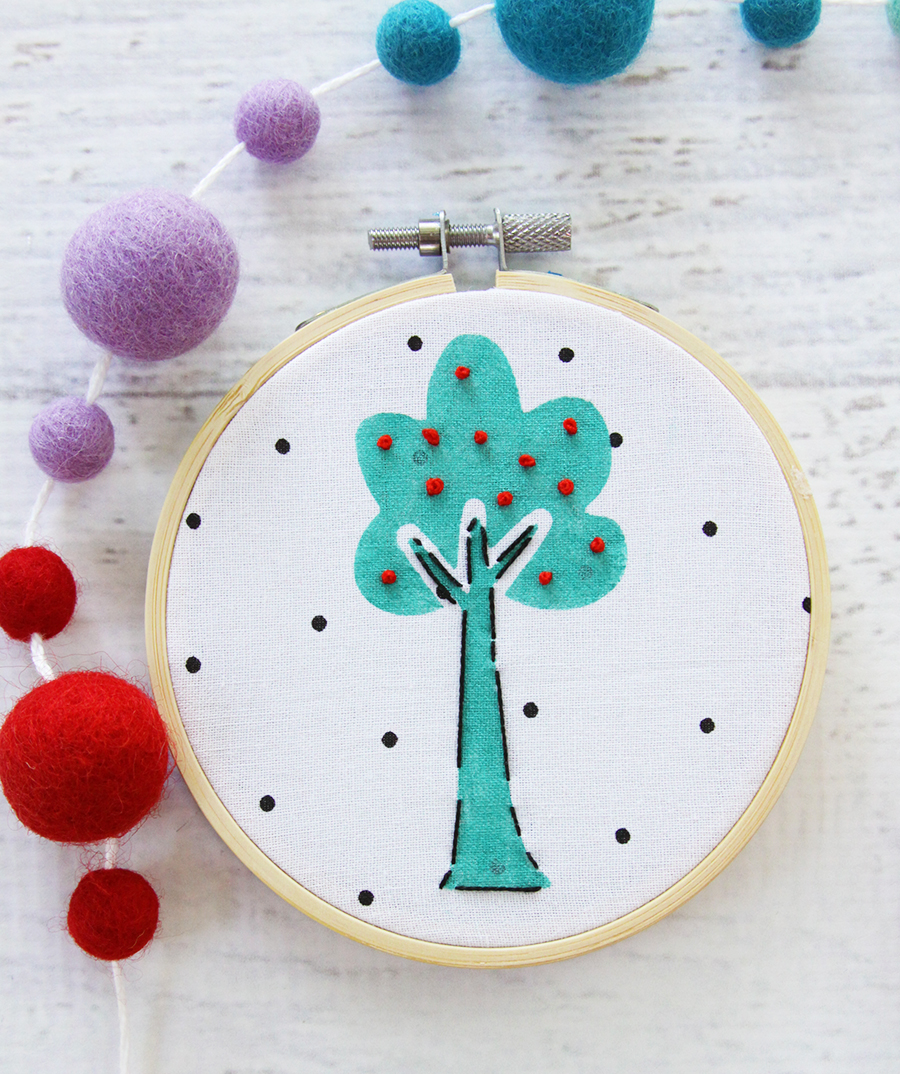
Once you have your houses and trees all painted, place the fabric in the hoops and begin adding in the embroidery. You can make this as simple or detailed as you like. I used black pearl cotton for the detailing on the houses and stitched French Knots in a variety of colors on the window boxes for each hoop.
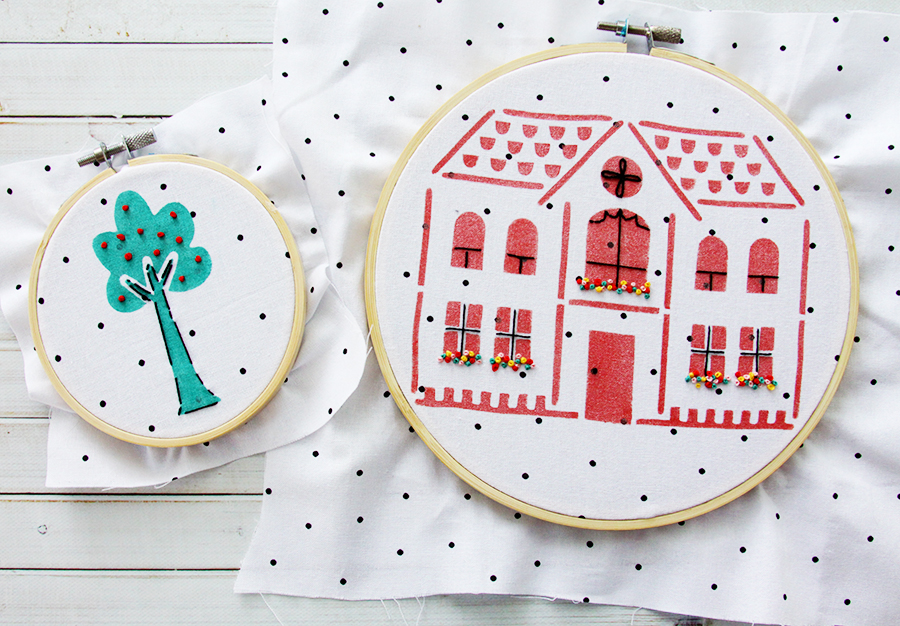
I love the added texture the embroidery adds too!
Continue for all your houses and trees. There’s no set way you have to add the details. You can try a few different looks as well before you stitch if you use a disappearing marking pen to draw on the hoops.
Once you’ve finished all the embroidery, finish the back of the hoops. You can click here for detailed instructions on that.
Now you can play with the layout until you like how they look together!
You can find Martha Stewart’s products exclusively at Michaels! Also new, find 168 new additions in the Martha Stewart line, including new silkscreens, which are great for achieving highly detailed designs with ease.
You can see more amazing projects by the other Plaid Creators here!


These are really cute.
What a cute idea! You always have such creative things up your sleeve to show us! Thanks for sharing them with us!
Bev! This is SO clever!
These are so cute Bev. I love how you incorporate both paint and embroidery into your projects.
These are so adorable!! My son and his family have just finished remodeling their new home. The are fond of simple lines and non-frilly items. I know that they would love these!! They are simply enough that my grandson, Wyatt age 7, could work with me!! I love when I can find stuff that we can do together!! Would you mind sharing the colors of paints you used? When I went to Michael’s I was nearly overwhelmed by the huge assortment of colors! Thank you so much for sharing this design! I am new to your site and have really enjoyed seeing the beautiful designs you create!
Just Adorable !!!!
This is so nice. Color combination is really great. They will look so cute as a gallery wall in a kids room or anywhere you’d like a colorful little neighborhood!