I am so excited to have another sweet friend visiting today! Michele from The Scrap Shoppe is not only a blog friend, but I get to hang out with her in person too! Especially since we live MUCH closer now than we used to. Michele is a whiz at all things crafty! You’re going to love her project today!

Hello, friends! I’m Michele from The Scrap Shoppe, and I’m so excited to be visiting Bev and all of you today! Bev is one of my blogging besties so I love when we get to hang out in real life AND virtually in blogland.

I have a fun, simple, and quick scraps project for you today. It just so happens that plaid is super trendy right now. And it just so happens that I have some leftover plaid flannel from my Glam Plaid Blanket Scarf project a few weeks ago. I never know what to do with my leftover fabric from a sewing project so I was super excited to create this Plaid Bangle Bracelet with it!

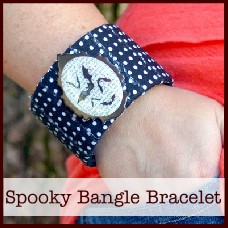
This project also utilizes another scrap… an empty roll of tape! I tend to hoard things I think can be upcyled and this acrylic ring has been in my stash for a couple of months now. The roll was from Super Sticky Red Tape but you could also use the cardboard roll from Duck Tape (see my Halloween Bangle Bracelet)
Along with the tape ring and scrap fabric, you will also need epoxy, wire cutters (or a shank remover), and some fun buttons.

Cut a long strip of fabric (~36″) that is approximately 1-1.5″ wide. If you are working with short pieces of fabric this is still doable, you will just need to use multiple strips to create the bracelet.
Fold over one edge of the fabric to hide the unfinished edge (see arrow) and glue to the inside of the tape roll.
Begin wrapping the fabric around the roll overlapping as you go, continuing to fold over one of the unfinished edges as you go. The other unfinished edge should be covered by the fabric.

Trim any excess fabric when you’ve wrapped the entire bracelet then fold the unfinished edge under and glue to the inside of the ring.

You can leave the bracelet as is or bling it up a little with some fun buttons. Remove the shanks from the backs of the buttons with the wire cutters to create as smooth a back as possible.
Go ahead and arrange the buttons the way you want to add them to the bracelet then glue them on.

And done! Isn’t it fun? And that’s two less things in the craft stash so YAY!
Thanks for having me over, Bev! Y’all come visit me sometime.


Michele is a wife and mommy to 2 little boys. She recently gave up her job in the field of science to pursue her dream of spending more time with her boys and becoming a full time blogger. When she’s not playing superheroes or building Lego mansions you can find her creating at The Scrap Shoppe. She doesn’t shy away from any type of media so you never know what sort of project will show up on her blog next!
Don’t miss


So much fun Michele!! Thank you for joining in with the Scrap Busting Extravaganza!!


Pretty!! I’ve got a Craft Gossip post scheduled for later this morning that links to your tutorial:
http://sewing.craftgossip.com/tutorial-scrap-fabric-and-button-bangle-bracelet/2015/02/07/
–Anne
Very clever. up-cycle. Not a big jewelry fan, but I like that bracelet with the decorative buttons and plaid fabric. Love how you re-purposed scrap fabric and the empty tape roll.