I’m pretty sure Kate Spade and I are long lost BFF’s.
She makes pretty much everything with me in mind. I mean, it’s all classic style, Polkadots and stripes, bright colors, and fun pops of gold. What’s not to love there?
About a year ago she thoughtfully opened up an outlet store less than a mile from my house. She’s a giver like that. I go in whenever I can and drool a little. My only problem with our friendship is that she often forgets to take into account my budget when pricing her beautiful creations, even at the outlet. So I admire everything, but don’t come home with much.
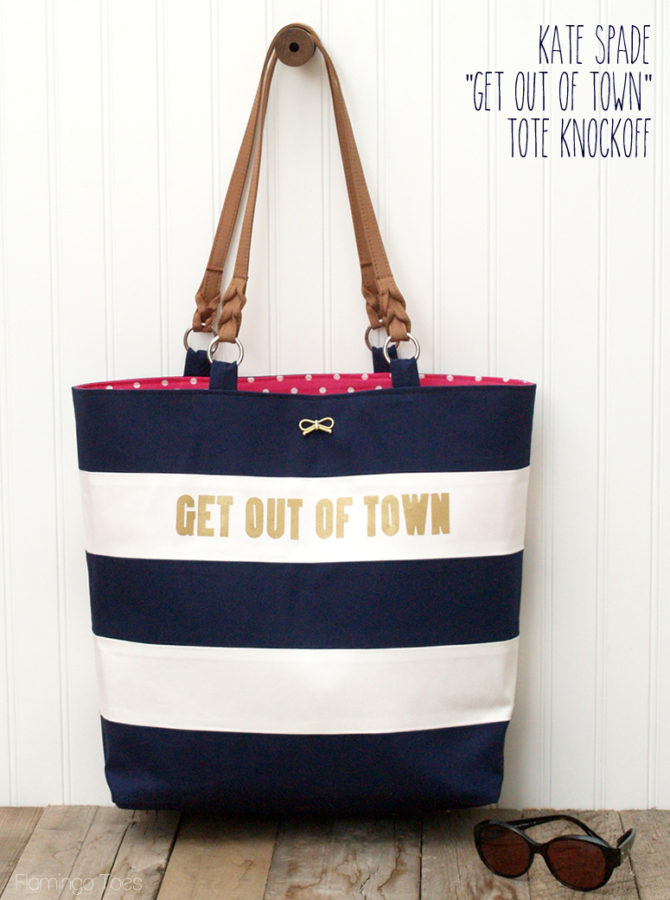
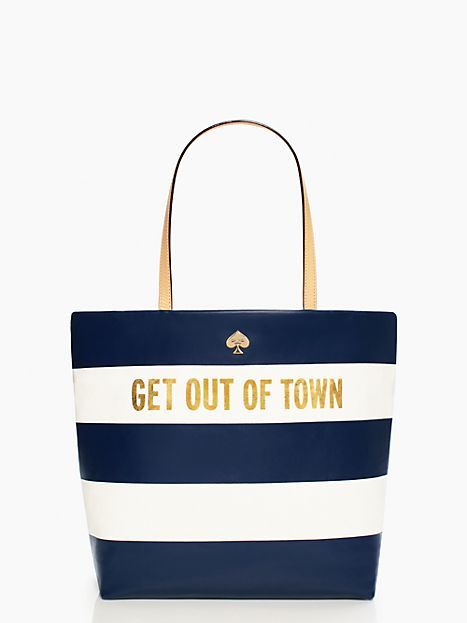
I still love her anyway. When I came across her Get Out of Town Shopper – I pretty much fell in love. It’s nautical and sassy. Of course I fell in love. But not so much with the price so I decided to make my own version!
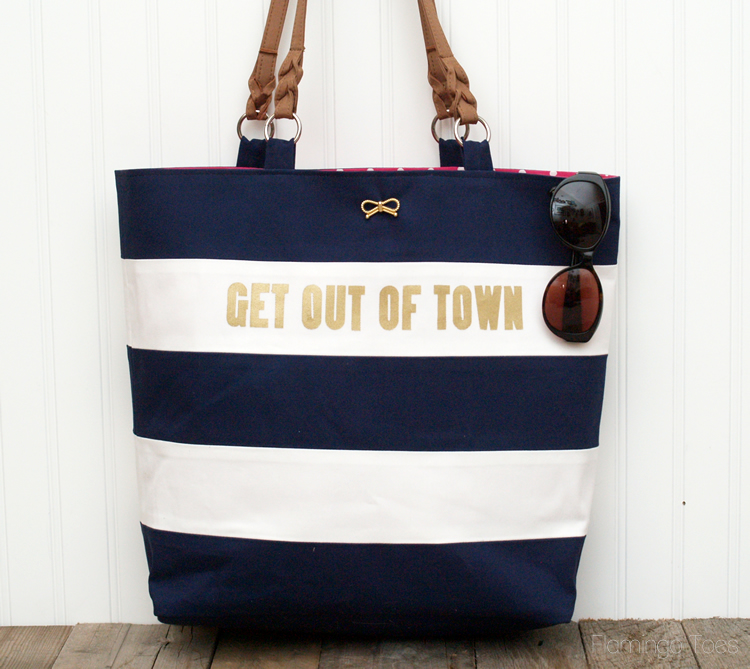
Um. Yeah. I will be carrying this everywhere this summer!
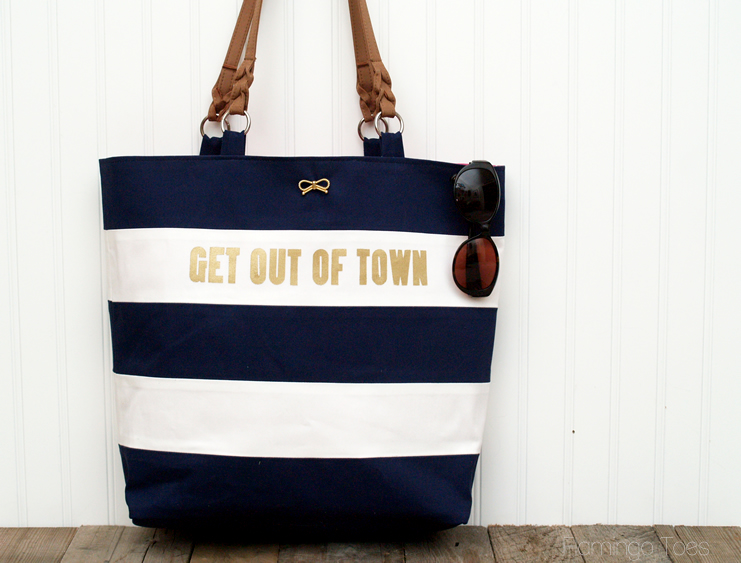
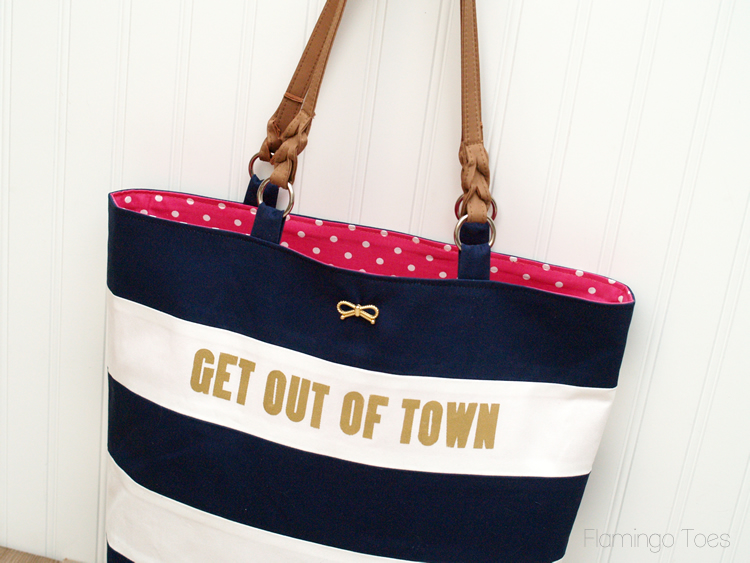
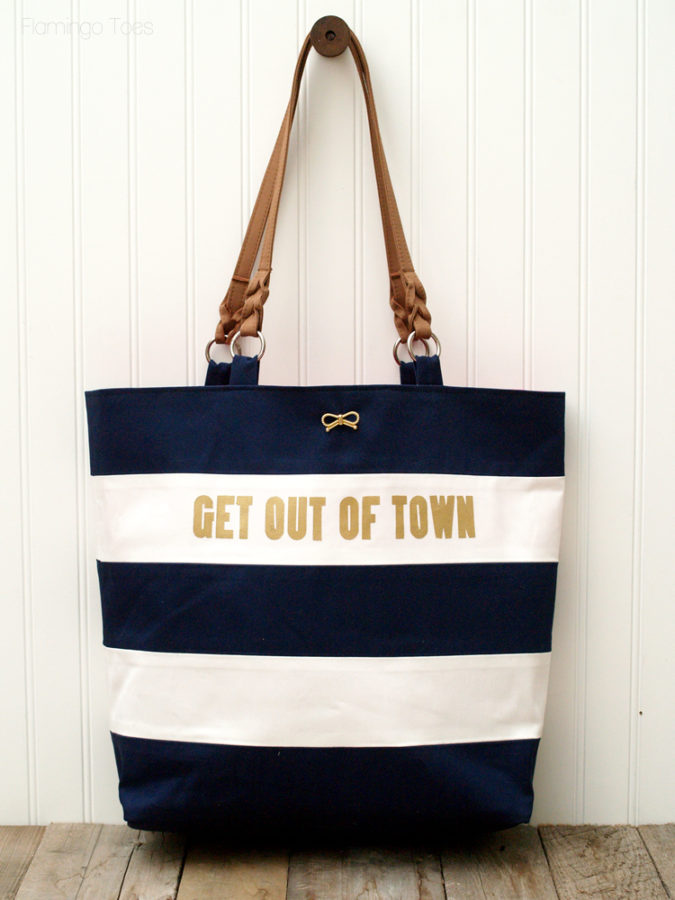
In true Kate Spade style, I made it like hers with the wide navy and white stripes and the gold lettering – though I used fabric instead of leather. I added a fun bright pink polkadot lining to mine too. I love how that color looks inside.
It’s a nice roomy tote too so it will hold a ton of stuff. You could take it as a shopping bag, or a travel bag – it would be perfect as a carry-on too.
Here’s the original. So fun right?
So let’s get started! Here’s how to make your own Kate Spade Knockoff. You’ll need:
- Navy fabric – use a nice twill or something equally heavyweight
– 6 strips 4″ x 19″ (for sides)
– 2 pieces 6″ x 15″ (for base)
– 1 piece 3″ x 12″ (for straps) - White fabric
– 4 strips 4″ x 19″ (for sides) - Lining fabric
-2 pieces 16″ x 19″ (sides)
-1 piece 6″ x 15″ (base) - Interfacing – heavyweight fusible- 2 pieces 16″ x 19″ (sides)
– ultra-firm stabilizer – 1 piece 6″ x 15″ (base) - Freezer paper for stencil, gold paint, scissors or cutting machine
- set of two purse handles
- optional – decorative button for front
Begin by cutting out all of your fabric. Make a freezer paper stencil that says “Get Out Of Town”. You want to use a blocky font and the lettering should be approx. 1 1/2″ x 10″. (If you need help with freezer paper stencils, there are a lot of great tutorials out there). You could also use purchased stencils to do the lettering if you want. On one of the white strips, stencil the phrase on using gold paint. Remember to use fabric paint or add fabric medium to your paint if you want to be able to wash your bag.
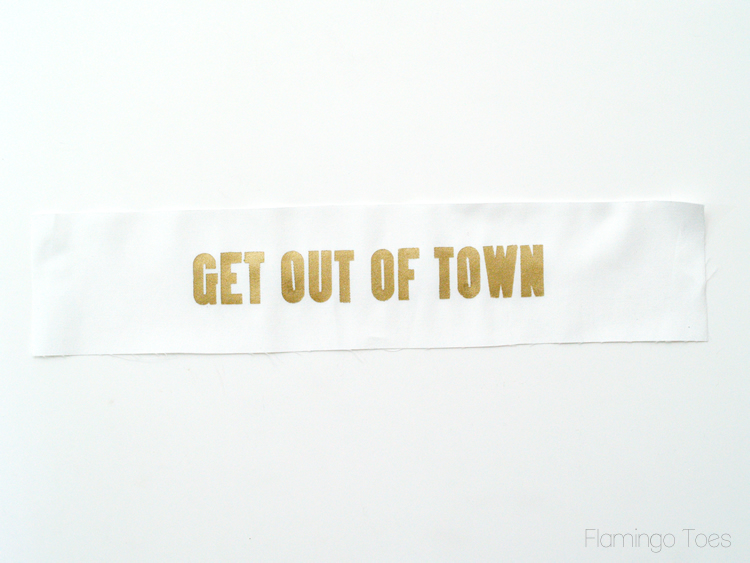
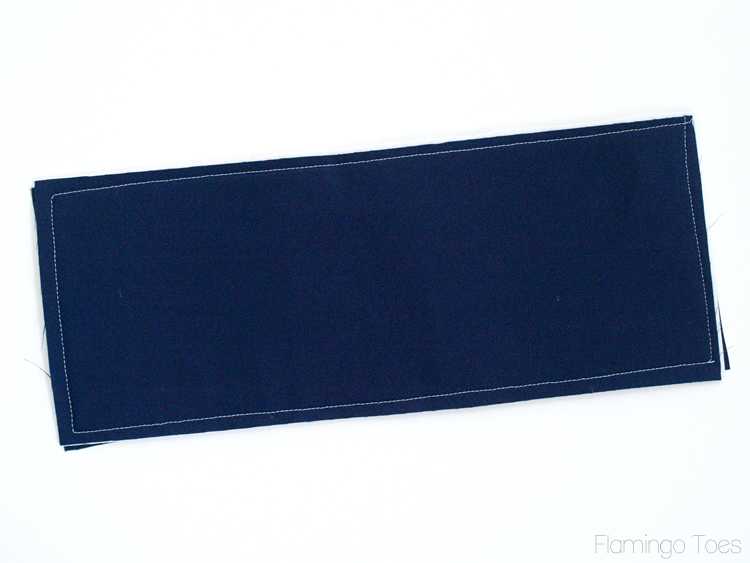
Let your paint dry very well (overnight is best) before assembling your bag. Once you’re all set, sew together the front of the bag, alternating navy and white stripes, like the photo below. Use a 1/2″ seam allowance for the bag unless noted differently.
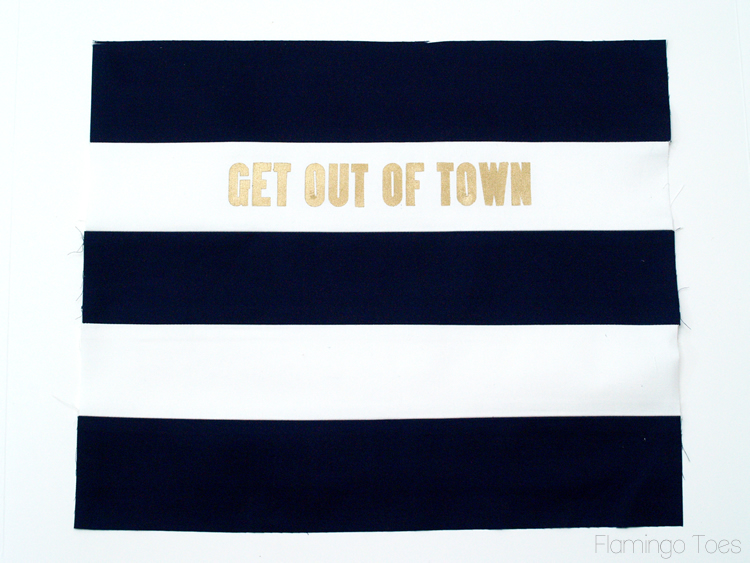
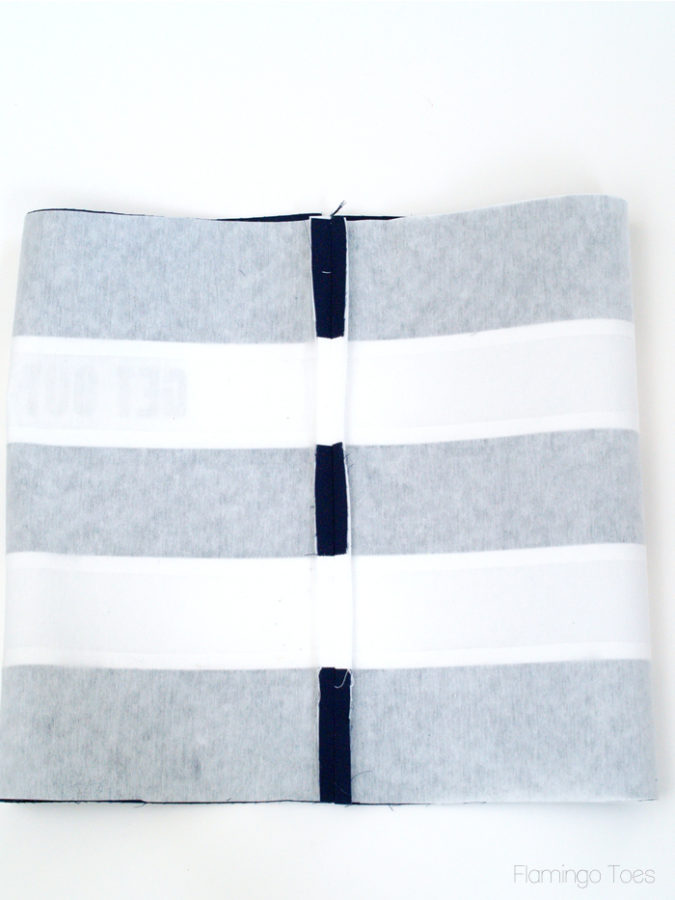
Repeat for the back of the bag, using the same stripe pattern. Iron your fusible interfacing to the front and back of the bag.
Lay the front and back, right sides together, and sew up the side seams. Make sure you match up the stripes.
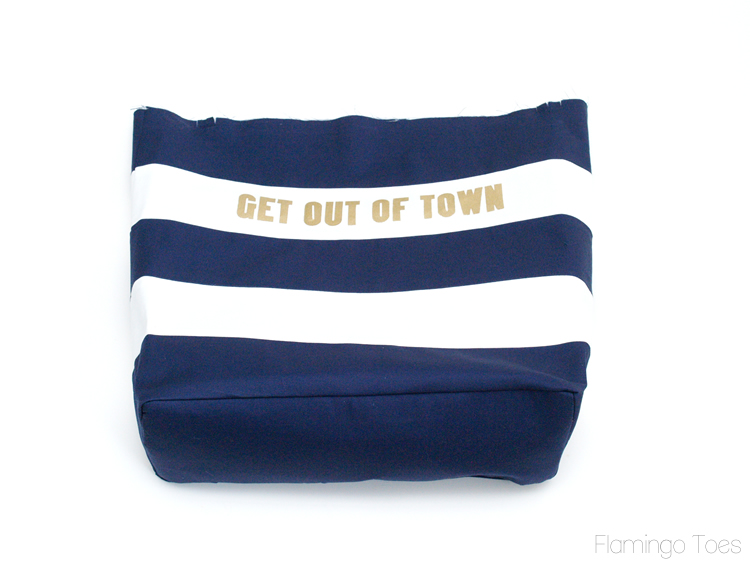
Layer together the two navy base pieces, and place the ultra-firm interfacing between them. The right sides of the fabric pieces should be facing out. Baste around all four sides of the base.
Match up the centers and sides of the base and sides of the bag and pin in place. Sew the base to the bottom sides of the bag, easing around the corners as needed.
Do not get distracted and sew the base to the TOP of the bag and then go to turn it right side out and realize your lettering is upside down and it now looks like you are making a knockoff of a bag you picked up off a table of terrible knockoffs in New York. Because that would be ridiculous. Ahem.
Clip the corners and turn the bag right side out and press.
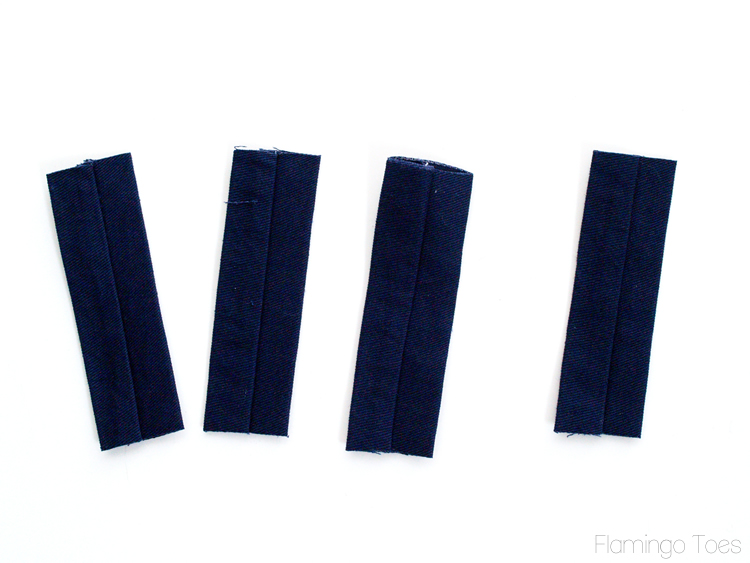
Take the navy strap piece that is 3″ x 12″ and fold it in half long ways. Sew down the raw edge side and turn right side out. Press the seam in the center of the strip, then cut the strip into four 3″ pieces.
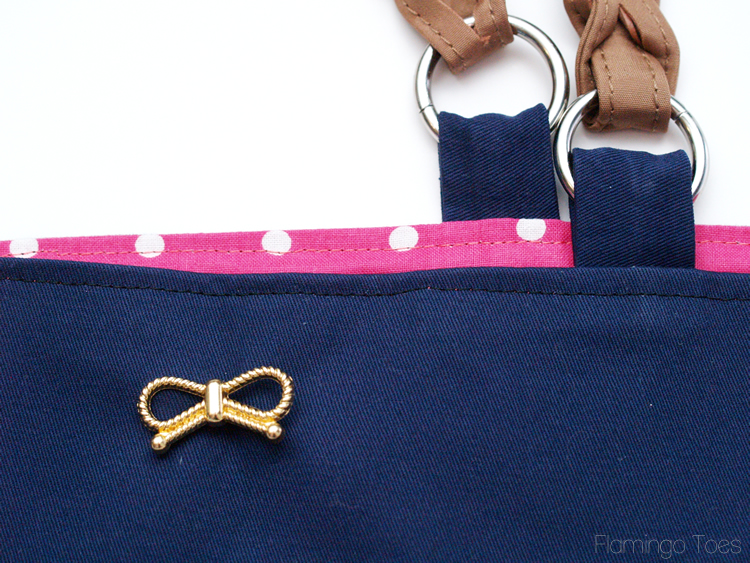
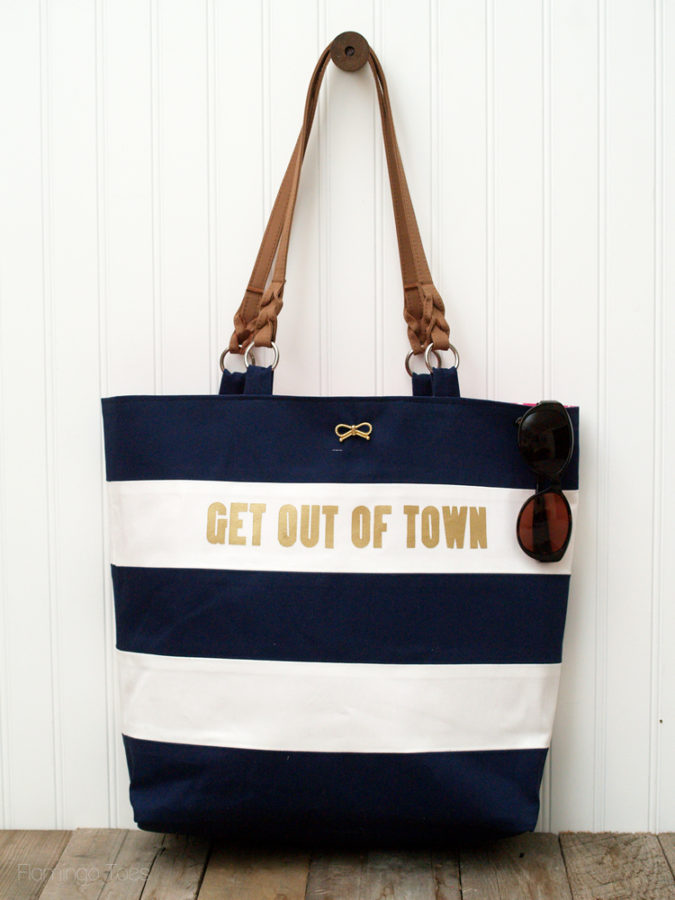
Measure 5″ over from each side seam on the front and back and mark with a pin. Slip the strap piece inside the ring on your purchased strap and fold the fabric in half. Line the raw edges up with the top of the bag and the outside edge of each strap piece with your pin. Sew the edges to the top of the bag with a 1/4″ seam allowance, going over the stitching a couple to times to make sure it’s nice and strong. Do this for the front and back straps.
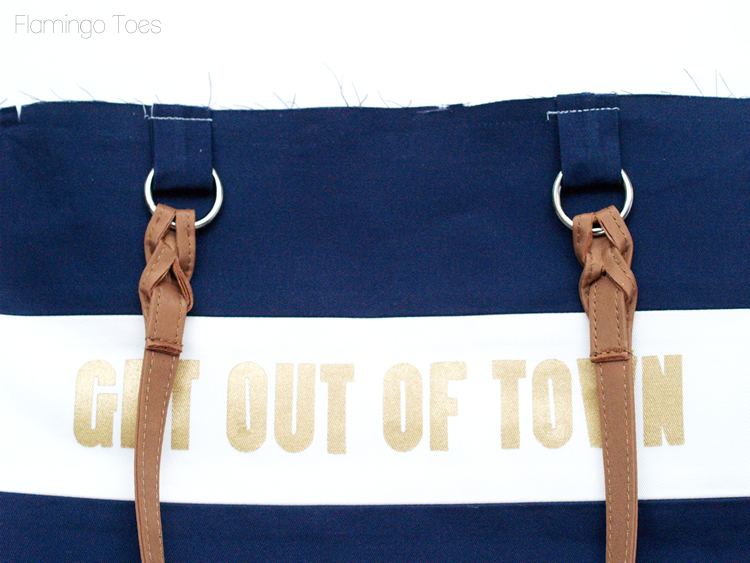
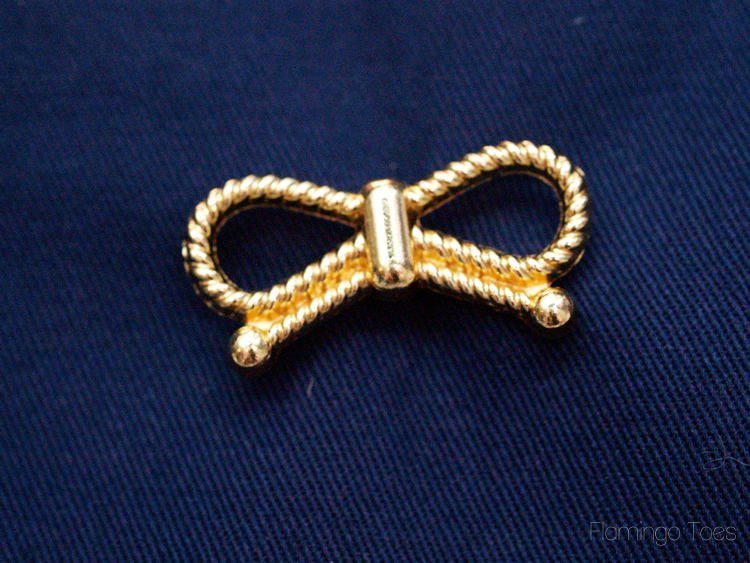
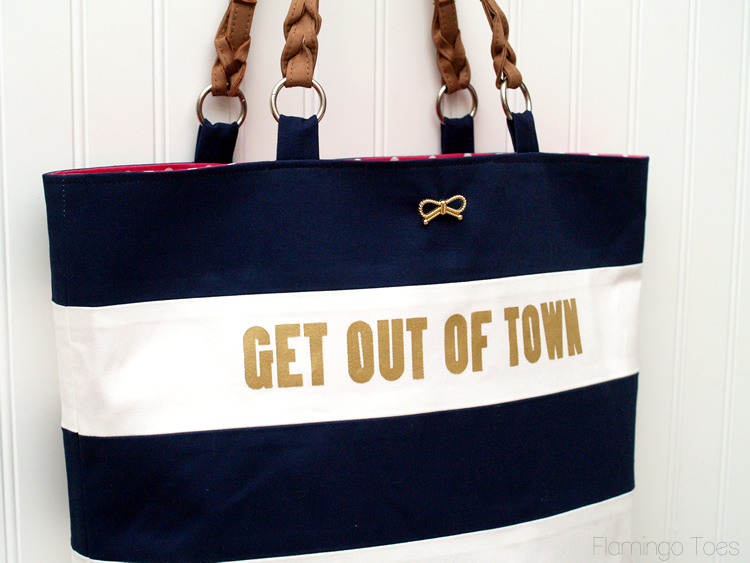
This is optional but I wanted to add a little decorative something on mine like Kate has the spade on hers. I couldn’t find a snazzy gold flamingo button (haha) but I did find this darling little gold rope bow. I thought it was perfect for the nautical look of the bag. Sew this on the center of the top strip, about 1 1/2″ down from the top.
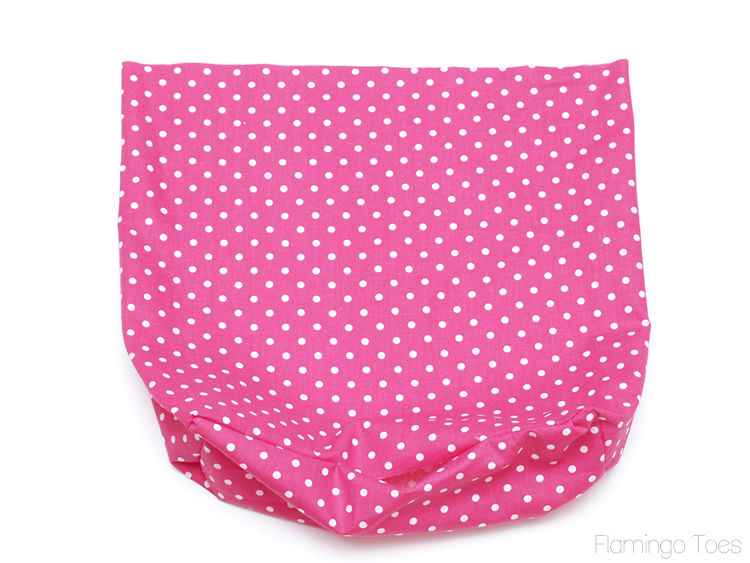
Sew the sides of the lining pieces, right sides together. Sew the lining base to the bottom of the lining sides, but leave an opening for turning about 5″ on one side.
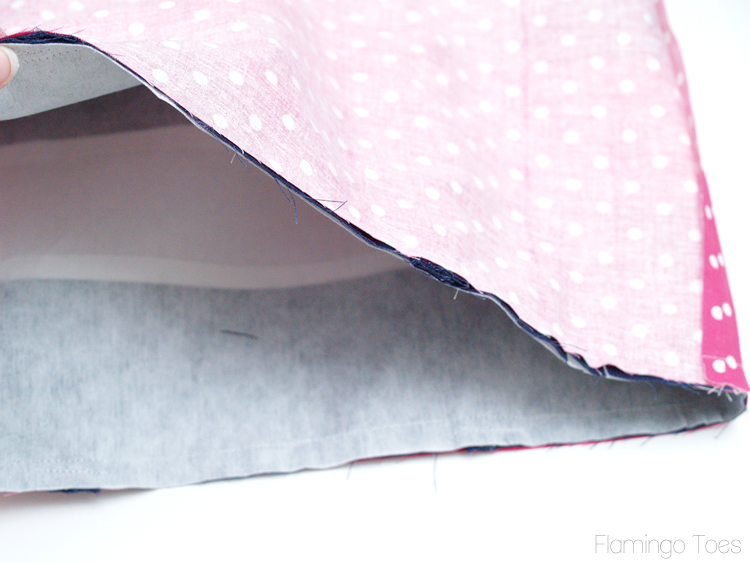
Turn the lining wrong side out and tuck the outside of the bag inside the lining. The right sides of the bag and the right sides of the lining should be together. Sew around the top of the bag. Make sure the straps are tucked inside when you sew.
Turn the bag right side out through the opening in the lining. Sew the opening in the lining closed by hand, then tuck the lining inside the bag. Press everything really well. Top stitch around the top of the bag, just inside the top seam. Use thread that matches your outside fabric and bobbin thread that matches your lining so you can’t see the stitching.
Unless you take a really close up shot of your top stitching with a macro lens, and then you can see that your stitching looks a little wonky in one part. Then you can be happy you used matching thread and no one else (except all of your blog readers) will know it’s wonky. hmmm.
That finished off your super cute new knockoff bag!
I just love that gold lettering!
I hope you give it a try!


Very cute! Very Creative! Thanks!
Thanks, I like it it is good for everyday use. I will try to make this bag. Thanks again to share.
I honestly like yours better!!! :) Thanks for sharing! I am going to do this for my mother who will be going to the OBX later this year! She will LOVE it!
I agree. This “knock off” is better looking than the original. I just finished my bag last weekend and love it. The pink polka dot fabric is the best lining too and I was so happy to find it for my bag.
Lovely diy & tutorial. I’d love to try making one. Yours turned out so pretty.
Love it! Way better than the original. I need a bag for the pool so bad, I’m going to make this. I’ve been dying to try that new spray on stuff called “never wet”. I think I may just have my new bag be the first thing I spray down with the never wet!
Nice job!!
Very Nice !! Thank you.
Where did you get your purse handles from??
I found them at Jo-Ann’s Jaclyn. I hope you can find them! :)
Hi Bev,
OMG, I love it! In fact, I like yours much better! Such a great knock-off. I’m pinning this — figuratively and literally!
Doreen
Love Kate.
Like yours BETTER.
Something about the balance in the handles you selected. Divine.
And the wee bow? Cuteness.
It’s perfect. You rocked it girl.
Love, love, love this! Kate Spade is my favorite although she usually doesn’t fit my budget either;) I will definitely be making one.
Yep, Ditto to everyone else saying Love Yours More! :-) And those handles totally complete the look. Going to look online for those now… Thanks for sharing!
Thanks so much Elita! I found the handles at Jo-Ann’s – I hope that helps! :)
I love Kate Spade and I LOVE this tote. You did such an amazing job. You can barely tell the difference!
Wow, love that! I recently made an “homage” (fancy term for knock-off) of a Chanel 2.55 bag in nautical striped jersey fabric. I may have to make one of these to go with it!
Are you KIDDING ME!?! This is fantastic! I adore your bag. I like it better than Kate’s – in 100% honesty. The pink polka dot lining and cute handles are perfect. LOVE!
I am in love! I’m a sucker for anything and everything Kate Spade, particularly her basket purses. Once upon a time, before I had a kid and spent every bit of discretionary income on Legos and Icees, they used to know my name at the Kate Spade store. I’m thinking we may need to get reacquainted or either I need to learn to sew, because I must have this bag!
Honestly amazing! I really never thought of sewing my own stripes-duh-I love how yours looks. Thanks for sharing.
This is AMAZING, Bev! I want one! And I totally think I can pull it off with your instructions. Adorable!!!
I agree with everyone else. I like yours better! Gonna have to make one.
So cute! You need to sell this on etsy for non-sewers like me!! :)
Would you consider making these for sale? I’d buy one!
Hi Jessica!
Thanks so much – I’m so glad you like the bag. Sorry though, I don’t have time to make them up to sell. I think the original bag is marked down though if that helps! :)
This is great.. Love it.
This looks AMAZING!! Awesome knock off! LOVE it, great job!!
Oh my goodness, how much do I love this bag!? I so agree with you, I think Kate Spade is one of my BFF’s too, and she just doesn’t know it! This bag is amazing, fabulous job!
That is so stinkin’ adorable. I’m not the biggest fan of my sewing machine, but I think I could pull this off! Thanks so much for sharing!
Love it – I want one! Pinned.
wow! i actually like the knock off much better!
I love the fabrics you chose! Do you know what they are called?
Made me laugh and laugh and laugh. And your bag is effing gorgeous, and your wonky sewing is perfect. I heart nautical bags and Kate Spade and figgering it all out yourself, so good on you.
Actually, ilike your bag better than Kate’s. I am so making me one. How generous of you to share…
Love this!!
Hello. I adore this bag.. Where did you get the materials from? I would love those same straps and the little bow button. Any information would be much appreciated. :)
Hi Lindsay! I’m so glad you like the bag! All the supplies – fabric, straps and button, came from Jo-Ann’s. Hope that helps! :)
Perfect.. Thank you so much, I will try looking there tomorrow. So excited!! Thank you for posting this tutorial.
Sweet! I hope you have fun with it! I’d love to see a photo when you finish it too!
I will make sure to tag you.on my IG account. :) @lindsayw72
I just got all the supplies today. I didn’t realize how large this bag was.. will the over all dimensions be about 19×18?
Hi Lindsay – the bag dimensions are 15″ x 15″ from side seam to side side seam and top to the bottom seam. If you add in the bottom it adds 2″ to the height – so 17″. Not including straps.
I will be watching for flamingo buttons so you can spray paint them gold! Ha!
lovely job! definitely going to make one.
This is TOO cute, I’m beyond impressed!! I’ve tried my hand at purse making, and it’s not a pretty sight haha, but you’ve inspired me to at least look for a similar striped bag and add the letters and button myself. Absolutely adore it, well done!
how about you just sell this on etsy so i can buy one?!!!!
SO LOVELY!
love this bag. kate Spade can always make a bag that I fall in love with I have some already striped fabric that I will make a bag closely resembling this one thanks for tuturals
Love your creativity! Just curious why you didn’t use an outdoor striped fabric rather than going to the trouble of piecing the stripes? Maybe Joann’s just didn’t have any when you shopped. Great post.
Patricia, Yes, there wasn’t any wide striped fabric in stock at the fabric store and so I decided to make my own! You could definitely use striped fabric to make the bag though! :)
Patricia, Yes, there wasn’t any wide striped fabric in stock at the fabric store and so I decided to make my own! You could definitely use striped fabric to make the bag though! :)
What font did you use for the stencil?
Hi, Bev!
I’m working on my version of this bag right now in a purple and natural stripe pattern. I love how the colors are coming out. I just have a question about the bag construction–the lining (and I KNOW I cut out everything exactly) seems to be too big and baggy for the exterior, and so I am working on tweaking it, especially in regards to attaching the base. That type of base construction in a tote bag is new to me, apparently! :)
I would appreciate the help! I would love to figure out how to “fix” my problem! :)
Thanks!
Hi Krista!
Sorry the lining is giving you trouble! I would maybe suggest bringing in the seam allowances on the lining a little to see if that helps? I’d be happy to help more if you want to email me too – [email protected].
To be 100% honest, I like your tote better. :)
I love the straps and also that you used fabric instead of leather, it made the project so much more delicate.
You rock!
I LOVE this bag and I love your version better than the spade bag! The straps add that perfect something and the bow button was just adorably cute. I’m making a couple today. :-)
I did want to let you know that the mobile version of your website is a bit difficult to navigate. I wanted to take a screen shot of the items needed, but there’s an ad at the bottom of the screen and a giant invitation to join your mailing list at the top which gives me about half a screen of visible space. With my keyboard up to write this comment I’ve got about four lines of text visible between the two. I love your site and your patterns, but I know sometimes we just don’t catch those things on our own blogs. :-)
I’m so glad you like the bag Denise! And thank you for the heads up on the Mobile Site. I will definitely be checking into making that more easy to use!
I’m planning on making this tomorrow. Do you think I will be okay to make this without interfacing?
Hi Brittany,
You can make it up without Interfacing, but it might not be super sturdy. It just depends on the fabric you’re using. If you are using a heavy weight twill or something similar it should be ok! :)
i’m using a thick canvas do you think that would be okay?
That should work great!
Did you use a heavy weight fabric for the white stripe as well?
I made two of these following the directions here. But I used navy/white heavy weight indoor outdoor fabric available from joann fabrics and also online from Premier Prints. Worked perfectly and less seams saves time and less places for dirt to accumulate. I also used brass paper fasteners to create legs on the base so the purse does not sit on the floor. In place of pleather handles I found navy drapery tie backs at joann. I love my tote and I got many compliments all summer. Great instructions.
Hi. I’m a beginner at sewing and i thought i could try this out. Your directions are pretty straight forward so i think i can do it. But i was wondering if you ever thought of adding a small inside pocket? I have no idea how, maybe just cut a hole the side i want and make a pouch and use a snap or zipper for it? idk just an idea :) and do you think i could use iron on letters instead of painting them?
I absolutely adore this! I will definitely be making one! Is it possible for you to tell me what brand of paint you used? I will be looking for the fabric and handles this weekend!! Thanks!
i used Martha Stewart – bright gold. held up perfectly, no flaking or chipping. It is not stiff either.
Thank you for this wonderful tutorial. I made a bag with the inspiration of your tutorial.
It´s a gift for my nice. Thank you
I love this bag! Is there a chance that you have the dimensions if I wanted to make it with a solid piece instead of the stripes? A friend choose some fabric that she wants me to make into a tote. I couldn’t find the right style…until now.
Thank you!
Absolutely Kim! You can just use the same measurements for the sides as you use for the lining if you want to use complete pieces of fabric – so 16″ x 19″. I’d love to see a photo when you finish if you think of it! :) Thanks!
Hi !
I love this pattern and am planning to make it as a birthday gift. Can you please tell me where you bought the handles? Thanks for a beautiful pattern.
Hi Marsha!
The handles came from Jo-Ann stores. (similar to these – http://www.joann.com/purse-n-alize-it-vinyl-braid-with-round-rings-purse-handle/7718612.html#q=braided+handles&start=1) I’ve seen similar versions on Amazon though too. Hope that helps!
Great job Bev, impressed by your hand cut stencil! I knew Kate Spade, way back when in downtown Manhattan when she was just starting out with a bag business, and just for your info, she actually sold the company to get away from the madness of it all. Not sure what she is doing now, but her brand sure did go a long way! thanks for sharing on craft schooling Sunday!
OBSESSED with this! I wish I had your skill! I have seen a nautical tote like this at Target recently, though, so maybe I’ll try it out on that!
Super fun bag and probably a lot more affordable than the real thing! Will look into using freezer paper to create graphics. Visiting from Pretty Pintastic Party.
I love yours better than the original! So adorable, great job! :)
Where can I find the purse handles for this bag.
I made this bag and it came out great, but I had to cut the base size down to 13 by 5. How did you get the 5×16 to fit the bag?
I have the same ones — got them at Joanne’s.
I had to make my version of this bag! Just love it. I too shortened the base. I used gold tone chain link and leather handles and it looks real sharp. Ty for the tute and idea!
I like yours better than the original! I have those same handles on a brown-toned crocheted bag. Might have to try something like this for a more summery tote!
Ohhhhh THIS is just BEAUTIFUL! I so wish I could sew (any chance I can get you to make me one or sell me yours haha)
I shall just have to simply drool over yours!
Fell in love with this tote and, following your excellent directions, made myself one. Joann’s no longer carries the handles in butterscotch so I had to improvise with a heavy cream and metallic infused trim. Pockets added to the lining for sunglasses and cellphone, a lobster clasp to avoid digging around for keys and, voila! I can’t wait to Get Out of Town! Wish I could send you a picture, I’m so very pleased with it. Thank you.