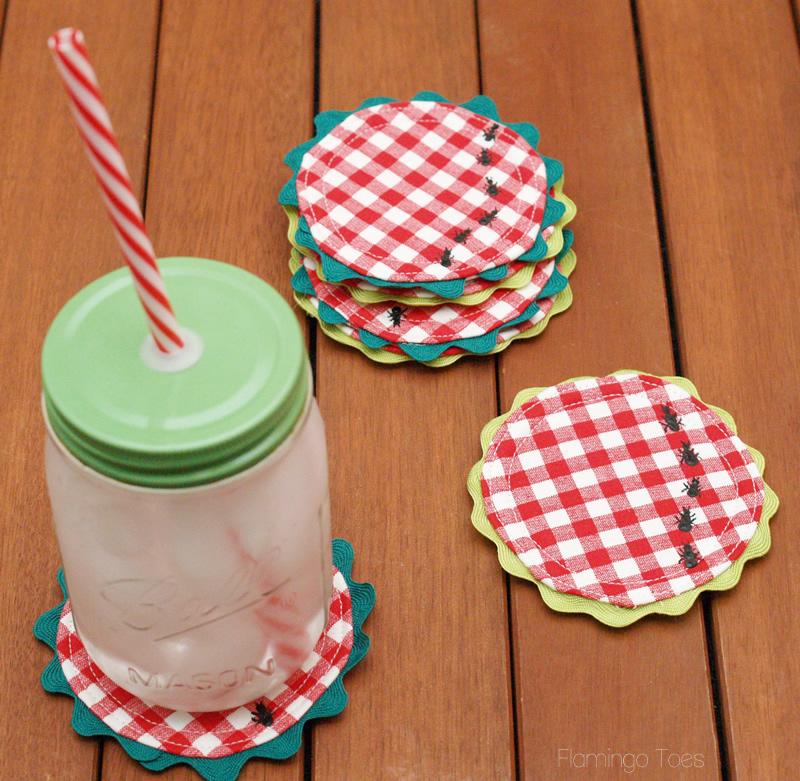
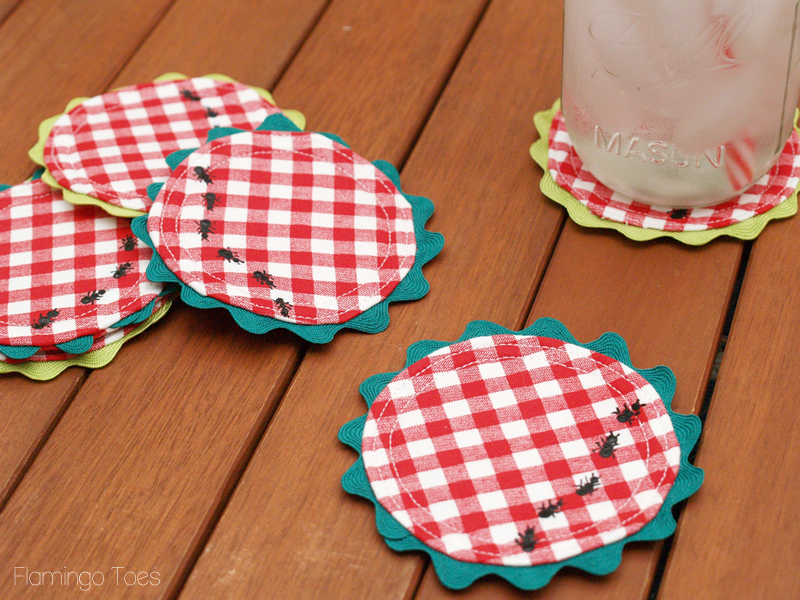
These Easy DIY Gingham Summer Picnic Coasters are perfect for any summer gathering or just to add a fun bit of Summer in your home.
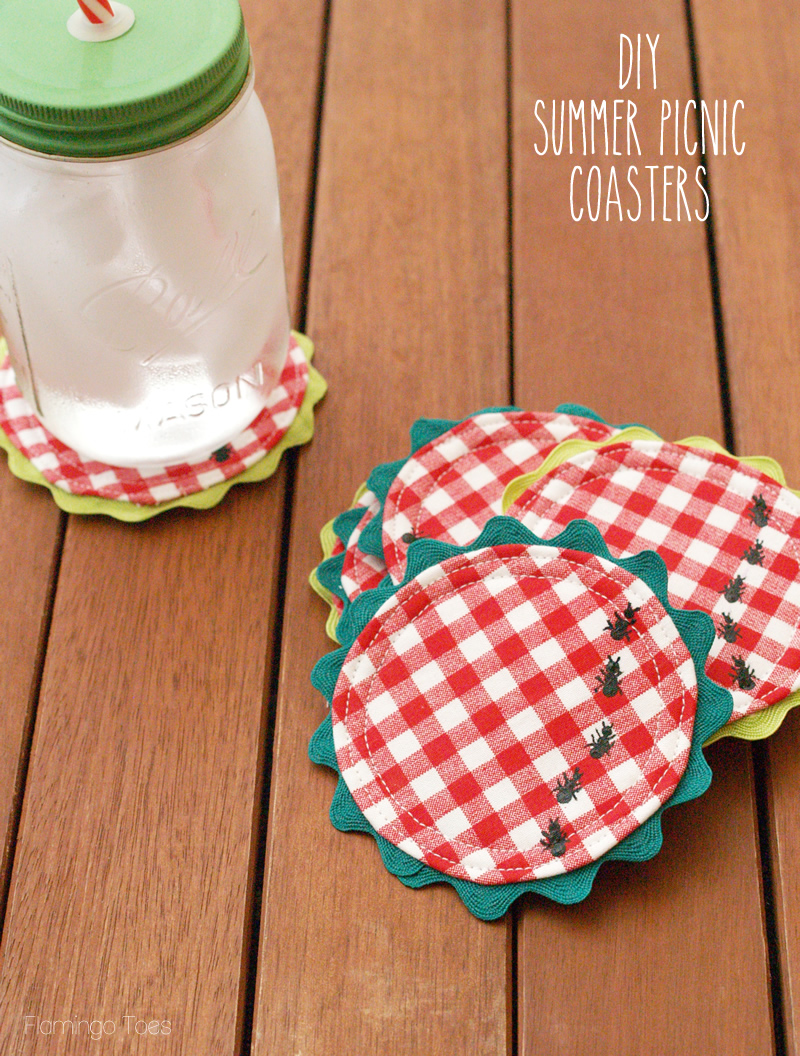
With summer in full swing , it’s time to start thinking about barbecues and pool parties and picnics! And with July 4th just around the corner – you can add in all the fun parties for that as well! They are so quick to sew up too!
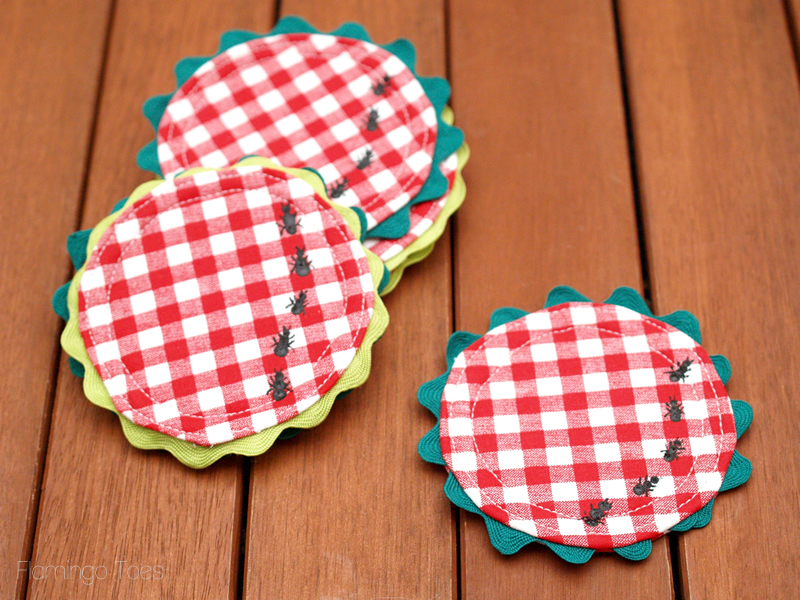
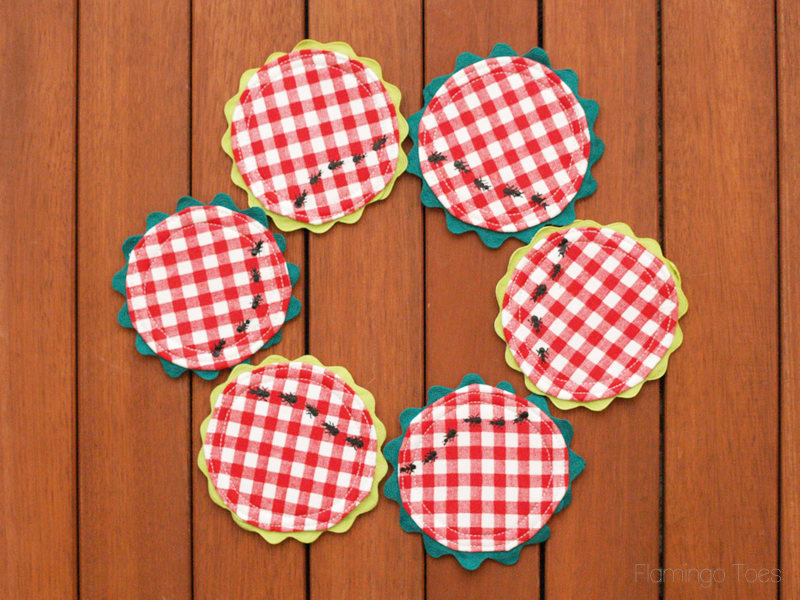
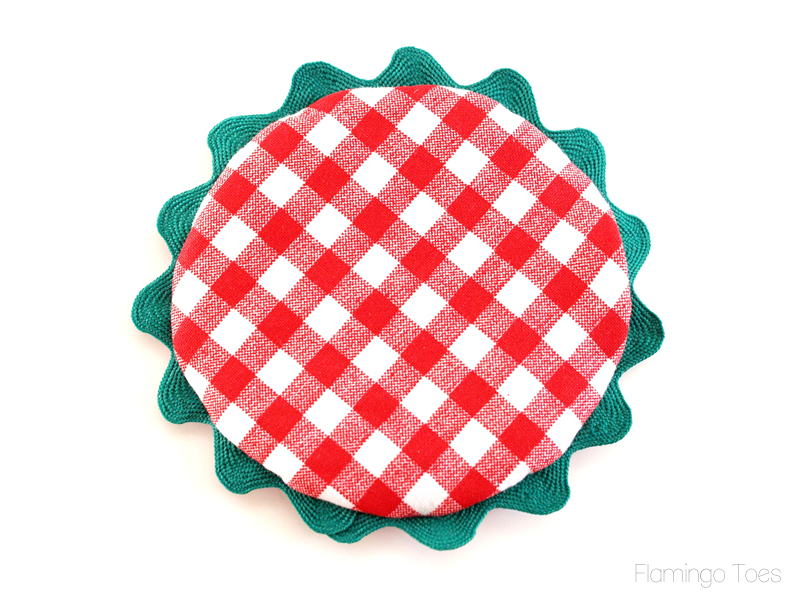
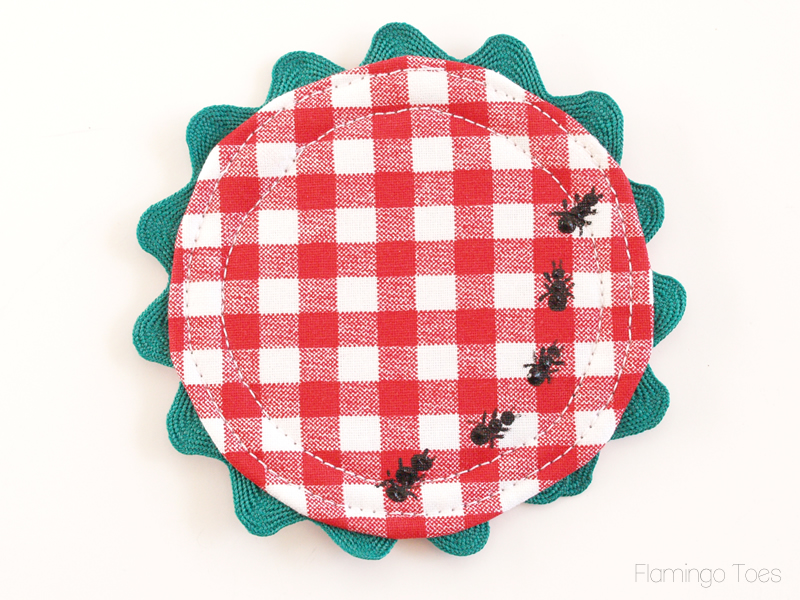
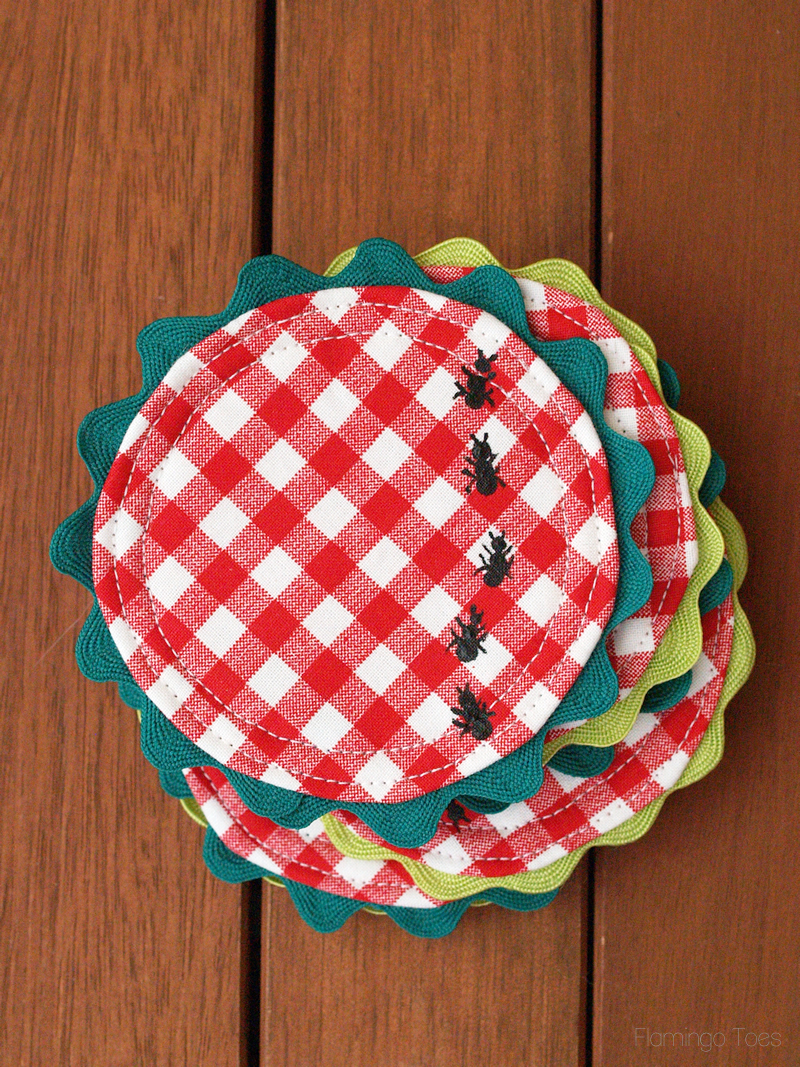
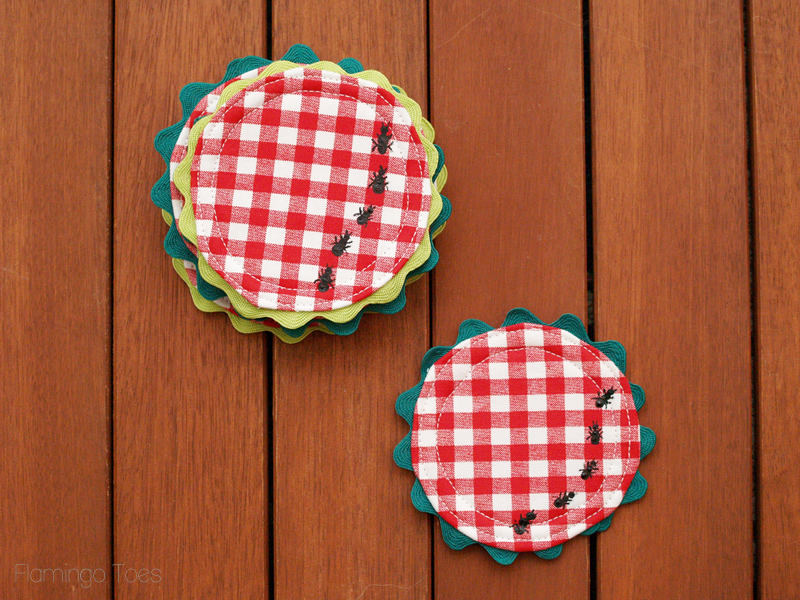
I found this awesome gingham at the fabric store and I knew that it would be perfect for some picnic decor. I painted on some little ants to keep with the picnic theme too. Even though ants give me the willies in real life. But I’m totally good with these cute little guys marching across my coasters.
Easy DIY Gingham Summer Picnic Coasters
Materials:
- 1/4 yard fabric for coasters
- 1/4 yard Thermoweb fusible fleece
- Rick Rack trim – you will need about 14″ per coaster
- disappearing ink marker or light pencil
- black paint and paintbrush for ants
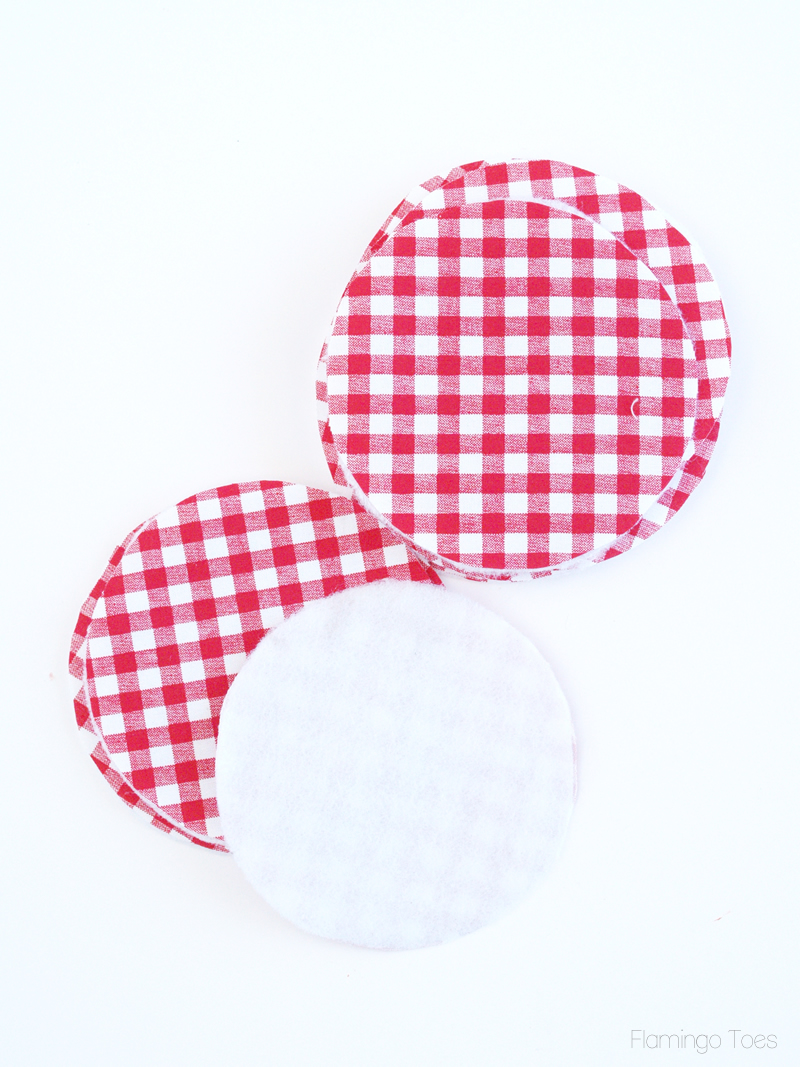
Begin by making a pattern for your coasters – you will need a 4 1/2″ circle. To make 6 coasters, cut out 12 circles each of fabric and fusible interfacing. Fuse the interfacing to the wrong side of each of the fabric circles.
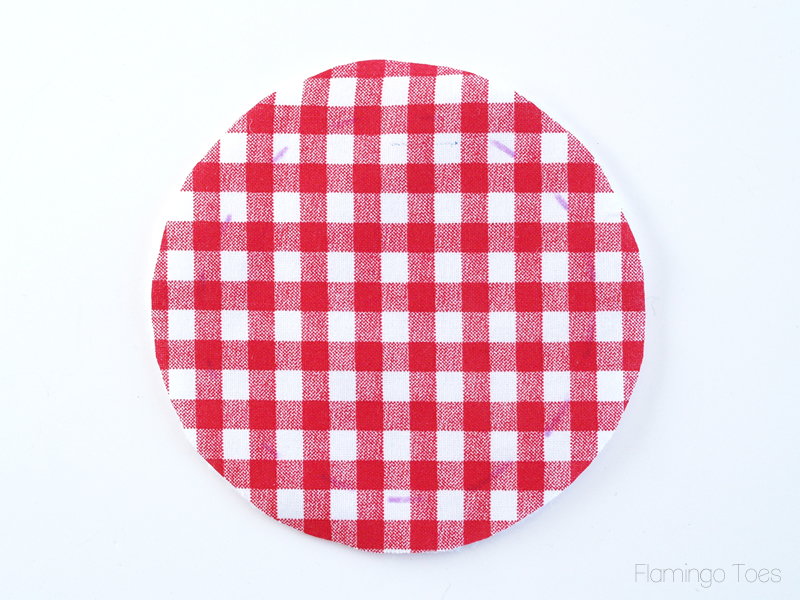
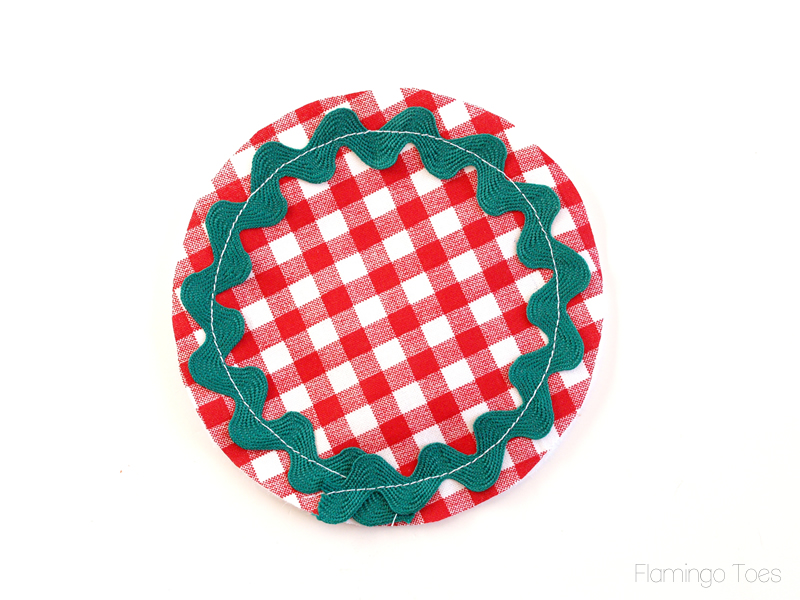
Measure in 1/2″ all the way around the circle on the right side and mark with a marking pen or something light. This will be your rick rack stitching line.
Place your rick rack so the center of the rick rack is over the line. Sew the rick rack to the circle, starting and ending the rick rack off the edge of the circle so the ends won’t show when you sew the pieces together.
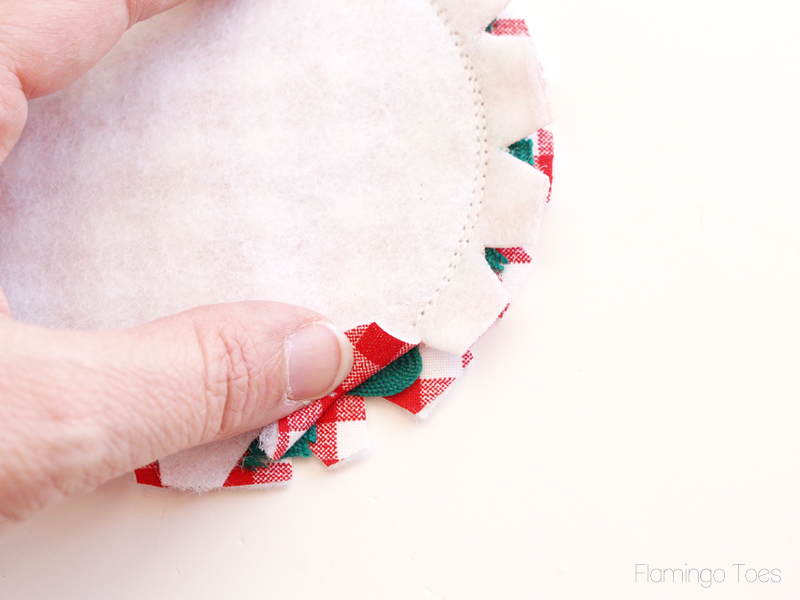
Lay two coaster pieces right sides together. One should have rick rack and one should be plain. Sew around coaster 1/2″ from the edge and leave an opening of about 1 1/2″ for turning.

Before turning your coaster right side out we want to clip the curves. Using some sharp scissors, cut little triangles out of the seam allowance. Cut each seam allowance separately, so the clipped pieces alternate. It will look a little like an awesome little viewmaster slide when you are finished.
Turn your coaster right side out and press. Tuck the opening inside before pressing. Note: Be careful with your rick rack – if it is polyester your iron will melt it. This will make you sad if your coaster looks all melty after you’ve sewn it up. Not that I would know anything about that. Use a piece of fabric as a pressing cloth over the coaster to protect the rick rack if you need to.
Topstitch around the curve of the coaster, just inside the seam, and again 1/2″ from the seam. Go slowly to make sure your stitching curves look nice.
To paint on the ants, dip the end of a small paintbrush in black paint.
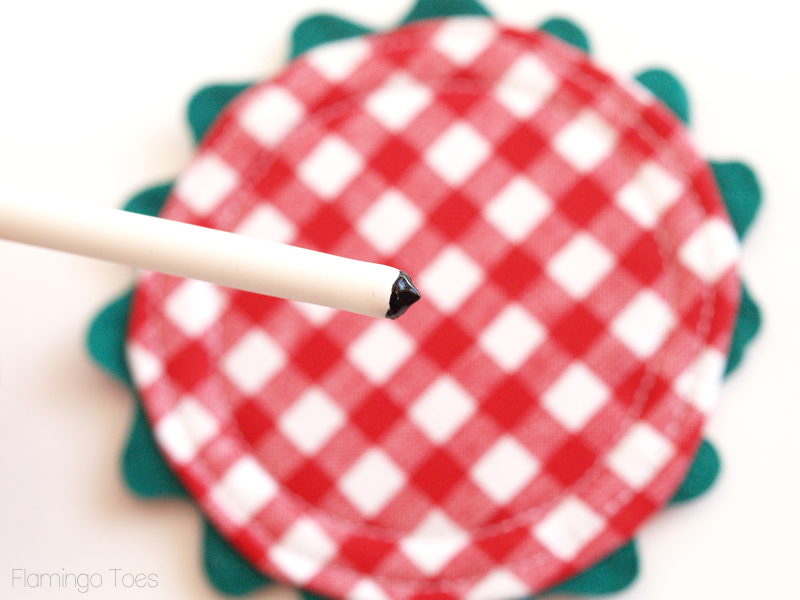
Create the ants by dotting the end of the brush onto the fabric in three little dots. The dots will get a little smaller each time so that is perfect for the little ants body. Practice a few times on some scrap fabric to make sure you have the look you want. Paint a little trail of ants across your coaster.
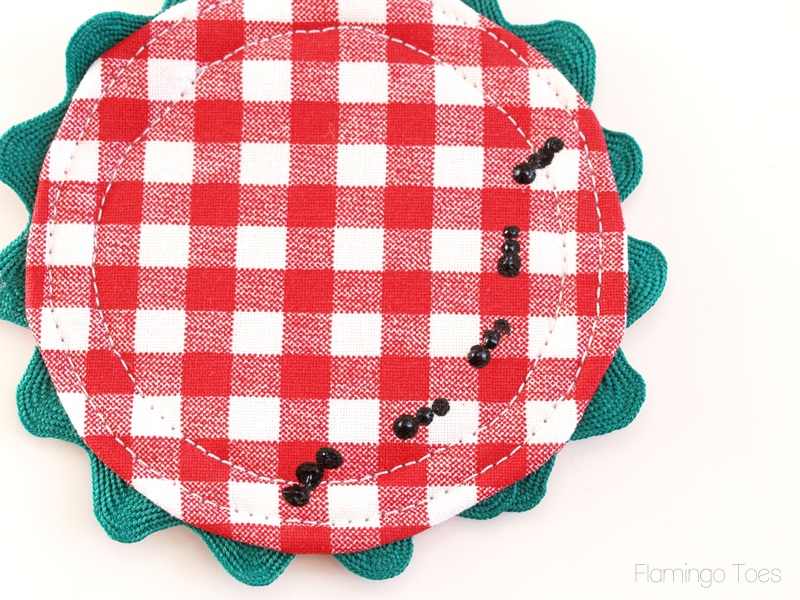
Using a fine brush, paint on the little feet and antennae for the ants. These don’t have to be perfect – they are so small that no one will notice if they look a little wonky.
That’s it! Repeat for as many coasters as you’d like!
These would make such a fun gift too – you could pair them with some sodas or iced teas and have a fun neighbor gift.
I’d love to see any versions of these Easy DIY Gingham Summer Picnic Coasters you sew up! Wouldn’t they look all patriotic and cute with navy rick rack too?!
If you’d like to check out some other quick sewing projects, take a look at these!


Love these, such a cute project! :)
Cute, cute!!! I’ve got a Craft Gossip post scheduled for this morning that links to your tutorial:
http://sewing.craftgossip.com/tutorial-summer-picnic-coasters/2014/06/23/
–Anne
Thank you so much for the feature Anne – I really appreciate it!! You are the best!
Adorable and just in time for summer. Thank you for your generosity!
Love your coasters, those ants are the perfect touch. I’m hoping to make some as a birthday present. For a summer birthday girl. Thanks
I was like eeekkk when I first saw the ants! Now I want some ants on my coasters too! So cute!
These are SO super cute, Bev!! Such a fun idea. I love the addition of the little ants!! They are perfect!
So cute Bev!! I shared this, perfect for picnic season! http://www.facebook.com/CraftsbyAmanda/photos/a.353593675216.349539.323548680216/10154330443310217/?type=1
I love finding new unique ideas like this that are so well done. Love it!
Nancy
“Ant”orable! Well, that didn’t work out very well..
Love quick, easy and cute!
Your directions are very clear and concise- which I definitely need- thanks!
2usesTuesday
Very cute! Inspires me to pull out my sewing machine. Visiting from Inspiration Spotlight party.
These are adorable little coasters! Thanks for sharing at Totally Terrific Tuesday party, I am one of the new co-hosts! I’m pinning this to our board!
These are adorable!!
– Jaclyn
These are so sweet & cute! The ants just make them!! Thanks for bringing this by Throwback Thursday!
Mollie
I shared & pinned this great coaster DIY. Thanks for droppinb by to share it at the #InspirationSpotlight party.
I hate ants in real life too, but these little embroidered ants are so adorable! These are perfect for any summery party.
Congrats on your feature in the #ThisIsHowWeRoll link party on Organized 31! I’m pinning this cute craft now!
Painted* ants (sorry!). But I might try my hand at embroidering them!
These are adorable! I am definitely going to make some of these this summer. They look so easy, too.
How cute! I want to make them.
What a perfect Summer party hostess gift!! Adorable.
I love this idea. Thank you so much for sharing!
How cute are these!