Gah. I love making dishtowels.
And let’s face it – I love making kind-of impractical dishtowels. The kind that make you freak out a little if your kids wipe their hands on them.
To be honest I don’t really care if they get messy. It’s worth it and I think it is soooo fun to add a bit of style and fun and color to your kitchen with sweet dishtowels!
Today’s new dishtowel is so cute – and a little snarky too. :)
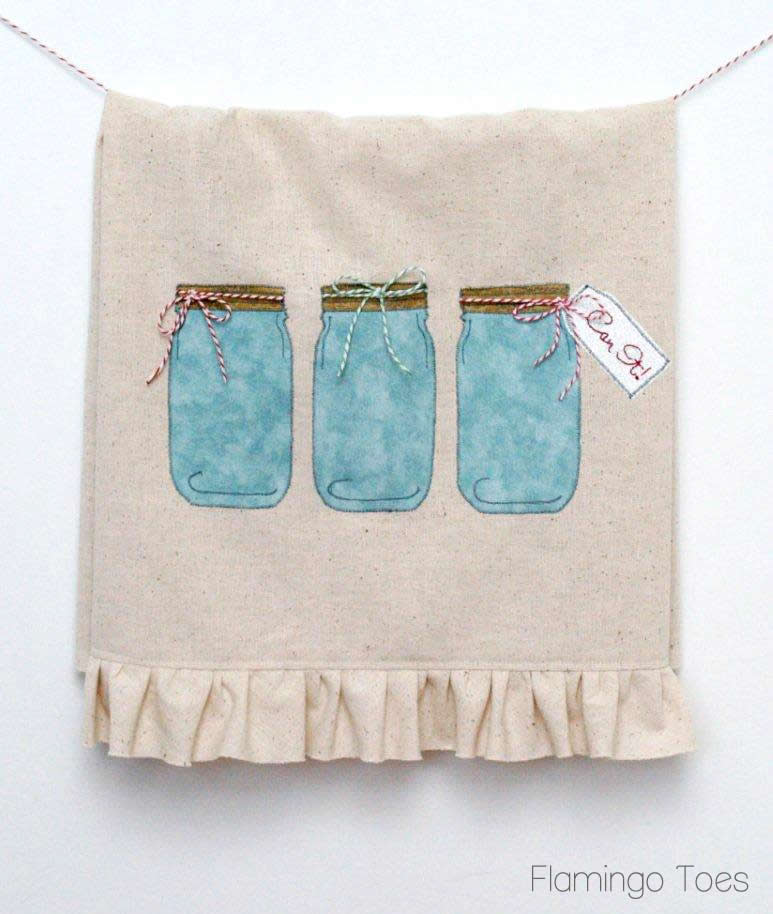
It’s my Can It! Mason Jar Dishtowel!
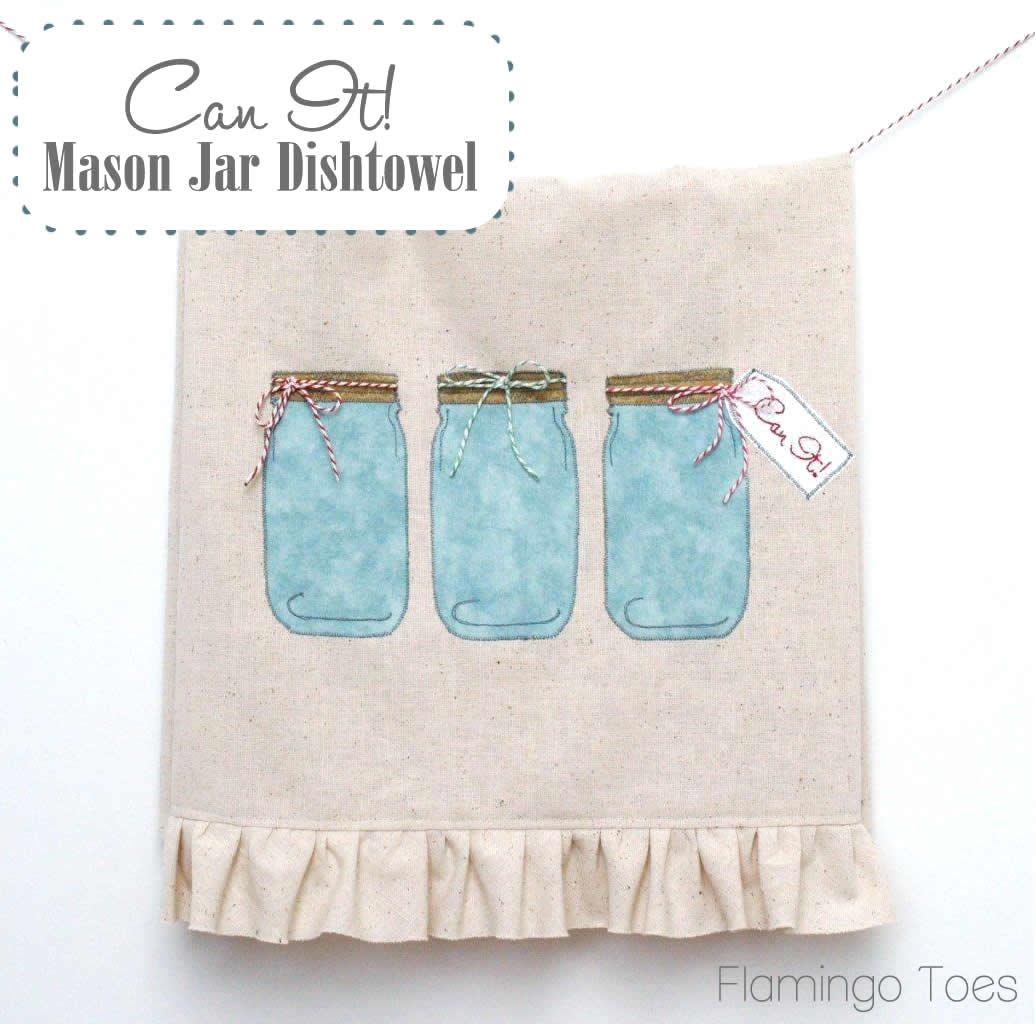
You can totally leave off the little “Can It” label or change the wording if you don’t feel like basically telling someone to shut it on a dishtowel. ;)

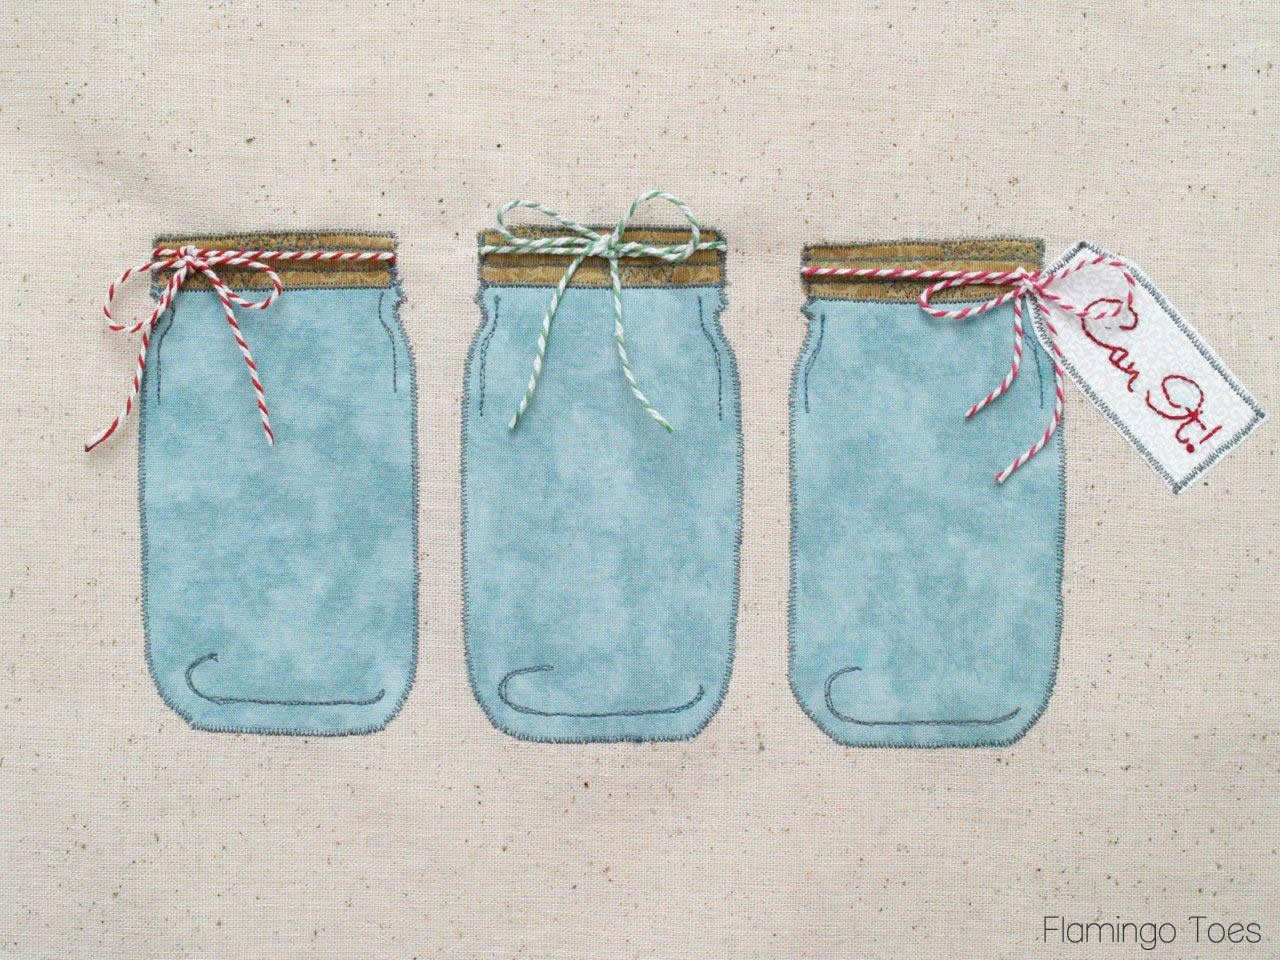
The Jars are stitched on, then embellished with just a wee bit of thread sketching. And they have baker’s twine decorating the lids! So fun.
Here’s what you’ll need to make your own:
- Fabric for dishtowel:
I used osnaburg but you can use any canvas or linen, or use a purchased dishtowel
You’ll need a piece 21″ x 28″ and a piece 2 1/2″ x 56″ (that little one needs to be cut on the bias) - Fabric for Jars, lids and label (see pattern for sizes – you don’t need much)
- Baker’s Twine
- Wonder Under
- Embroidery Floss
- Glue (for ends of twine)
- Pattern for Jars – Click Here to Open
Please keep in mind that all Flamingo Toes patterns are for personal use only. Do not transfer or sell the pattern, or items made from the pattern.
Also, patterns are for Flamingo Toes followers, so please choose to follow along before downloading any pattern. Thanks!
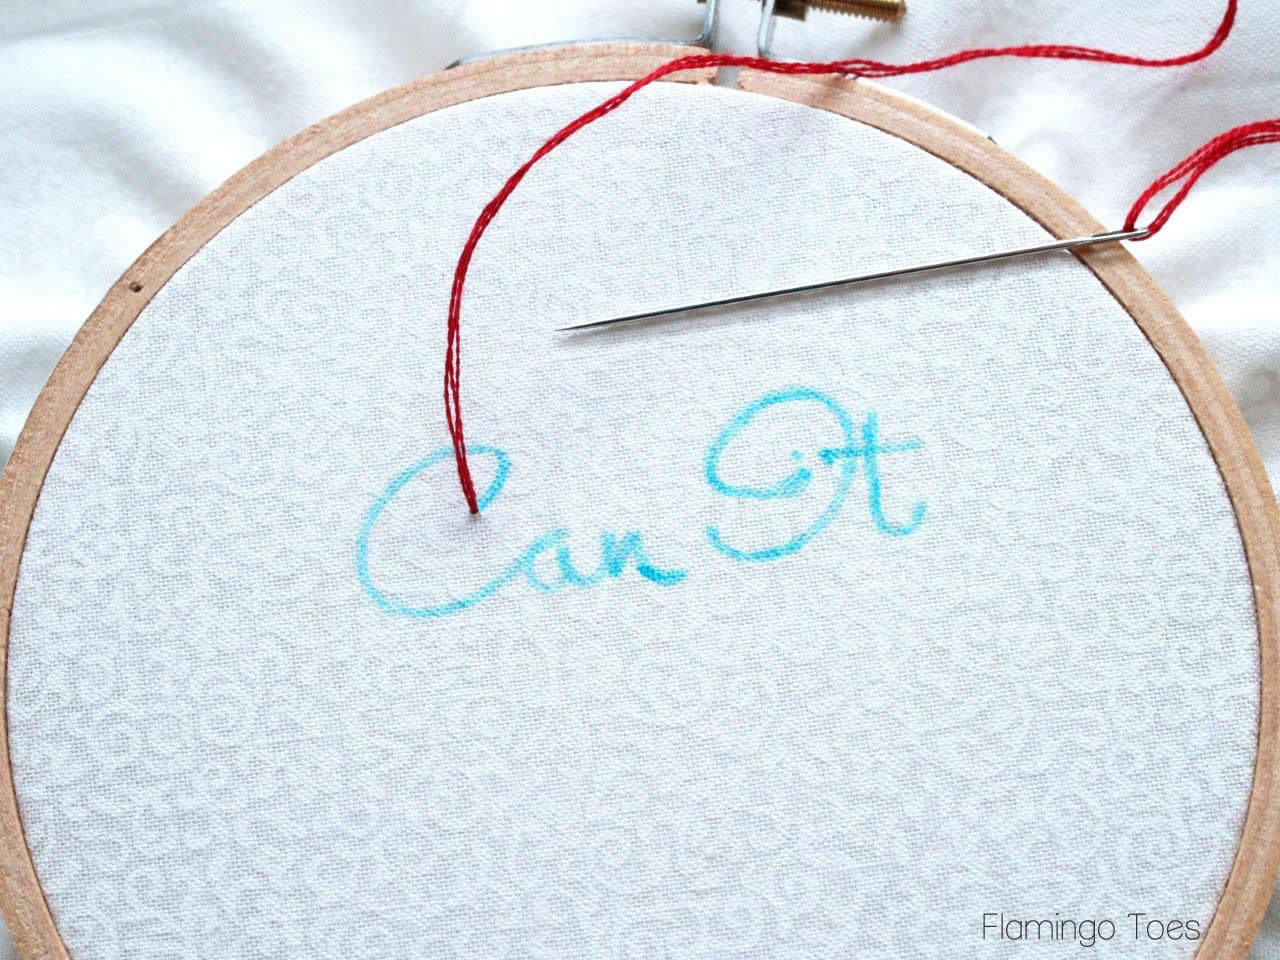
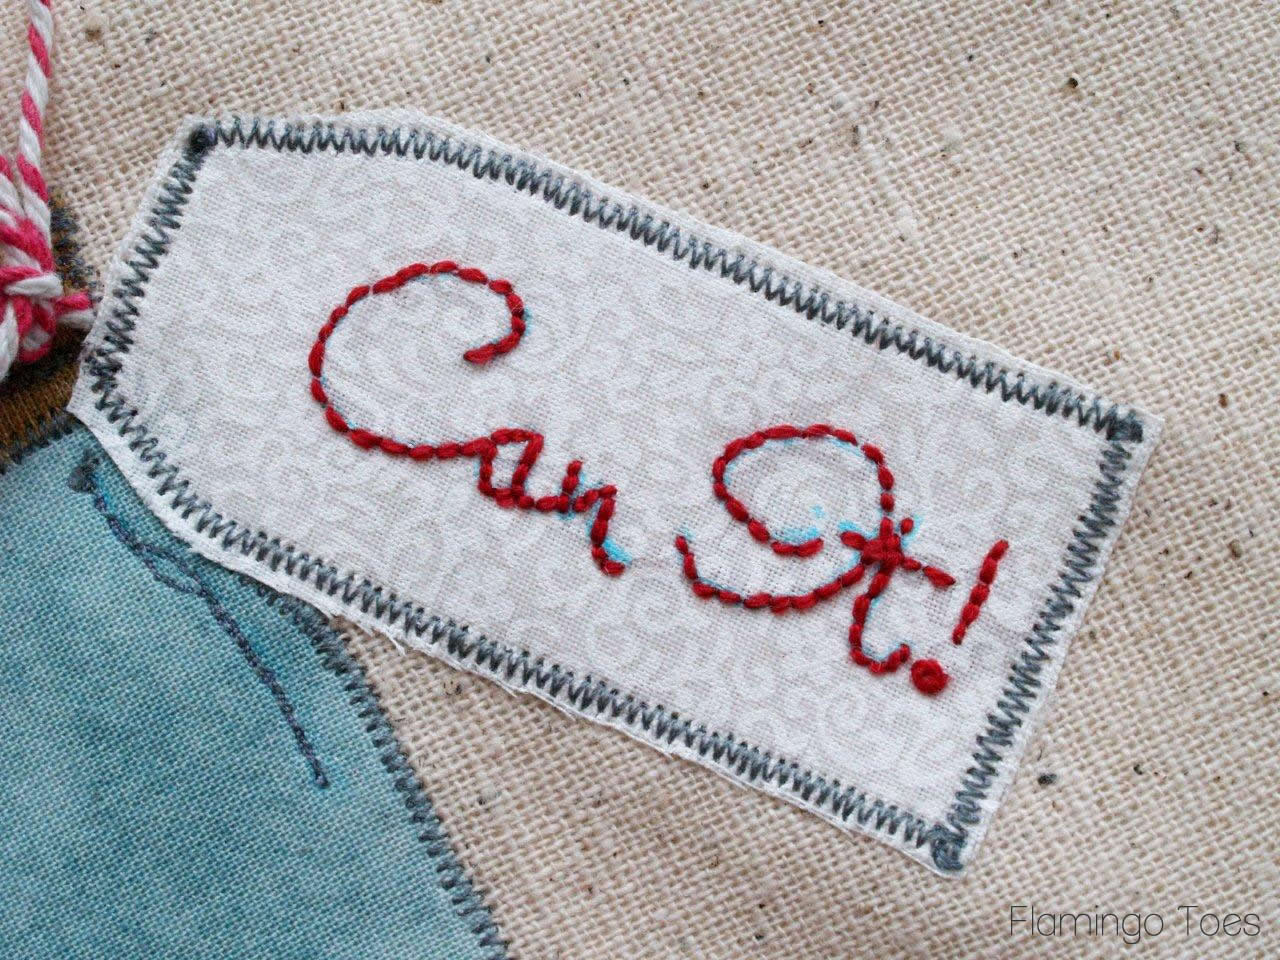
Start by embroidering your label. Trace the lettering onto a scrap of white fabric.
Use a back stitch to do the letters. If you need a tutorial you can find one on my How To Do That page for embroidery.
Pretend there’s an exclamation point on there ok? I sort of forget to trace mine.
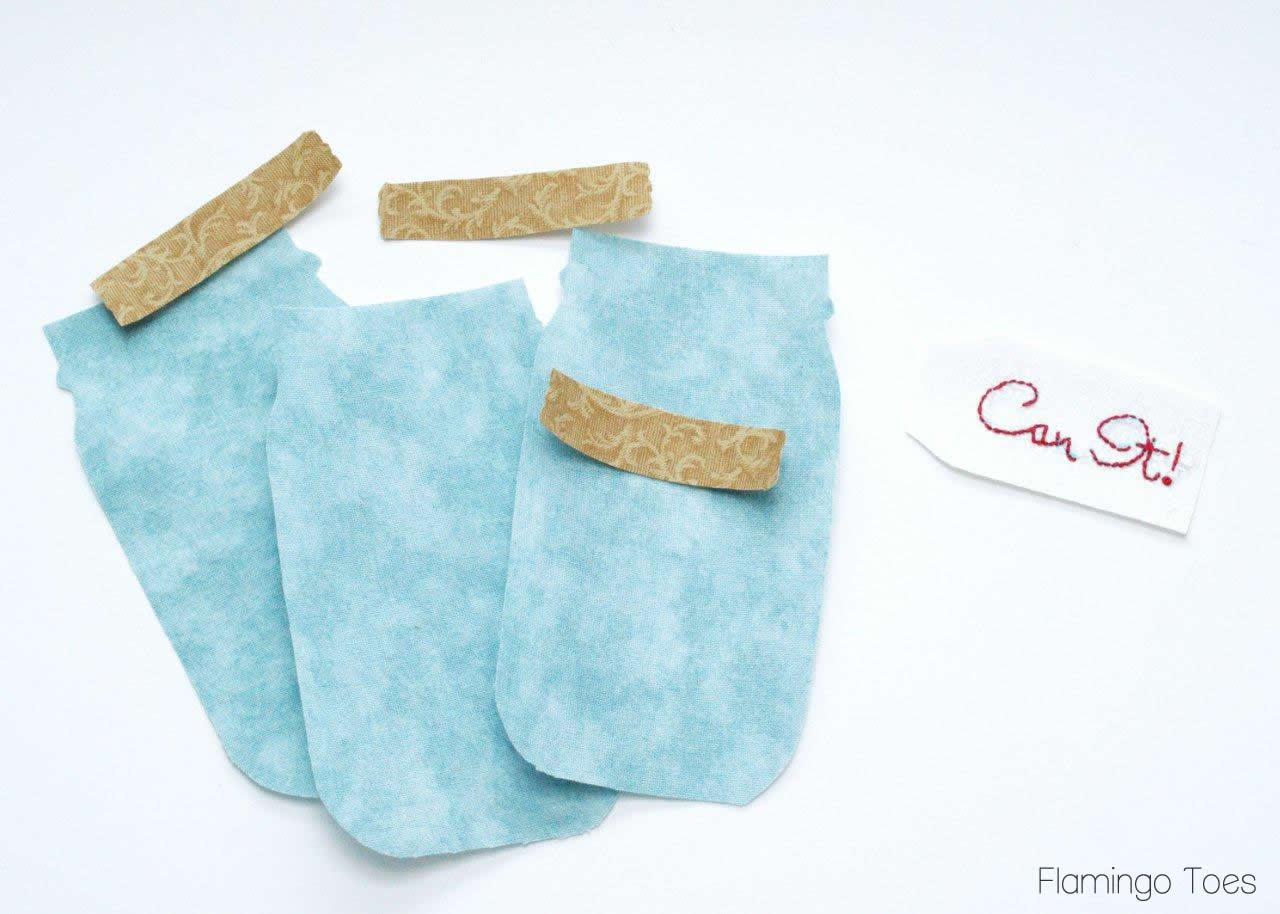
Once your embroidery is done, iron a piece of Wonder Under to the back and cut out your label piece.
Iron Wonder Under to your jar and lid fabrics and cut those pieces out as well.
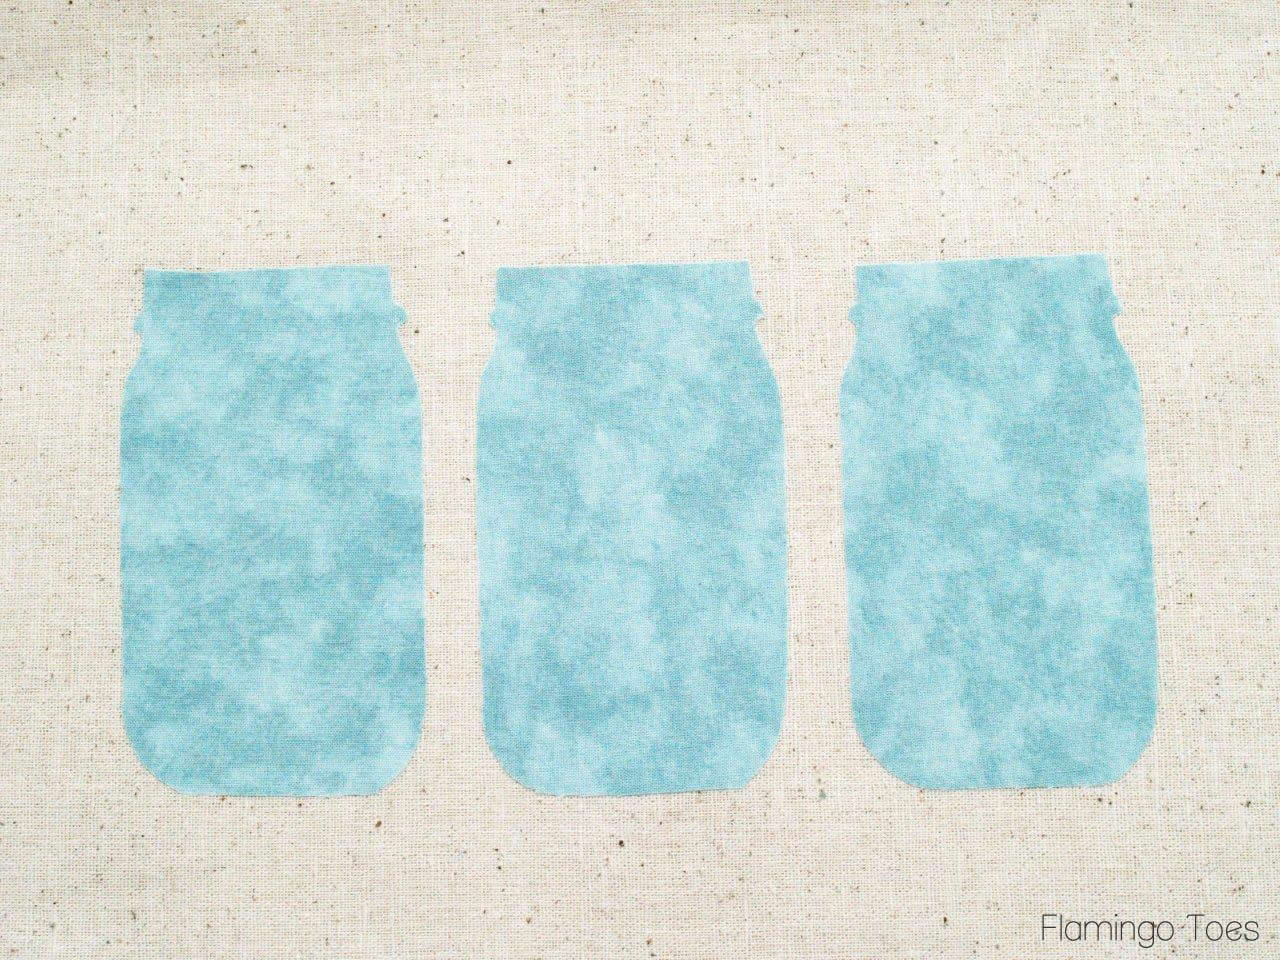
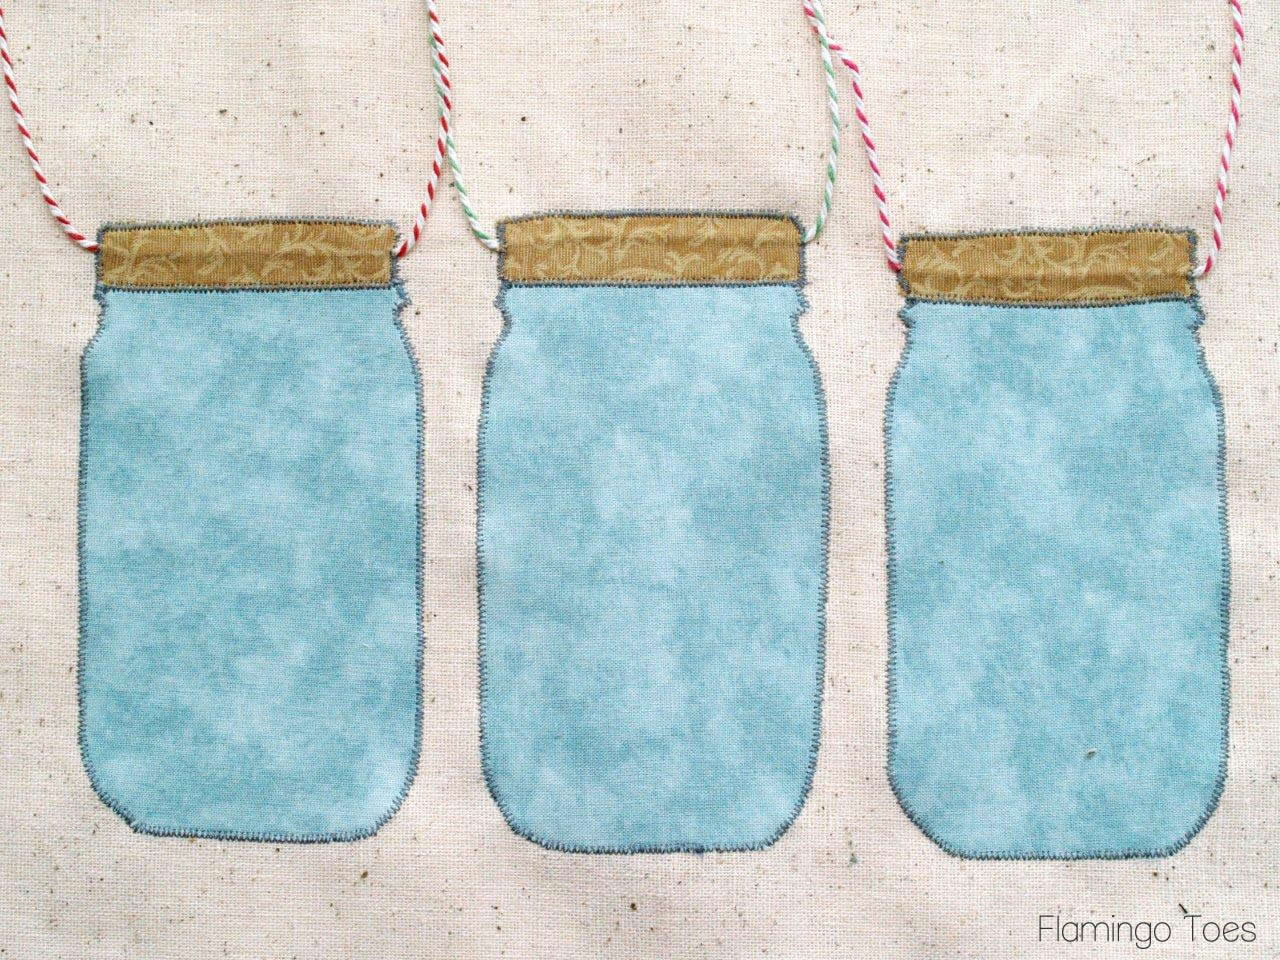
Lay out your jars on your dishtowel. Center the middle jar on the towel, about 4″ up from the bottom of the towel. Place the other two jars on either side, 1/2″ away from the center jar. Remove the paper backing and iron these in place.
Cut three 24″ pieces of baker’s twine in whatever colors you want. I found that the thicker twine works best here.
Lay the twine over the top section of the jar. For the middle jar I centered the twine. For the left and right jars, I layed them out a little uneven since I wanted the bows off-center.
(So the left jar had more twine on the left side.)
Place the lid piece over the twine and jar top. Remove the paper backing and iron down, sandwiching the twine between the two pieces.

Once all your twine and lids are ironed on, sew around the edges of the jars and lids with a little tiny zig zag stitch. Sew right over the edges of the jar lids, sewing over the twine at the same time.
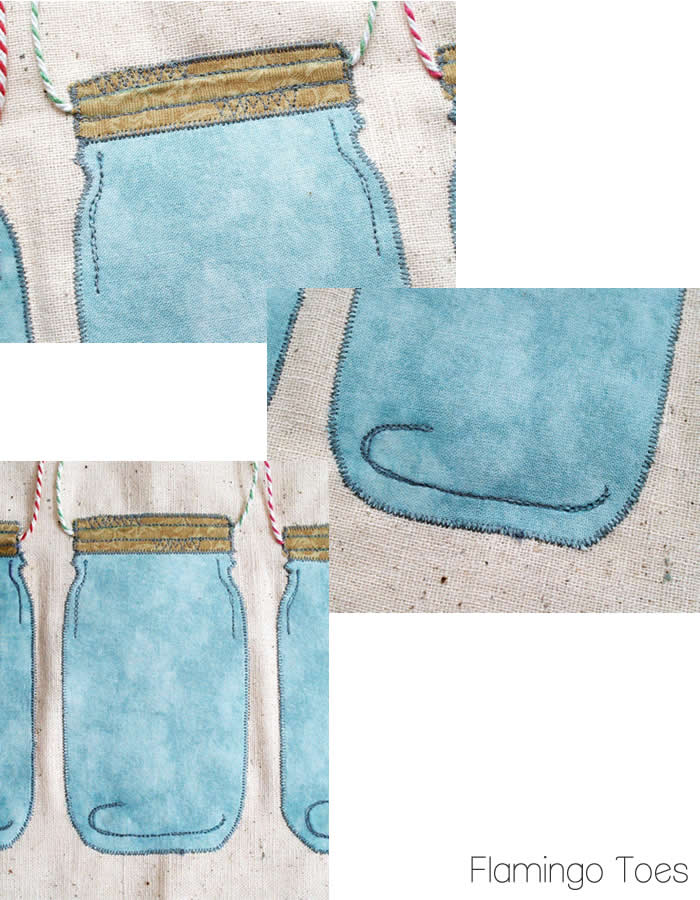
Now we’re going to do our sketching. Lower the feed dogs on your machine and put on your free motion foot.
Mark the jars with the sketching lines that are on the pattern.
Sew over these lines, going over them as many times as you’d like. The more times you sew over them, the darker the lines will be.
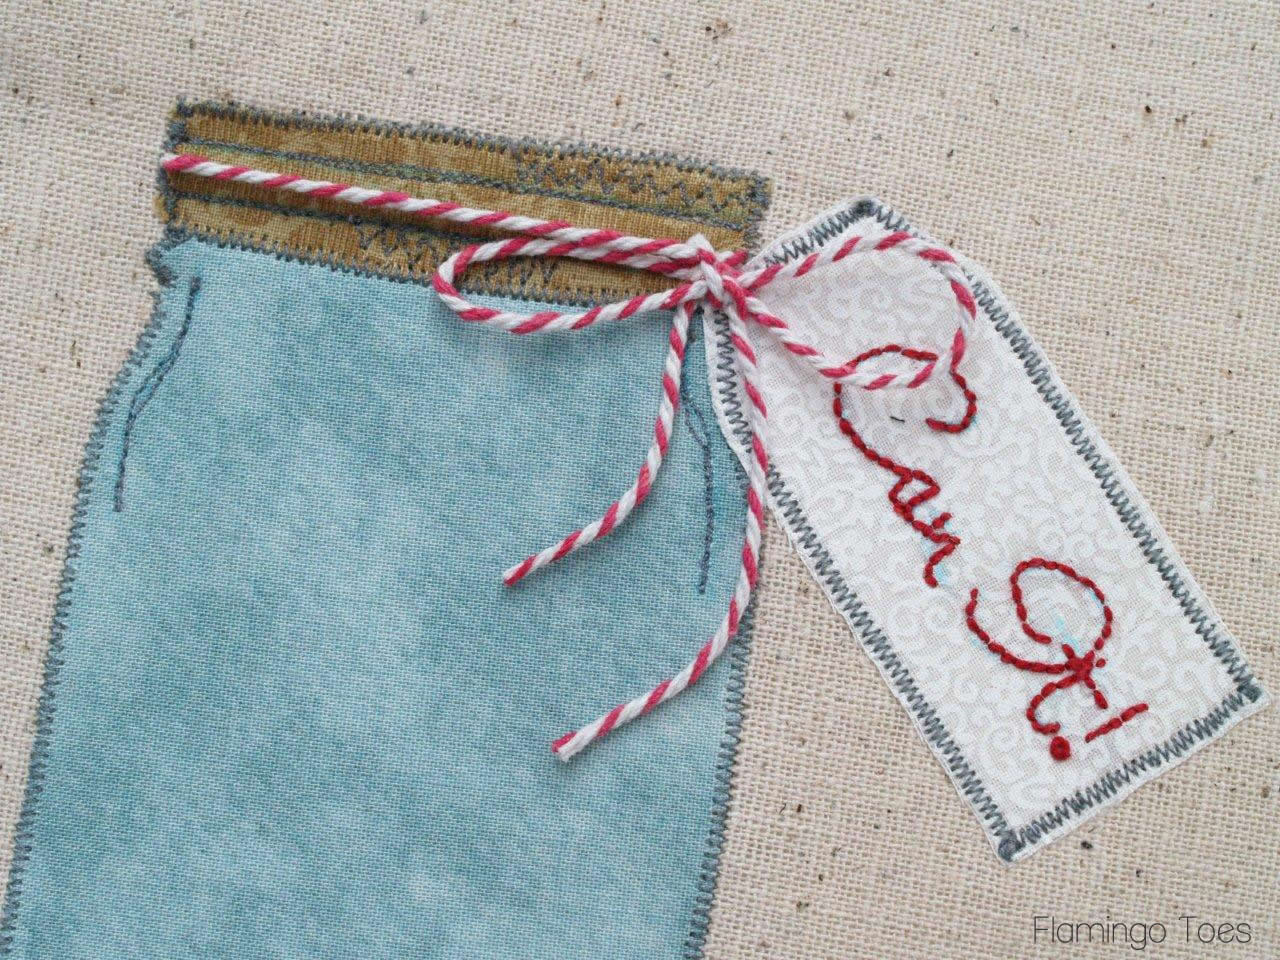
For the jar lid, sew the horizontal lines on either side of the twine, then sew some zig zags in between the top and bottom lines, for a fun sketchy look.
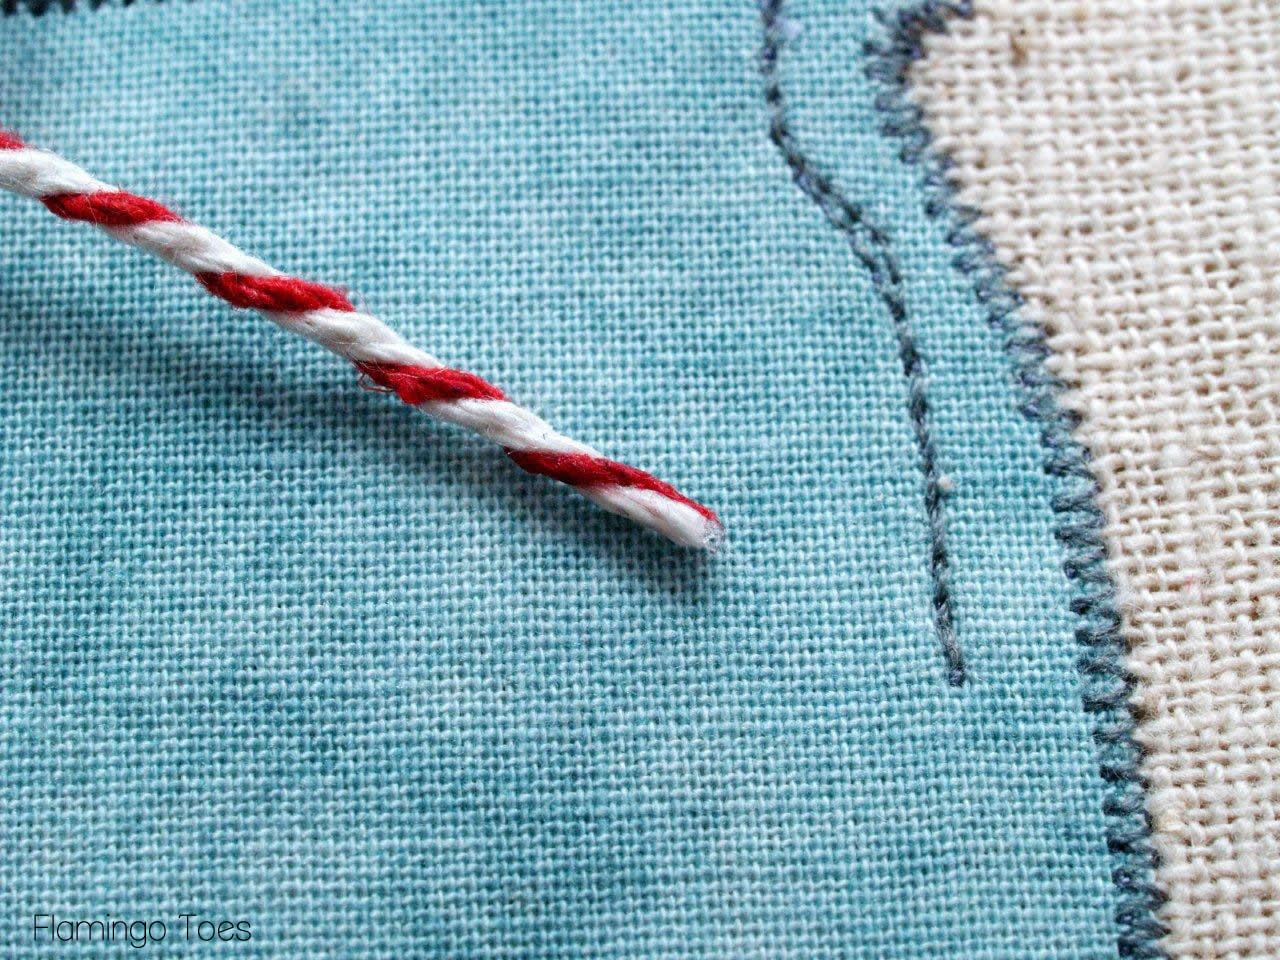
Once your lines are all sketched on, tie the twine in the bows where you’d like them. Hand sew the knots of the bows in place.
Trim the bottoms of the bows so they’re not crazy long or crooked and treat the ends of the twine with glue so they don’t unravel.
Move the bow of your right dishtowel out of the way, then place the label to the side of the jar. Iron the label in place, then sew on with a small zig zag stitch.
Now we’re going to finish off the dishtowel. Hem the two long sides and the end of the dishtowel that won’t have the ruffle.
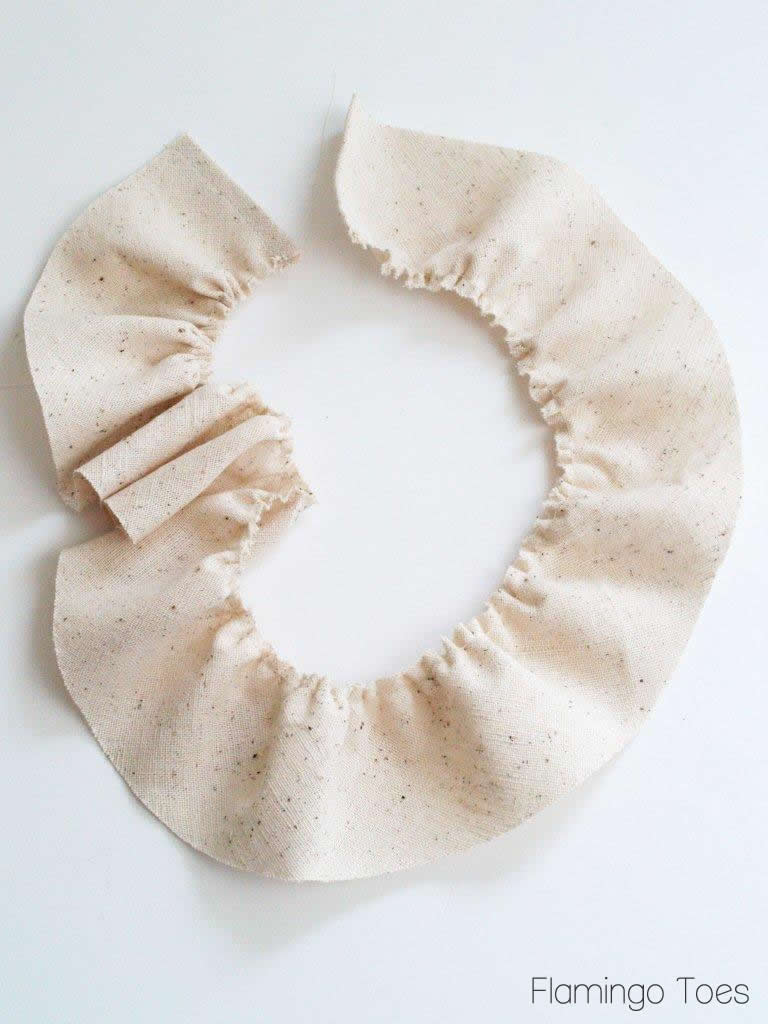
Hem the two short sides of the ruffle, then sew a gathering stitch 1/4″ away from the top edge.
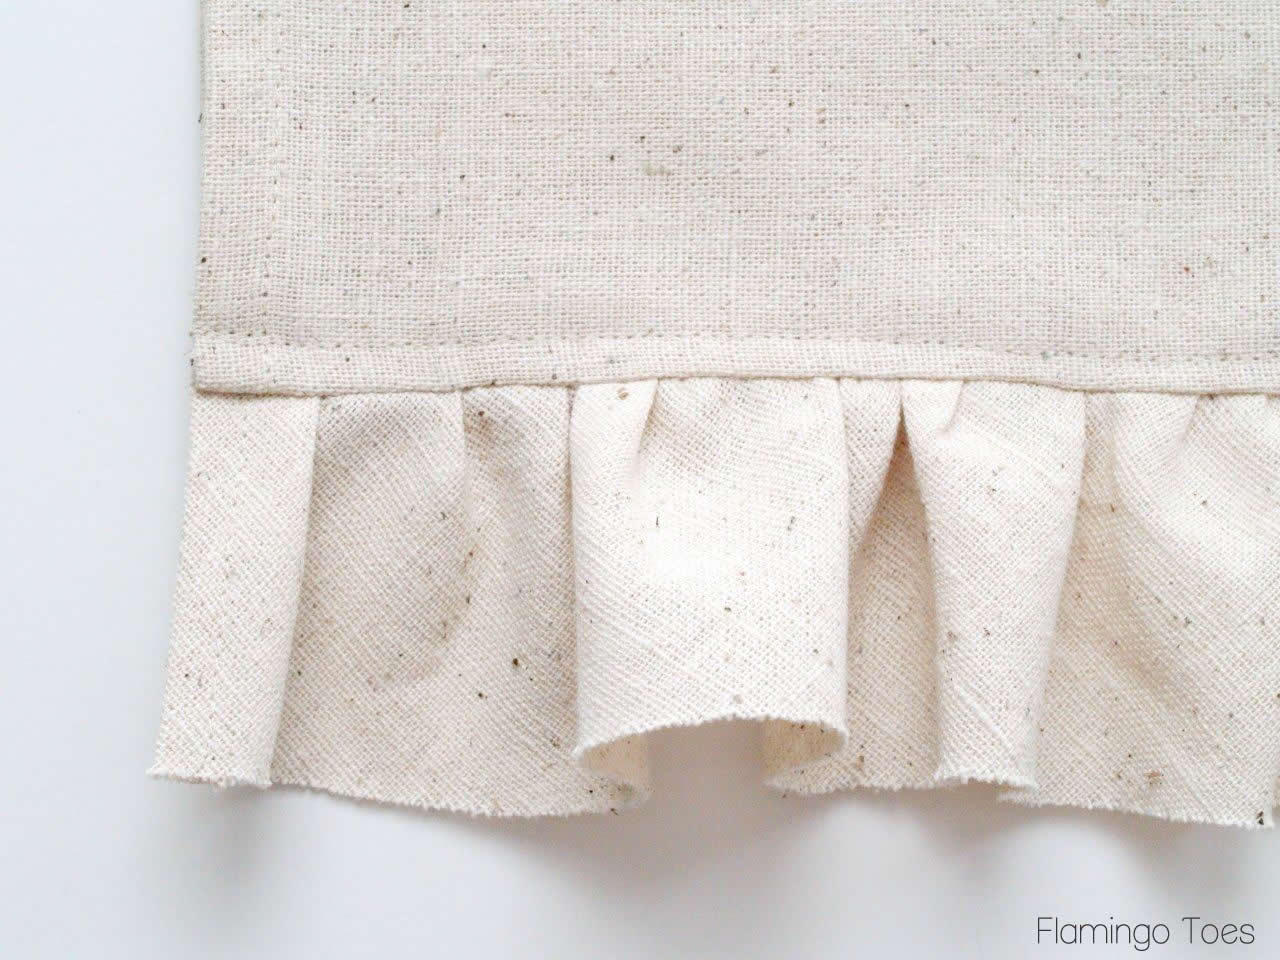
Sew the right side of the ruffle to the right side of the bottom edge of the dishtowel with a 1/2″ seam. Press the ruffle down and top stitch the seam, 1/4″ from the edge on the dishtowel side.
And you’re all finished!!
So what do you think? Pretty fun right?
Linking up at Sunday Scoop, Today’s Creative Blog, Met Monday, Tutorials & Tips Tuesday, Quilt Story, Shabby Creek Cottage, My Repurposed Life, 504 Main, Positively Splendid, and the other fabulous parties on the party page – make sure you check them out!
This was originally a guest post over at Eat. Sleep. Make. :)


seriously SO SO cute. i love mason jars. and twine. and ruffles. eek!!
Love this! And who doesn’t Love Mason Jars.
Thanks for the tutorial!
I found you through A Girl And A Glue Gun and now I’m spending the better part of my morning stalking your blog. You had me at the Crazy Easy Anthro Knockoff Bracelet. Love it all!
Mason jars are my favorite! Thanks for the great tutorial.
This is adorable Bev! You are so creative :)
Love, love it! Just found your blog and so happy I did. I’m a new follower and can’t wait to read more about your creative talents.
Stop by and say hi when you can!
Pat
WOW! I absolutely LOVE this one! Fantastic job and thanks so much for sharing!!!
I love this! Definitely going on my to-do list for February, unless I can squeeze it in this month!
So cute! I love all the stitched details!
oh this is so flippin’ CUTE!
Cutest. Dishtowel. EVER! And you’ve made a lot of cute ones, my friend!! I love this one AND the snarky message it sends. lol!!
Bev – OMG – SEW adorable. And you’re right — I also love the look of clean, never-used dishtowels hanging in my kitchen. I have found myself actually (almost) yelling at my family, “No, don’t use that towel!” Pinned project :)
Totally Kewl!
Beyond cute!! I love these so much and the tutorial is fantastic!
Oh my…this is such a charming idea. Would love to have you share it at my party. If you like to paint…then you need to come by and enter my Miss Mustard Seed’s Milk Paint GIVEAWAY…hope to ya there!!!
Blessings,
Linda
I found you on Pinterest. Added you to my sidebar and featured one of your projects here – http://downtoearthstyle.blogspot.com/2013/01/old-wood-chicken-wire-art.html
You have inspired me. Thank you!
Holly @ http://downtoearthstyle.blogspot.com/
So cute!! Love it”
What a fun idea! What a super cute design! And the quote: “Can it” is just perfect! You are so creative.
I love home-made towels!
Thanks for sharing your terrific towel!
hugs x
Crystelle
This is so adorable! What a neat idea.
Already your follower hopping by, blogging @ Getting Healthy with Essential Oils
So adorable! I love the little strings on the lids. I really enjoy your blog.
I host a link party every Thursday – I’d love you have you join and share this.
Thank you for the great post!
-Angie
http://www.easylivingmom.com
Oh no you did not….this much cuteness should not be allowed. I LOVE it Bev! I want 20 of these towels!
Wow Bev, this is a beautiful tea towel! I would have thought a project like this would be way out of my league but your tutorial is explained brilliantly. I might be giving this a try at the weekend :)
I cannot even tell you how much I am in love with this little. I’m all about making one except I don’t sew. Do you happen to sell these little cuties?
I thought I left a reply to this the other day but these are ADORABLE! I just love them!! :) Claire
Sooo adorable!!
Fotini
These are so cute! I’m obsessed with mason jars. And I love the “can it” label :)
Oh, my gosh, cuteness!! Love it, Bev!! :)
oh so cute Bev!! i’m a sucker for anything with a mason jar :) ♥
Oh Bev! These are absolutely, wonderfully, splendidly creative and so beautifully done (as always). Your creations are truly exceptional!
This is an adorable project . Love it and Pinned it so that my daughter can look at it. She loves Mason jars and used them in her outdoor wedding decor.
I love these! I don’t mind if my kids us my dishtowels to dry their hands either, I just wish they would really wash them first.
So much cute friend!!! I love it!!!
This dish towel is wonderful. I love it.
Ruth
These are going to be a “must do” for my kitchen. I love mason jars and my kitchen and dining room light fixtures are mason jars so these would fit right in. Love them!
Just perfect Bev. Wanted to let you know I just featured this as part of my link party wrap up!
Very talented! I love your design.
Really cute & the details are adorable. I’ve featured this fabulous idea at this week’s Craftastic Party. Be sure to grab a Featured On button & thanks for linking to Craftastic Monday at Sew Can Do:)
This is absolutely darling! I love it! My first thought was that it would make a great house warming present, or mothers day gift. My second thought was – that would look great in my kitchen! I am pinning this and will definitely be making at least one! Thanks for the great post! Have an awesome day!
Very cute! I love it.
Squealingly cool! Many thanks for sharing it!
“Put A Lid On It!” would work too. ;)
Found you through Today’s Creative Blog. Cheers!
Love it! Seriously, such a perfect tip for the kitchen.
I love the stitching of the “shadows” or “light glares” – takes it to the next level of awesomeness!
Love this!! I too have a thing for dish towels and this one is adorable!!
This is super cute and I know a lot of my local friends who love to can their locally grown foods, i.e., the perfect gift! Thanks and I’m going to make some of these this weekend!!
bev–love the towel! It’s really soooo darn cute. Great tutorial
catching you!
gail
I love mason jars and this towel. Do you have a esty store that you sell the items you make? I do not sew and even though you posted a great tutorial I’m a little scared to give it a try.
Hi Bev! Love these. They are so fun! I included them on my favorites post today! http://missloviecreations.blogspot.com/2013/01/my-favorite-things-thursday.html
these are amazing! right up my fruit jar alley lol ! thank you for the pattern!
could I ask where in the world you found that blue fabric for the fruit jars? and also for the lids????
Oh my goodness that is ABSOLUTELY BEAUTIFUL!!!!! Love love love what you did!!!! What a cute idea, and so beautifully done!
thinking kitchen curtins!!!!!
I really like the look! I not only like for dishtowels; but I think these would make nice “vintage” looking curtains–especially if you use flour sack dishtowels!
How do I print off the pattern and directions for the kitchen towel with the canning jars?
Thank you
In the post for the dishtowel there is a link to the pattern up in the Materials List. That will give you the pattern pieces for the lids, jars, and tags. The instructions are in the post – I don’t have those in printable form.
Thanks, Bev
I think these would also make awesome Kitchen Curtains. Love it!!!
LOVE it so much I am in the process of making as a birthday gift for a canning friend of mine. Figured would be cute tucked in a ball jar along with some canning labels. Thank you, thank you… think she’s going to love it! But I have a couple of questions please as it’s a tad difficult to see on the computer screen. 1) Does your thread match your jar or is it a tad darker? 2) did you use the same thread for the sketching? 3) the sketching appears to be a straight stitch? 4) if a straight stitch, what length did you set your machine at?
Thanks Madam!
I’m so glad you like the towel Susan!
So for your questions – the thread for all the sketching and zigzags was a dark gray. I wanted a contrast with the fabrics but not too dark.
For the sketching – I put my machine on a straight stitch but I drop the feed dogs and use a free motion foot. But if you don’t want to do that, I’ve also done it with the presser foot removed. It’s just a little hard to control but it works. Either way it doesn’t matter what the stitch length is because you’re controlling the fabric and length.
I hope that helps – let me know if you have any other questions!
Bev
This would be a great gift for my brother Charles as he is alway canning. If he finds something he likes, he makes small batches, adjusts the sugar/salt/spices until he get it to his liking. Just like a scientist, I can see him now, flipping open his little notebook and jotting more change, yaaa! Just perfect!!! Just like this towel, thank you!
Wouldn’t that make an awesome apron!!!! I like the idea of wearing something that basically says shut it while I am cooking…. and if I’m canning, then I really mean it!! Love it… thanks for the inspiration.
Thank you so much for the idea! My daughter is having a “rustic” theme wedding using lots of mason jars in the decor. This is a perfect gift for the bridesmaids! For the wedding, each guest will have a drinking jar and the jars have chalkboard emblems on each for the guest to chalk their names on them. I fused heat n bond to black fabric and used the same large punch we used for the jar’s emblems. It punched through the fabric easily. I then “sketched” their names on each one, then pulled the backing off the heat and bond, then ironed them on the jar (I only used 1 jar per towel).
I am so excited about the results! Thank you again!
These are so cute. I am going to try to make my mom some. She has everything, she will love these. Thank you so much for sharing!!!!
These dishtowels are so cute! Can’t wait to make some and use them for gifts!
Thank you.
What a wonderful idea. My older friends just love them. Reminds them of the time when they canned.
This is adorable….I will be making this for Glenda who cans….plus, I may make kitchen curtains as suggested by Sarah.
This is adorable!
So cute; I want to make these for our DD for a little Valentine’s gift, but I think I’ll use quilting fabric printed with pickles, veggies, etc…! They’re adorable thank you for the pattern! :)
Muita criatividade! Já vi muitas aplicações, mas neste tema, não.
Parabéns pelo blog!
Thank you for this very cute idea. My daughter is a Mason Jar addict and I made this for her. She is going to love it.
Bev – This is the most adorable design! It would look cute on an apron as well. I am going to make it with a few crafty friends next week. Thanks!
Bev…which by the way is my sister’s name, my OLDER sister :) We grew up on a farm and did a lot of canning…I’m going to make this for her…she will love it!
This is such an adorable project! I would like to make appliance covers using the Mason Jar motif, and perhaps a wall-hanging organizer as well as towels. It’s a must-do project, as far as I’m concerned, as my maiden name was Ball! I’d love to know what font you used in your PDF, if you’d care to share. I’m growing more vision impaired and it is so easy to read! Thanks in advance!
This is so cute and creative!
Couldn’t survive without this site. Thanks for being so nice
I think it would really stand out with a littlet bit of batting behind each jar…