Today I’m SO excited to be at SNAP Conference in Salt Lake City surrounded by 500 other talented crafty bloggers learning, creating, and celebrating the friendships we’ve made because of blogging! And to celebrate with you, I teamed up with Abbey from The Cards We Drew and a large group of bloggers to create Crafts in a SNAP {15 Minute Craft Ideas} so that ANYONE, whether beginner or seasoned pro, can learn to create fun and handmade items in no time at all!
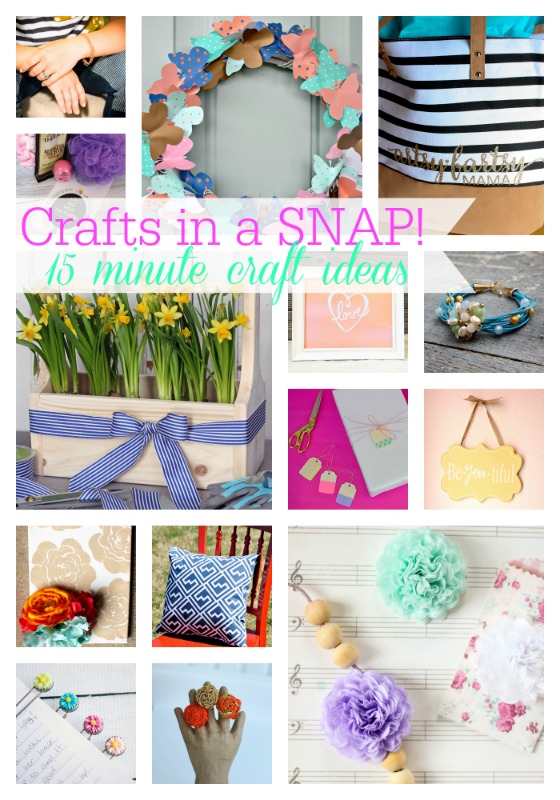
I’ll have links for you at the bottom of the post – aren’t they all so cute?!
Here’s what I made for our Quick Crafting party!
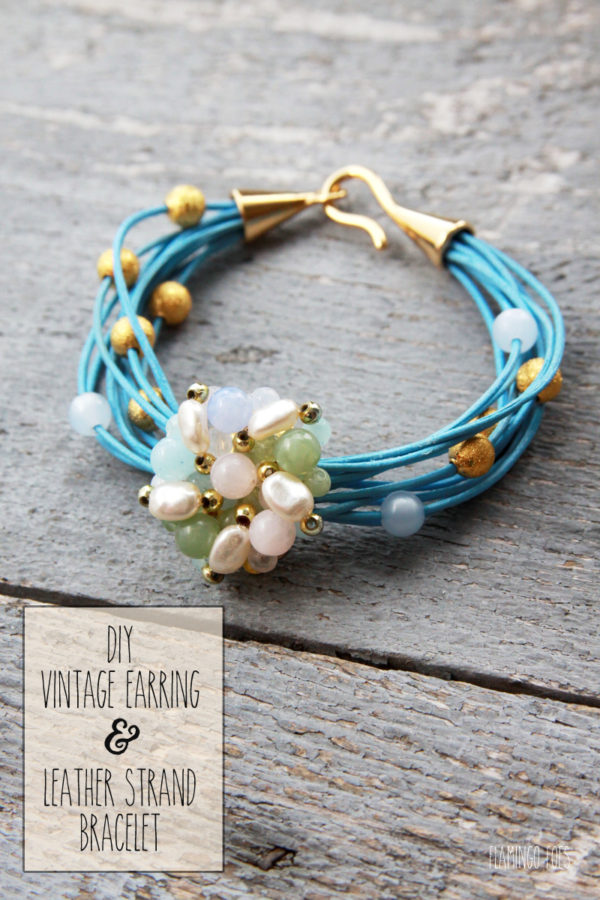
I am always looking for fun new ways to use vintage jewelry! I just hate to think of pretty beaded earrings and necklaces sitting all sad and forlorn in thrift stores and antique shops – I just want to give them all new homes. :)
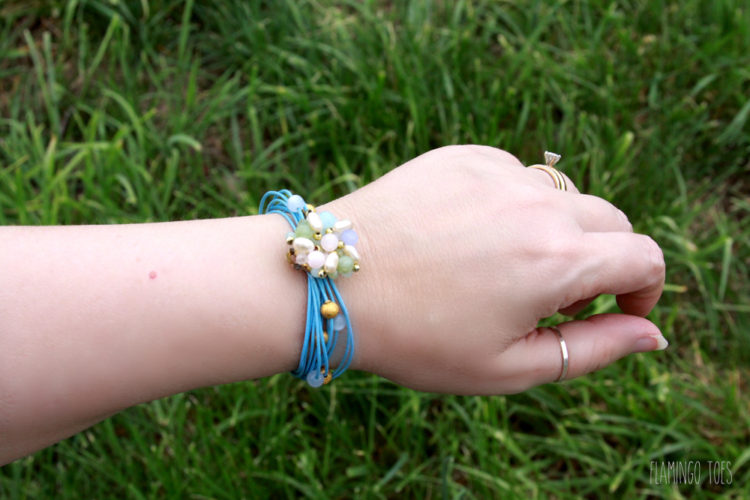
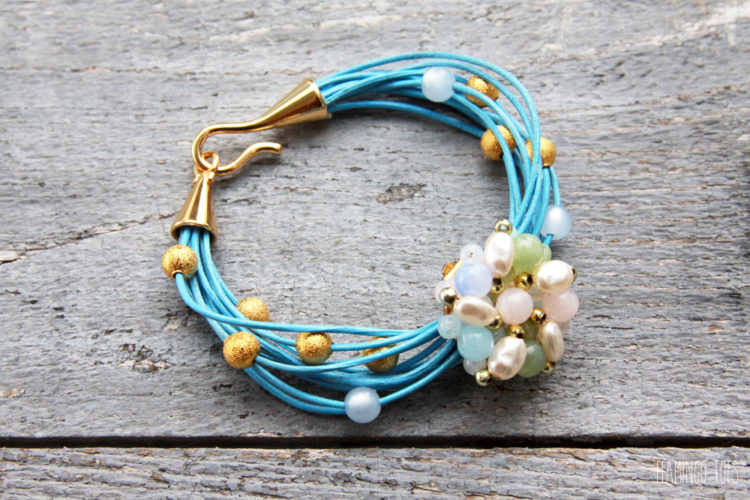
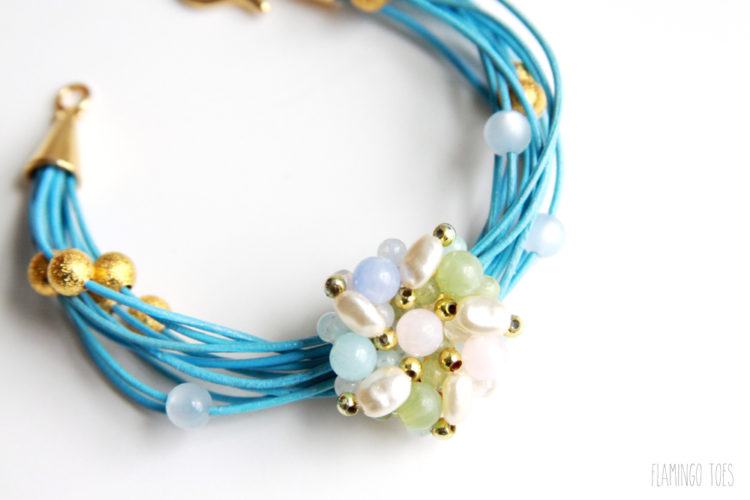
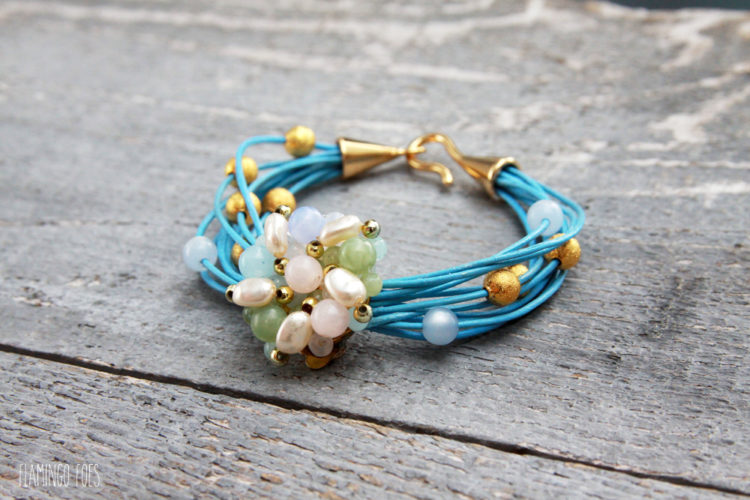
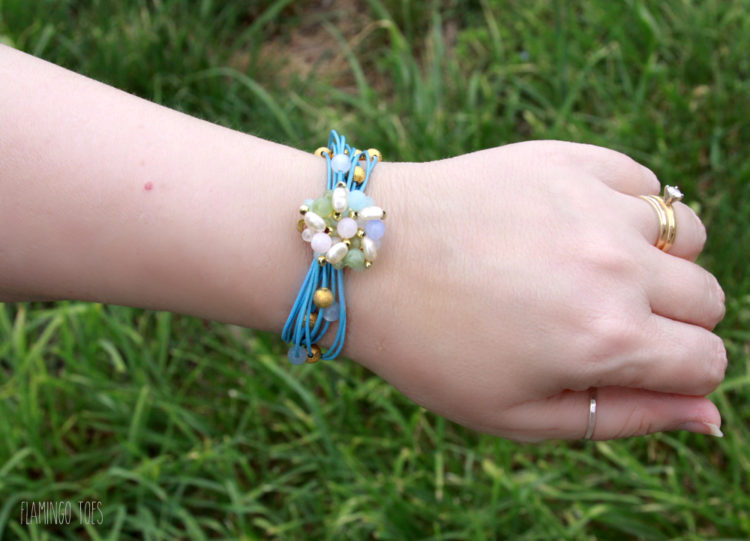
This sweet little DIY Vintage Earring and Leather Strand Bracelet is a cute way to highlight just one vintage earring! You can use a special piece from grandma, or something you pick up at a garage sale – either way you’ll have a unique and cute bracelet to add some color and style to your outfit!
This is a super easy bracelet too – you don’t need any jewelry making skills. You can make one up in about 15 minutes!
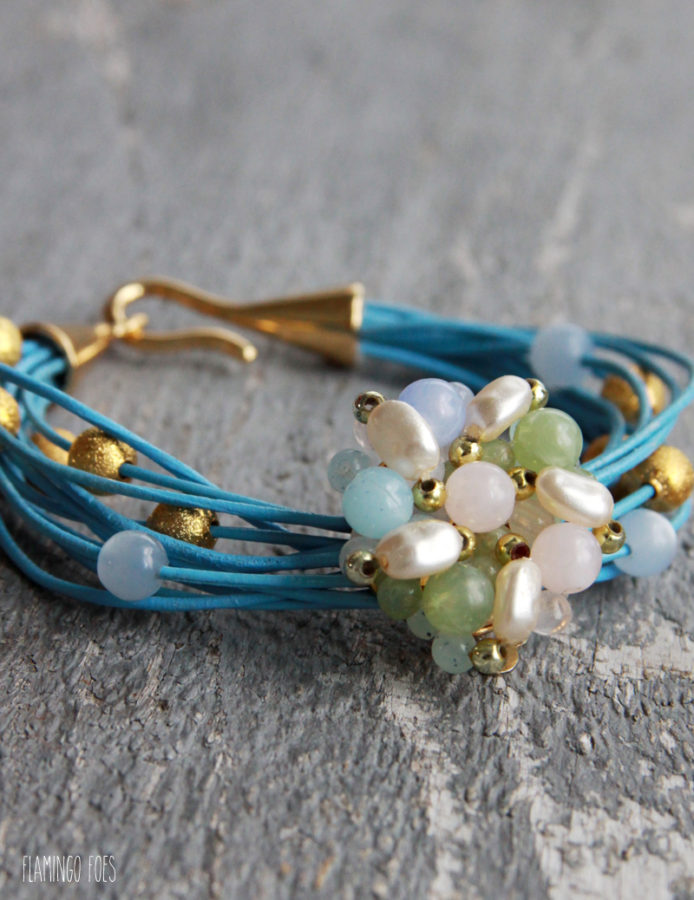
I dressed up the leather strands of the bracelet with some little beads that coordinate with the earring – I think they add a fun dimension to the leather. You could definitely leave them off though and just focus on the earring – that would be super pretty too!
So let’s get started!
Materials:
- Leather cording strand – about 70″
- Vintage Clip On Earring
- Beads that match your earring – make sure the holes are large enough for the leather strand to feed through
- 6mm wide hole Hook and Eye Bracelet Closure (Mine came from here)
- Scissors
- Jewelry Glue – I used E-6000
- Optional – round or flat nose pliers
Cut 10 strands of your leather cording – about 7″ each. Line up one end of all the strands – add a good amount of glue to one side of the hook and eye closure and place all the ends of the cording pieces into the opening.
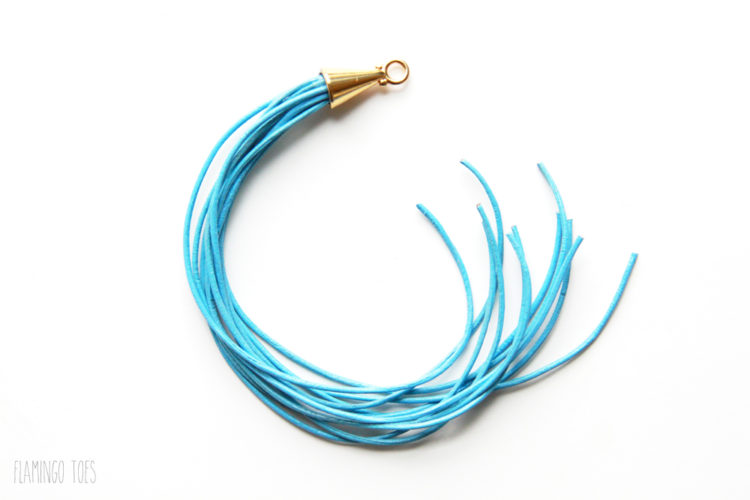
Wait until your strands are set in the eye piece before you start adding beads to the strands, otherwise you will possibly pull out the strands from the opening. Ask me how I know this. :)
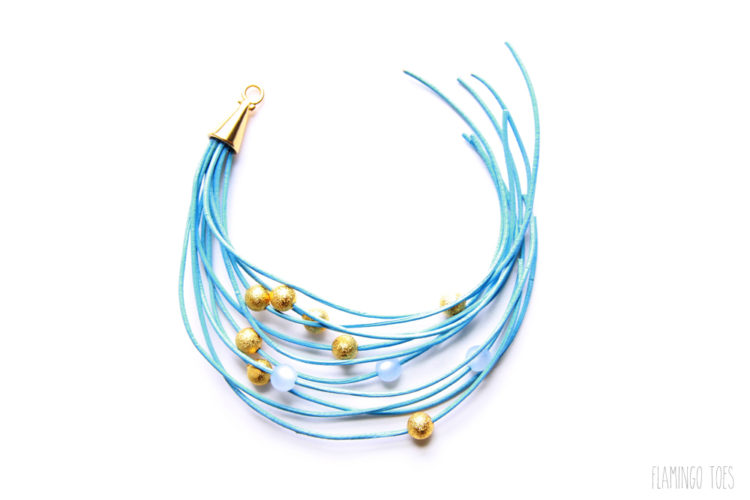
Once the glue is set up, add a bead to each of the strands, mixing up your colors if you want.
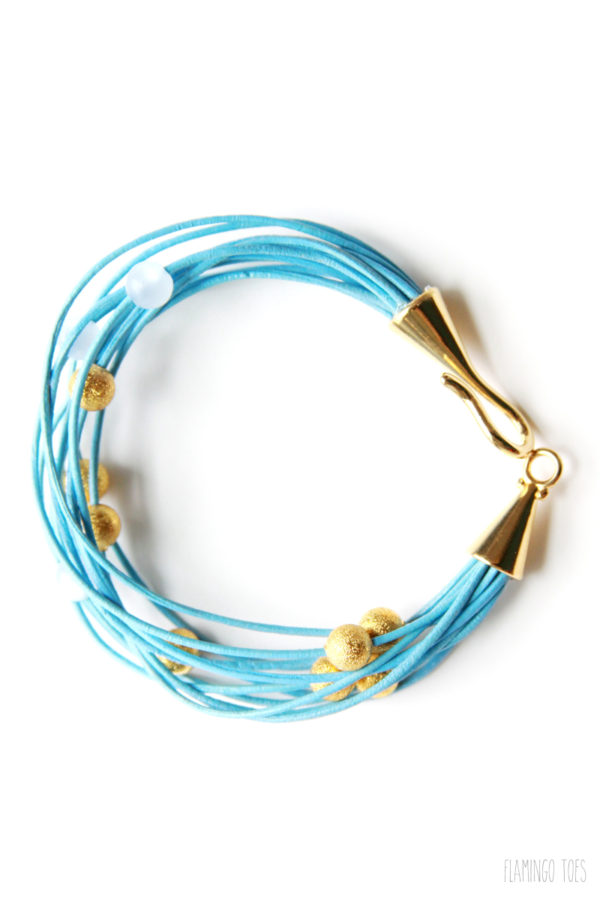
Line up the other ends of the strands and glue them into the opening of the other hook and eye piece.
For the earring, we’re going to glue the clip on portion of the earring around the strands at the center of the bracelet. Check to see how the earring clamps around the leather. If the earring stands out from the clip portion, bend it down just a little with the pliers so it lays just a little flatter. Glue the earring in place around the leather strands.
So super easy right? I love it!
I can’t wait to see your versions! There are so many fabulous earrings out there!
Here are all the other Snappy Creative projects – make sure you check them out!


Gorgeous! I love how easy this is to make (and thanks for the resource for the hook and eye closure; the ones I see at the craft store are never as cool as the ones I see on your blog! :)) Hope you have fun at SNAP–that sounds like a dream conference. I’ve been following along via IG with other bloggers and it looks like so much fun! :) Off to pin this bracelet-have a great day. :)
You make it looks so easy! Love the color combo, and what a great use of an old earring! Love it!
Lovely bracelet, I really like the idea of using an old earring and making something new. I also love how you found out that waiting for glue to dry is a necessary inconvenience – if you are anything like me once you get started you just want to get on with a project , waiting for pesky things like glue to dry is so annoying!