One of our kid’s favorite things to do when they were little was to do Christmas Countdowns, or Advents. I think at one point we had 4 or 5 of them around the house, of different types, and we’d hit each one at some point during the day and change the date or eat the candy or whatever the activity was.
Even though they are teenagers now, they still enjoy counting down to Christmas. Actually we all do. :)
I thought it would be fun to share a Christmas countdown chalkboard with you!
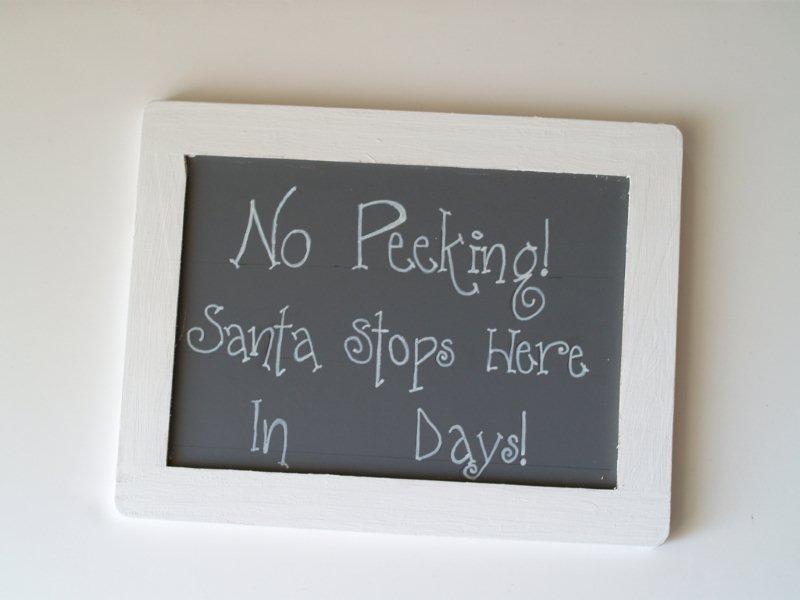
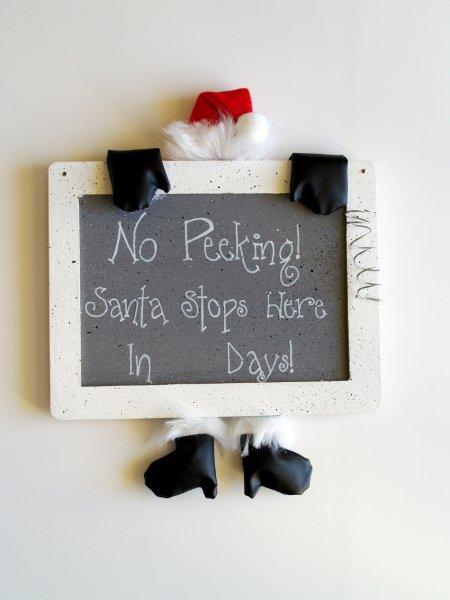
Here is my little “Santa Stops Here” Countdown Chalkboard.
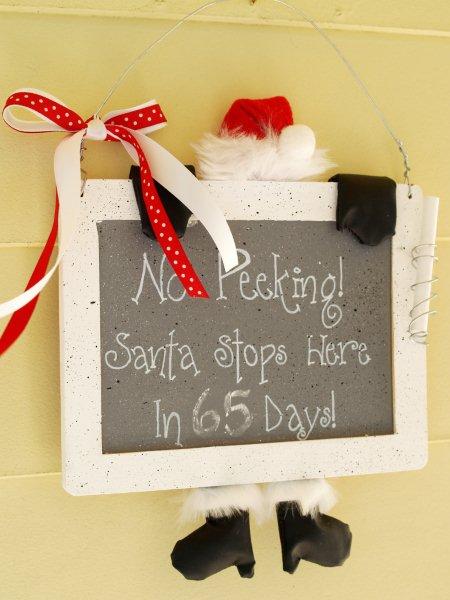
(I shared this at Me Making Do’s Christmas Week so I’ve reposted it here in case you missed it. Which explains the 65 days haha.)
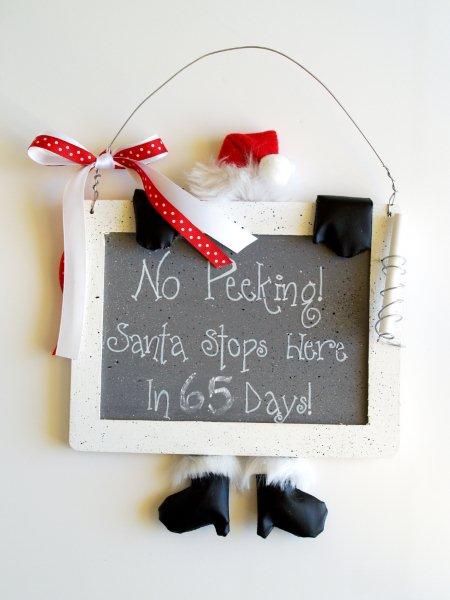
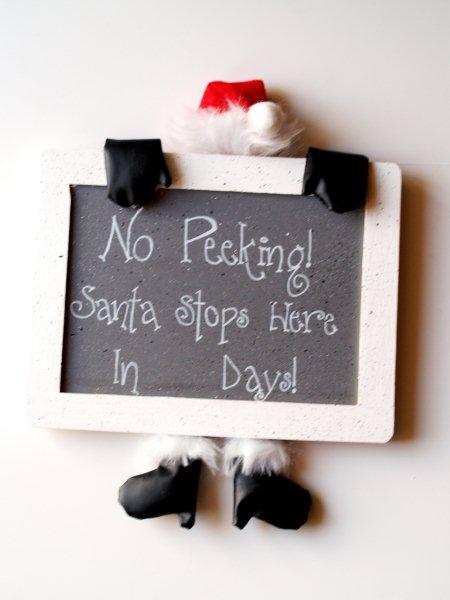
There’s a cute little Santa hiding behind the board (he’s not supposed to arrive until the 25th so he has to hide) and a wire chalkboard holder so you can easily change the number every day.
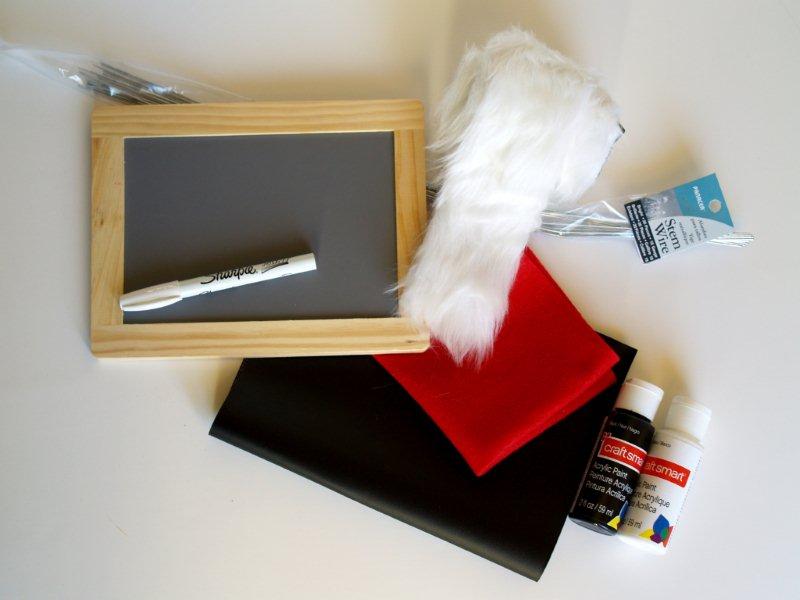
Ready to make your own?? You’ll need:
• A small chalkboard
• A paint pen (white)
• Craft Paints – white and black
• wire ( I used a pack of stem wire, 18 gauge – you just want something pretty thick)
• felt for hat
• fabric or faux leather for mittens and boots
• small scraps of fur or fleece for hat and boots
• 1 small white pompom
• very small amount of stuffing
• ribbon
• chalk
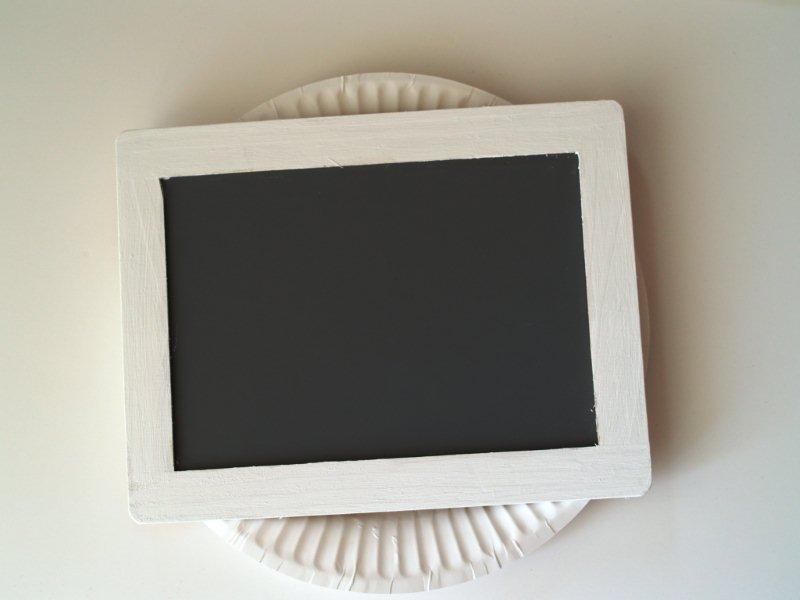
Start by painting the wood portion of the chalkboard white.
With the lettering, I find it easier to freehand write if I have something to look at for reference.
If you’re the same way, find a font you like and print out the wording on paper. Using a pencil, write out the words on the chalkboard lightly. Make sure you leave a space where the countdown number will go.
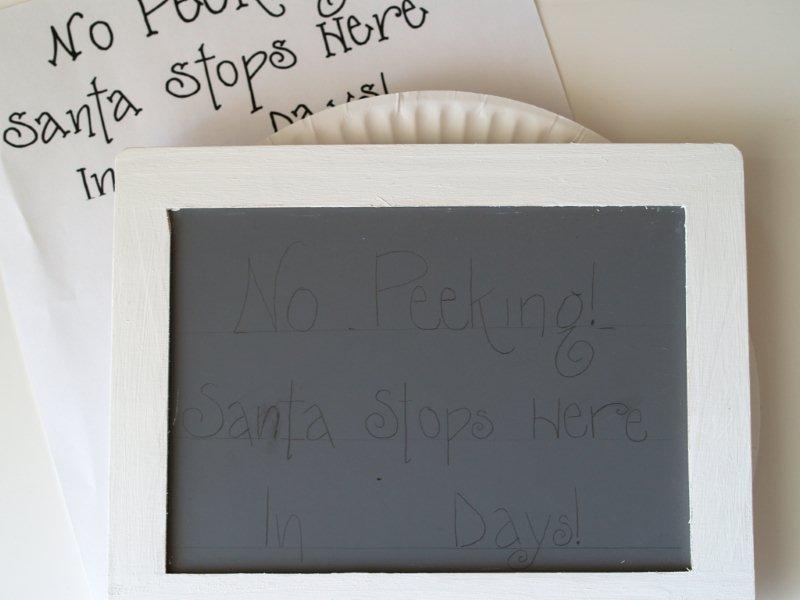
Trace over the lettering with your paint pen. Mine was a little light so I went over all of it twice.
(If you have a nifty cutting machine, you could also do this out of vinyl and just stick it on.)
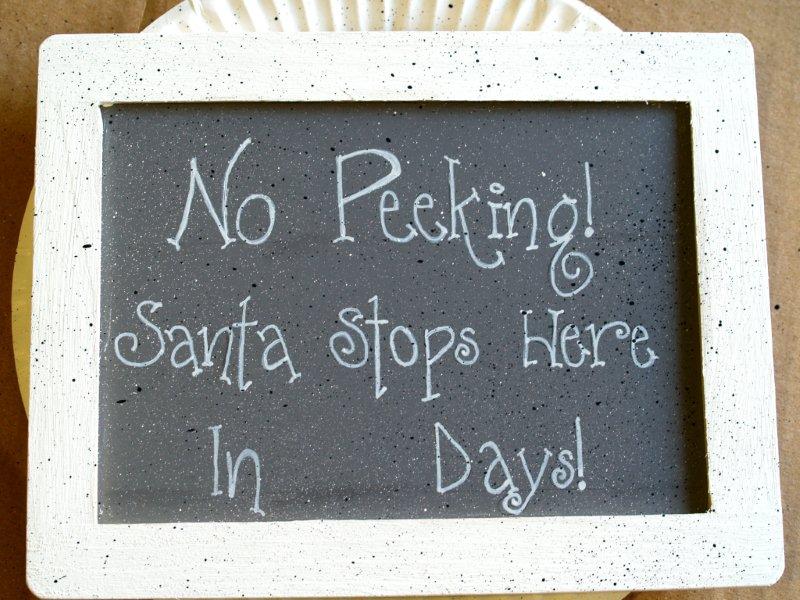
Spatter paint your whole chalkboard very lightly with white paint. A toothbrush or stiff paint brush dipped in paint works well for this. Test it on a scrap piece of cardboard or paper first to make sure that you like the look.

Repeat with black paint.
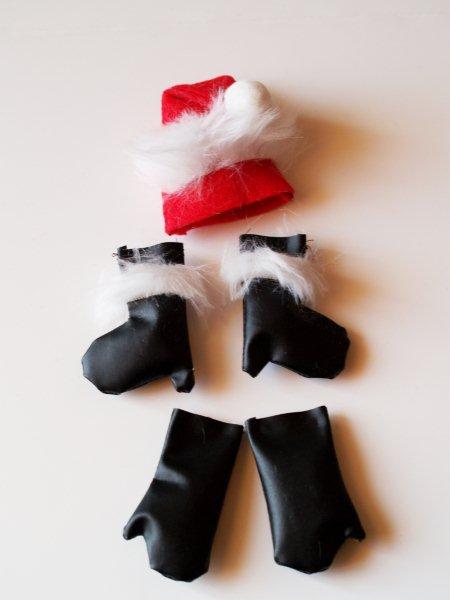
To get your Santa ready, cut out a small hat, mittens and boots. Cut two of each.

Sew the pieces together and then turn right side out.
This fake leather was TRICKY to turn right side out for the little pieces. Ack. I used a chopstick to help turn them right side out – and some inventive fake swear words. They helped.
Stuff a little batting in each piece so it doesn’t lay flat.

Glue (I used a glue gun) the fur onto the bottom of the hat and top of the boots. Leave about 1/4″ of space at the top of the boots and the bottom of the hat so you can glue them to the back of the chalkboard.
Fold the hat over and glue the tip down and glue a pompom on top of the end.
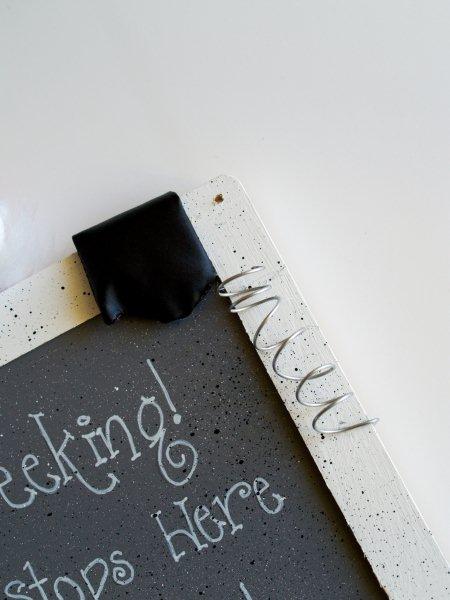
Glue all your pieces to the chalkboard. Glue the mittens so they wrap around the board – you want it to look like Santa’s hanging on from the back.
Find something round (like a thick paintbrush) that is wider than a piece of chalk. Wrap one end of the wire around the something round you found.
Try your piece of chalk in the loops and if it falls right through, twist the bottom loop a little tighter so that it gives the chalk something to rest on.
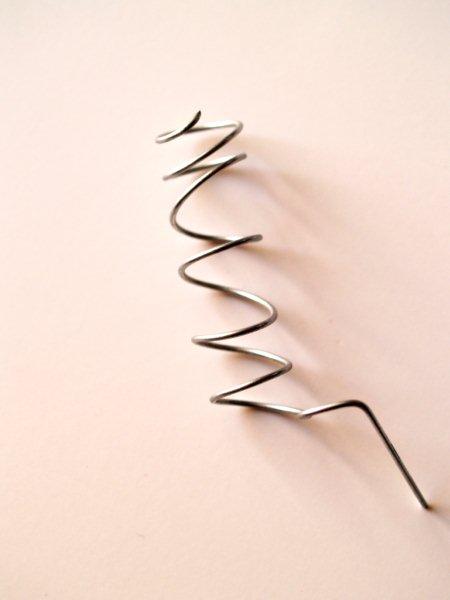
Place this on the right side of the chalkboard and wrap the straight end around to the back. Make sure it as flat as possible so it doesn’t scratch your wall. Glue it on.
Drill a small hole in the two top corners of the chalkboard.
Wrap the ends of another piece of wire through the holes and twist. This is what you’ll hang the chalkboard from.

Tie a bit of ribbon on one side of the wire for additional cuteness, and slide in your piece of chalk. Woohoo!
You’re all done!
Stress yourself out by writing out when Santa will be arriving.
I hope you enjoyed this little Countdown Chalkboard!


so so so so so adorable!!! i want to make one right now!
Cute idea!! We always bought advent calendars growing up and even though I’m all grown up, I still have to buy one every year! Only problem is that time zooms by so fast that I get behind opening up the little doors. :)
Awww…I love that! You really put together great tutorials Bev. It’s so clever…
I really enjoyed this at Me Making Do! A very fun countdown. I think my favorite part may be the chalk holder. Too clever!
This is too cute :) The black spatter paint made me think of soot be shook off my Santa.
I wish I had little ones to share with?
So adorable! I need to try this sometime! Hope you have a great Thanksgiving!
so cute!! I’m going to make one of these for my house!
Sorry! That last comment was from Marni @ Sassy Sites! xoxo!!
Ha, ha. Love it. Very helpful sign for someone with children. No more answering the dreaded question.
Very cute idea!!!
Sherry
WOW- this is just darling! I love it. Great tutorial too. WELL DONE! jen
This is soo stinkin cute! I love the head and feet! Hope you will share with my Pink Hippo party @ http://pinkapotamus.blogspot.com/2010/11/pink-hippo-party-4.html
LOL… I’m impressed with the toothbrush trick!
Super cute!
What a fun idea! I’ve been thinking of doing something similar…I need to get on it!
This is super cute! I love it! Come link up!
http://gigglesglitzandglam.blogspot.com/2010/11/glam-party-3.html
SO cute! I like the chalkboard idea!!!
Adorable!!! I’m blog hopping and found your blog. I’m a new follower. Would love for you to check out my blog and follow back!!
This is way cute!
You have the cutest ideas! Funny that my daughter, who is almost 12, had never seen an advent calendar or anything like it until the other night. Thought it’d be neat for her to have one. After tomorrow, I’ve got plans to make one of those advent block sets. Just picked up all of my supplies tonight. I’m doing a block/chalkboard combo so your tutorial will def come in handy.
Have a happy Thanksgiving!
That is such a cute project!! Happy Thanksgiving! Angie xo
This is adorable! I’m a new follower! Great job.
Simply adorable!!! Thanks for linking up to Thrilling Thursday @ Paisley Passions :)
What a great blog! I love that you have a 65 day countdown to Christmas!! I’m a new follower.
That is so cute! We have one similar to that but I bought it. I wish I was as talented as you so I could make one!
Best wishes,
Natasha.
Hi Beverly. This turned out adorable! Thanks so much for joining the Sunday Showcase – I greatly appreciate it. I have featured this today. Hope you have a fabulous week ~ Stephanie Lynn
Thanks for pointing this out Bev, sooo cute!!
http://homeandgarden.craftgossip.com/9-santa-crafts-for-christmas/
If you would like a “featured by” button, you can grab one here!
http://homeandgarden.craftgossip.com/grab-a-craft-gossip-button/
This is so cute….I missed this the first time. I love it.
You could use a white board and pen as well.