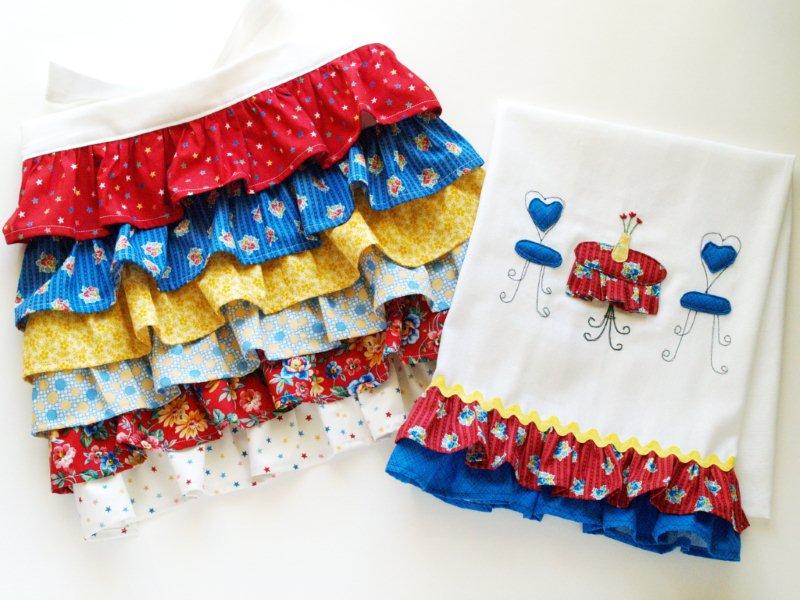
Welcome back! I hope you liked the first half of the set – the Ice Cream Parlor dishtowel!
If you missed the tutorial, click here to check it out!
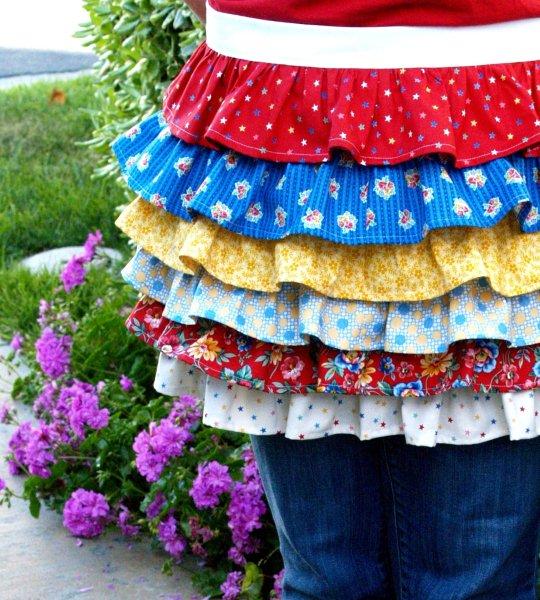
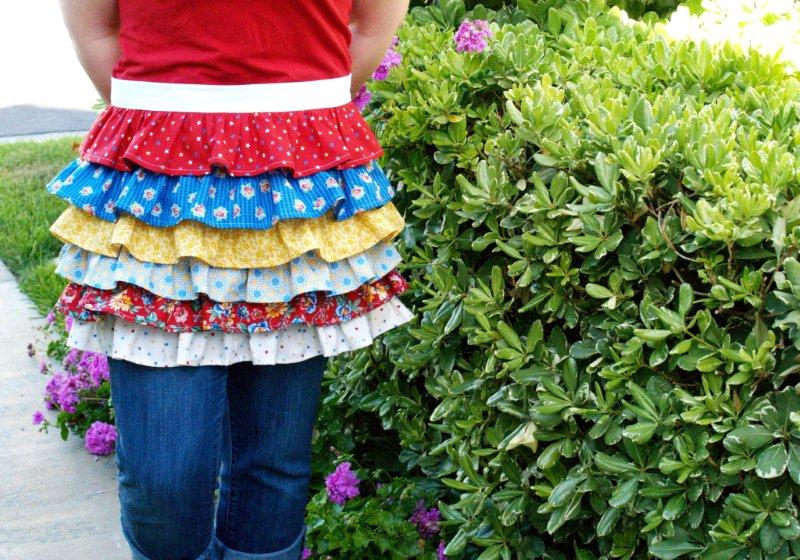
Today we’re going to do the Ruffled Apron.
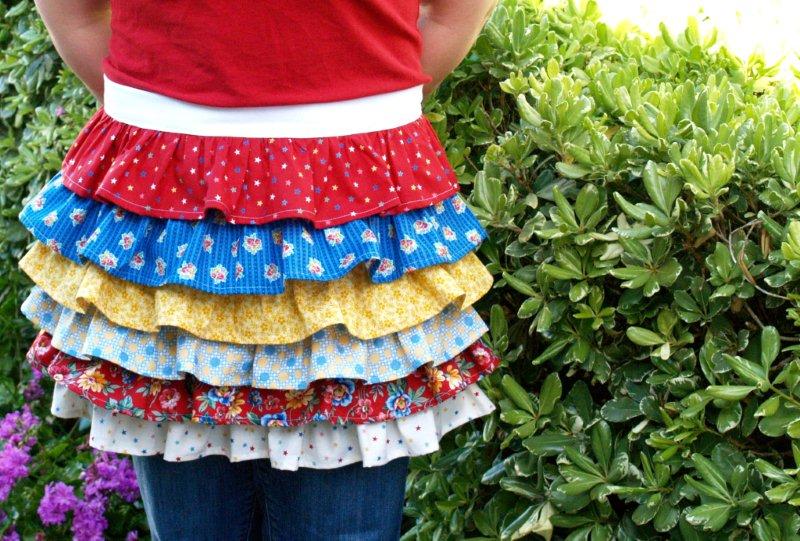
I know there are other tutorials out there – but I wanted to give it a try myself. And I wanted it really ruffley!!
Which is not a word. Spell check says so.
Who cares about stinky ole’ Spell check. There should be a dictionary just for bloggers.
Ruffley [ruhf-uhl-ee] – adjective – meaning to be very ruffled and full of yummy fabric.
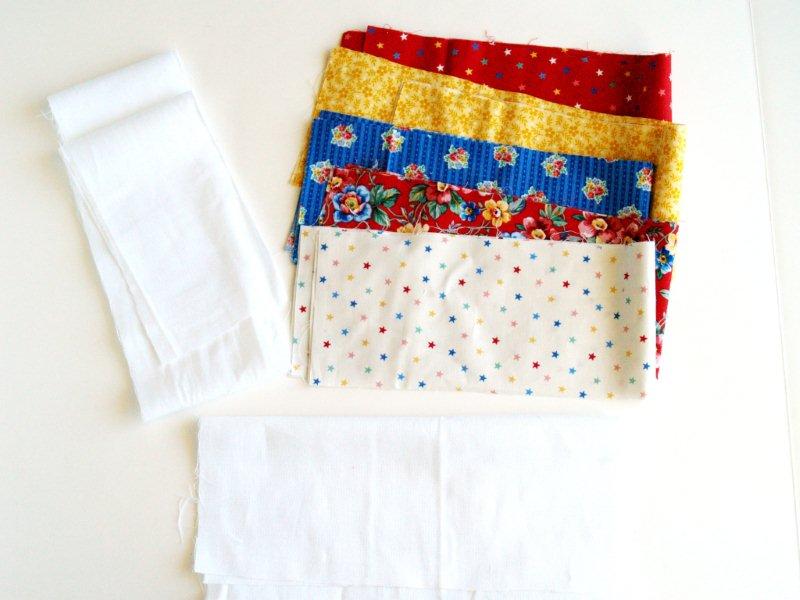
Here’s what you’ll need to make your own!
• Fabric for underskirt of apron and ties
You’ll need a piece 11″ x 24″ and 4″ x 78″ (if you don’t piece together your waistband and apron ties)
• Fabric for 6 ruffles
4 1/2″ x 42″ each
That’s it for this one – not too bad huh? ;)
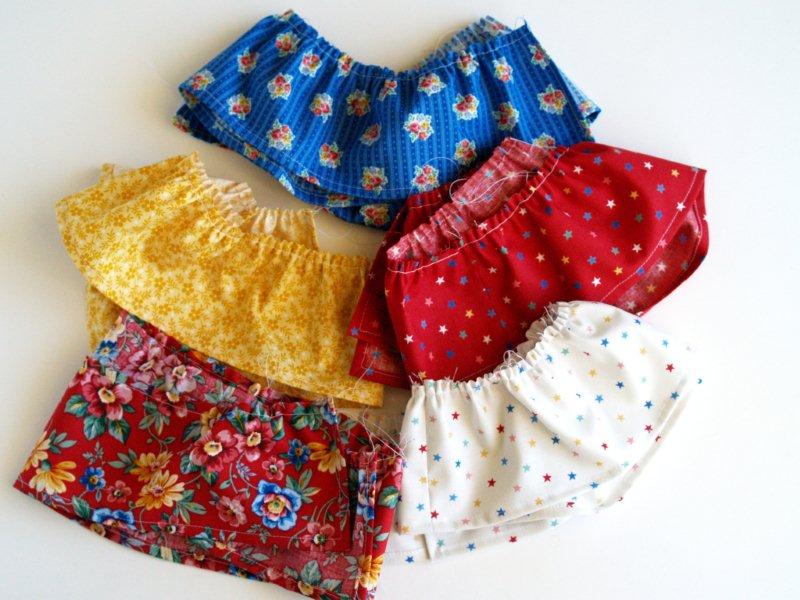
Start by cutting out all your pieces.
(This picture showes 5 fabrics for ruffles – I ended up using 6. So pretend there is an extra ruffle here, k?)
Hem the two short sides of your apron underskirt.
Hem the two shirt sides and the bottom of the 6 ruffle pieces.
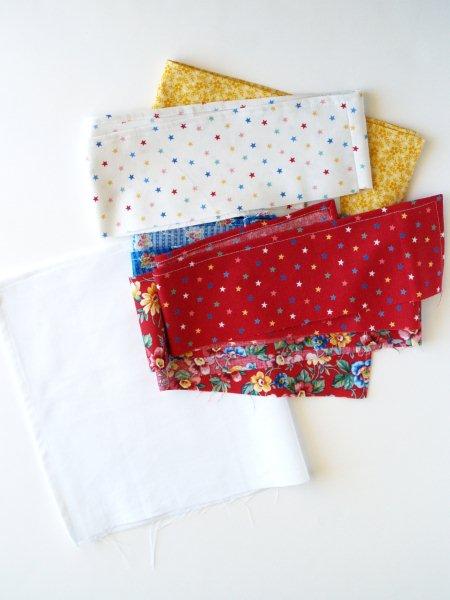
(Sorry the white underskirt is hard to see in these. I really need to get a colored background in these cases.)
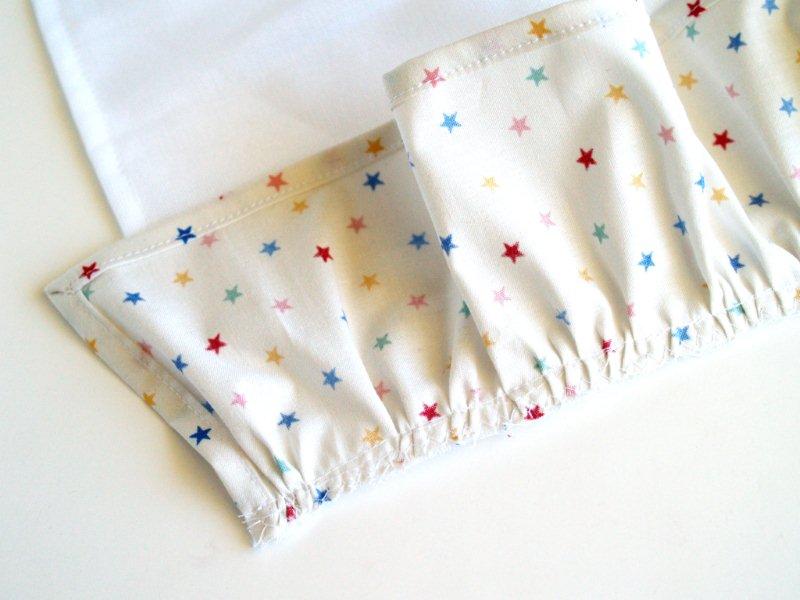
Sew gathering stitches along the top, raw edges of all of your ruffles. They should measure about 22″ when you pull up the threads.
Yes. We’re still pretending there are 6 ruffles in the picture.
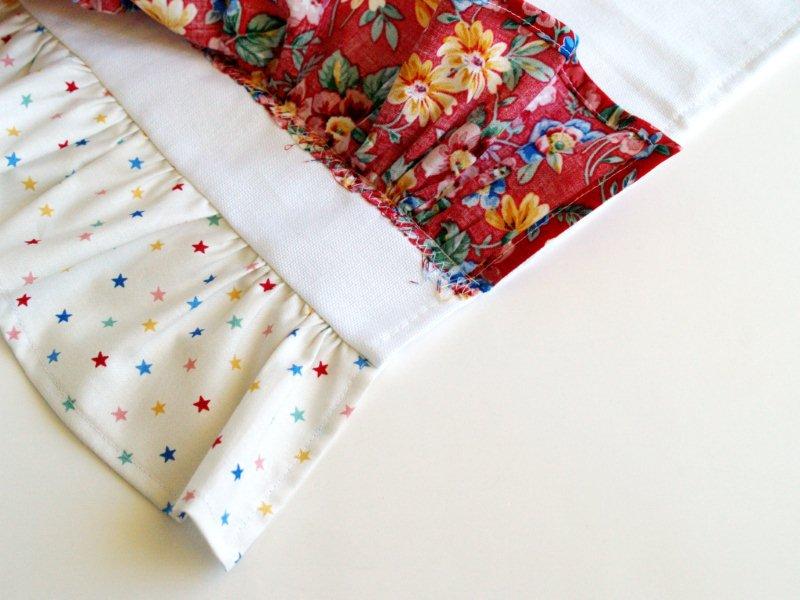
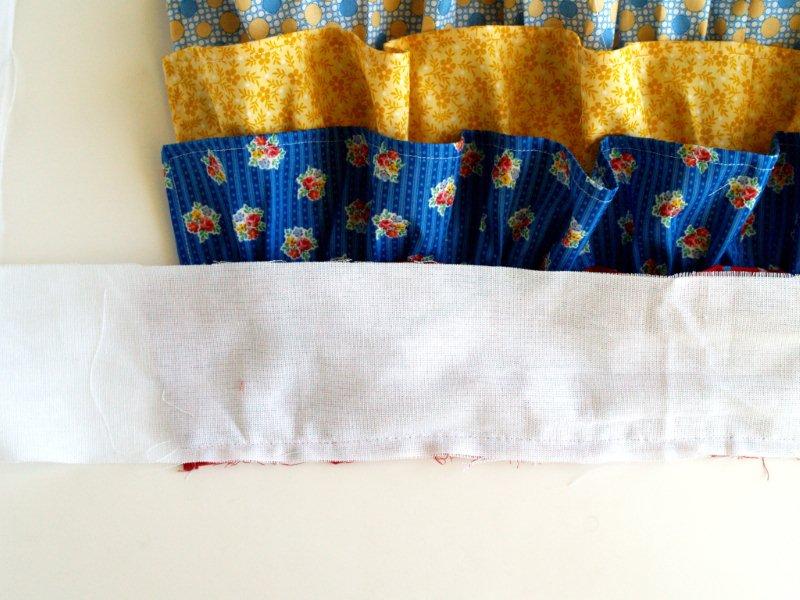
Choose which will be your bottom ruffle and lay it along the bottom of your underskirt, raw edges and right sides together.
Sew onto your underskirt.
Press the ruffle down.
Measure 1 1/2″ up from the ruffle seam on the underskirt and mark across with a disappearing pen.
Pin the next ruffle along the line, right sides together so the raw edge is along the line.
Sew in place.
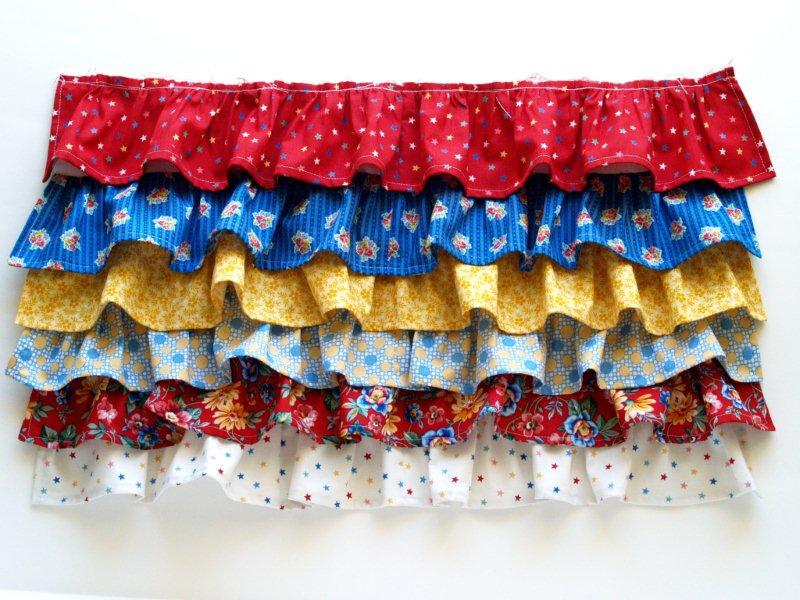
Continue pressing each ruffle in place and sewing the next above it, until you get to the last ruffle.
Line that up with the top, raw edge of the apron underskirt, with the wrong side of the ruffle to the right side of the skirt. Sew the ruffle down along the top.
Lay your waistband piece along your apron top with right sides together. Line up the center of your waistband tie with the center of the apron.
Sew in place with a 1/2″ seam allowance.
Press the tie away from the apron skirt, with the seam pointing up.
Press the tie in half, then press the raw ends under (to the center) 1/2″.
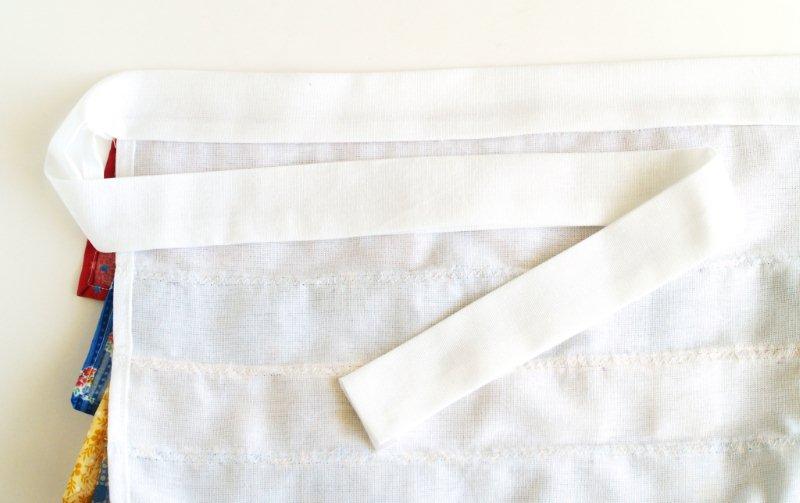
Topstitch close to the edge along the two short sides of the tie and the bottom. This will close the tie and sew the waistband to the back of the apron.
And that’s it!! Super easy, super ruffley apron!!
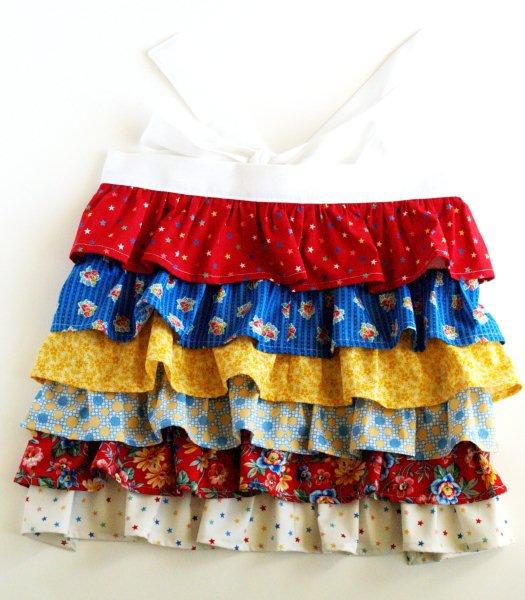

I seriously love all these ruffles.
What do you think of the set? Do you love it too? :)
I’m linking to Sunday Scoop, Today’s Creative Blog, Met Monday, Skip to my Lou, Tutorials & Tips Tuesday,
Quilt Story, and the other fabulous parties on the sidebar – make sure you check them out!


Bev! This apron is so wonderful!!! I love love love it! And I love the vintage repros you used!! (There’s another of those “blogger” words…;)). Soooo, ummmm, I’ll just send you my address & you can pop that little number in an envelope and send it on over…mmmkay? ;) Have a great week!
This apron is ADORABLE! Thanks so much for the tutorial. I pinned it! :)
This is super cute! I love it! It would be perfect for any holiday or just for fun.
Oooo, Bev! I really love the apron/dishtowel! I think I’m going to make this for my Nanny’s birthday! Thanks so much for the tutes :)
The whole set is so cute!
ADOOOOORABLE! SOO FEMININE AND FUNKY!!
I’m always looking for projects that will help increase my sewing abilities. This seems easy enough for me to follow. I love it!!
Those aprons are adorable!!
That is SOOO cute – I almost want to plan a BBQ so I can strut around showing off my ruffly apron. lol. =] I made an apron for my dad for Father’s Day (http://www.shabbybeachnest.com/fathers-day-tea-towel-apron/). All the way through making it I kept fighting the urge to add ruffles and flowers, and I had to remind myself that this apron was for my dad, who is definitely not the kind of guy who would appreciate those girly touches. Aprons are just so much more fun that way, though!! lol. Thanks for the adorable tutorial – I’m definitely going to be making it to soothe my ruffle junkie urges. ^_^
Oh my goodness! I love it!
So so soooooooooo CUTE Bev! Great job. LOVE IT! Thank you so much. Gosh, now I need to plan a party or go crash someone else’s wearing this cute apron. HA
Hi Ms. Beverly! These are darling! I’m gonna feature them Friday on my site! Thanks for sharing!
Jen
Super cute !!
I love, love, love your ruffle apron!! It’s darling. Perfect for summer!
so cute you could wear that anywhere over shorts a dress and looks great with jeans
Love it! Such pretty ruffles!
How funand easy is this apon …! I’d love for you to come and share this at my link party today. Great job!
thirtysixthavenue.com
Very cute and summery! Great job!
Yes I follow you here, twitter, facebook and google acount, network follow…
yes would love the number one set..thank you so much
chris
[email protected]
So, So cute!!!
Keep them coming. Love the things you come up with!!
Great tutorial. I am working on a “ruffley” apon right now too!
Amanda
So cute! Love the bright colors!
Would love for you to join my linky party!
http://www.inspiringcreationsblog.com/2011/06/friday-favorites-linky-party_09.html
I love how bright and cheerful that is.
I don’t sew…… could you make me one ???? Please !
So cue. I wish me and my sewing machine got along!
Very cute, it turned out great-enjoy:@)
That is so cute! I have been wanting to make one of these. I just might now!
Thank you!
~Liz
Super sweet set! Love, love, love!
This is so darling! I love it! Pinning it now :)
Ok, this is ABSOLUTLEY ADORABLE! i love the colors you choce, Iam going to be making these for my girls, way to go !
I think this apron would make my weekly chores Oh So Much More enjoyable! Plus I love the vibrant and festive colors that you chose! I love giving aprons as gifts, and this one would make any of my friends and family smile. Great design:)
Warmly,
Stephanie from Deviantly Domesticated
So adorable! I just love all the ruffles! ~April @ Wildflowers & Whimsy
This apron is just gorgeous! I love all those ruffles -and you explain how to in such a simple way! I’m off to check out the dishcloth tute too! I would be honoured if you would consider linking this fabulousness up to my little Round Tuit party at:
http://jembellish.blogspot.com/
Have a great week!
Jill @ Creating my way to Success
Happy Tuesday!
Lovely apron project~ a true metamorphosis.
If you get a chance, please stop by my blog and enter the giveaway.
Your apron and towel are just too cute! You did a great job! Would love for you to stop by and share it at the Tuesday To Do Party! http://blackberryvine.blogspot.com/2011/06/tuesday-to-do-14-and-13-list-makers.html
Smiles!
Jami
Oh! I love it!
Awesome! And I love that towel too! The ruffled apron is just gorgeous, thanks for the tute!
I’m such a fan of ruffles!! I just bought a ruffle foot and can’t wait to use it : )
I hope you will share at my party.
http://www.cherishedbliss.com/2011/06/craft-and-tell-no-9.html
I love, love, LOVE it!!!
Ca-razy cute!!!
This apron is adorable! I am going to feature this one and your darling retro ric rac apron on somewhatsimple.com this Thursday. Thanks for the inspiration!
-Steph
Very cute! I need to make my Valentina an apron soon.
Love this apron. I have been away from sewing for 30 yrs and just ordered mysrlf a new sewing machine as I qant to get back into sewing. But I need a pattern to follow. Where is the pattern?
Hi Fran!! How exciting that you are getting back into sewing! That will be so fun.
For this apron, you don’t need a pattern. I have measurements of the fabric pieces you’ll need – they are just rectangles of fabric so you can use a measuring tape to measure and cut them out. The fabric piece measurements are under the second picture in the post.
I hope that helps – let me know if you have any other questions!
Good work so soon Sagrb Thank you:)
This symbol (•) was up at the beginning of the fabic needed above. Could you tell me if this is a typo, or is it an amount or size fabric I need.
Thank you
Sorry for the confusion Brenda, I’ve had some funny things show up on my blog since I changed servers.
It is just a bullet point. Under each phrase are the size fabric pieces you’ll need to cut out of the base fabric and for the ruffles.
I hope that helps!
Bev
This is one of the cutest things I have seen on Sewing it all up. I plan on making this asap. I will feature it on my blog and have already pinned it. SEW CUTE!!
very cute and I’m sure if one wanted they could change the size of the underskirt and ruffles for larger or smaller sizes without much trouble.
Could you make a skirt that goes to the knee with this sort of pattern ruffles? Maybe just add wider and more ruffles and loner to go all around the waist.
Could you do a layout tortal for a ruffled skirt Beverly? I would to see it.
Thanks
Love the fabrics and the beautiful threads. I live in Fallbrook. We are neighbors.
Love this tutorial!! Thanks for sharing! Peg
Love this! Looks easy enough for me! What size will this fit? A size 10 woman? A size 10 girl?
Hi Alex! The measurements should fit a woman – anywhere from size 2 up to maybe a 14? I’m just guessing there. I think if you’re doing a larger size than that, you’ll want to add some fabric both to the rectangle underneath and the ruffles.
Thanks for stopping by!
Bev
What size will this fit? Size 10 woman? Size 10 girl?
I love it!