Mother’s Day is just around the corner! Somehow it has snuck up on me this year!
If you’re in the same boat I have a fun and easy wrapping idea for you today – as well as an amazing gift idea!
I recently had the chance to try out the new Heidi Swapp Minc Foil Applicator machine and let me tell you – this thing is awesome. If you’ve visited around here before you know that I have a deep and abiding fear of paper crafting. Seriously – I’m kind of a mess with it. So I was a little leery to try this out – but it was sooo easy!
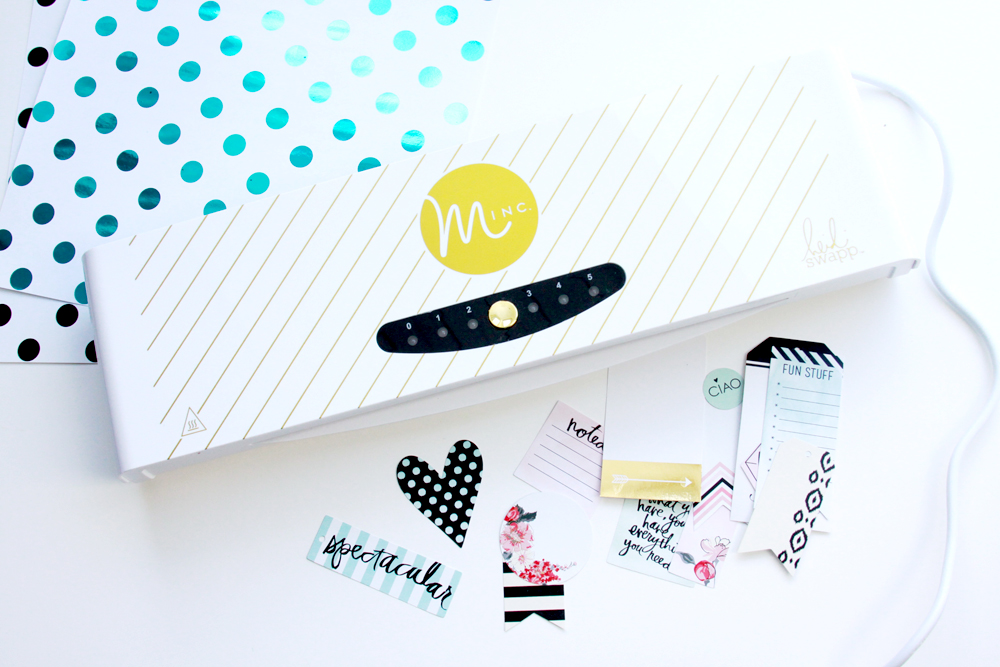
If you haven’t seen the Minc before, it’s a new machine from Heidi Swapp that applies foil to toner on their pre-printed accessories or to a surface printed on a laser printer (or copier). It will NOT work with an ink-jet printer. It’s a little similar to a laminator in that it applies the foil with heat, but it has 4 rollers instead of 2 like a regular laminator and it has 4 heat settings!
I got out some supplies and started foiling all the things!
I used a Number 3 heat setting for most things – that works great for most heavy papers or card stocks.
All you have to do is slip your surface in the laminating sleeve, lay foil over the top and make sure it is laying flat with no wrinkles or bubbles, lay the top of the sleeve over the foil and then feed it through the machine!
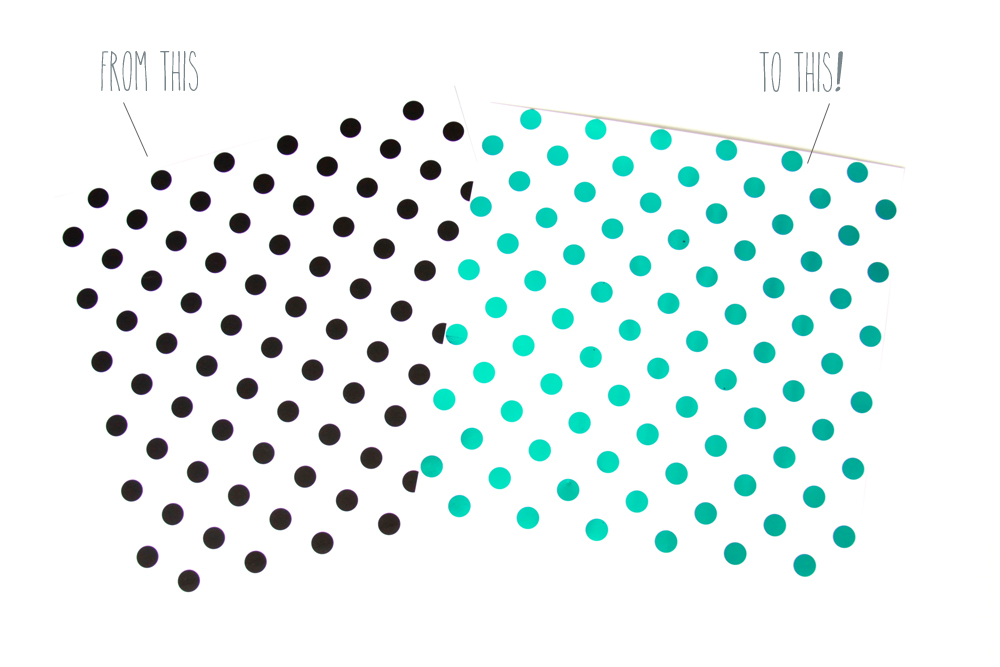
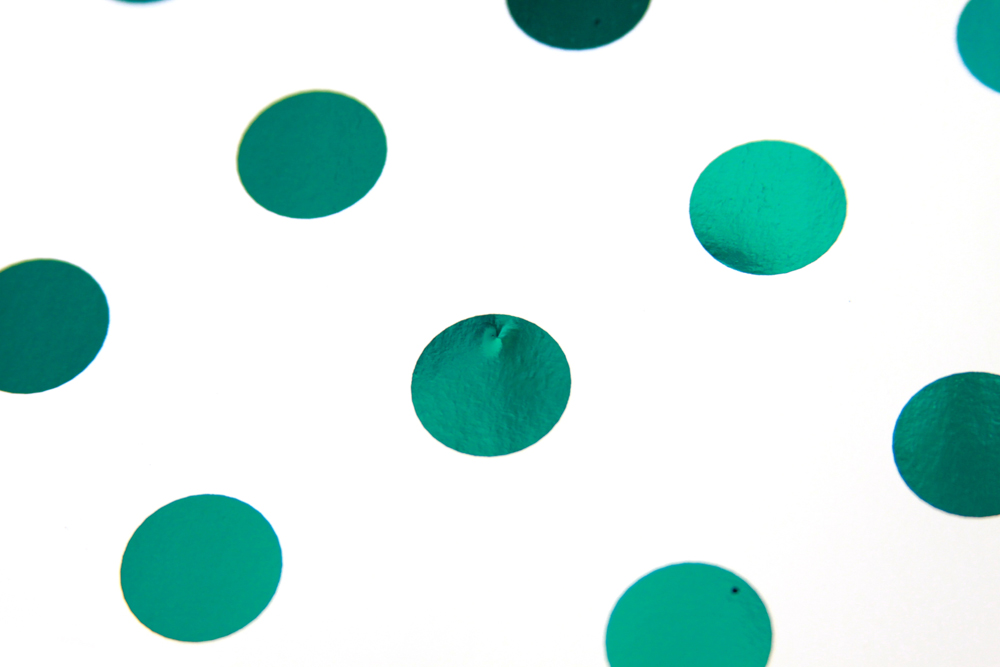
The foil fuses to everything printed with the toner – so it takes all the black and turns it into fun metallics! There are so many great foil colors too.
Here are some tips I learned:
- Make sure your sleeve, paper and foil are all clean and laying flat. No little fuzzes or shmutzes on there – the foil will either have a bubble or won’t adhere to the toner. See the little bubble in the foil?
- Use the right heat setting for the job – there are labels right on the accessory items to tell you what to use.
- Make sure your scissors are sharp – dull scissors won’t cut the foil well and will leave jagged edges
- Once you’ve put your paper through the machine the toner is activated and you can’t run it through again, so make sure the foil covers all the black areas you want to cover.
- You can re-run the foil through though – so save all those pieces that have large open areas and use them on smaller projects!
It’s really pretty delicious pulling that foil off and seeing how awesome the project looks afterwards.

I had a pretty easy time with everything! I did have a little bleed on my chipboard piece – the foil stuck to some of the outer edges of the letters. I just scraped off as much as I could with the dull side of my Exacto knife and I was able to get most of it off. This is pretty close up – it’s not really noticeable with the eye. Or with my eyes anyway. :)
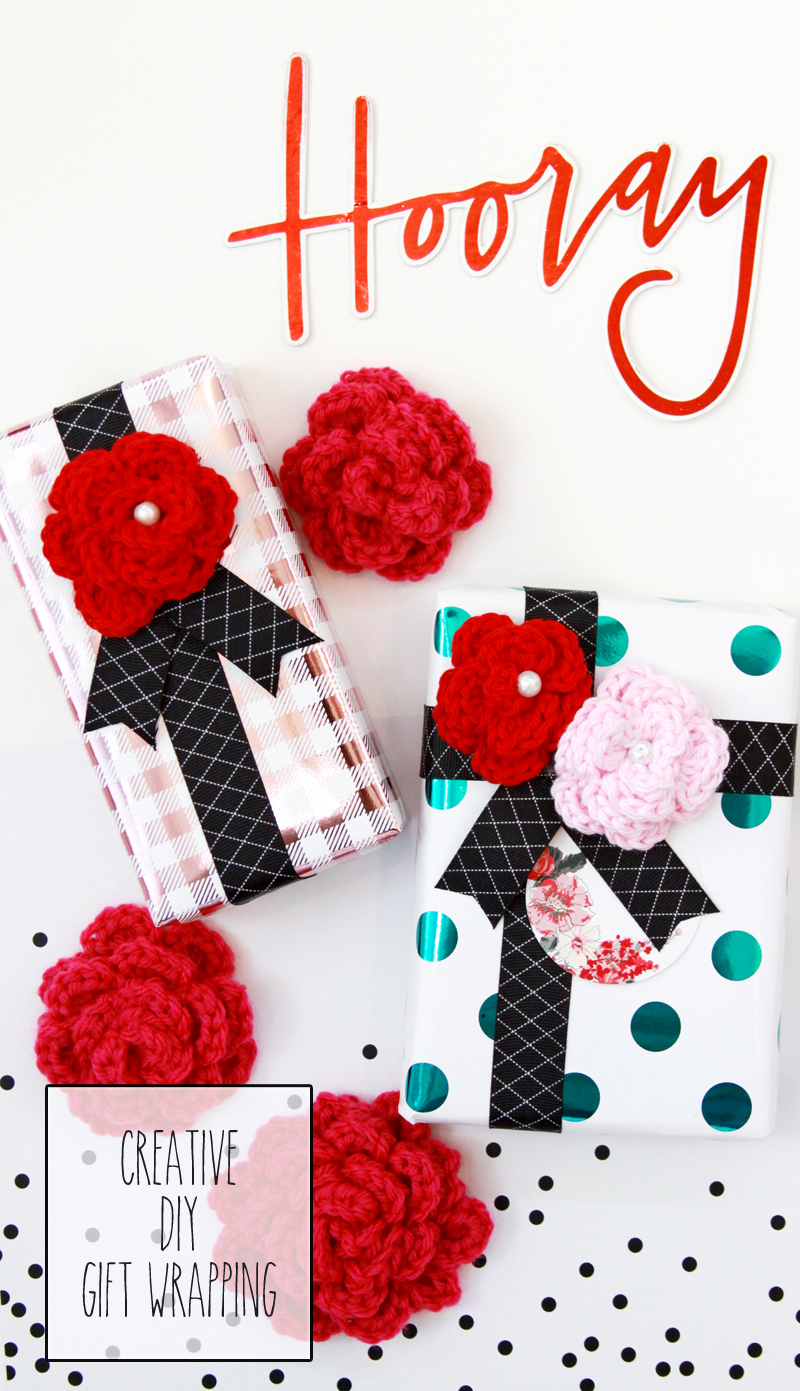
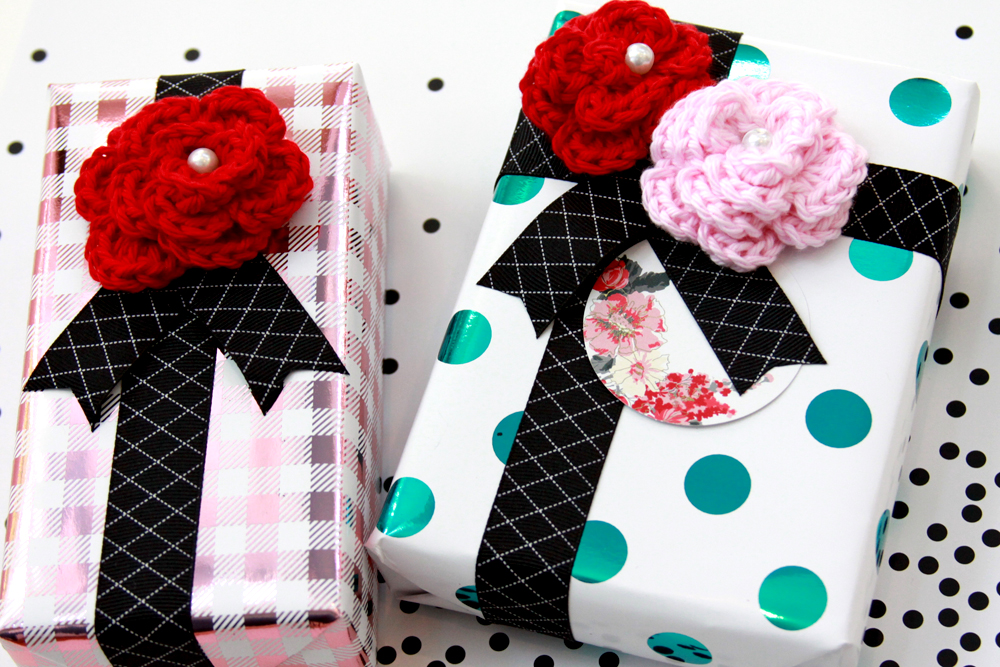
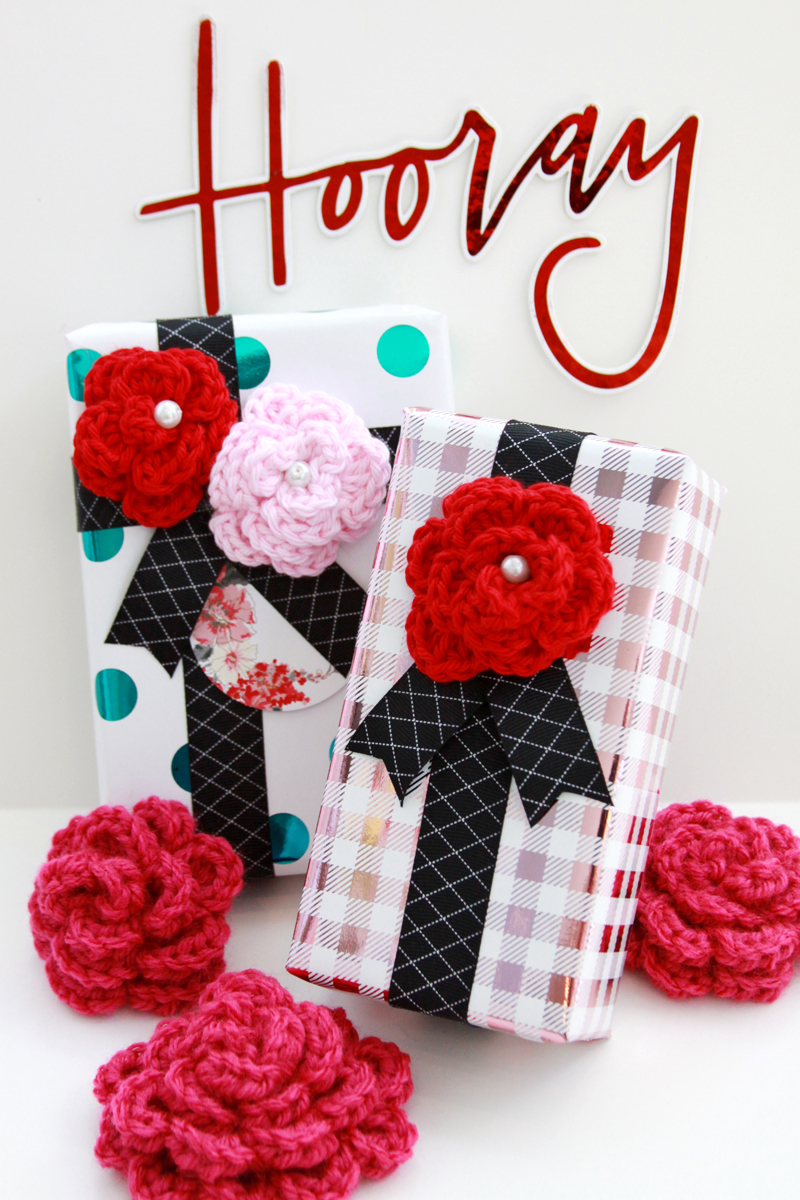
I wanted to wrap up some presents for Mother’s Day and I thought it would be fun to mix the pretty metallic papers with some of my crochet roses – I love using different textures together!
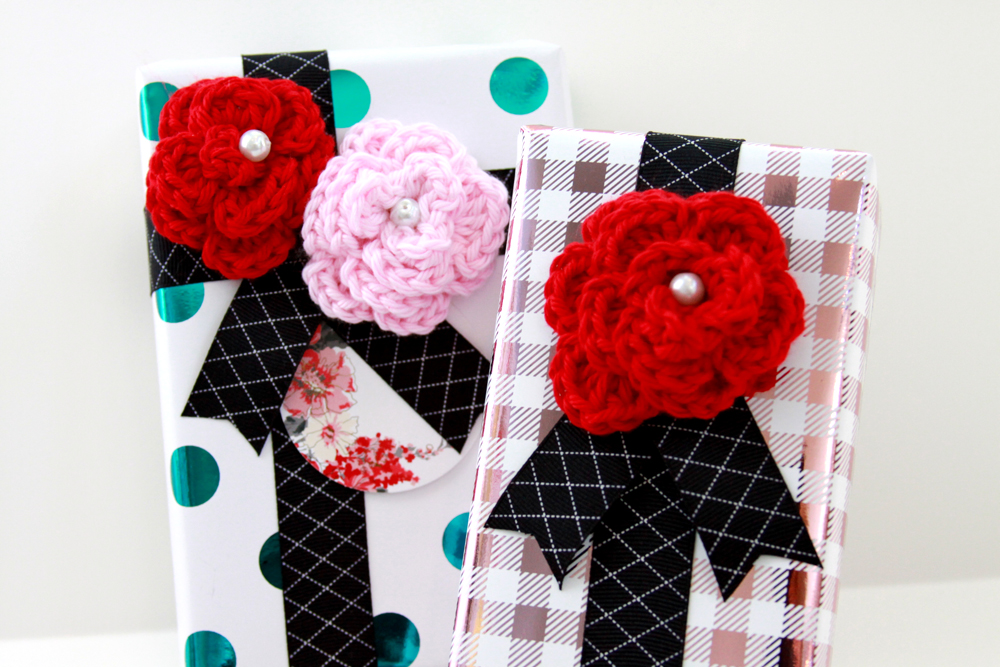
The paper patterns are so gorgeous and even the little extra tags and things are so pretty.
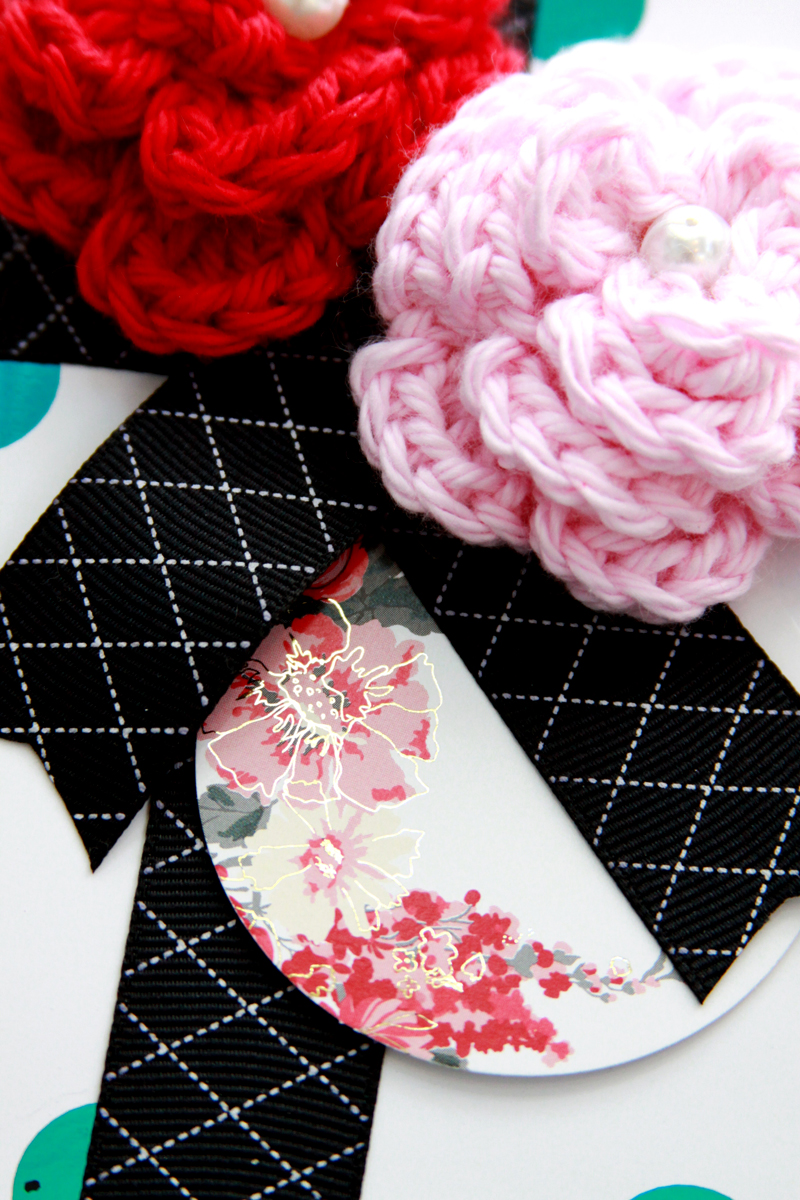
I was excited to find a way to use up these crochet flowers I keep making up! I used the tutorial over at Skip to My Lou to make these roses – I added a little pearl center to mine.
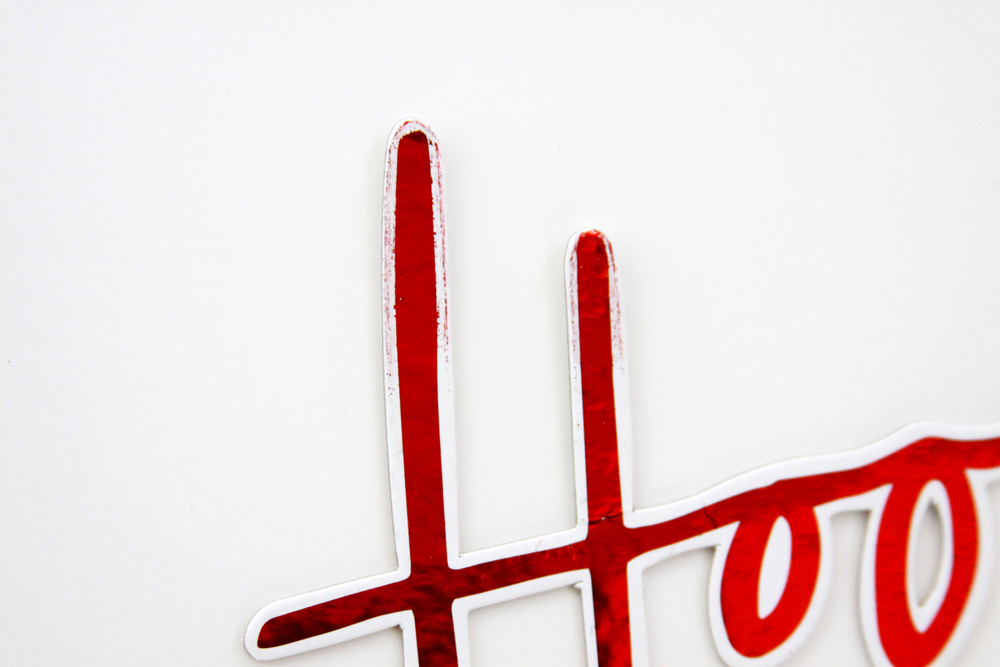
I think the little chipboard “Hooray” is super fun too – I’m going to use that for all sorts of parties and cake decorations! Or maybe even just to hold up when people say interesting things around here. I’m sure that will go over well.

Here’s a little more info about the Minc:
- Minc Foil Applicator and Starter Kit are $149.00 Minc. The Foil runs $9.99 (foil is 12” x 10’) and accessories range from $2.99 to $12.99
- Minc Foil Applicator and accessories are available at Hobby Lobby, Jo-Ann, as well as locally owned craft stores and online shops
- The machine is a fairly light weight and compact. It measures about 19.5” x 5” so it doesn’t take a ton of storage space. Which I totally don’t have much of. :)
- Minc features:
- Ability to accept a 12” wide sheet
- Four pressure rollers (most laminators have two) to evenly distribute pressure across a 12×12 surface.
- A heating element that covers the entire 12”, as opposed to heat focused at the outer edges (also common in every day laminators)
- The adjustable heat settings let you apply foil from everything to vellum, chipboard, even thin wood veneer! (You know I’m going to try that!
I can’t wait to show you more of the things I make with it! I have so many ideas!
If you want to check out some of the other projects people have made with the Minc you can follow along with Heidi here:
- Facebook http://facebook.com/heidiswapp
- Instagram http://instagram.com/hkswapp
- Pinterest http://www.pinterest.com/heidiswapp/
- Twitter http://twitter.com/heidiswapp


i got mine the first release date (and cheap) and have been obsessed ever since!!! it is SO much fun – i just can’t get enough
I **love** the idea of making my own foil gift wrap!! I seriously need one of these machines to show up on one of the deal-of-the-day sites I stalk. I need one!! :)