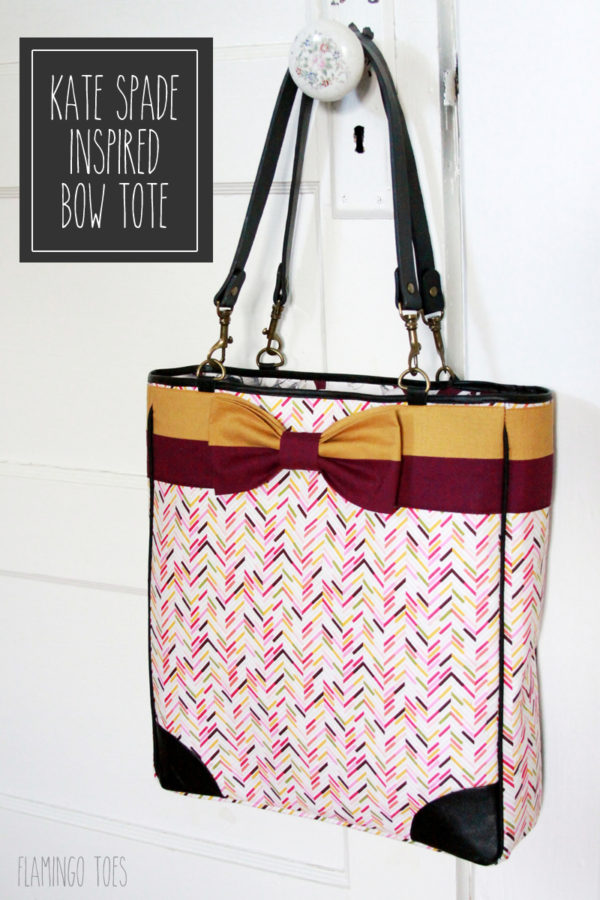
Since we’re getting all geared up for Fall around here, I thought it would be fun to make up a new bag for Fall! Ok that’s kind of just an excuse cause I wanted a new bag – but it sounded pretty good right?
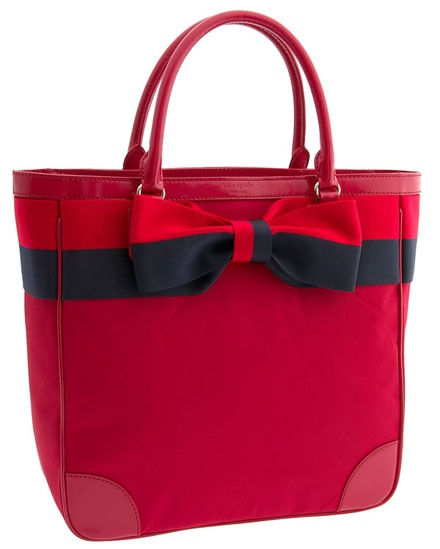
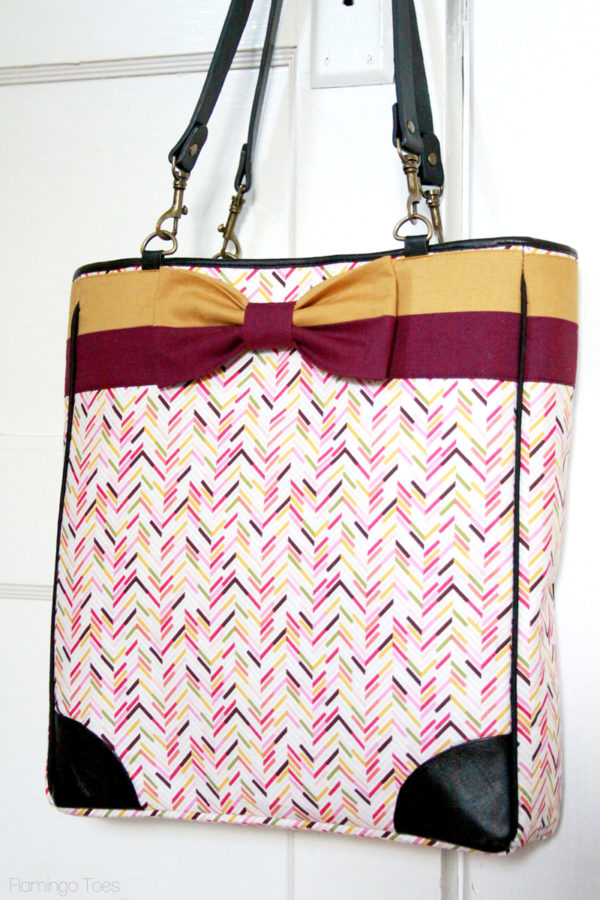
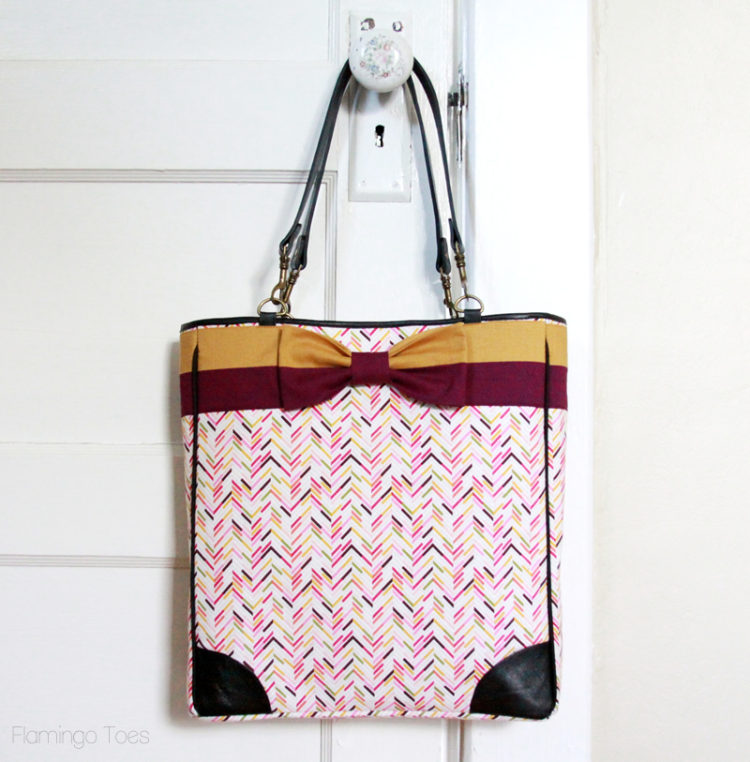
I snooped around a little at some Kate Spade bags, looking for a little inspiration, and I found a darling tote with a big bow on the front. Hello cuteness! I got busy sewing and today I’m sharing my new Kate Spade Inspired Bow Tote!
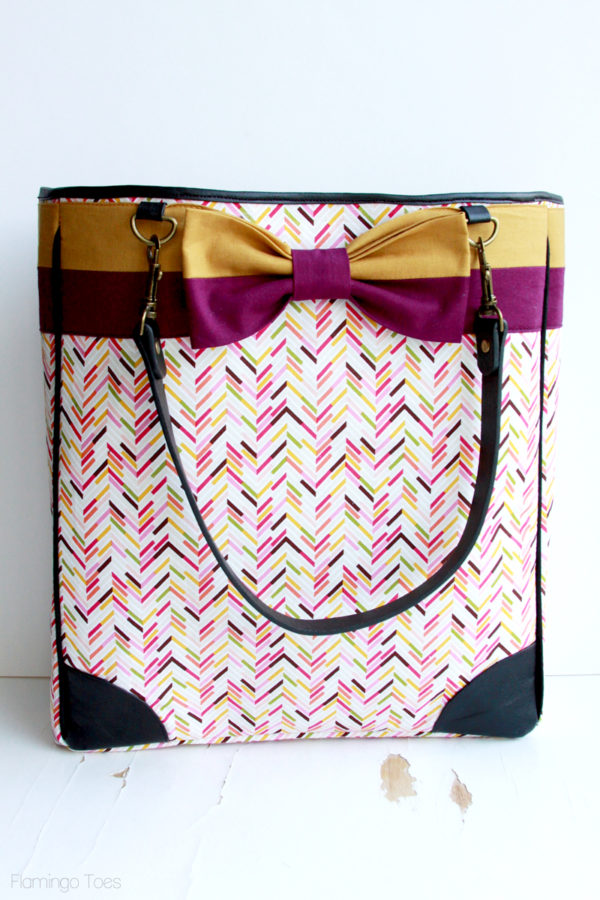
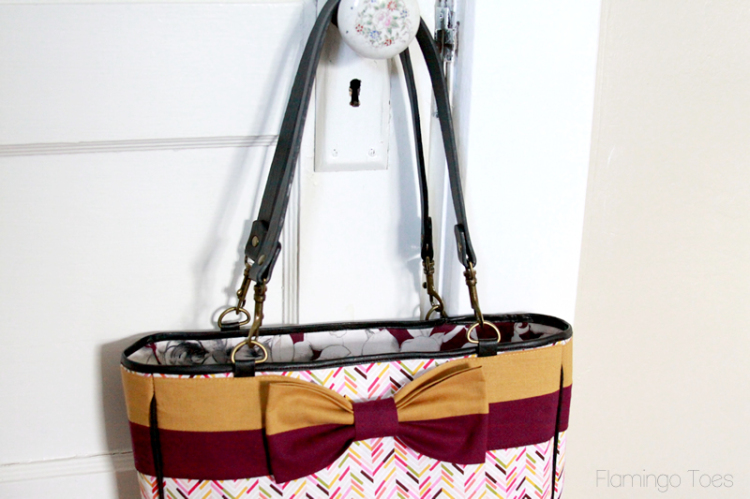
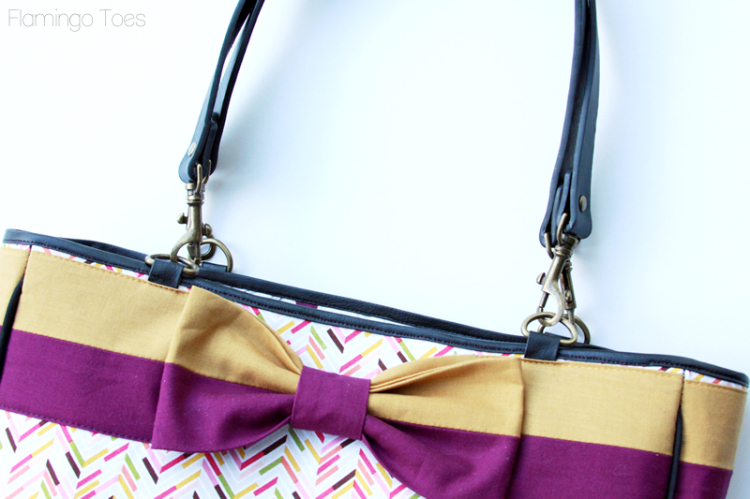
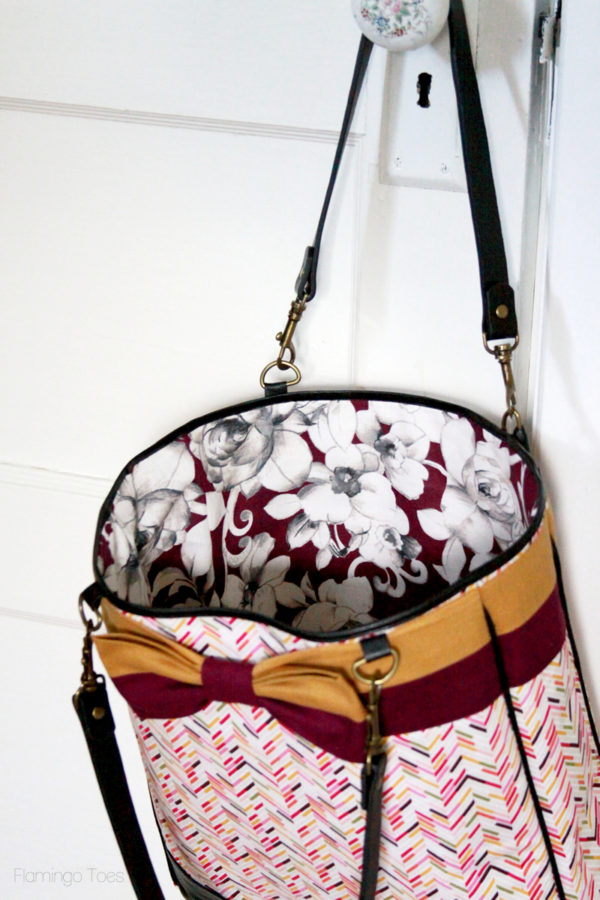
I used some purchased purse handles – I think they add a great touch with the leather and the antique brass connections. I added a few more little leather touches, in the bottom corners and as a little trim at the top. These were super easy to add in and I think they give the bag a more professional look, don’t you?
Here’s the inspiration bag. I love this one so much but I wanted mine a little more colorful.
The fabrics I chose are a yummy combo of plum and a mustard gold, which I thought would be super great as Fall colors. Though you could make up the bag in anything you want!
So let’s get started on the tutorial!
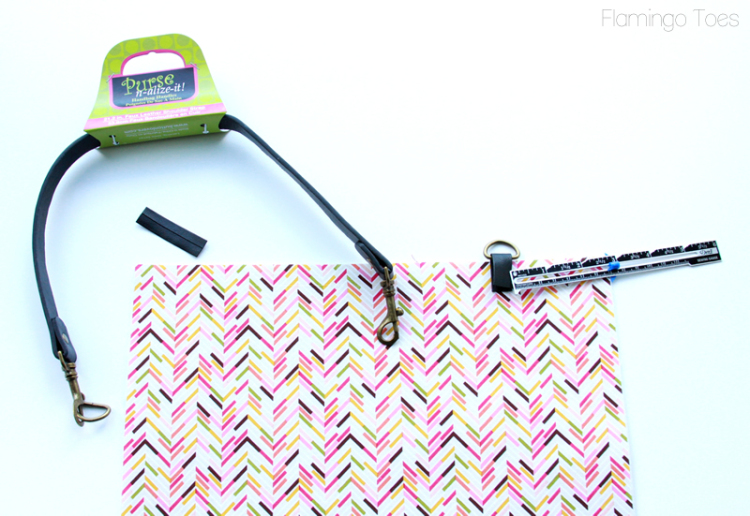
Here’s your materials list. All my supplies came from Jo-Ann Fabric and Crafts.
- Outside Fabric: 1/2 yd
- Lining Fabric: 1/2 yd
- First Contrast Bow Stripe: 1/4 yd
- Second Contrast Bow Stripe: 1/4 yd
- Heavy Craft weight Interfacing: 1 1/4 yd
- 2 Purse Handles
- 1 Pkg Piping
- 1 1/2 yds leather bias tape
- Leather scraps for corner pieces
Cut out your fabrics in the following amounts:
- Outside Fabric: 2 pieces 14″ x 13″, 2 pieces 14″ x 4″, 1 piece 13″ x 4″
- Lining Fabric: 2 pieces 14″ x 13″, 2 pieces 14″ x 4″, 1 piece 13″ x 4″
- First Contrast Bow Stripe: 2 pieces 13″ x 2 1/2″, 2 pieces 4″ x 2 1/2″, 2 pieces 13 1/4″ x 3 1/2″
- Second Contrast Bow Stripe: 2 pieces 13″ x 2 1/2″, 2 pieces 4″ x 2 1/2″, 2 pieces 13 1/4″ x 3 1/2″, 1 piece 2″ x 4″
- Interfacing: 2 pieces 14″ x 13″, 2 pieces 14″ x 4″, 1 piece 13″ x 4″
Ok, now we can start with the fun stuff!
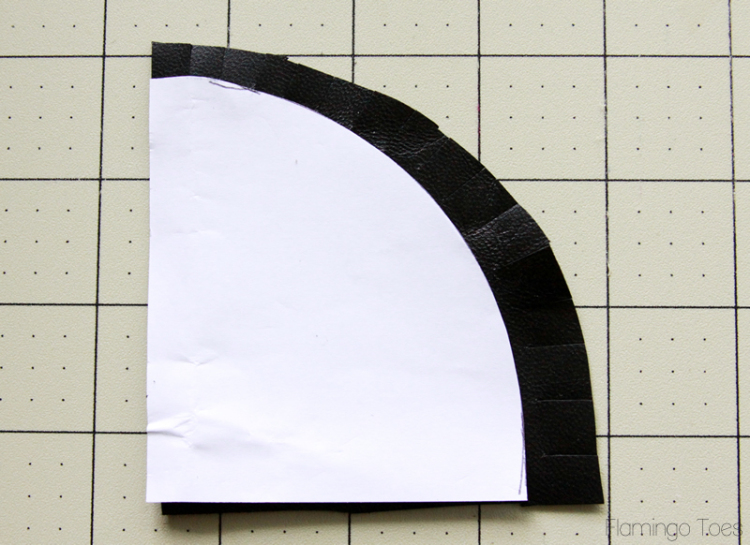
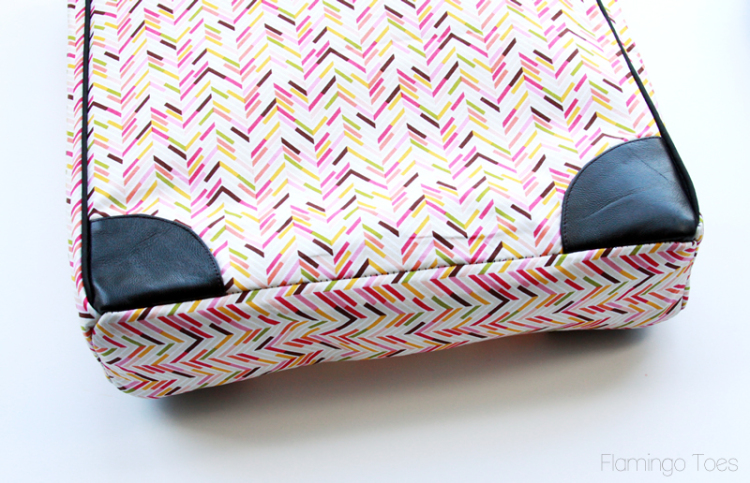
Use a small round bowl to create a pattern for the curve of your corner pieces. Trace the pattern onto paper and cut out four corner pieces from the leather. Make sure you flip the pattern for two of the pieces so the corners will face the correct way. Clip the curved edge of the leather piece so you can fold the edge over.
Line the side and edges of the corner pieces up with the bottom corner of the front piece. Fold the curved edge under and sew along the fold. Sew the other two sides down as well, to keep everything in place.
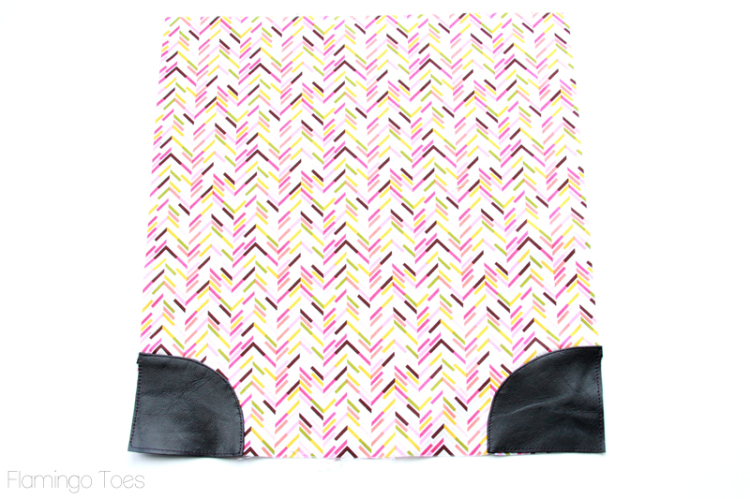
Repeat for the back of the bag.
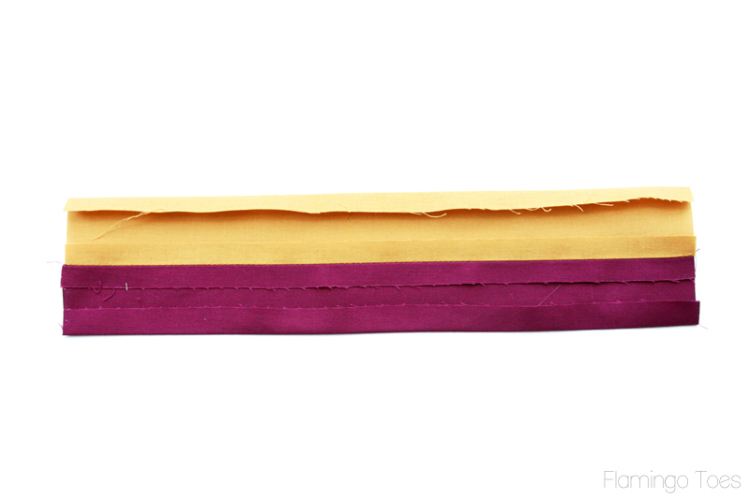
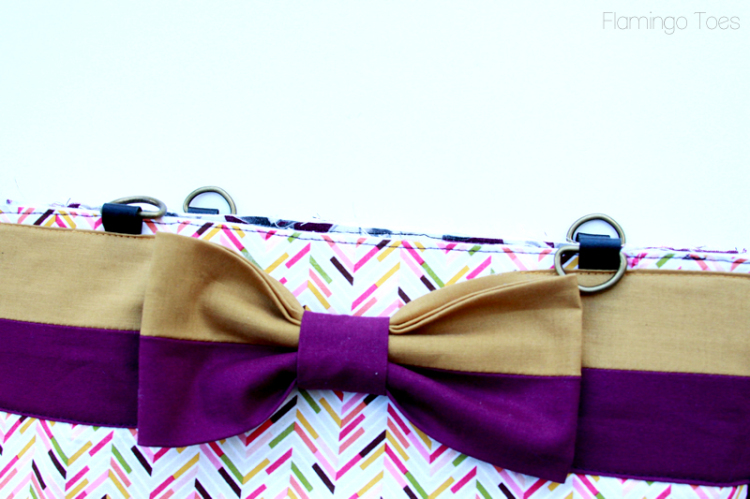
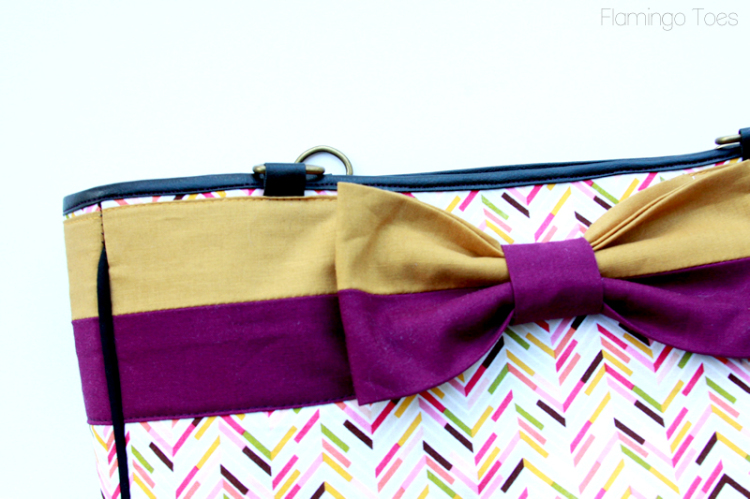
Sew the contrast bow pieces together for the back and sides. Press the top and bottom edges of the bow pieces to the back side, 1/2″ on each side. Sew the bow piece should measure 3″ tall.
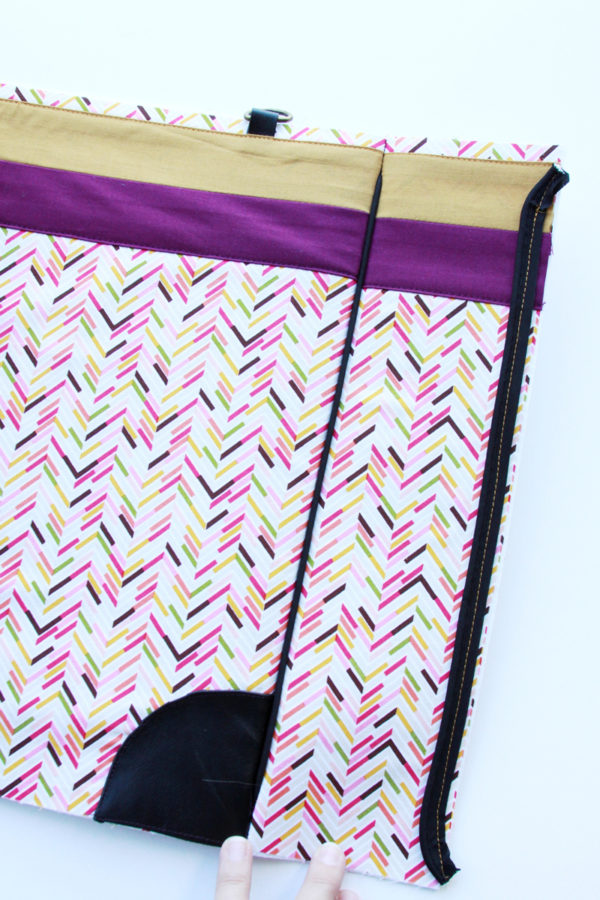
Cut two pieces of leather bias tape 2″ long each. Take the D ring off the purse handle end. Fold one of the bias tape pieces over the straight side of a d ring. Measure 2 7/8″ from each side and place the bias tape so that the d ring sits just above the edge of the fabric. Sew in place along the bottom of the bias tape. Repeat for the the other d ring, and for the back piece of the bag as well.
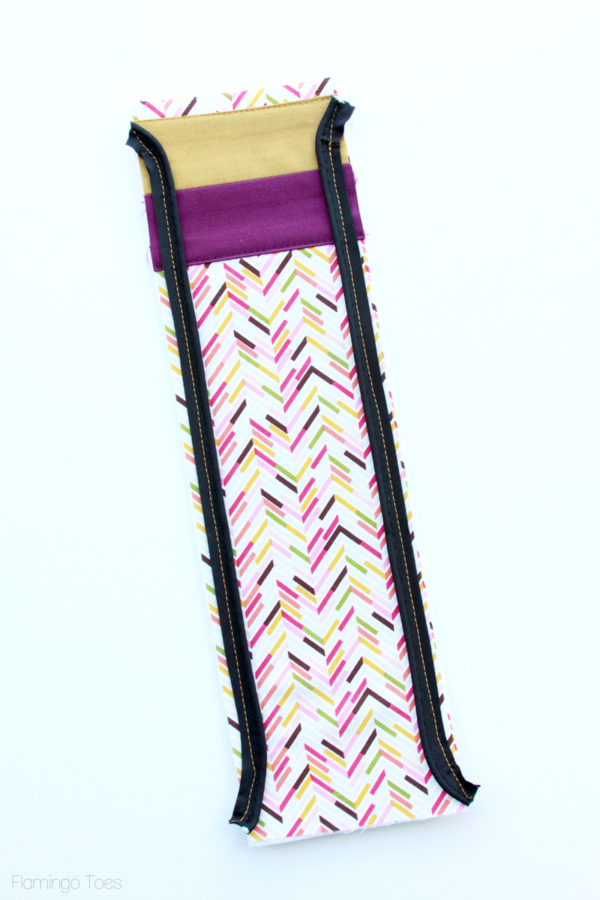
For all the outside assembly, place the heavy-weight interfacing on the wrong side outside fabric pieces.
On the back of the bag, place the bow piece 1/4″ below the top edge of the fabric. Sew the piece down along the top and bottom. Use coordinating thread to make it more subtle.
Sew the bow pieces on the sides as well, 1/4″ below the top. Lay the piping right side down along the edge of the side piece so the piping seam is 1/2″ from the side edge. Sew the piping in place with a 3/8″ seam, curving the piping in at the top and bottom. Repeat for the other side.
For the front bow piece, sew the 3 1/2″ bow pieces together. Press the long raw edges of one of the pieces to the wrong side, so the bow piece measures 3″. Repeat with the other piece then fold the short ends to the back. For the bow center fold the long sides in 3/8″ and press.
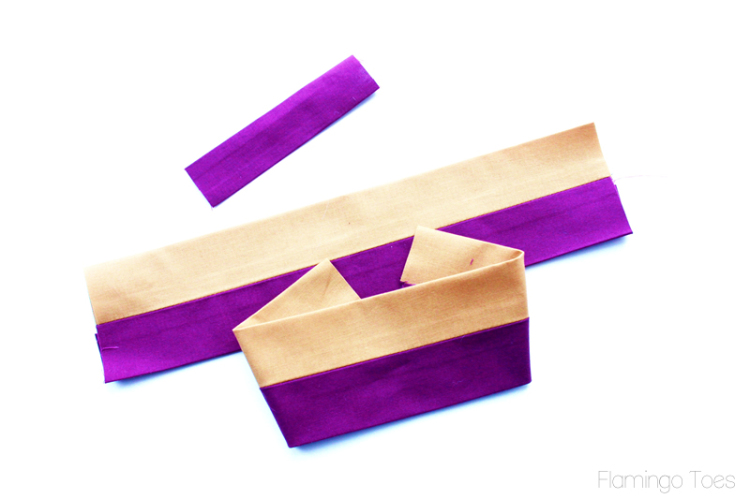
Place the bow piece in the center of the long strip, then fold the bow center around both pieces. Hand sew the center of the bow in place.
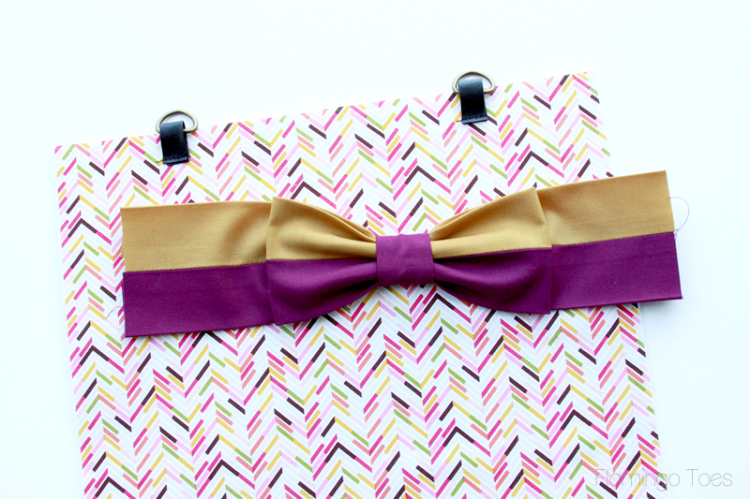
Place the bow piece 1/4″ below the top edge and sew the sides down 4″ from the side. Leave the center unsewn.
Sew the side pieces to the back, making sure the bow sections line up.
Repeat with the front, sewing the sides to the front. Place the bottom of the bag along the base and pin in place. Sew the bottom in place, easing around the corners.
Turn right side out.
You should now have the entire outside of the bag sewn together, with the interfacing inside.
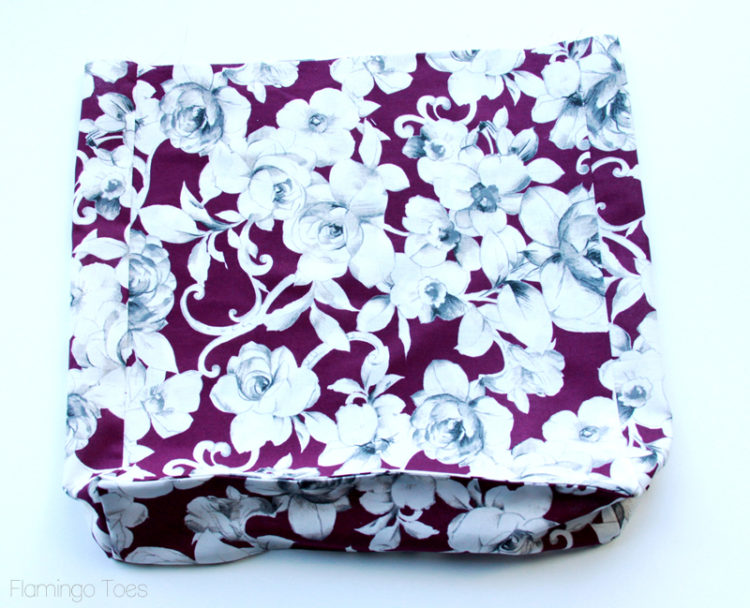
Sew your lining together by sewing the sides to the front and back, then sewing the bottom in place.
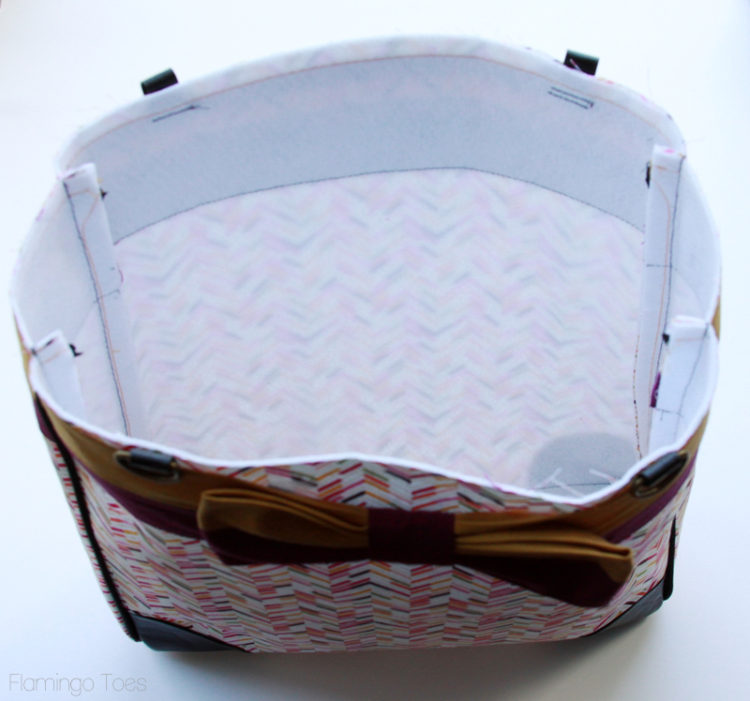
Turn the lining so the right side of the fabric is on the inside. Tuck the lining inside and line it up with the top edge of the outside of the bag. Sew around the top, 1/8″ from the edge. Trim just to the edge of the sewing.
Fold the leather bias tape over the top edge of the bag. Sew the tape in place, moving the straps with the d rings out of the way as you sew. Overlap the tape at the back of the bag.
Clip the purse handles in place and you’re all finished!
I love how roomy the bag is – this will hold all kinds of fun stuff!
I hope you give it a try!
This post is part of the Jo-Ann Sew Your Style Contest, sponsored by Pellon! You should totally enter – the contest is all month long and you can enter by creating a non-quilted, non-traditional project out of quilting fabric. This can be a purse, curtains, napkins, a dress, you name it! You can enter the contest and find out more info here!
You can check out some more fun Sew Your Style projects here – some of your favorite bloggers are sharing inspiration for the contest!
Disclosure: This was a sponsored post for Jo-Ann. All ideas and opinions are my own. :)


WOW! SO STYLISH A TOTE . . . and inspired by a Kate Spade tote! You sewed an excellent bow tote with black leather double strap handles and trims. The 2-color gold and plum large bow near the top highlights this unique tote. I LOVE the tasteful print fabrics you selected: chevon-like narrow stripes of muted colors for the exterior and gorgeous large white flowers on a plum background for the lining. BRAVO! You were ambitious to design and complete this project. I’m certain you’ll receive numerous compliments whenever you use it. Thanks for sharing your detailed tutorial. I don’t have the ambition to “tackle” such a project, however. I LOVE my Kate Spade cream leather purse, which is high quality, indeed. Sarah in Minneapolis
This is off the charts>>>>>>> the bomb! I am constantly amazed by your creativity and abilities. I like yours better than Kate Spade’s. I have a Flamingo Toes folder which I keep just to refer to to make me smile. This goes in with so many of your others.
oh. my. word. LOVE! one day i dream of sewing like you. :)
Love your bag! This is a great tote for fall! I have been looking for something to make with those kind of handles! The bow is just perfect!
LOVE, LOVE, LOVE this tote! Great job Bev!!! :)
Love it!!! I think your version is way cuter!! I’ve got a Craft Gossip post scheduled for tomorrow morning that links to your tutorial:
http://sewing.craftgossip.com/tutorial-designer-inspired-bow-tote/2014/09/09/
–Anne
wowsers! that is one nice bag! I love that its big and roomy but not slouchy. I might be one of the only people around my family that does not like slouch bags. I am not a confident sewer but with your great pictures and step by step instructions I am going to give it a try. thank you so much for sharing your inspiration and giving us a can do project.
Bev!! This looks completely tailor made. SO adorable!!!
Ah! I want to make this bag so bad in denim and leather, but I cannot find the leather bias tape. Even at the Joann’s web site. Can you point me in the right direction?
Thanks!
Oh man, totally did not mean to be a copycat, but I just realized I came home from Joann’s with the same outside fabric! I got different colors for the bow and inside though :) Looking forward to starting on this tonight, but I don’t have leather bias tape. The girls at Joann’s didn’t know of such a thing either. Maybe you can post a pic of the packaging, please? Thanks!
How fun Kristin! I think it’s cool that you found the same fabric! I just fell in love with it. :)
For the bias tape – it wasn’t in a package. It was in the trims by the yard section at Jo-Ann. Hope that helps! If you can’t find it, you could definitely use regular bias tape – that would work great too! :)
Hi Bev, thanks for the quick reply! I’m finally sitting down to assemble the bag and I had a question about the bow. Your instructions call for 2 pieces 13 1/4″ x 3 1/2″ in each color for the bow. I’m confused, why not just 1 piece in each color like the sides of the bag. I don’t understand the construction! I’d appreciate any tips :) Thanks again
Hi Beverly – I love your bags! I’ve made a few so far. With this bag, I have vinyl and was hoping to make bias tape myself. Any suggestions as to what size and should it be double fold?
Can you explain in more detail how to construct the bow? I’m lost
I was wondering what you used for the closure of this bag…did you use a snap or Velcro….I didn’t see where you mention it in your tutorial.
I thought “Oh another tote” Was I surprised. You took a simple profile and turned it into a Dazzler! Way to go. The compliments will be pouring in.
I make purses all the time and this one is so adorable. I’m hoping to make it soon. Thank you so much for sharing Bev.
A few questions: First: what was the width, approximately, of the leather fold? Was it about 1/2″? Second: Did you lengthen your stitch for the leather stitching to give it that top-stitching look? Third: Did you use a teflon foot? What weight of thread did you use for the leather?
Trying to create to see if this would be a good class to teach.
Thanks
Hi Lyn,
It’s been a while since I made this, but I believe the leather fold was about 1/2″. I did lengthen my stitch just a bit, it gave it a nice look and made stitching on the leather slightly easier. I don’t have a teflon foot, I added some washi tape to the bottom of my presser foot to help it move a little more smoothly. I used a regular weight thread for stitching it.
I hope you have a great time making it up!
I was just thinking today that I need a new bag for the fall. This looks terrific!! Can’t wait to get started!!