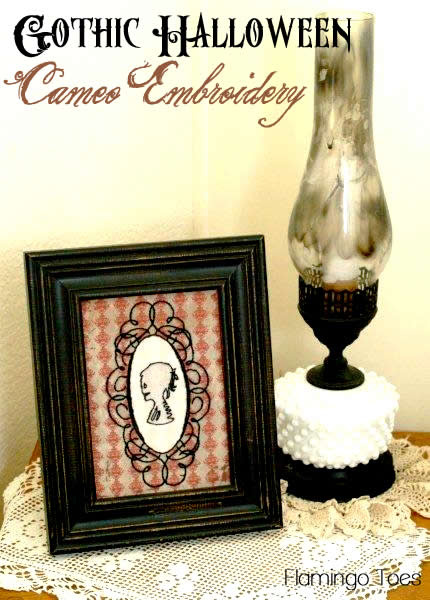
Eeek!! Our first Halloween project of the year is here!!
I am so ready for fall and Halloween!! I think we’re going to decorate early. One month is just too short to have all the fun and spooky decorations up.
Last year I went with a gothic theme for my Halloween Mantel and I liked it so much that I decided I want to keep going – in fact I used the same Skeleton Cameo that is on my Wreath from last year for this little project!

It’s a sweet and spooky little Gothic Halloween Cameo Embroidery Artwork – ok, more spooky than sweet.


Isn’t it fun? I made a cool shabby wallpaper-looking background for the little skeleton girl’s cameo – and then just embroidered the black outlines for a 3D look!
It only took a few hours so you have plenty of time to make up one for Halloween!
Here’s what you’ll need –
- 5 x 7 frame
- 8.5 x 11 piece of freezer paper
- 8.5 x 11 piece of white fabric
- black embroidery floss
- embroidery hoop
- Cameo Embroidery Pattern – Halloween_Cameo_Embroidery – (this might take a while to open, it’s kind of a biggish file)
Start by ironing the glossy side of your freezer paper onto the wrong side of your white fabric. Make sure your edges and sides are clean and straight. This will help the fabric go through the printer cleaner.

Place the fabric in your printer so that the fabric side will be printed when it runs through. Print the Cameo image onto the fabric.
(Mine does not show the little outline around the skeleton – but it was a little hard to see the shading when I stitched it – I added it to the file so it would be easier.)

Peel off the freezer paper and pop your fabric in an embroidery hoop. Begin outlining the swirls on the cameo with a stem stitch.
You can check out the How To Do That embroidery page if you need help getting started.
I used three strands of floss for the swirls and oval.

Continue until all the swirls are stitched –

Now outline the center black oval. I did one line at the top and bottom, and two lines on the sides where the black line was thicker.

The last step is the skeleton cameo. Switch to using just two strands of floss for the cameo – the detail is finer and you will be able to sew the curls and bones much easier.
Once you’ve stitched the cameo, switch to one strand and sew small lines for her teeth.
Trim the fabric down so only an inch or so of the white is showing.

Tape the fabric around a piece of cardboard or even the glass from the frame. Pop it in a frame and you are good to go!

I love it! Such a fun way to start off the Halloween season!


Though I’m thinking she needs a fella. I see a debonair skeleton boyfriend in my future.
Oh – and if embroidery isn’t your thing? You could totally just use the image as a printable! It would be cute framed in a little Halloween display with some other fun decorations!
What do you think? Are you getting ready for Halloween yet?? :)
Linking up at Sunday Scoop, Today’s Creative Blog, Met Monday, Tutorials & Tips Tuesday, Quilt Story, Shabby Creek Cottage, My Repurposed Life and the other fabulous parties on the party page – make sure you check them out!


So cool! Love this idea! The background is really cute too
-Jen
What a great idea Bev!
Very cute image, embroidery and tutorial! Thank you so much for sharing! I’ve begun to “colorize” lineart images on my computer and print them on linen for embroidery. The finished product, with subtle shading, closely resembles the old-fashioned crayon-tinted embroidery. I apply the linen to the “sticky backing” of a full-page label sheets (8-1/2 x 11). I send these through my printer and then peel off the backing. Works like a charm!!!
It’s soooo cute, Bev!!! And yes, the girl seems to be waiting for her boyfriend there :)
Adorably spooky. Since I am a newer follower, I went and checked out your mantle from last year–LOVE! LOVE! LOVE!
Hi Bev,
So, so cute! Can’t wait to see her BF!
Keep up the good work, ma’am:) Di {CookTheTV}
Bev, this is so stinkin’ clever!!
This is cute… errr spooky. I love the pattern you used for the background and the colors. It’s a piece of art that makes you do a double take.
If you get a chance I would love for you to link your tutorial at my Fall Edition Pin Party.
http://sarahdawndesigns.blogspot.com/2012/09/pintastic-monday-fall-edition.html
Spooky chic!! :) I think she looks wonderful and would love a fella! I’m super impressed with your embroidered frame!
so fabulous. I love the embroidery. I’m a huge fan of embroidery and I would have never thought to make a halloween decoration! thanks for the inspiration. I came over from sewmuchado and I can’t wait for more inspiration
Bev – you made me smile. I know I was supposed to be spooked, but I giggled. I love this!
omg! this is so cool. love it.
Ooo—that is spooky! I adore that gorgeous scrolly frame around the cameo. :)
I love it! I just wish I could download it. When I download it only comes up with one page and it is of the picture and nothing else. I says the it may take a while cause it is large but it says 1/1. I would love it if you could help. Thank you