I have two super easy, quick set of earrings to share with you all. Some of you know we’re on a road trip – so these are crafted in the car. haha. Low on supplies and mess. Though I didn’t anticipate the problems taking pictures of the process in the car – so I apologize in advance for the slight blurriness in some of the pictures.
Here are the two sets of earrings. . .
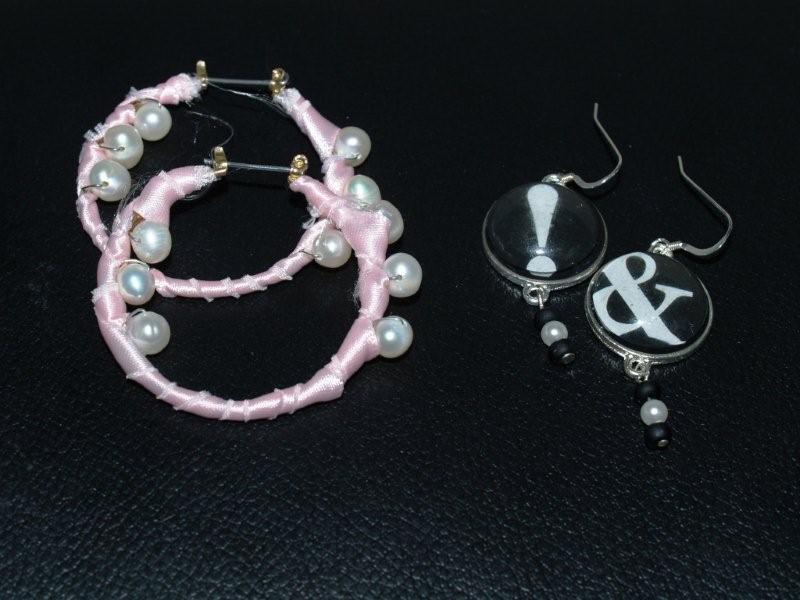
See? Girly and geeky. :)
Let’s start with the girly set. I based these on these designer earrings. I loved the fabric and the bling – but I thought I’d wear them a bit more if they were pearls. And pink of course.
For your set you’ll need:
- a pair of hoop earrings
- ribbon or fabric
- beads
- wire – I used 26 gauge
- thread or glue
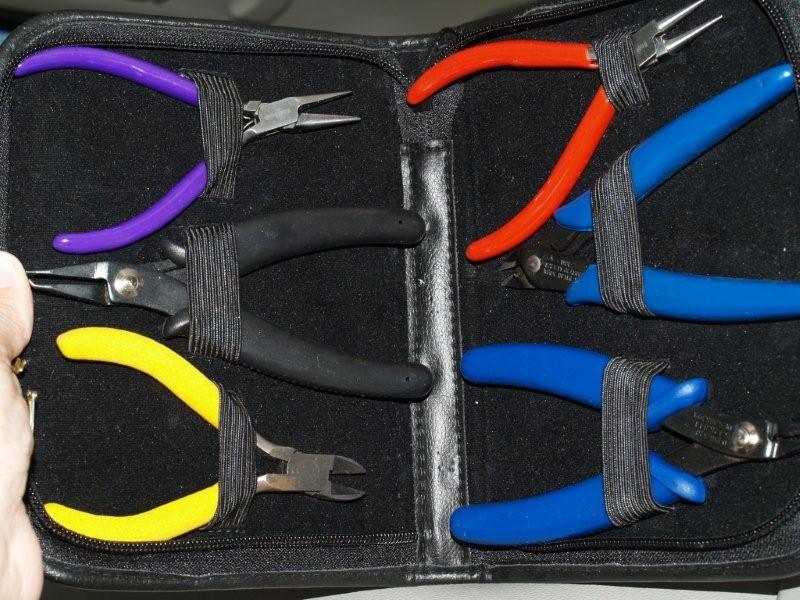
- some basic pliers
I don’t do much in the way of jewelry making – but I did invest in a little pliers set. I think it was $20 and it zips up and has pretty much everything I need.
I started with an old set of hoops. I am sure you have an old set lying around that has tarnished but you haven’t gotten rid of them. Maybe in the back of your jewelry case. I bet you do. :)

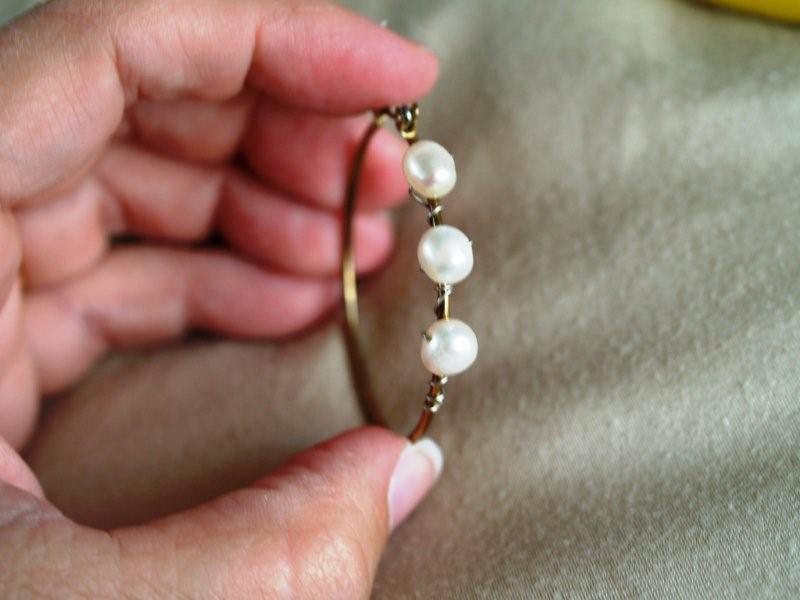
I actually have two pairs haha. I used the larger set for these because my pearls were a little too big for the small set.
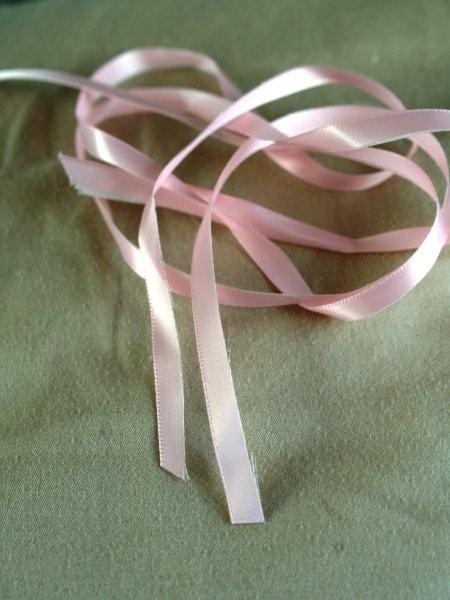
To wrap around the earrings I cut about 18″ of ribbon in half – so one side would be raw edges.
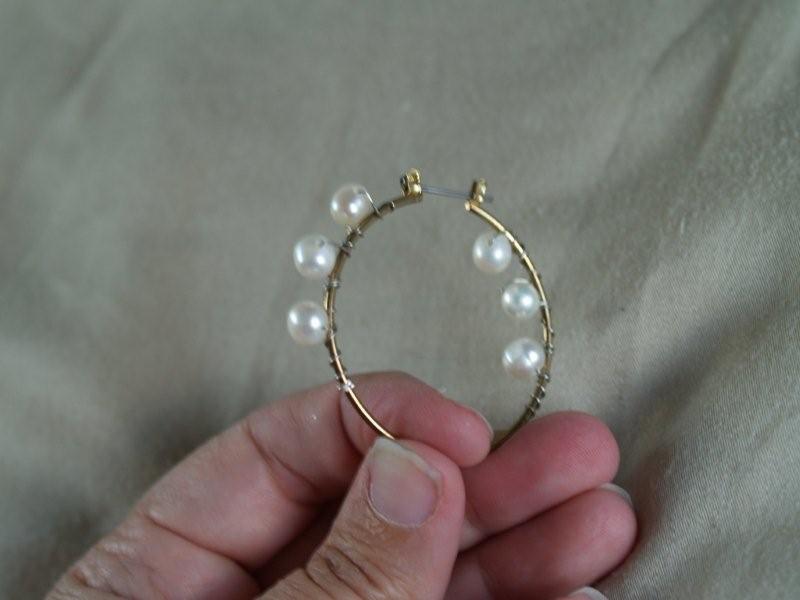
I cut about 5 inches of wire and started wrapping the pearls on the hoops. The 3 pearls on the outside are wrapped on the outside of the hoop and the three pearls on the back are wrapped on the inside of the hoop.
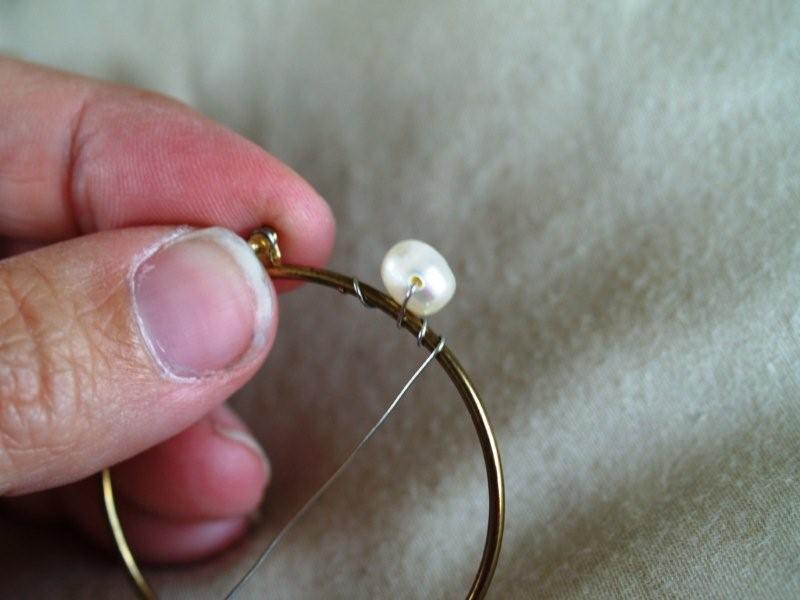
(Yes. I need a manicure. And some lotion. Embarassing. Don’t you love my backdrop? It’s a pillow. We’re seriously fancy here.)
Just keep wrapping and put a little space between the pearls for the ribbon.
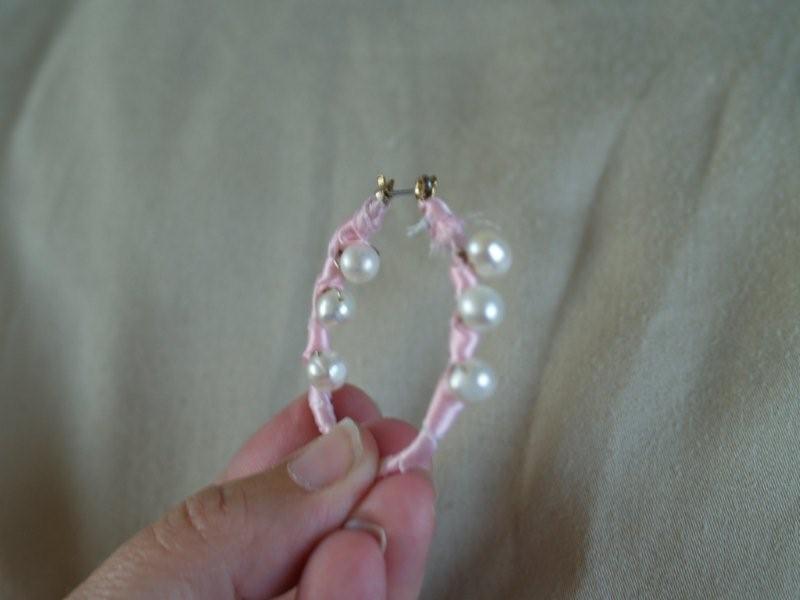
Once the pearls are wired on, you can begin wrapping the ribbon. I stayed away from glue because clumsy and car bound don’t mix, but you could do that. I sewed the ribbon on tightly and then started wrapping it around the hoop.

Keep wrapping and overlapping the ribbon until the hoop is all covered. I then knotted and sewed down the end but you could also glue it.
Before you get too far on the second hoop – take a break and have some fake oreos. Don’t want to overexert yourself.
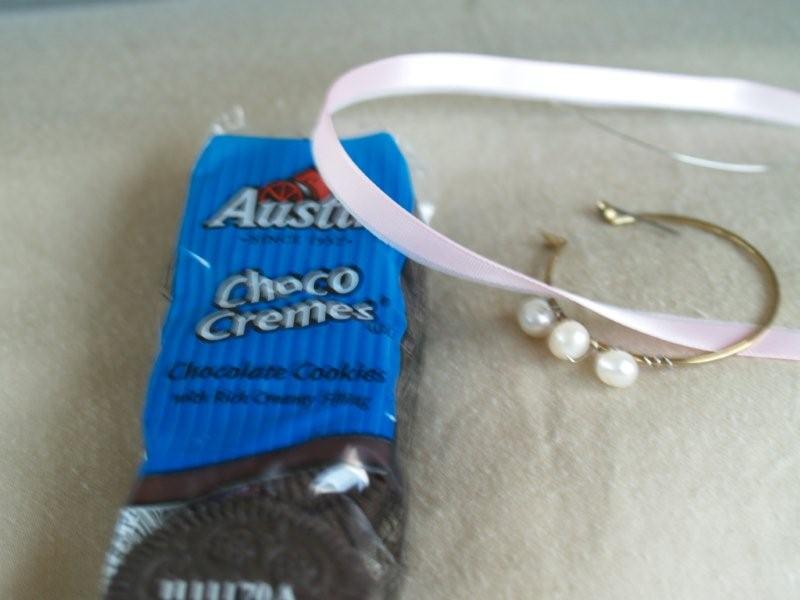
Ahh. Better. Now we can get back to wrapping.

Aren’t they cute?
Ok – enough of girly – let’s get to geeky.
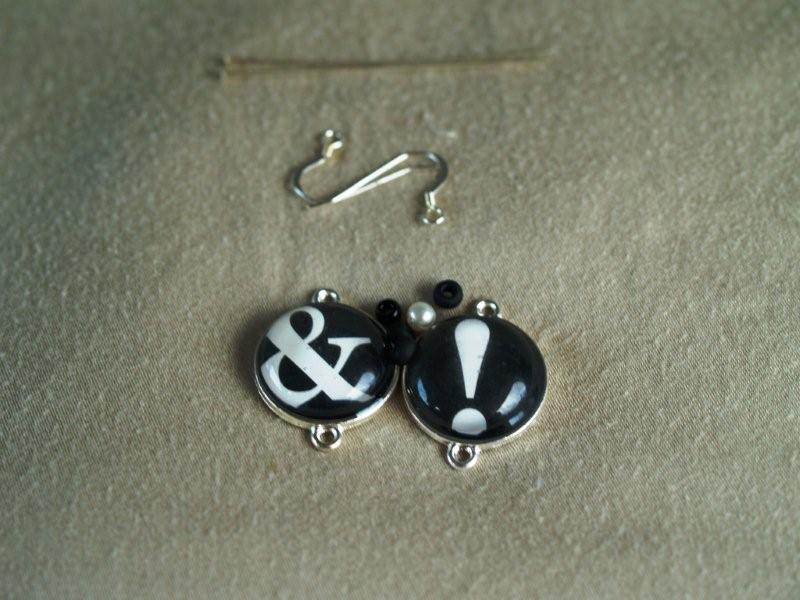
Here’s the materials:
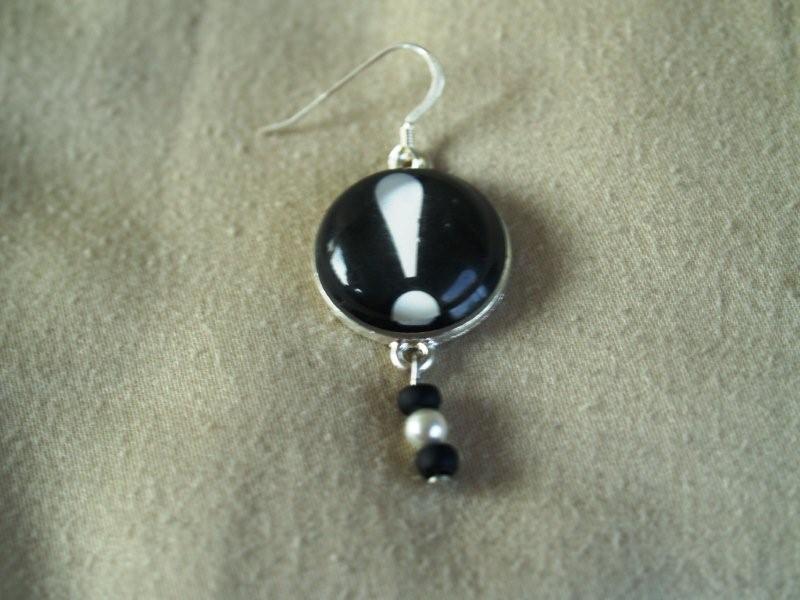
- 2 great beads
- head pins
- small beads
- earring wires
I found these great beads at Michael’s and fell in love with them.
I don’t claim to be a jewelry expert by any means – so if I can do this – you can. And there’s probably better ways to do this but this is how I did it. :)
Start with your head pin – that’s the one with the end on it – and thread on the small beads.
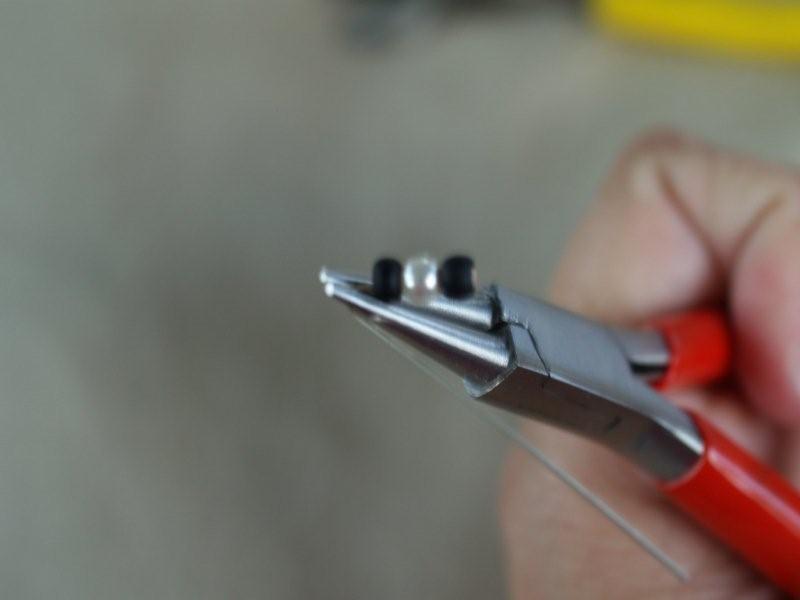
Wrap the head pin wire around the rounded pliers to make a loop.
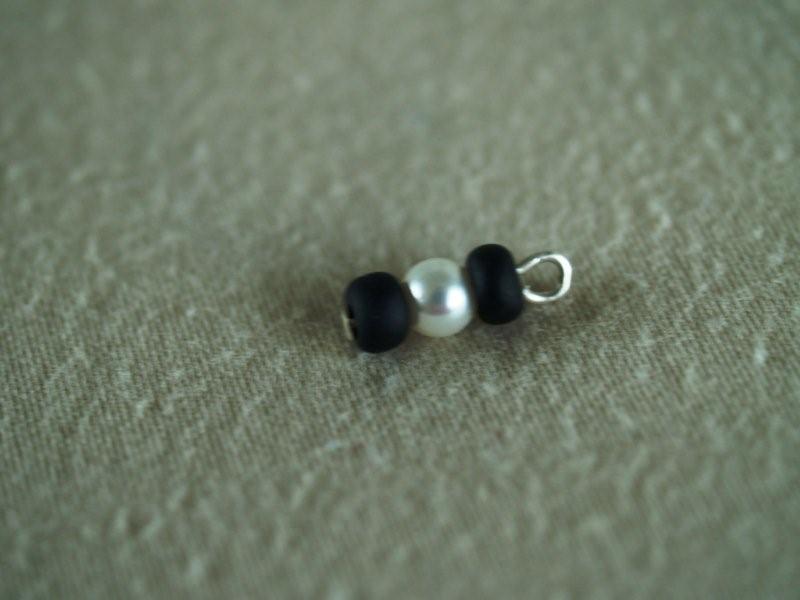
Trim of the end and open up the loop sideways. Slip on the large bead and close the loop.
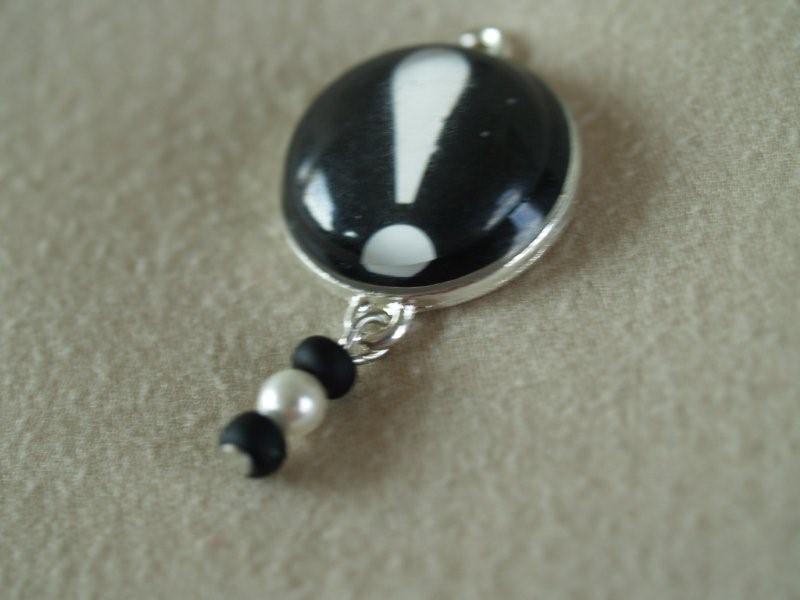
Open up the loop on the earring wire – again sideways – and slip on the loop on top of the bead.
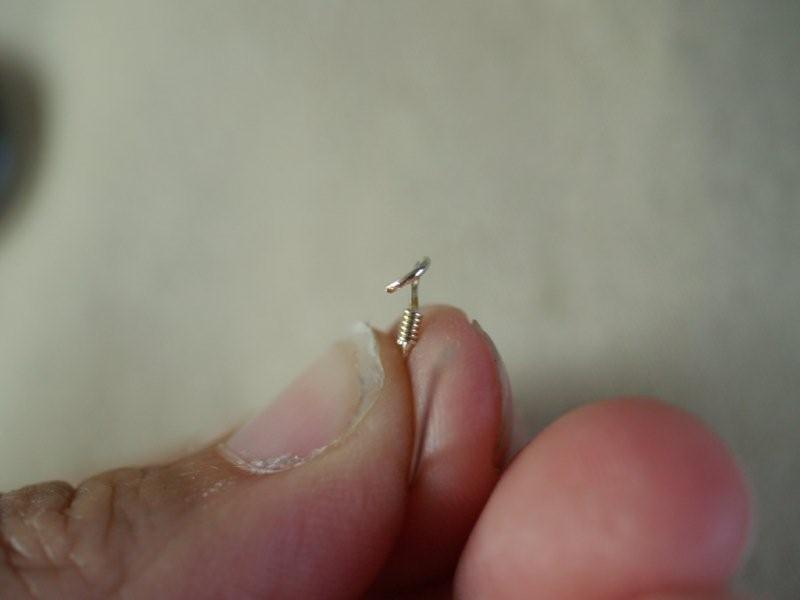
Close the loop and your earring is finished! Can’t get too much easier. :)
Repeat for the other earring – and then you’re all done! Two sets of earrings for two different moods. Love it,


lol you made those in the car? crazy! I like the one with the keyboard keys on them!
So cute!!
Hope you weren’t the one driving :-)
Wow I can’t believe you have done this in a car – you ARE a crafter! Love the geeky pair. The beads are fabulous. You can’t go wrong with pearls and pink as well! Hope you have a fun trip! Thanks so much for joining the Sunday Showcase Party! I greatly apprecite it. Hope you are enjoying your week. ~ Stephanie Lynn
Hi! I’m visiting from the Anything Related party. I hard to decide which ones I like more…the geeky ones! :)
Alison
http://welcomesunshinehome.blogspot.com/
I like the geeky ones. :-) Very cute!
Thanks for joining us for Anything Related #12! ~Bidgette