There’s something about writing a blog that makes you feel the need to come up with cutesy names for projects and posts.
It’s almost a compulsion.
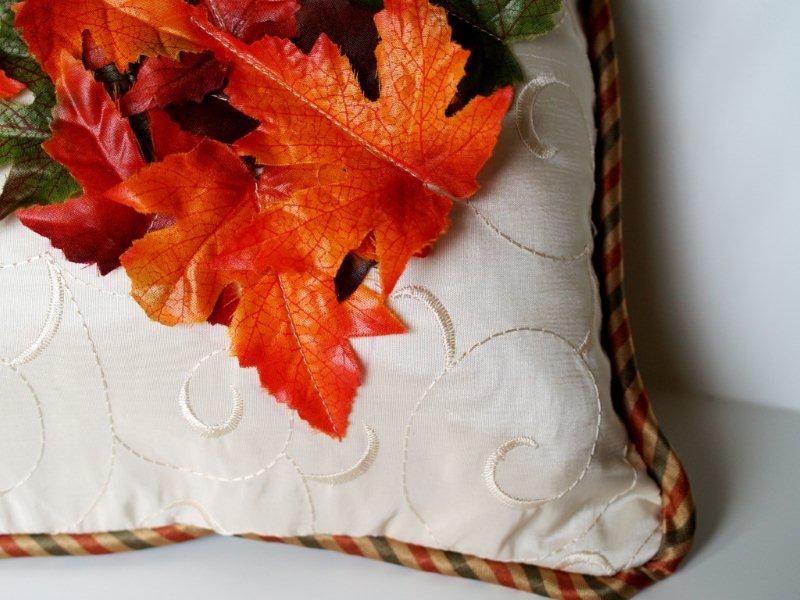
While I was working on this sweet pillow for Fall – the name just popped in my head. And being a mushy sort of person anyway, I didn’t fight it too hard.
Plus I love Fall and I love pillows. So it’s a good fit. ;)
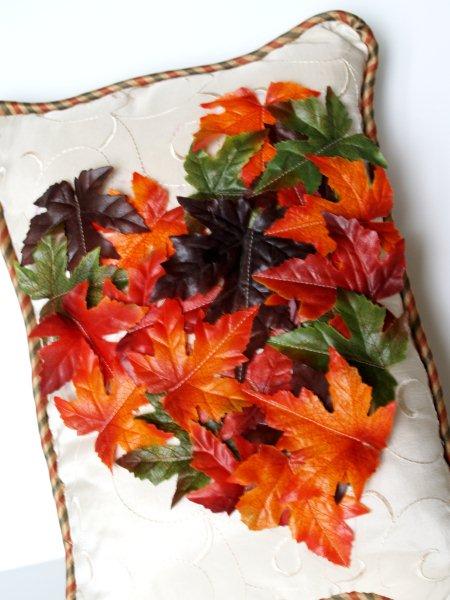
I’d like to show you my newest project – the Fallin’ In Love Pillow. :)

Everybody say “Aawwwwww”. :)
I have a super easy tutorial for you if you’d like to make one too.
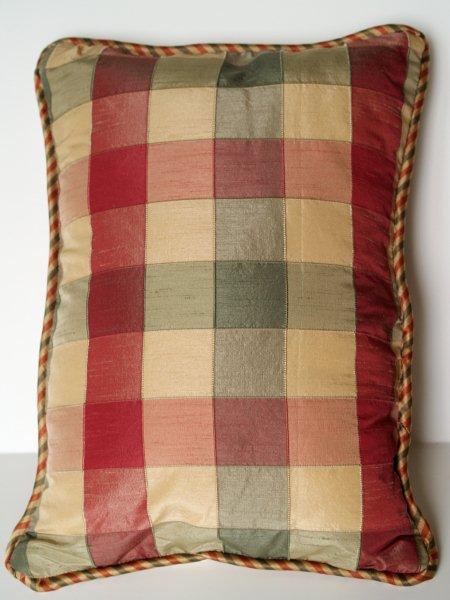
I found some sample decorator fabric squares marked down at Joann’s and I knew they’d be perfect for a pillow. The ended up being $1 each – this pillow uses 3 of them. One each for the front and back and one for the piping. You could use any fabric you have on hand though.
Materials:
- 1 12 x 16 piece of fabric for pillow front
- 1 12 x 16 piece of lining if pillow front is sheer
- 1 12 x 16 piece of fabric for back
- 1 pillow form
- fabric for piping
- 60″ cording
- leaf garland
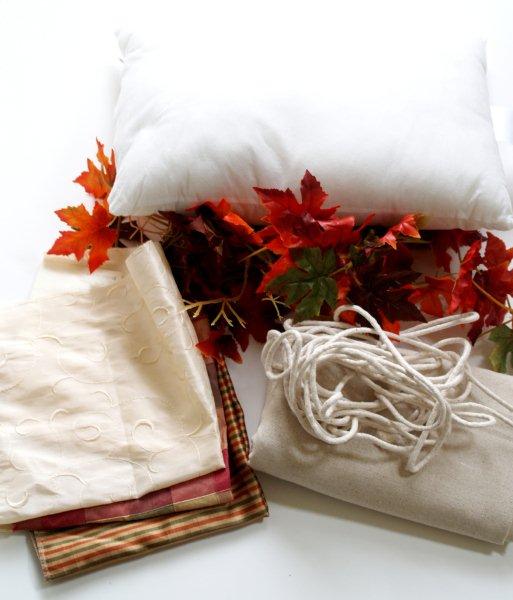
I had the leaf garland on hand but you can find them almost anywhere. I’ve seen them at Walmart and they might even have them at the Dollar Store. You want to make sure and choose the garland that has the fabric leaves.
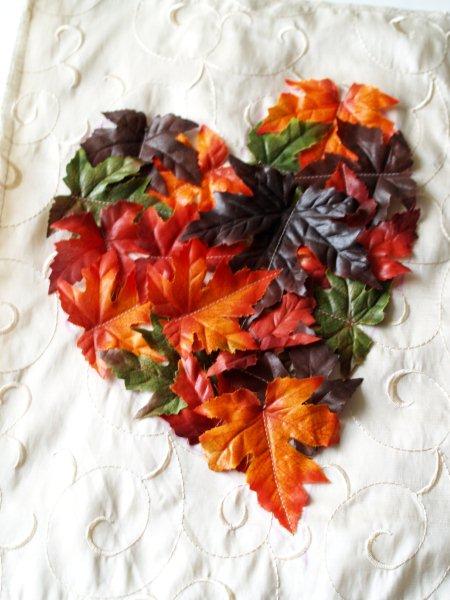
Cut a heart shape out of paper and gently remove enough leaves from the plastic backing on the garland to cover the heart.
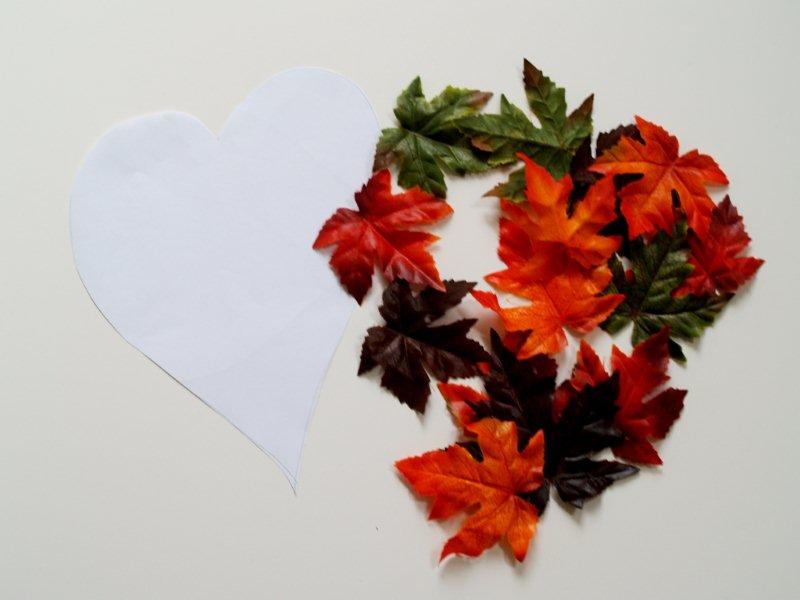
It’s a little hard to see my heart shape there.
If your top fabric is a little sheer like mine was, sew it to your lining fabric around the edges.
Trace your heart shape onto the top of the pillow.
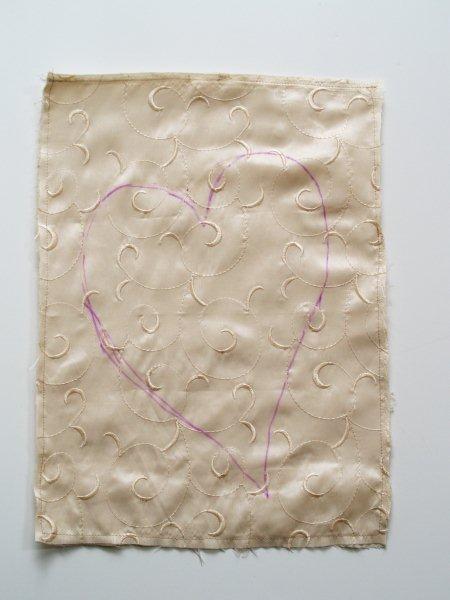
Marking pens are one of my great frustrations in life.
The two pens I have drive me crazy. One is the blue type and doesn’t come off the fabric unless you talk real nice to it and promise it a dinner out.
The other is a purple pen and fades away faster than you can say “I’m using you because the blue pen won’t wash out so you better not fade away”. Oh it’s gone? Great.
If anyone has found a marking pen that falls somewhere in the middle – I would love to know where you got it.
Enough drama. :)
Begin by sewing your leaves on around the edges of the heart. I wanted mine to be loose so I only did one row of stitching down the middle of each leaf.
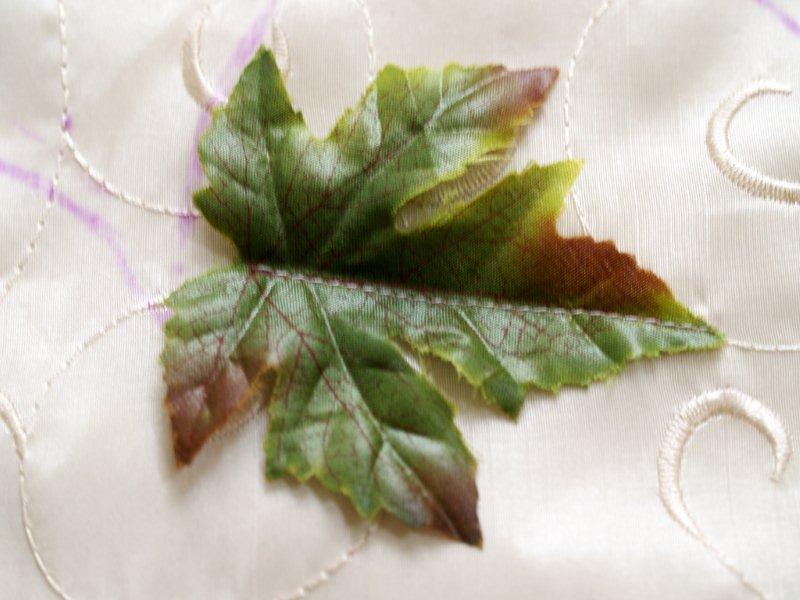
(Purple pen already fading away haha). Sewing fast now.
Continue layering and sewing down leaves, keeping within the marking line for the heart.
Overlap the leaves to cover the center.
Set your pillow front aside.
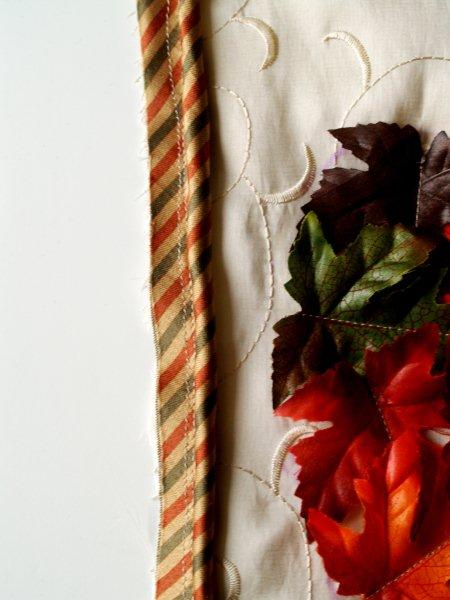
Cut 2″ strips out of your piping fabric and piece them together if needed to make 60″.
It is a good idea to cut your strips out on the bias (diagonal to the selvedge). It also has the added bonus of making the pattern on your fabric angled which looks fun.

Fold the piping in half with the cording in the center, wrong sides together. With your zipper foot on your machine, sew the piping together.
Pin the piping to the front of the pillow, overlapping the piping at the bottom center. Sew to the pillow front, just inside the stitching line on the piping.
Place the pillow backing on the front piece, right sides together. Pin all the edges.
Sew the pillow front and back together, right along the edge of the piping. This stitching line will be the closest yet to the piping.
Make sure you leave an opening for turning large enough for you pillow form. Which of course I didn’t do and spent waaaaayyyy too long stuffing the thing in.
When your pillow form is finally in, hand sew the opening closed.
That’s pretty easy isn’t it?? ;)
It’s a fun addition to our Fall decor and I can leave it out after all the Halloween things come down.
I’m linking to Met Monday and the other parties in the sidebar.


The name is definitely fitting. I never actually understood how to do piping, so I totally learned something from this. Thanks so much Bev!
Another great project Bev! I’m very impressed by your sewing skills. I would love to add piping to a pillow but not sure if I can pull it off.
Just beautiful! The fabric is gorgeous, too. We are both on a reversible kit! Those types of projects are the best! I’m fallin’ for it! :)
I’m fallin in love with your pillow, blog, sense of humor, etc. I just may have to make one of these too, especially since we have a Joann’s now!! Woo Hoo!
soooooooooooooooooooooooo cute! i LOVE leaves and your pillow turned out adorable! I love the colors and the texture! Perfect for fall!
Wow, you impress me!! This pillow is completely amazing and unique.
I love the texture in this pillow and I would have never thought to sew right through those leaves – great idea! Very pretty.
I have already Fallin’ in Love with all of your projects so of course I am in love! The colors are fabulous…I also love leaves.
Fabulous! I love it!
That is SI cute!! Thanks for this idea :)
Waoooo…this is really colorful,lovely….
What a wonderful project. I really like it!
You are truly creative. I enjoy all your projects. You have great ideas and great technique.
Hi Bev….what a sweet pillow. I have the same problem with marking pens. I’m anxious to see who might have “the one” that answers the need.
Hi Bev. Oh, I love your sweet pillow!! Love the fabrics and your tutorial! You’re good! :)
Be a sweetie,
Shelia ;)
too darn cute!!! i love it!
I love it!! I need to take you everytime I go to Joann’s for your creative ideas!
Awwwww….
:)
Definitely perfect for the autumn season! ^-^
Can I tell you how crazy I am about this pillow? Gosh, with your instructions I might even be able to make one of my own. It’s gorgeous! And you, you are SO creative.Thanks for sharing this beauty with us.
Awwwwww isn’t that sweet!? Can you make me one with snowflakes for a winter theme? Can you? HMM? Or did I just give you an awesome idea for a holiday post – foooor freeeee?
No one better steal this idea. It’s officially copyrighted right now. Copyright 2010 Nice Flamingo Girl Toes
Cute pillow!! Thanks for linking @Creative Itch’s “Sew Cute Tuesday
Aw, SO cute! And adorable! And sweet! And fun! ;) Thanks for sharing! I hope you can join my giveaway going on now! alittleknickknack.blogspot.com
“Sew” pretty! (oh, now I’m losing it…) I’d love if you’d link this up to my autumn linky party:
http://makinglemonadeblog.blogspot.com/2010/10/halloween-spooktacular-week-two-take.html
Bev, I’m in LURV with this one! Thanks for the awesome idea!
What a sweet, fun pillow! I’m fallin’!!!
Very cute title and very cute pillow!
Perfect, Beverly, yes I do love it! You are amazing.
hello Im a new follower from the thrilling thurs. linky. Would love to have you follow me back :)
This is a great idea. How creative is that and I would love to make one as well. Thanks for the how to.
This is cute! What if you got an even larger square form and put the leaves in a “mess” on the bottom and had one or two floating down to the pile with little fall lines stitched behind them?
Super cute pillow! Found you via the Tatertots & Jello weekend wrap up!
GREAT tutorial and a super CUTE pillow! Thanks for sharing on Thrilling Thursday @ Paisley Passions. Hope you stop by again soon :)
~Lori S.
So fun and festive and creative!! I love when people share their ideas!! Thanks for linking up, see you next week :)
VERY cute! It’s a perfect heart, and I like the piping too! What gorgeous colors. Thanks for linking up to Topsy Turvy Tuesday’s!
Beverly– so creative and fun! Thanks for sharing at A Crafty Soiree. Can’t wait to see what you post this week.
So fun and festive and creative!!
Love this. It is surly my future project