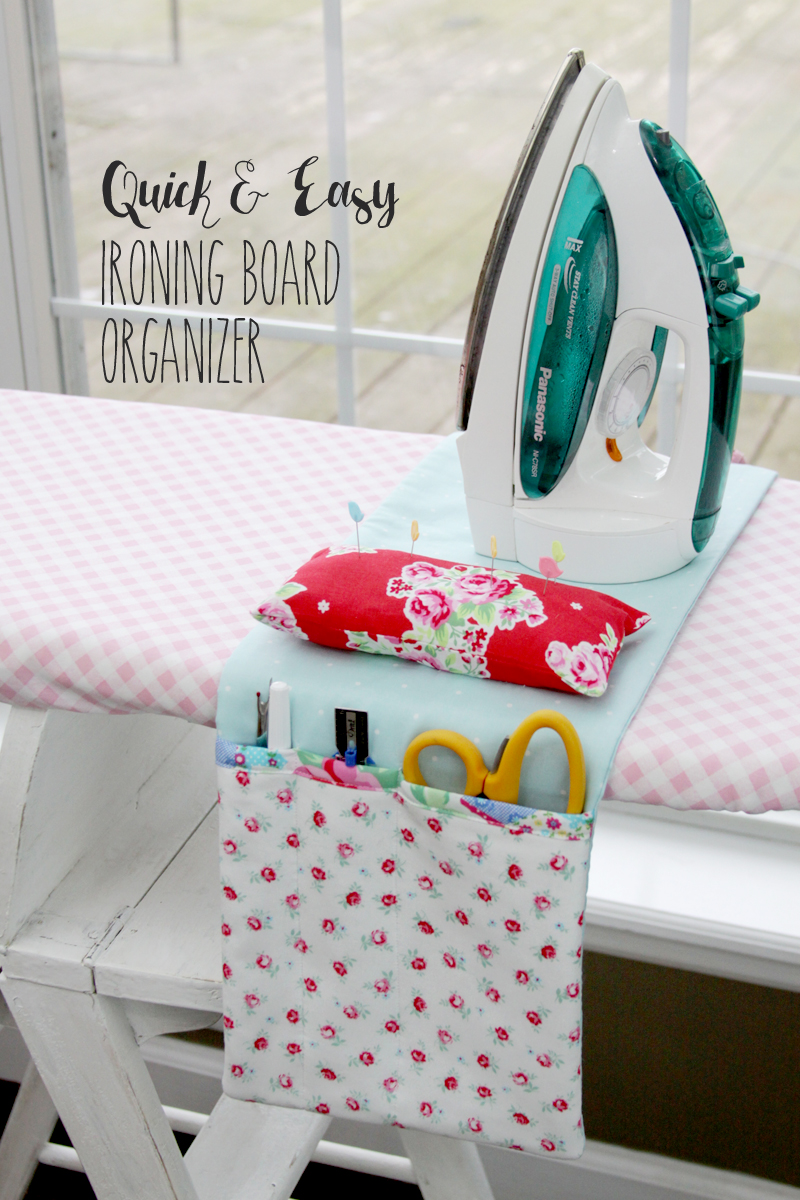
I don’t know about you, but when I’m in the middle of a sewing project, the end of my ironing board usually ends up being a hot mess. With scissors, pins stuck every which way, marking pens and measuring tapes, it can be pretty messy, and all those things take up a ton of space too! (You can totally tell I’m not a tidy crafter here.)
If you’ve got the same problem, I have the perfect solution! This quick and easy ironing board organizer is super simple to sew up – and it looks so cute sitting on the end of the ironing board!
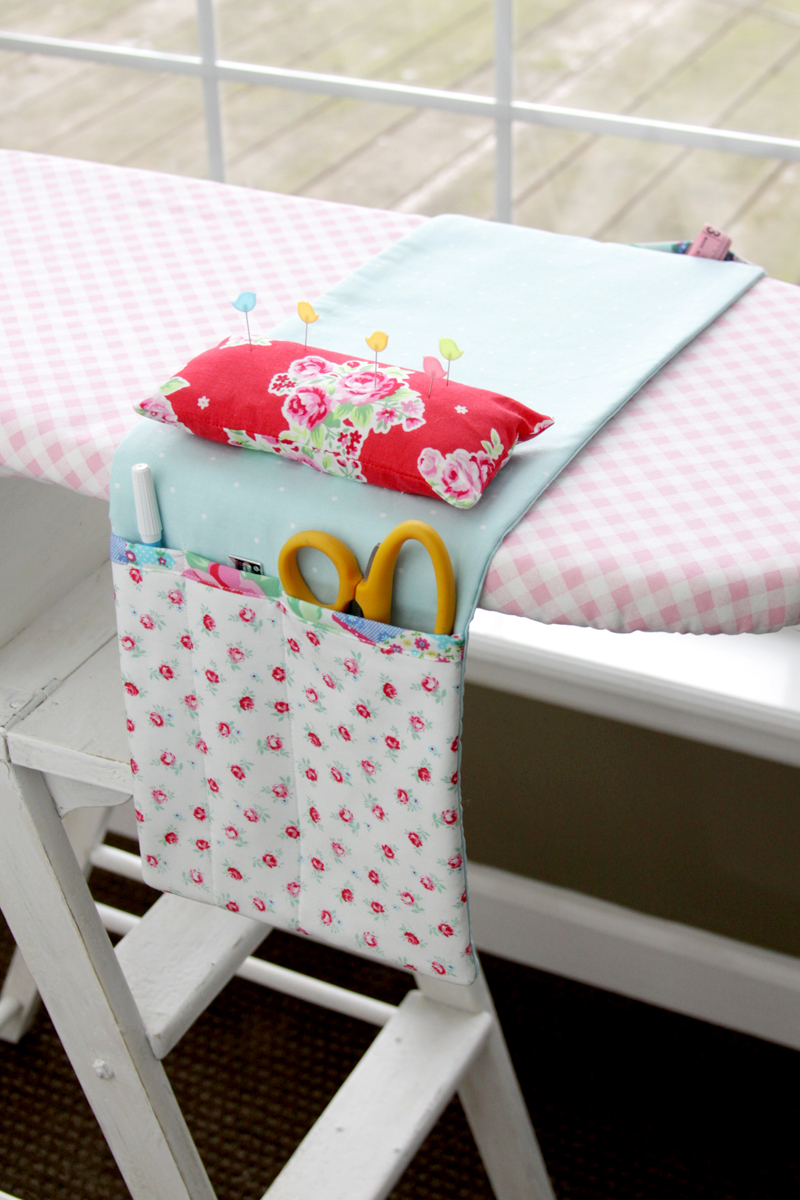
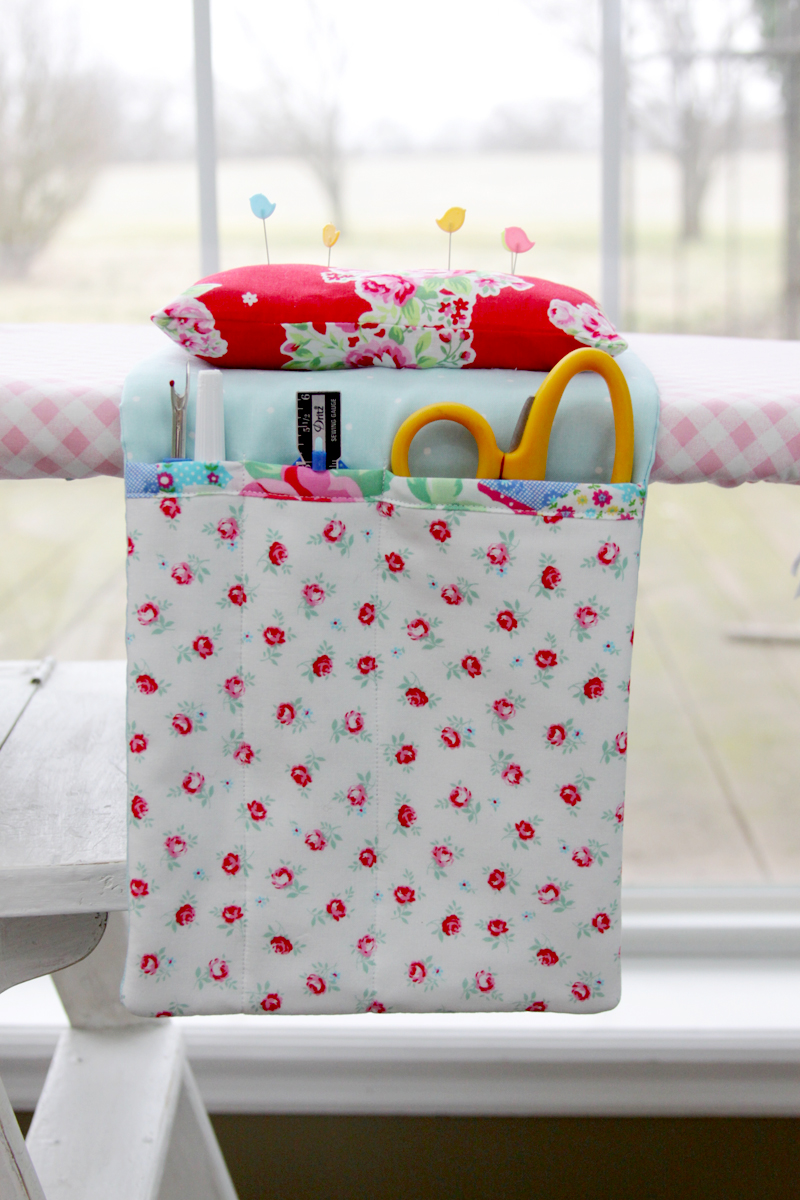
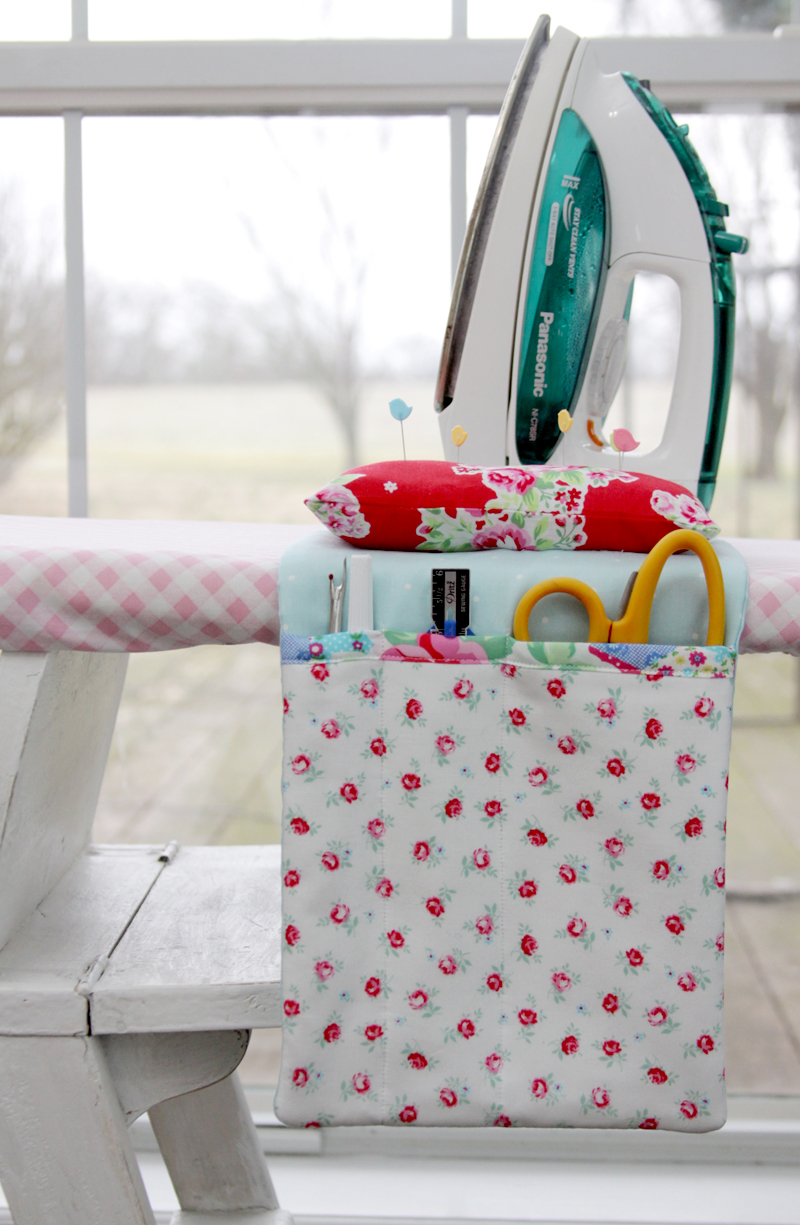
It has pockets on each side, a long one in front for scissors, pens and more. There’s a little pincushion in front too!
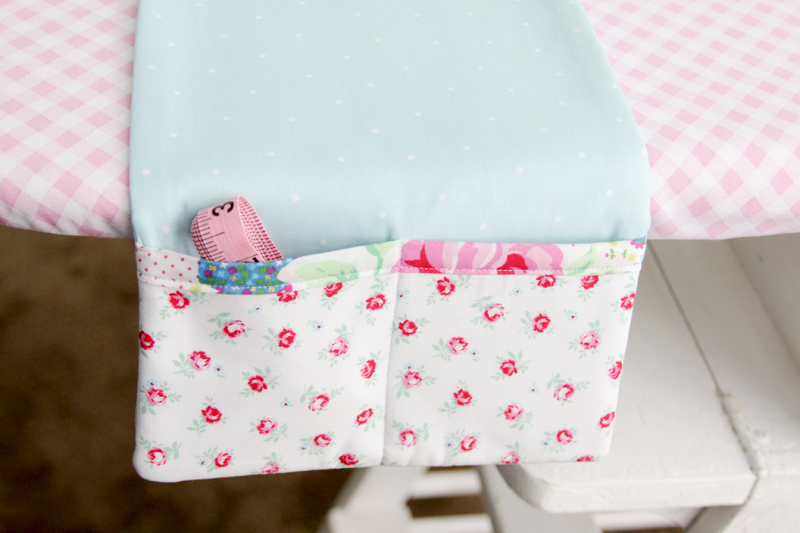
The back has a cute smaller pocket – perfect for holding measuring tapes or safety pins!

It’s so quick to sew up – so let’s get started!
Materials:
- 1/2 yard for main fabric
- 1/4 yard for pockets
- 4″ x 9″ piece for pocket edging
- 8″ x 8″ piece for pincushion
- 1/2 yard fusible fleece
- fiberfill
- needle & thread
Start by cutting out your fabric. My main piece is 9″ x 29″ but my ironing board is 13″ across at the base. If your board is wider or narrower, add or subtract inches in length if you need to.
Cut 2 pieces of main fabric 9″ x 29″. Cut one piece of fusible fleece this size also.
Cut 2 pieces of fabric and one piece of fusible fleece for large pocket 9″ x 8″.
Cut 2 pieces of fabric and one piece of fusible fleece for small pocket 9″ x 4 1/2″.
Cut 2 pieces of pocket edging 2″ x 9″.
Cut 2 pieces 8″ x 4″ for pincushion.
Iron the fusible fleece to the wrong side of one main fabric piece, one large pocket piece and one small pocket piece.

For each of the pocket edging pieces, iron the two long sides so they meet in the middle, then iron the piece in half again so the long pressed sides meet. You just made bias tape!
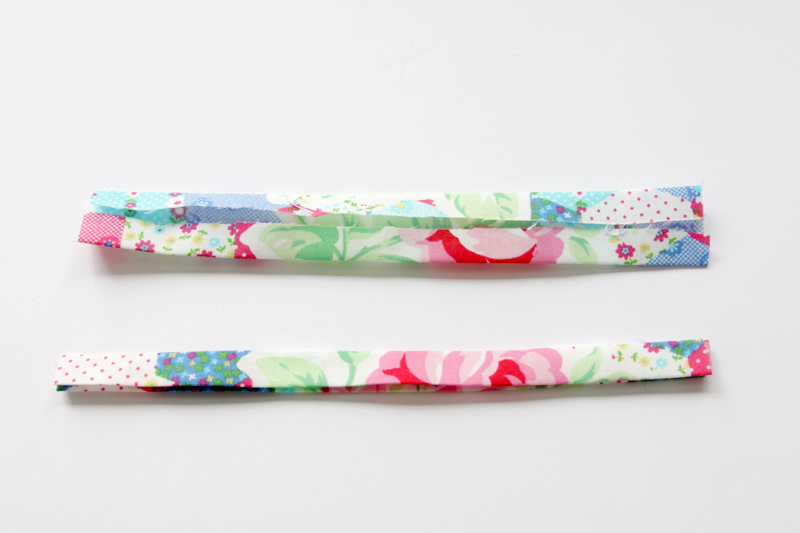
For each of the pocket pieces, place the two fabric pieces wrong sides together, so the fleece is in the center. Place the bias tape over the top edge of the fabrics and sew in place, close to the pressed edge.
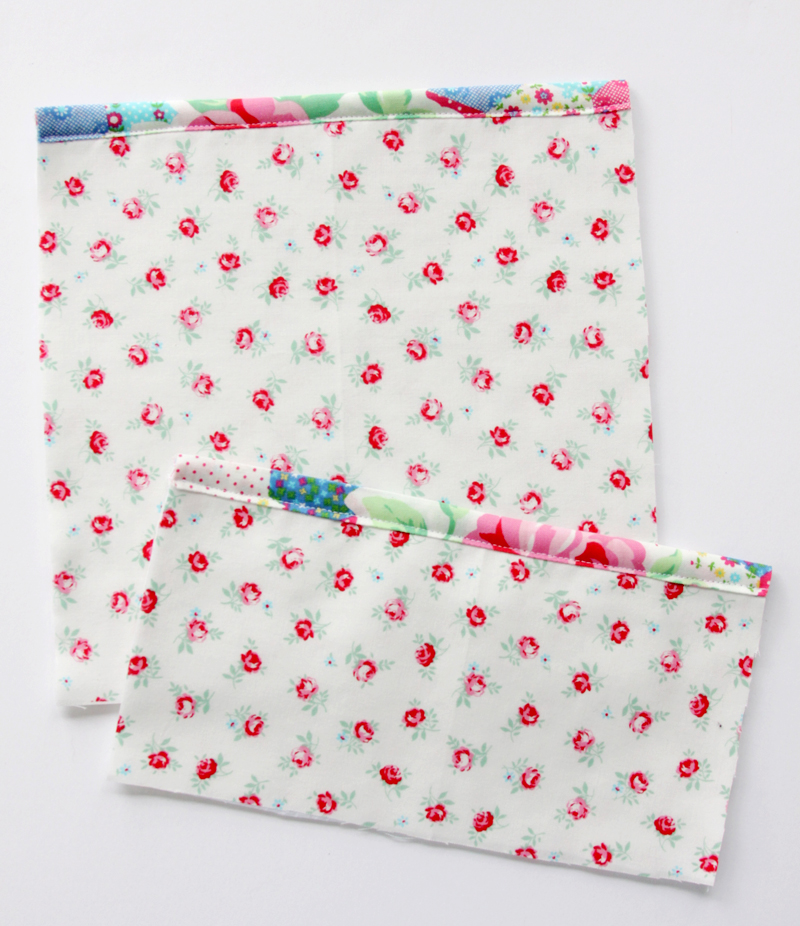
Place the large pocket at one end of the main fabric piece with the fleece, and the smaller pocket piece at the other end. The bias tape ends should be towards the center of the long main piece. Sew around the sides and bottom with a 1/4″ seam allowance.
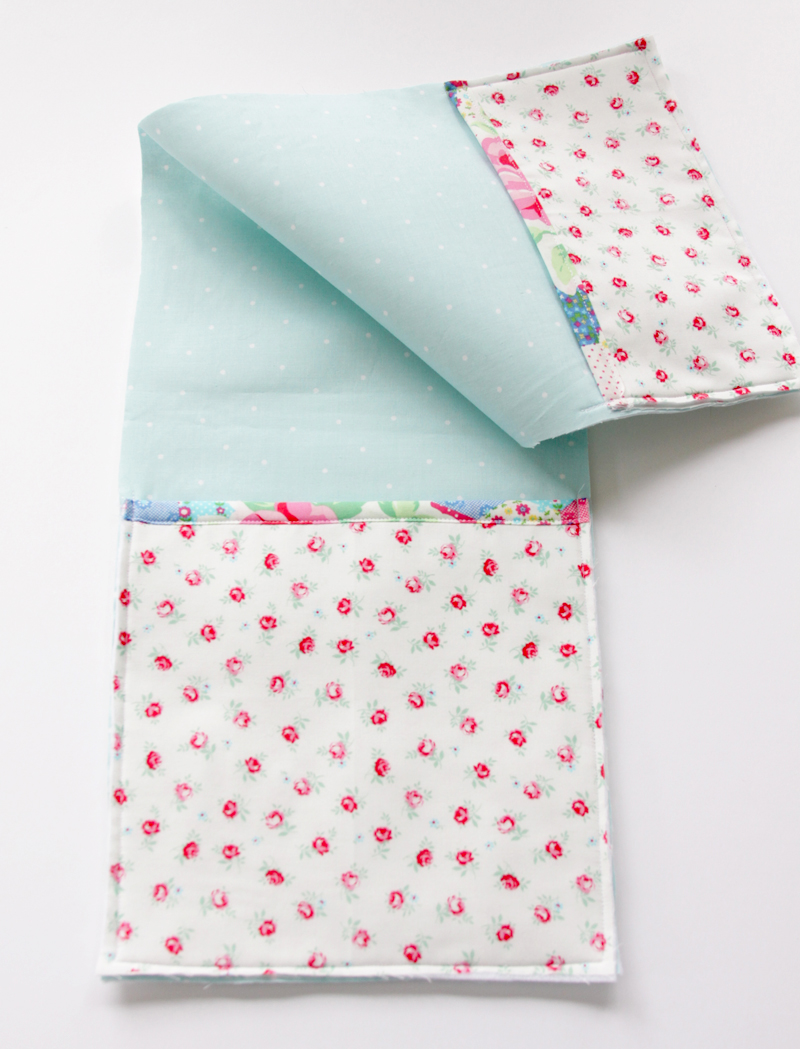
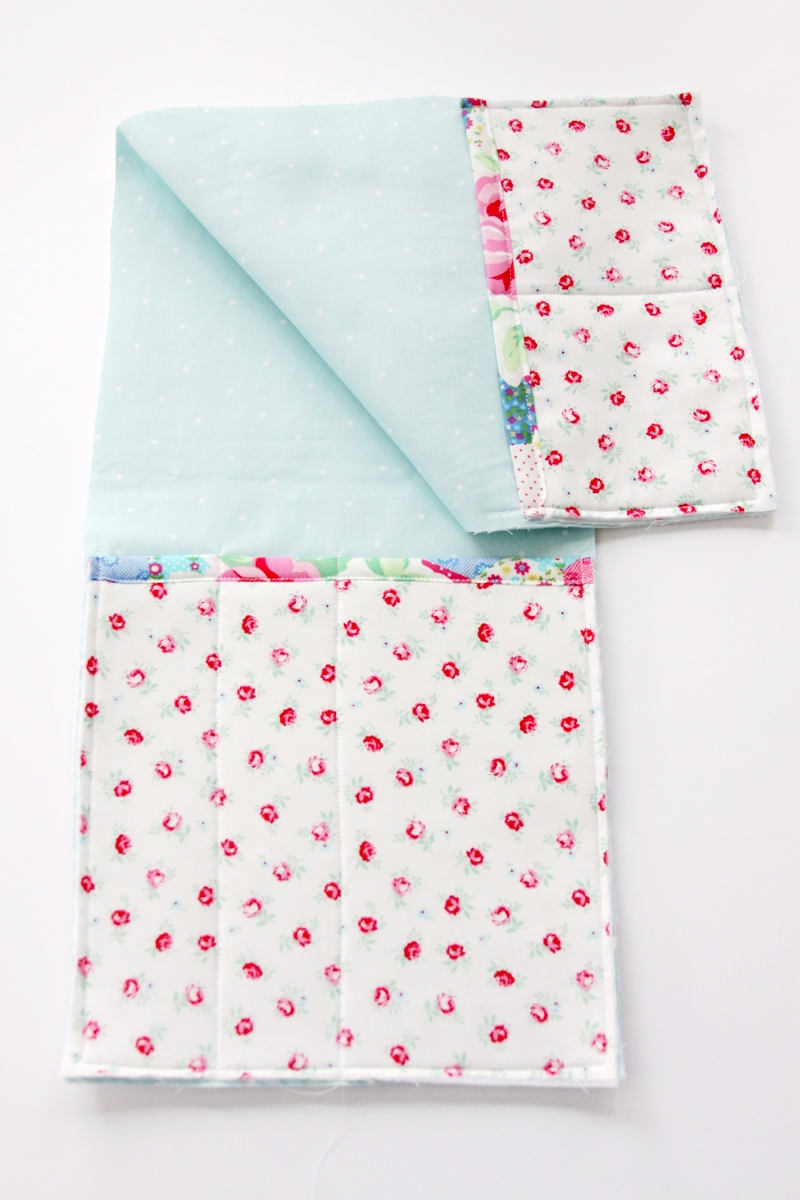
Decide where you’d like your pocket dividers. I did one seam down the center of each pocket, and a second seam on the long pocket on the left side, between the center and the side edge. Sew a straight line down from the top of the bias tape to the bottom of the pocket to divide the pocket.
Place the two pincushion pieces right sides together. Sew around the sides with a 1/2″ seam allowance, but leave a small opening of about 2″ on one long side. Clip the corners.
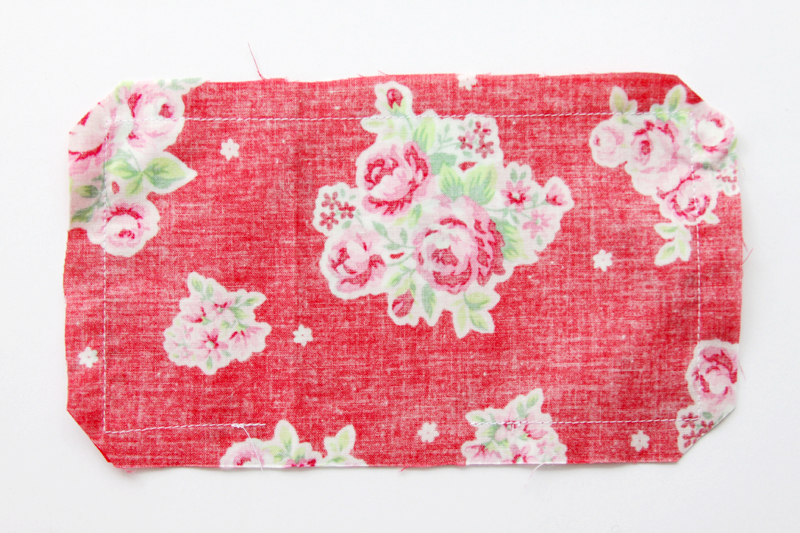
Turn the fabric right side out. Fill the pincushion with fiberfill and hand sew the opening closed.
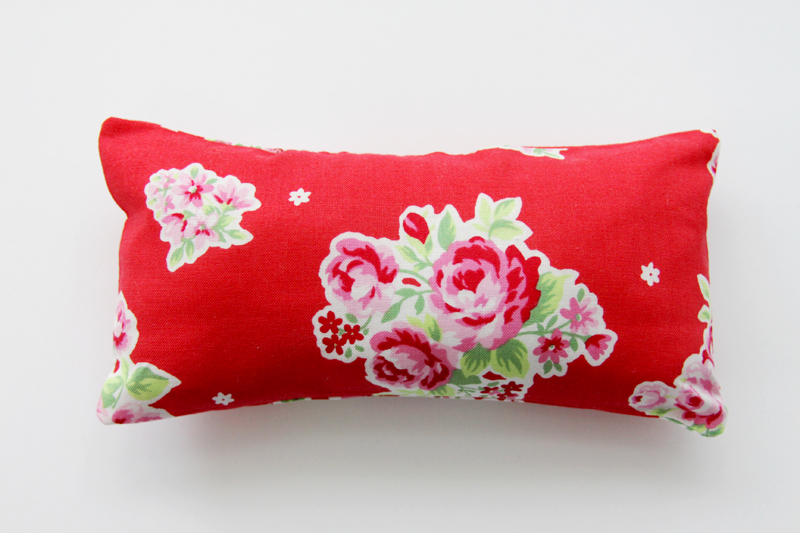
Hand sew the pincushion in place above the large pocket.
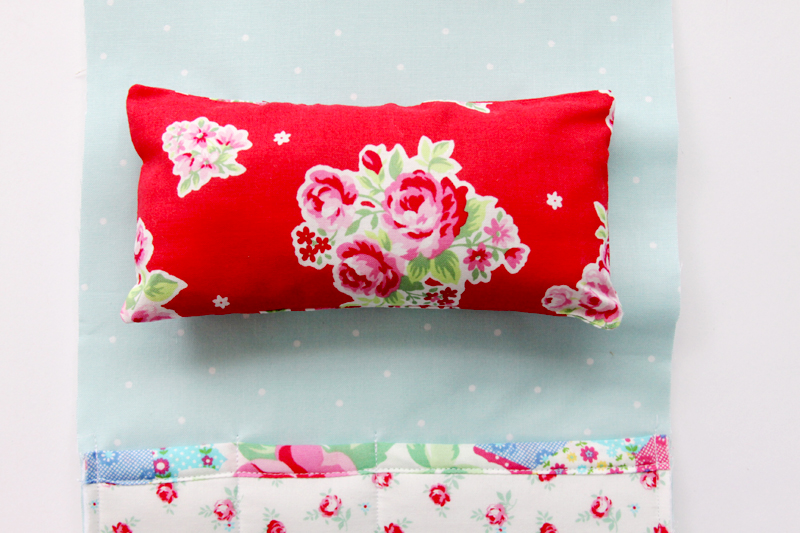
Place the remaining main fabric piece on top of this piece, so right sides are together. Pin the pieces together. Sew around all four sides with a 1/2″ seam allowance, leaving an opening for turning of about 4″. (You have to get that pincushion back through.) Clip the corners.
Turn the organizer right side out. You can use a chopstick or skewer to make sure the corners are nice and pointy. Press and then hand sew the opening closed.
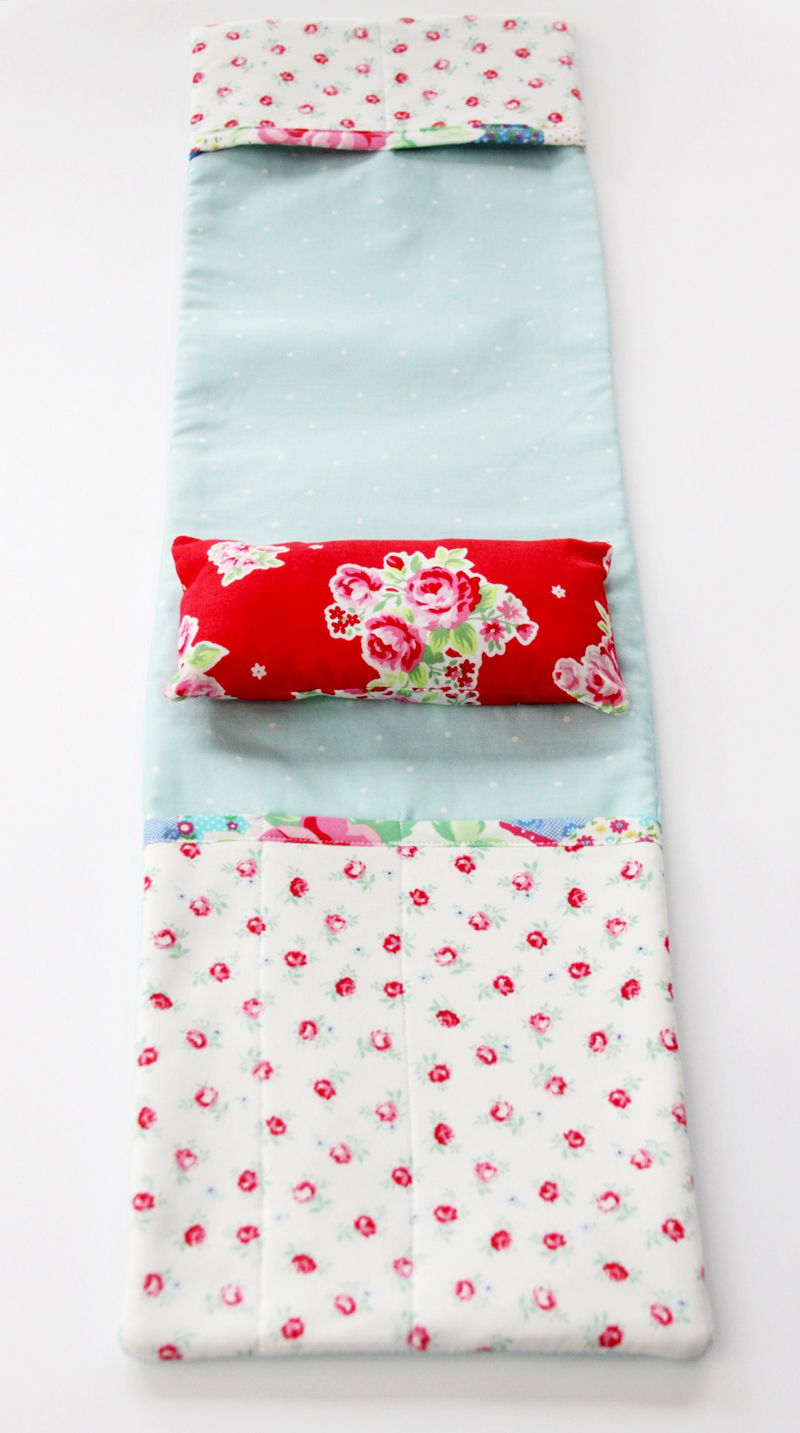
That’s it!! So fun right?
I have this new vintage wooden ironing board and I love how cute it looks with it.
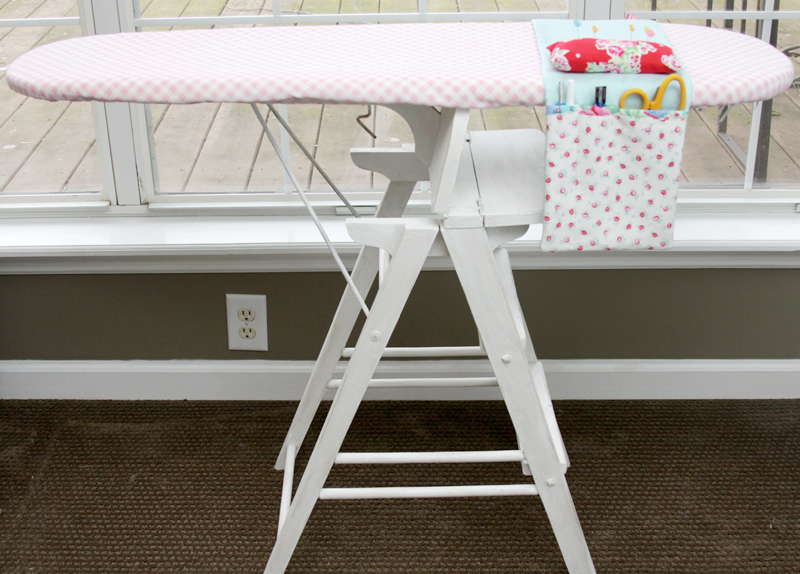
Plus now my things are all organized and neat! I love it when you have things cute and tidy. I hope you make one up!
You might want to try
Floral Flamingo Sewing Machine Cover
Simple And Sweet 30 Minute Fabric Basket


I love your DIY, great idea ;-) Thanks for everything
So CUTE!!
I’m in LOVE!!!! Even my mom saw it and we are both definitely making this!
XO
This is a great idea. I sew lots of small charity projects and use a table-top style ironing board that sits on top of a short bookcase, against a wall. A potholder at one end of the bookcase holds my iron. I’m going to replace that potholder with an Organizer, using this easy tute, and insert a little weight (old pr shears?)in the unused back side pocket to keep the Organizer balanced.
So cute! Thanks for the wonderful, easy to follow tutorial!
I love that ironing board! My daughter and I were in a second hand store and I found one very similar! I snatched it up for $5.00! This project is on my to do list! And maybe painting my ironing board too. I love the white! Mine is just stained.
Clever idea! Lovely mix of fabrics & colors used! BRAVO! Thanks for sharing!
The ironing board is gorgeous! Where did you get it? You did a very professional job sewing the kit. It is so colorful and fun – it makes one want to sew!
I want to know about the ironing board as well. Please show a picture of what it looks like when it is folded. Thanks.
Great idea! I pinned it and added it to my mental to-make list!
hello- where is this adorable red fabric w the flowers from?
This is a great idea! Thanks for sharing at Think Tank Thursday.
Thanks for the cute organizer and clear directions! I think I’m going to make the pin cousin Velcro on instead so that I can take it between my board and machine…
I like your idea of the Velcro.
I love this idea! And it’s so darn cute too.
Cute! Also, very useful. I think I’ll make one. Where in the world did you get your ironing board??? Did you make your ironing board cover too? Thanks for the instructions.
This is a lovely tutorial Bev and great for any sewer. I need to make one for me ;) Thanks for sharing at the #InspirationSpotlight party. Pinned & shared.
Such a great idea! I’ll be doing this for sure! I like that I can take it off and keep my sewing things together when I collapse my board – perfect when you have little ones crawling around!
What a pretty and useful project!
Another genius idea!! Thank you and Thanks for sharing with us on Throwback Thursday!
Mollie
Bellisimo gracias
Made this and love it! Planned on sending pic but do not see that option. Thanks for a great organizer. :)
This is an awesome idea, as I am also an untidy sewer/crafter. And since I do lots of hand-work whilst sitting in my comfy recliner, with tools cluttering my side table, getting lost down the side of the chair, or falling on the floor, I could take it from ironing board to recliner very easily when I want to fold up the ironing board and put it away. Thus my supplies would be organised when I’m working from my recliner. Many thanks!!
Is there a way to print out the directions without al the pictures for future reference?
Made it, and love it!!
What a wonderful and creative place this is. Thank you for inviting me in. I will visit often!
Bev
Thanks so much for the Ironing Board Organizer. I’m always at the ironing board cutting, measuring, ripping out boo boo’s. AND I need pins too. I would love to share this idea in our American Sewing Guild local newsletter. Would love to get your permission to do sew.
Thanks for sharing
Linda Norwood
How clever! And it looks great with all your pretty fabrics.
Amalia
xo
Love it! I so need this! I am always misplacing everything! Visiting From Artsy-Fartsy Link party!
Love the idea and instructions. Will definitely make one or two of these. I was looking for a pattern to make something similar to go by my sewing machine and hang to the side or front. I will adjust your instructions to make one for my sewing station with 1 set of pockets. The longer part without pockets will be under my sewing machine to hold it in place Then I won’t have to reach around my machine or pick the scissors, seam ripper… up off the floor, where they end up, as I move the material through the machine.
Love the vintage ironing board too. I have one from the 1950s in wood and I love it.
I love, love, love this! Cute idea, cute material, and cute all the way around!
super cute! And a great idea for corralling clutter!
#creativemonday
Katelynn, hampersandhiccups.com
Bev I love this! I was JUST altering pants for my hubby and doing some other projects and as I shuttled back and forth from my sewing machine with tape measure, scissors, pins, etc. I thought — I really need to keep a set of these things AT the ironing board lol. Pinned your project – thanks for sharing – it’s lovely!
Bev you always make such cute things, this ironing board organizer makes me want to start ironing again!! I was one that have enjoyed ironing, crazy I know.
You shared on #omhgww and last week and this week your post is being featured, pinned and shared on Instagram!! Watch for it, share it. Be sure to stop by and share again!!
Have a wonderful week!
Karren
Do you have the instructions in PDF format?
Eleanor Flynn back on March 03, 2017 asked if there was a way to print out your instructions without the pictures. I would love to know how to do this also. Also, my mother had a wooden ironing board, which I ironed on also. Ironing was one of my chores at home. I do not have any idea whatever happened to it. Would love to have it back!
Thank you,
Linda Barber
I used to use something like this but I was always bumping it around and knocking things out of the pockets. I found an old wooden kitchen drawer with wooden partitions in it, painted it, modge-podged leftover scraps of favorite fabric onto the bottom of the drawer and hung it so the bottom was against the wall beside my ironing board. Then I thumbtacked some small fabric containers to it and added some screw-in hooks.
It holds my tailor’s clapper, sewing ham and log, a pin cushion, pressing cloth, spray starch, water squirt bottle, and my collection of bias tape makers. Hanging from the hooks are a mini iron in it’s bag, my quilting rulers, and a bag for scissors (I have a pair of scissors everywhere – one by the sewing machine, one by the ironing board, and one at my cutting board). Then I clamped a light to it as well so I can see darker fabric better.
It’s working very well for me.
I really love this, it’s beyond cute and so smart. I’m going to have a DIY weekend this weekend and give it a try!
Its amazing and super cute idea for corralling clutter!. Thanks for sharing this
could you put pdf downloads patterns for all these.
Do you remember the names of the fabrics you used? I’m obsessed with the trim and baby flowers!
I just finished the ironing board organizer. Thank you so much for the free pattern. I just love it. Your directions were so easy to follow.
Thanks and have a great day, Paula