Today for our Scrap Busting Extravaganza I’m so excited to welcome Melissa from Melly Sews and Blank Slate Patterns!

Melissa is so amazing. She can sew anything and her patterns are hugely popular – they are even carried by Jo-Ann Fabrics! I think her project today is so cute!
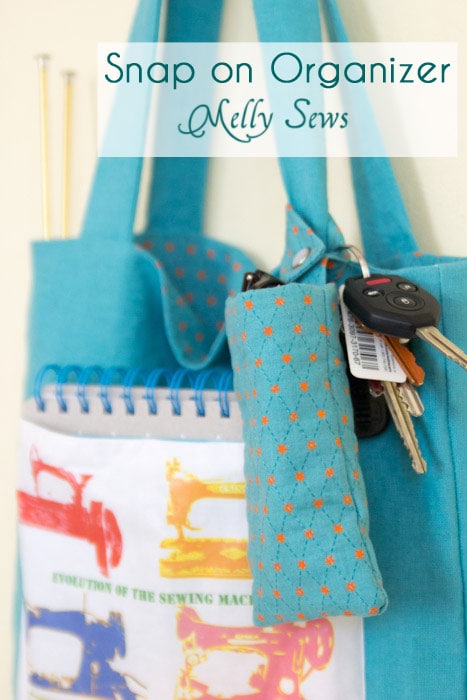
Hey y’all – I’m Melissa, from Melly Sews and Blank Slate Patterns and I’m excited to be here today to show you how to make this snap on organizer pocket.
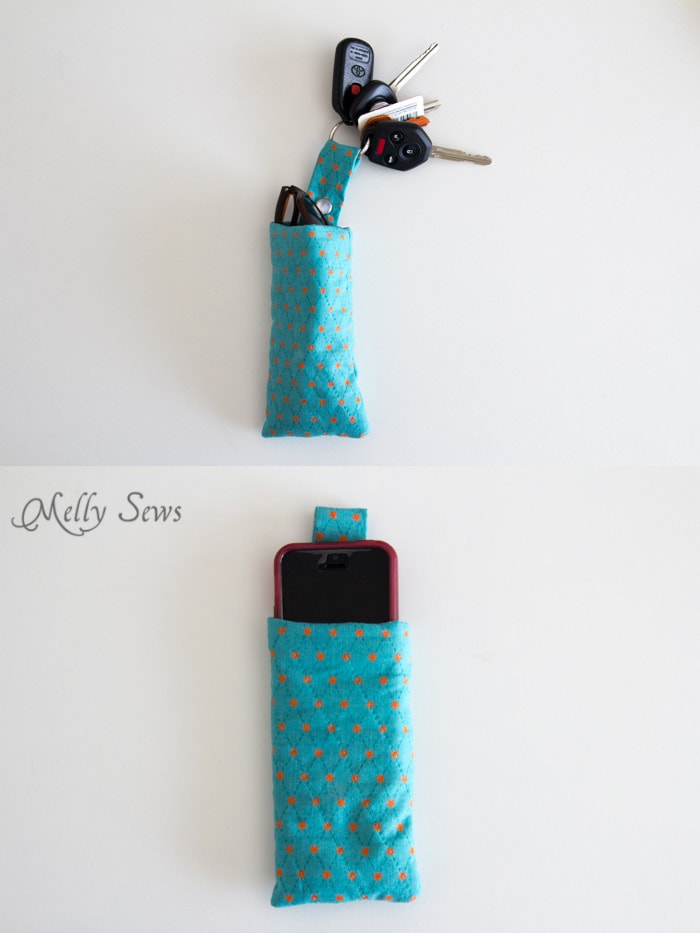
If you’ve ever been to my blog, you might know I’m kind of a freak about organization. And while I love tote bags – after all, they’re super handy for schlepping all sorts of mom/kid/business stuff – I hate having to dig to find what I need. You know, like keys, sunglasses, my phone…so this kind of thing is perfect for me – and bonus! you can add it on to any bag.
OK, to make this you’ll need the following materials:
Note: If you’re going to use this pocket for a phone, double check the circumference of your phone in it’s case. These dimensions work for my iPhone 5 in a slim case, but wouldn’t work for larger phones. Yo want the width of your rectangles to equal the circumference of your phone plus 2 inches.
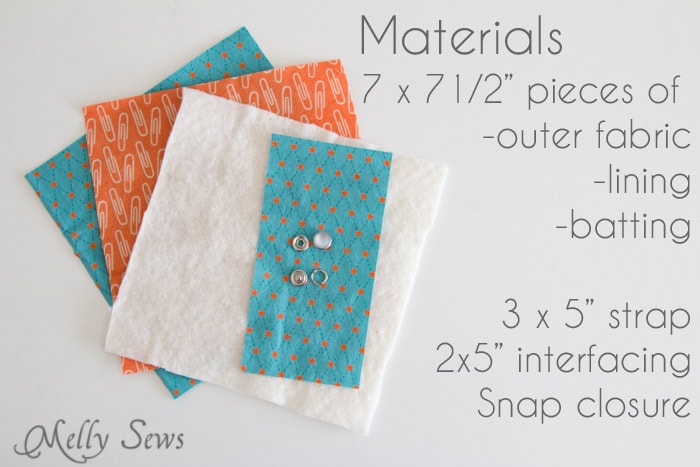
Note: Use a 1/2 in seam allowance unless otherwise indicated.
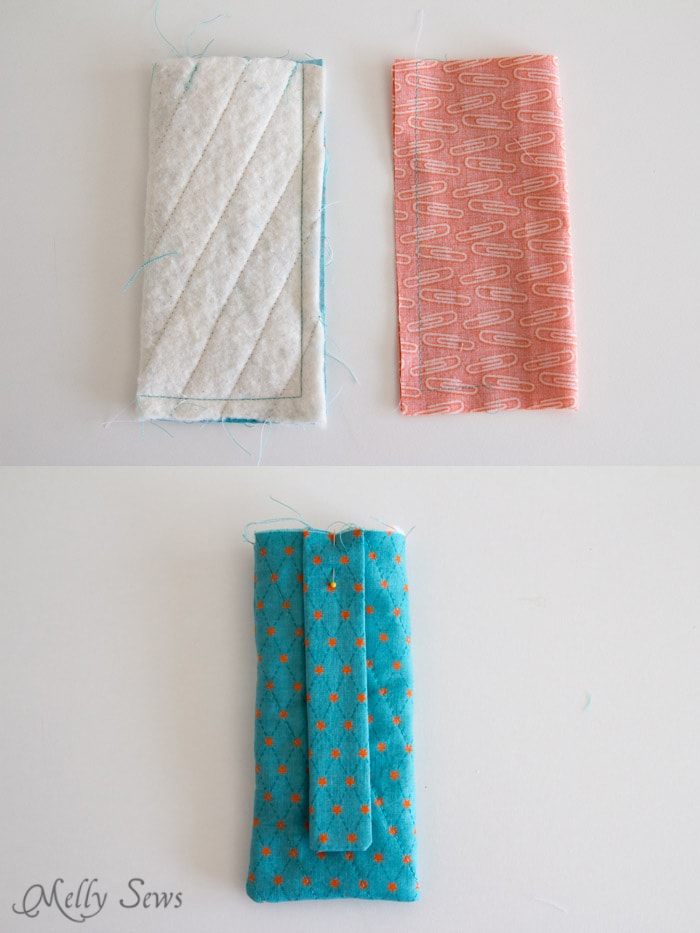
I started by quilting the outside fabric for the organizer. Since my fabric had lines on it already, I chose to stitch in straight lines right on top of those.

Fold the strap piece right sides together, matching the long edges. Press. Open. Use the crease to center the interfacing on the wrong side of the strap and fuse into place. Fold again, matching the long edges and stitch down two sides. Clip the corner and trim seam allowances to 1/4 inch. Turn the strap right side out and press.

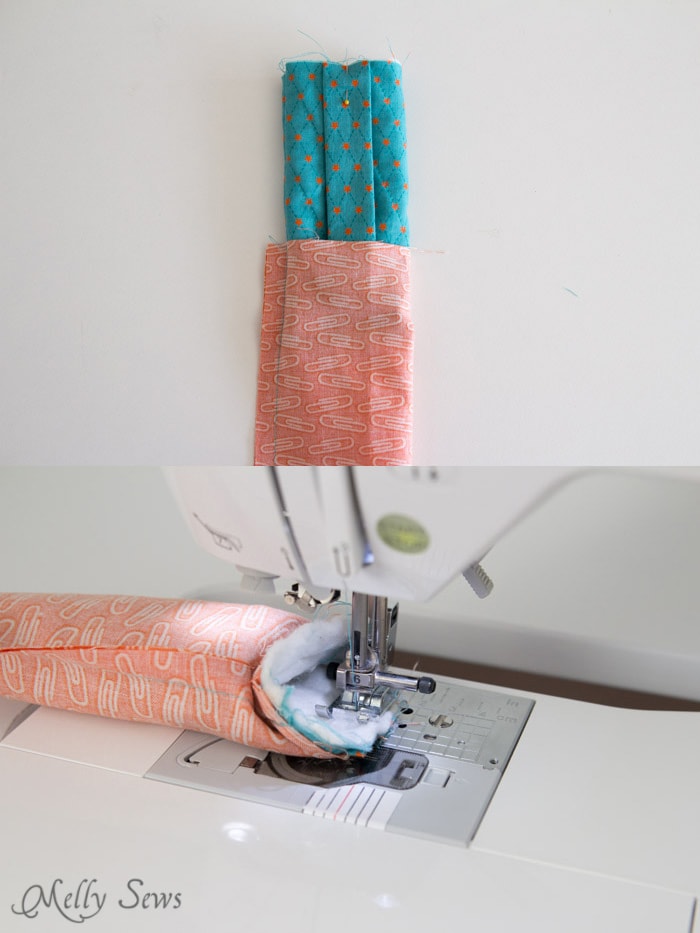
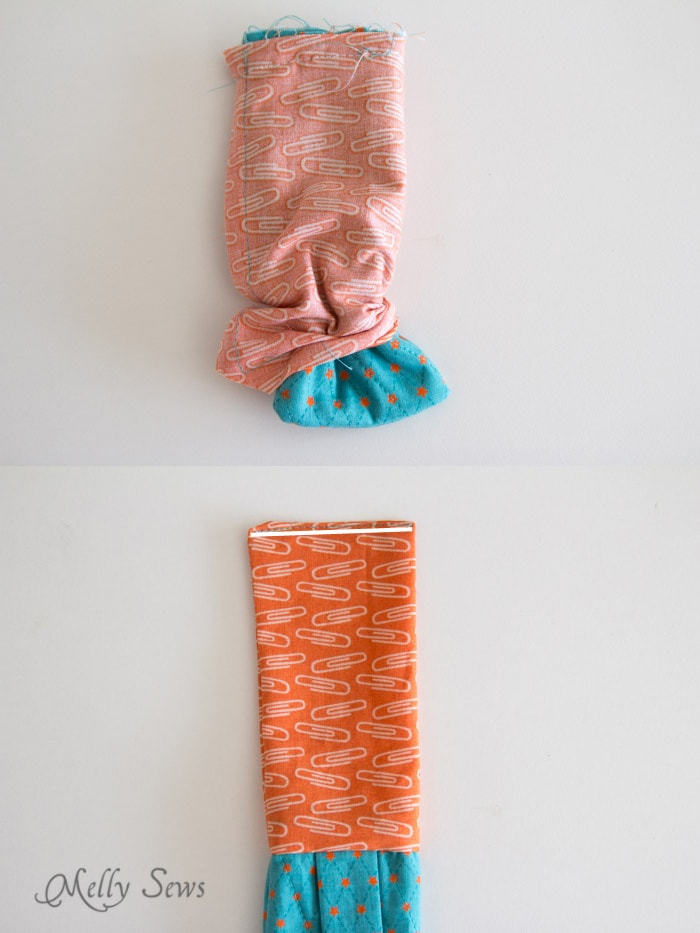
Fold the outer fabric and lining right sides together, matching the short edges. Sew the outer fabric along both edges, sew the lining fabric down the long edge, around the corner, and about 1 inch of the short edge, leaving a hole to turn the pocket later.
Turn the outer pocket right sides out and pin the strap to one side.
Place the outer pocket inside the lining pocket, matching the seam. Pin around the top edge. Stitch.
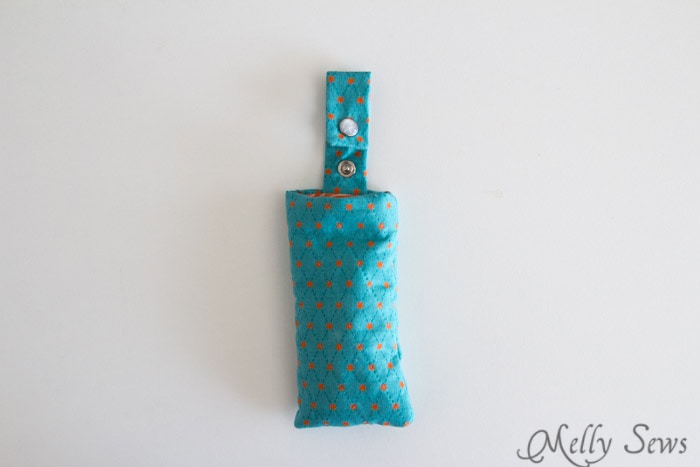
Turn the pocket right sides out through the hole in the lining.
Press the raw edges of the lining to the inside. Stitch across the lining to close the hole. Push the lining into the pocket.
Follow the instructions on the snap package to install the snap on your strap.
Use the pocket for keys, sunglasses, phone – whatever you don’t want to dig for in your bag! Bonus – you could totally snap this on a belt loop too.
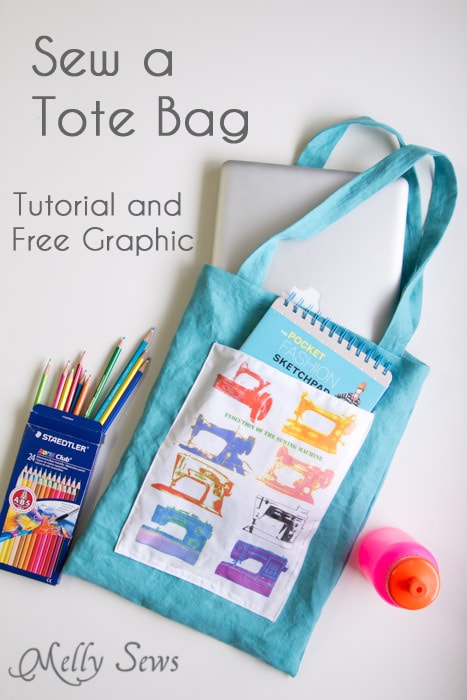
Want to sew the tote bag this organizer is snapped to? I’ve got a tutorial and FREE printable for the decal here.
Thanks for having me Bev!

How fun is that?! I think the totebag and organizer are so cute!
Aren’t these other projects from Melissa so great too?!


Thanks so much for joining in the Scrap Busting Extravaganza Melissa!


Love the pattern, and the tote bag with the graphic! I’ve just joined your blog, and immediately clicked to go to the free tote bag pattern, but was instead taken to a page on how to sew a drawstring bag…. I’ve looked around a bit, and can’t seem to find the page with the tote & graphic. Could you give me a hint as to where I should be looking? Thanks so much! Love your creativity!! (I’m good at following directions, but don’t have a creative bone in my body! :-) )
Hi Vivian,
It’s possible that her post wasn’t up yet when you clicked over. I just checked and the link works now, it takes you to her tote bag. Thanks so much!
What a great idea!! I could have used a few of these during our diaper bag days. ;)
Love Melissa’s patterns! I’ve used the robe one and it was SO easy to make.
So fun – thanks for having me in this series Bev!
Brilliant!
So fun!! I need to get organized! Love this.
xo
These are so cute! I must make some, they would be great gifts. Her Baby Romper pattern is awesome, I’ve made half a dozen for my lil’ man.