About a month ago I shared this tutorial over at The Scrap Shoppe.
I’ve posted it again here, in case you didn’t have a chance to stop by!
And hey – if you’re checking in from a reader – pop over and see how our Flamingo in the header is dressed up for Halloween!!! :)
I love the new casual styles of necklaces out there using fun materials like lace, ribbon, and fabric.
They’re also so easy to do and there’s not a lot of detailed wire work.
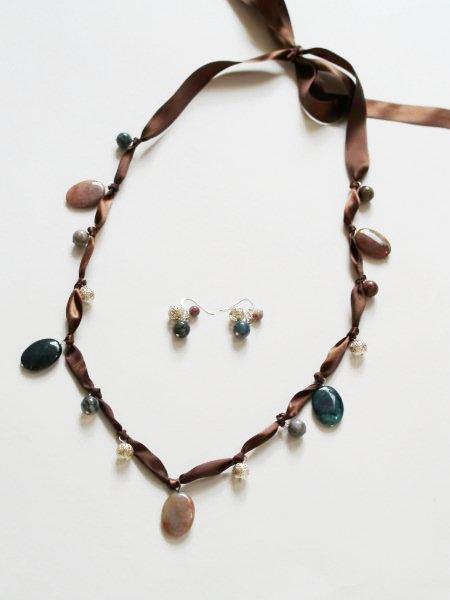
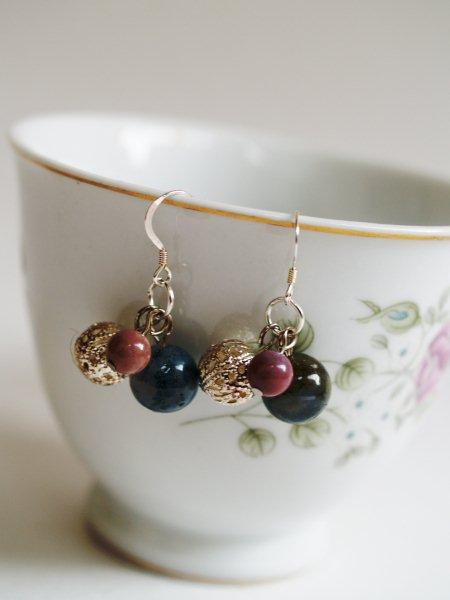
That’s just the case in this pretty Beaded Ribbon Necklace and Earring Set.
This necklace is great because you can take the basic design and adjust the beads or ribbon to go for a completely different look or color scheme.
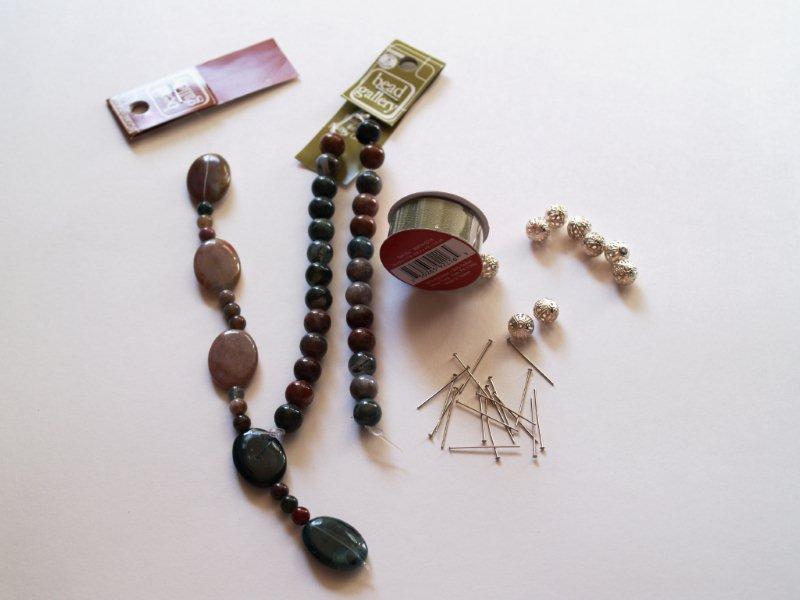
To make one you’ll need:
-
Ribbon (about twice the finished length of the necklace)
-
Large and small beads
-
Head Pins (wire with a flat end on it, longer than your beads)
-
Rounded pliers and wire cutters
Start by putting the beads you’ll use on head pins and making a loop. To do this, thread the bead on the pin,
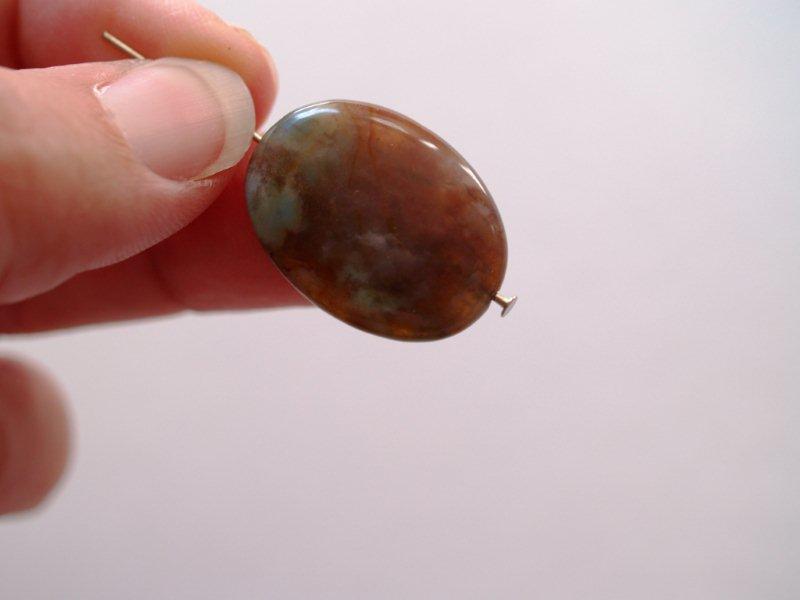
then with rounded pliers, bend the end of the wire into a loop. Trim any extra wire off the head pin, making sure you have a tight loop.
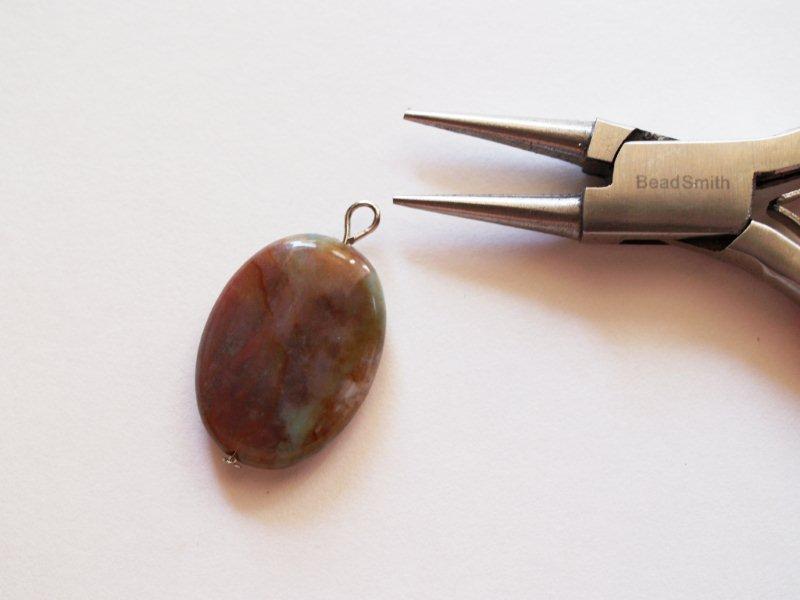
Also, don’t make your loop so small that your ribbon won’t go through it. It doesn’t have to be perfect, most of it won’t show, because of the knots.
You just don’t want the ribbon to be able to slip out of the loop.
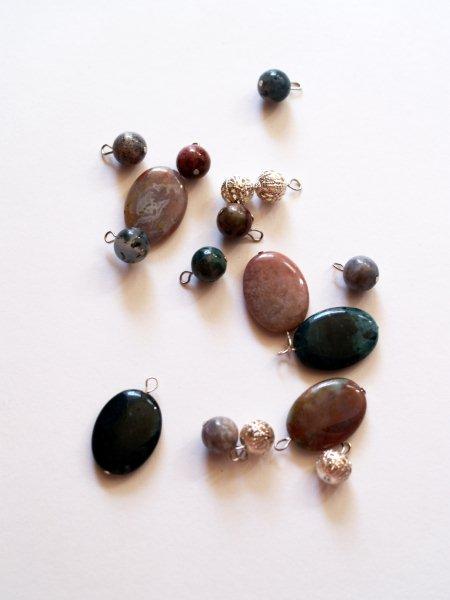
Once you have your beads all ready you can start threading them onto the ribbon. You might want to layout the beads in the pattern that you’ll use in the necklace.
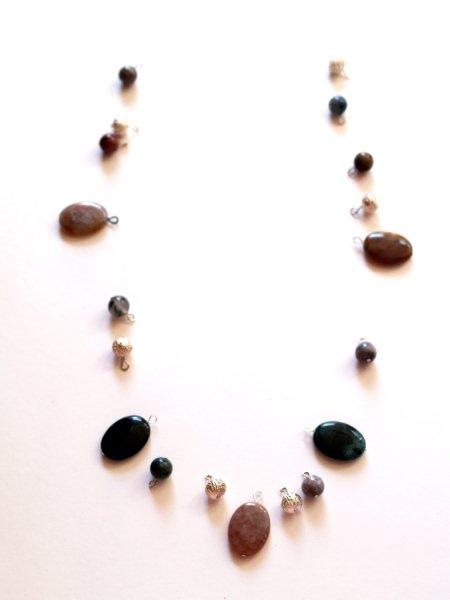
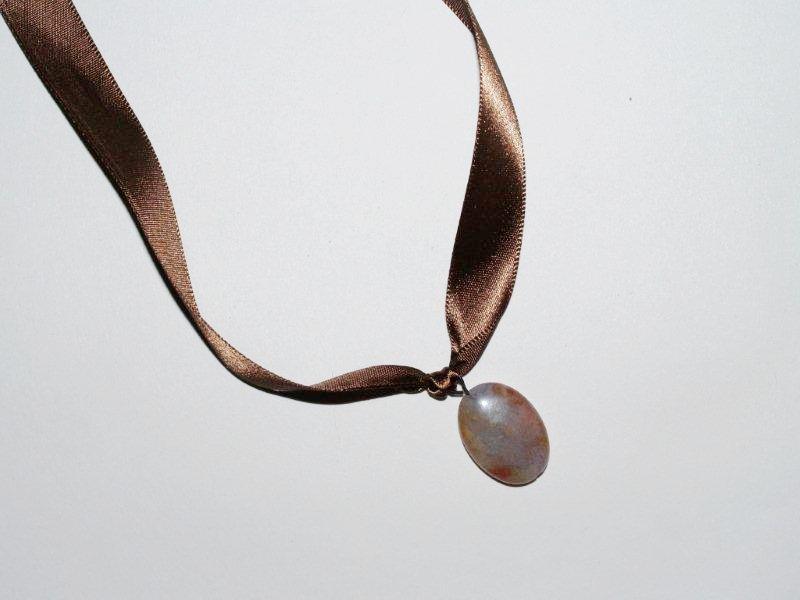
Start with a center bead. Thread it onto your ribbon, down to the center. Knot your ribbon around the pin loop.
Continue adding beads, switching back and forth on each side of the center bead, knotting the ribbon around each pin. Try and keep the space between beads about the same, and the spacing of the beads even on both sides of the ribbon.
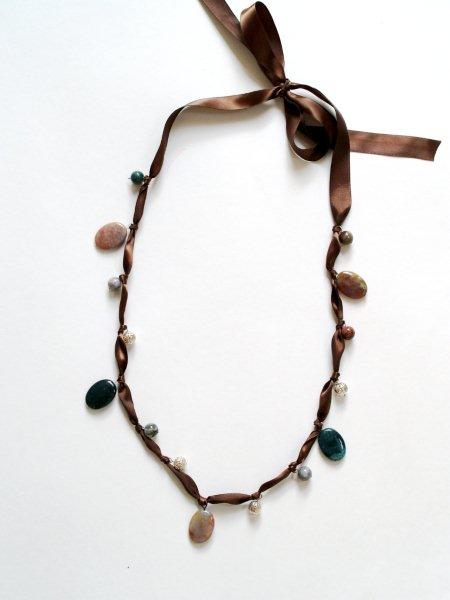
Try the necklace on every so often to check the length. When you have all the beads on that you want, tie the ribbon in a bow at the back and trim off the ribbon ends.
Add some Fray Check to the ends so your ribbon won’t fray.
If you have any beads left over (which I did because I forgot that I’m short and didn’t need a beaded necklace that went to my waist) you can add them to a set of ear wires for a quick set of matching earrings. I added three beads to a jump ring, then added that to an ear wire. Easy!
And that’s it! So simple!
It makes a fun addition to a plain T-shirt (yes. We did that AGAIN) . . .

Or under a cute jacket – for when it’s actually cool enough to wear one!

Perfect for fall don’t you think?


LOVE this necklace! What a perfect accessory for fall. It looks super cute with a denim jacket. I may be making this one! :)
ps, love the Elvis flamingo!
Design question: do you tweak your header in Illustrator?
Thanks Emily!! Yes. :) I do use Illustrator. I loooove it.
Your elvis flamingo makes me smile!
I love Elvis! I really do… that necklace is very pretty and seems very quick and easy to do, can’t wait to try it…
haha Elvis! :D
The necklace is beautiful and definitely perfect for fall!
Thanks for the step by step pics! I’ve always been curious about jewelry making.
Hope you had a great weekend!
KareyEllen
KareyEllenDesigns.blogspot.com
Seriously, Bev. I love your jewelry!!! I cant wait to make this one :)
Saw you on OC Cottage…loved the name, so I checked you out and found the answer for my “homemade” Christmas present for my nieces…No, I will won’t be making the necklace, but I will pass on the tutorial, the ribbon and the beads and let them create. Thanks so much for sharing this idea. It’s great!
Jane (artfully graced)
Thanks for the detailed instructions. LOVE flamingo Elvis!
I have beads and jewellery making supplies AND I had ribbon I haven’t yet put the two together, great idea.
elvis flamingo! how fun! and that necklace is fab. i wear jewelry like that to snazz up all my work outfits.
Elvis has left the building? Love it!
Still lovin’ this necklace, too! So glad you shared it with me! Thank ya. Thank ya very much. ;)
I have absolutely no ability to adlib crafts so where did you get your beads?
thanks !
This is pretty!
Beautiful necklace!! What a great and easy piece to make!!! Thanks for the inspiration!!
Very cute,I have been looking for something easy for my granddaughter to make,she’s gonna love it!
That’s beautiful! I love the stones. Thanks so much, I’ll be linking.
This is a great set!
That is so simple and pretty! I love it with the natural stones and brown ribbon, and I love the extra long drape!
It’s very pretty! Thanks for stopping by and linking to Anything Related!
{Rebekah}
Gorgeous Beverly, but then again, everything you make is! I really like the softness of the ribbon and love the earrings. Thanks for linking up to A Crafty Soiree! Please come by again next week!
Very Pretty. It looks awesome.
Cheri
PRETTY! Thanks for linking up and sharing on Thrilling Thursday @ Paisley Passions :)
So pretty! I’ve never tried to make jewelry… your tutorial makes it not quite so intimidating. Nice!
That is so pretty. What a great idea. I’ve been looking for inexpensive Christmas gifts for my friends. This is perfect. Have a great weekend.
GORGEOUS! I love it. I like the pinki-ness with the browns as well as the blue. It all looks great together! Thanks for linking up to Topsy Turvy Tuesday’s!
Very nice! Thanks!
So gorgeous – I’ve never tried to make jewelry, but this makes me want to! I’ll be featuring it at this week’s Craftastic Monday, so be sure to stop by & grab a featured button:)
So pretty! I love how it looks with the denim jacket and white shirt!
yes perfect for anytime!
Thank you for your tutorial. It was very helpful to me!!!
PRETTY! I just bought my supplies for the Paisley Rebirth Necklace.
I’m going to make this for some friends for Christmas. It’s perfect!
Quick question. What width of ribbon did you use for this?
You just made my day! I toss my old very unique necklace and couldn’t find a tutorial to make one myself until today. My old necklace was beautiful and simple. I could wear it with anything and make me look elegant (grey ribon and pearls in many loops). Everyone asked for it and I can’t remember were I got it :-( now I can at least try to make my own! Will try to post a picture once it’s finished. Thanks for posting this tutorial. Sharing is caring like my kids say :-)