I mentioned to my daughter that I needed to come up with an idea for a Back to School craft, and this school supply pouch was her suggestion. She’s a smart cookie. ;)
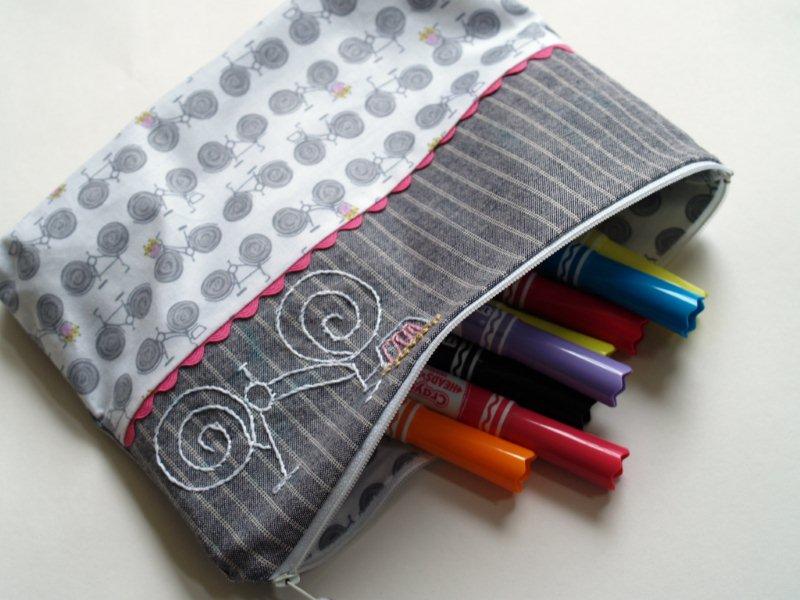
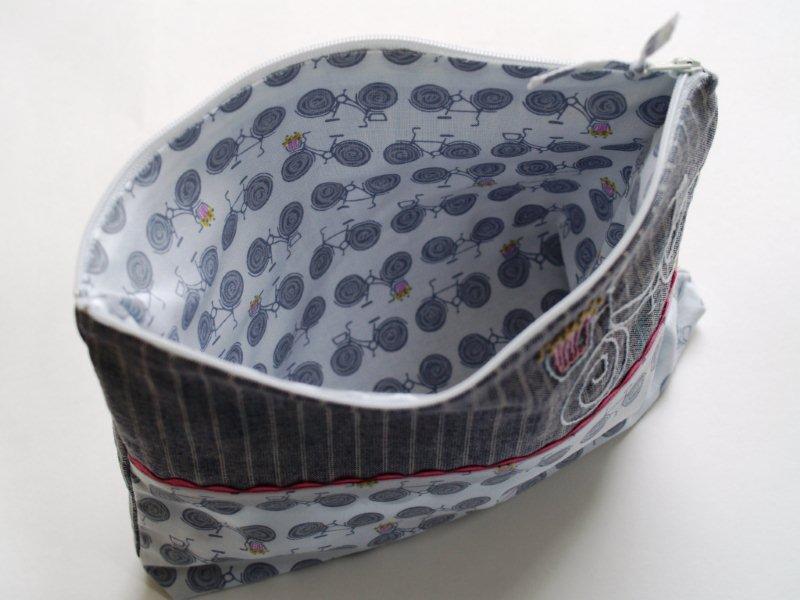
And since she’s also a senior in high school, I thought this was a great craft for any age. Here’s the finished pouch we came up with. We thought it would be great for pencils, markers, that sort of thing.

I found this great bicycle fabric on our road trip this summer – I just fell in love with it. But the basic design of the pouch would work well for any cute fabric you have in your stash.
Here’s how to make this super easy pouch!
You’ll need:
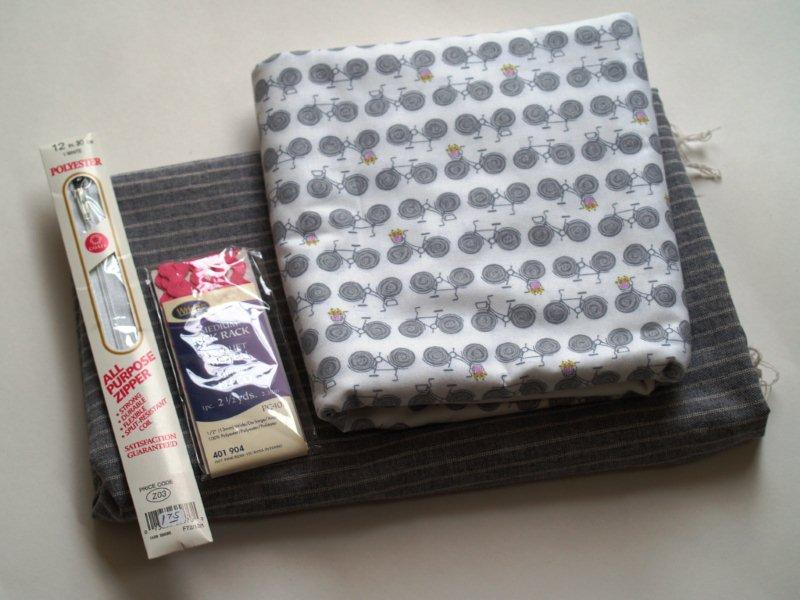
- Decorative fabric for outside lower section and lining
- Denim or heavier weight fabric for the top and back of case
- Ric Rac
- 12″ zipper
- embroidery thread
Out of your fabric cut the following pieces:
- Decorative fabric: 2 pieces 8″ x 11″, 1 piece 5″ x 11″
- Denim fabric: 1 piece 8″ x 11″, 1 piece 4″ x 11″
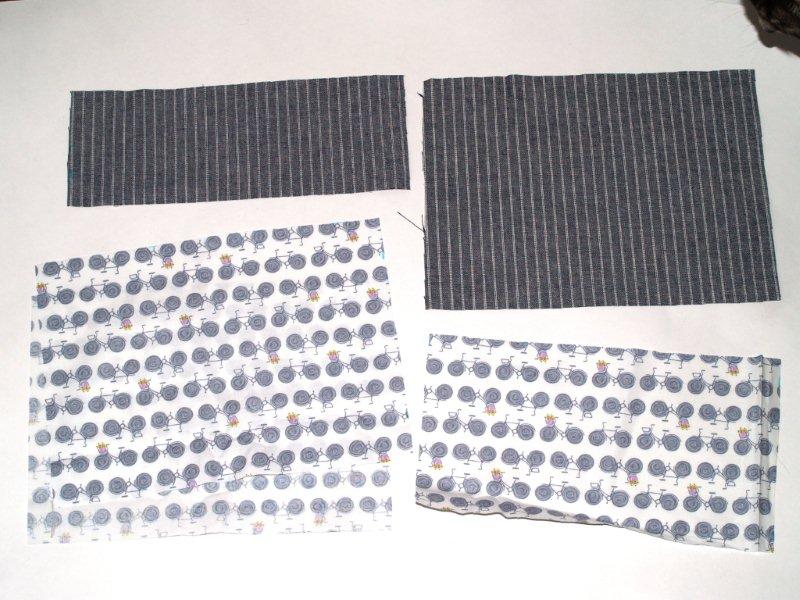
(Excuse the kitty inspector in the top corner there)
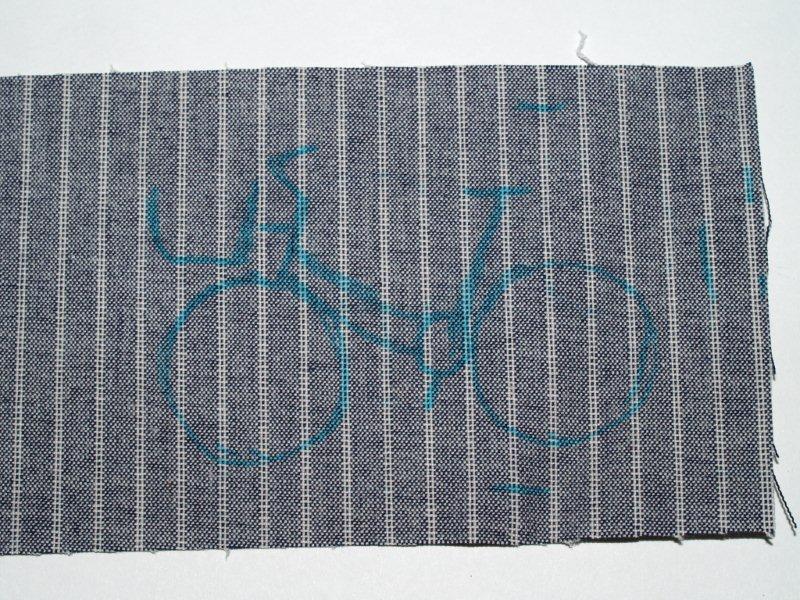
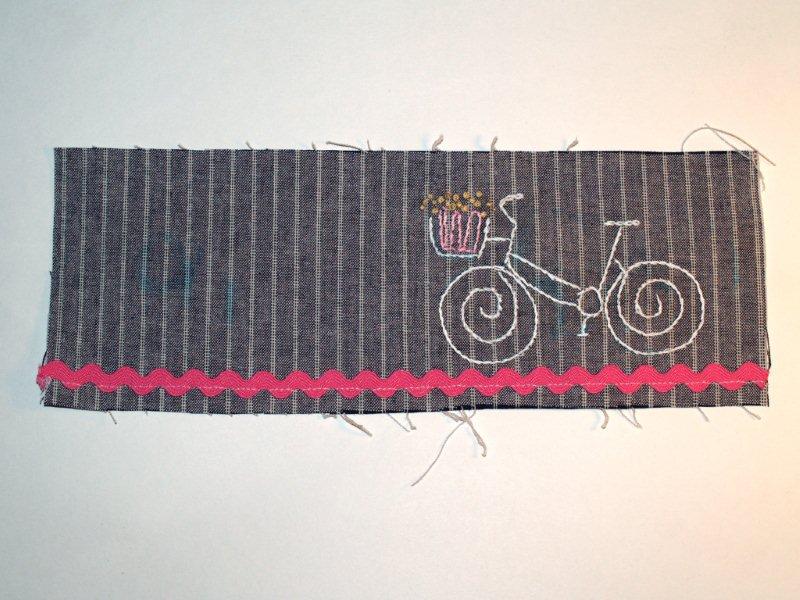
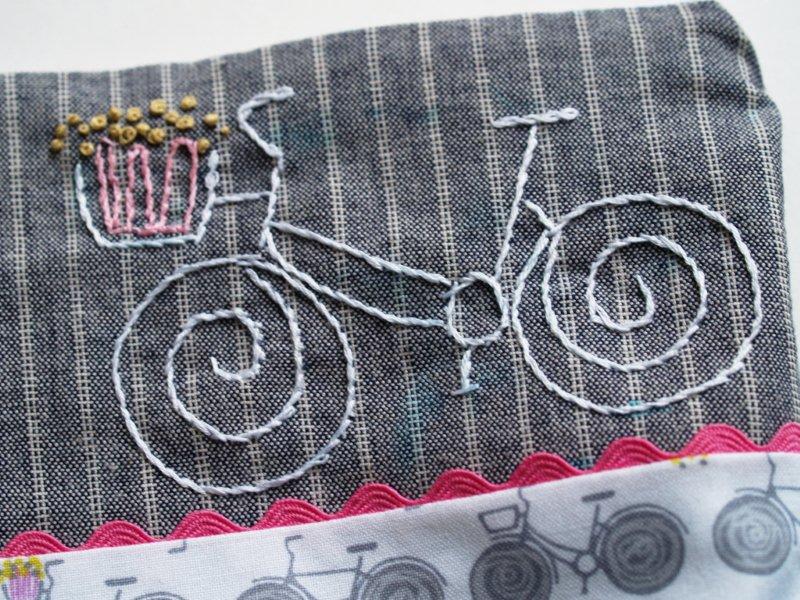
If’ you’re going to do the embroidery on the top denim panel, do that first. Choose a design that coordinates with your fabric. I redrew one of the bicycles from the decorative fabric. I marked the location of the seams first, then drew the bicycle with a fabric marking pen.
I embroidered the lines with a simple stem stitch and in the basket I used french knots for the flowers. Once your embroidery is done, wet the design to wash away the marker.
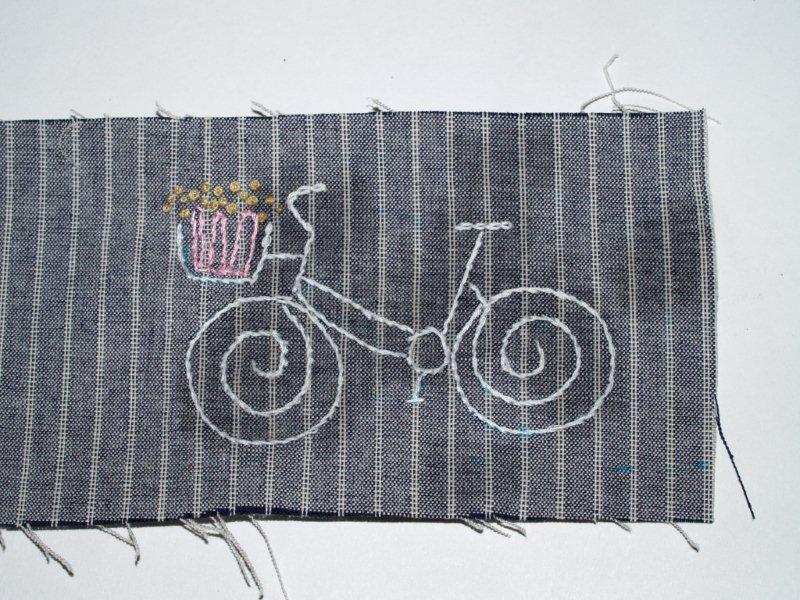
Sew on the Ric Rac border along the bottom edge of the top denim piece.
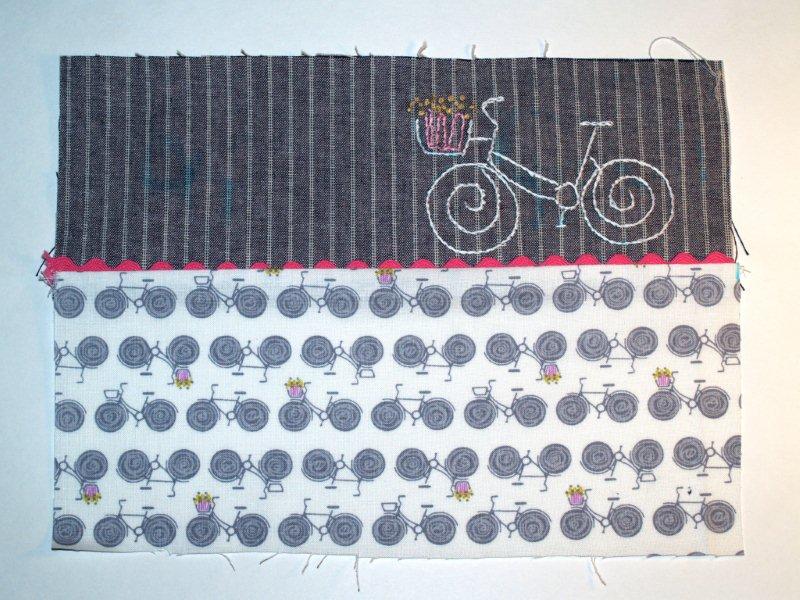
New sew the small decorative fabric rectangle to the top piece, right sides together. (I used 1/2″ seams for the pouch.) Press the ric rac up towards the top panel.
Prepare your zipper. Mine was too long for the pouch but this is easy to fix. Lay the zipper along the top edge and mark where you need it to stop.
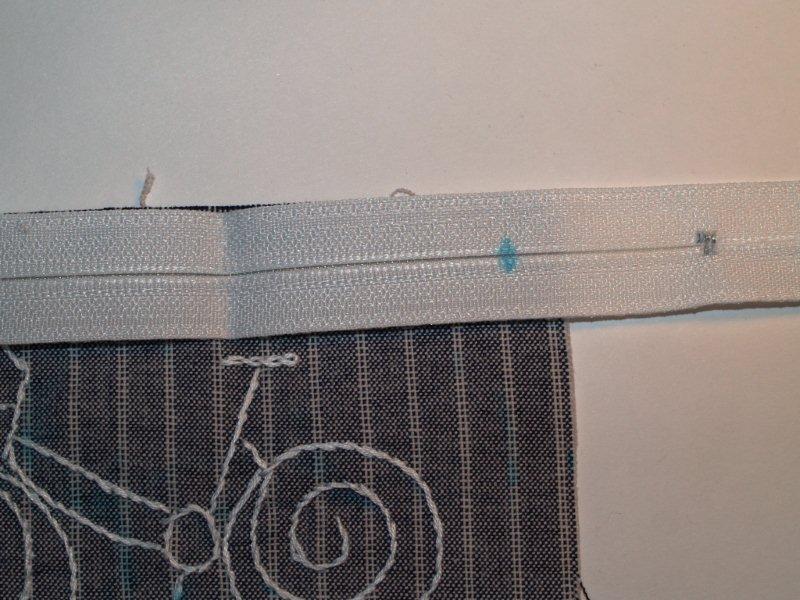
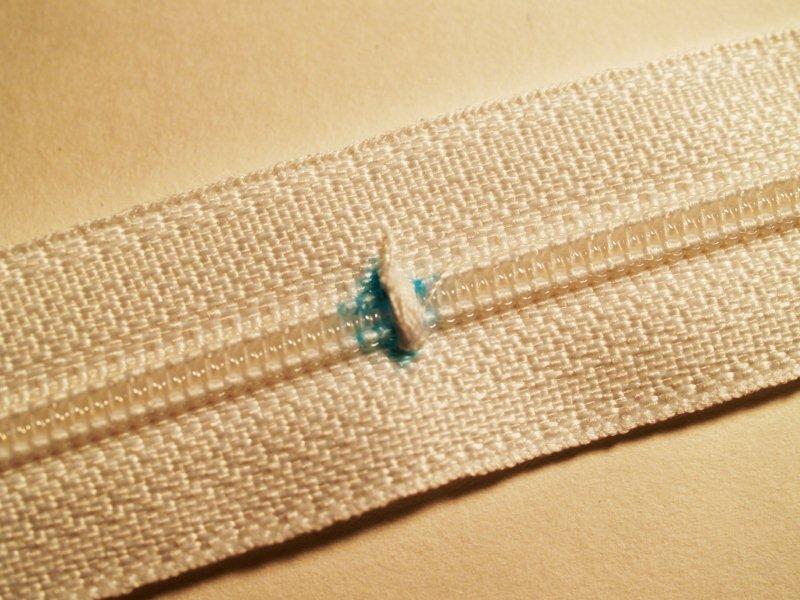
Sew a small zig zag stitch over your marking stitch. Trim the zipper 1/2″ below line.
Open up your zipper and sew the right side to the right side of the top panel. Repeat with the back piece of the zipper pouch.
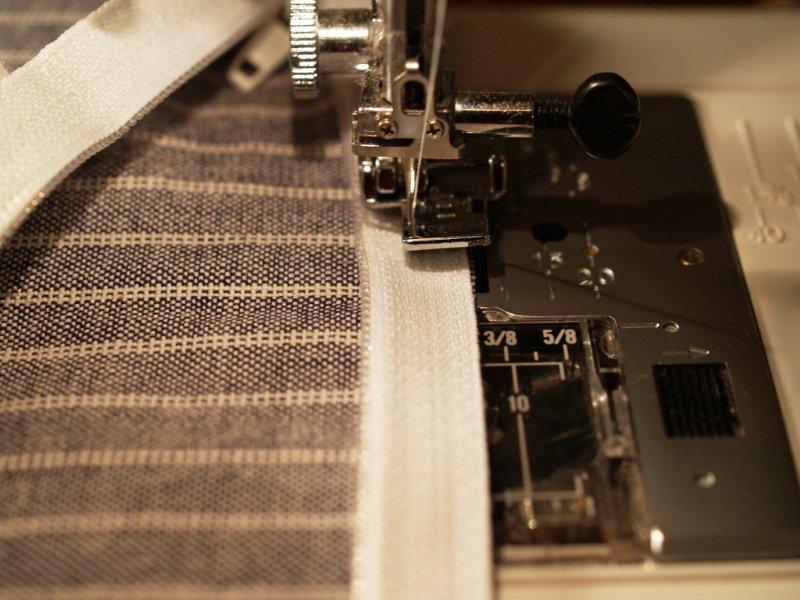
Press the seams down. Put your front and back panels, right sides together and sew the remaining three sides of the pouch. Form a small triangle at each bottom corner of the pouch and sew a line 5/8″ from tip of corner. This will make a small flat bottom edge for the pouch.
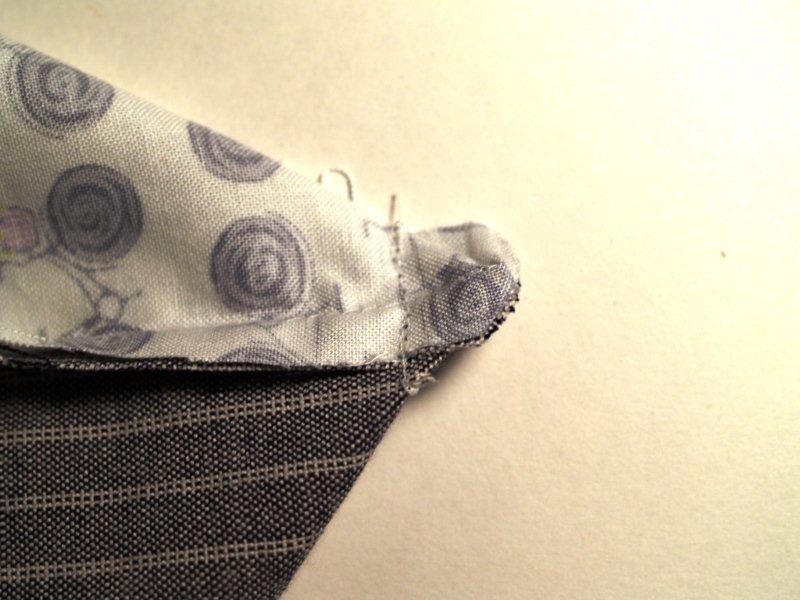
Set the outside piece aside. Place your lining pieces right sides together and sew around three sides, leaving the top edge open. Sew your corner edges in your lining just like you did on the outside piece. Press the top edge down 1/2″.
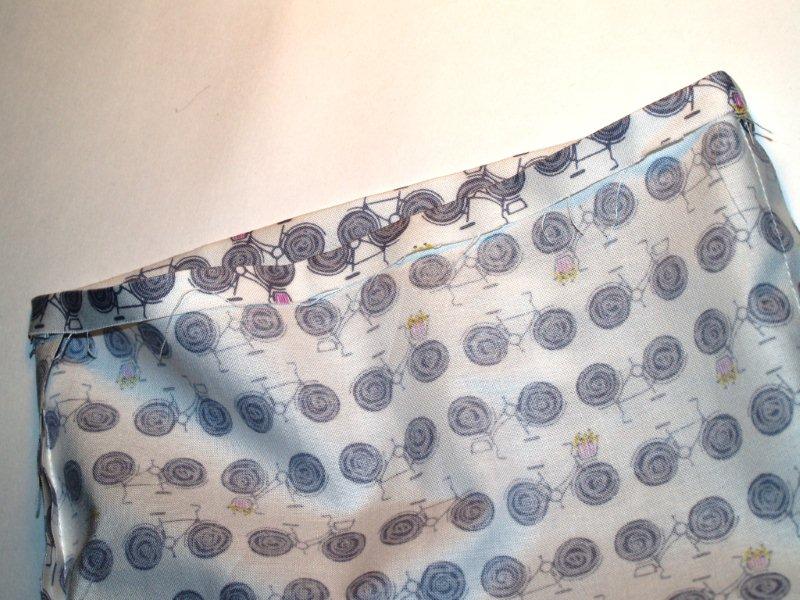
Turn your lining right side out and place inside outer section, so wrong sides are together.
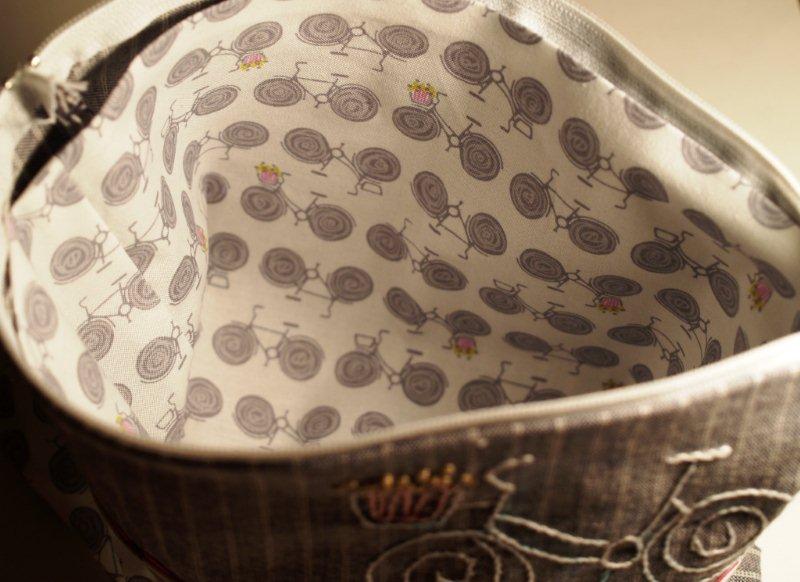
Sew your lining into the pouch, just below the zipper.
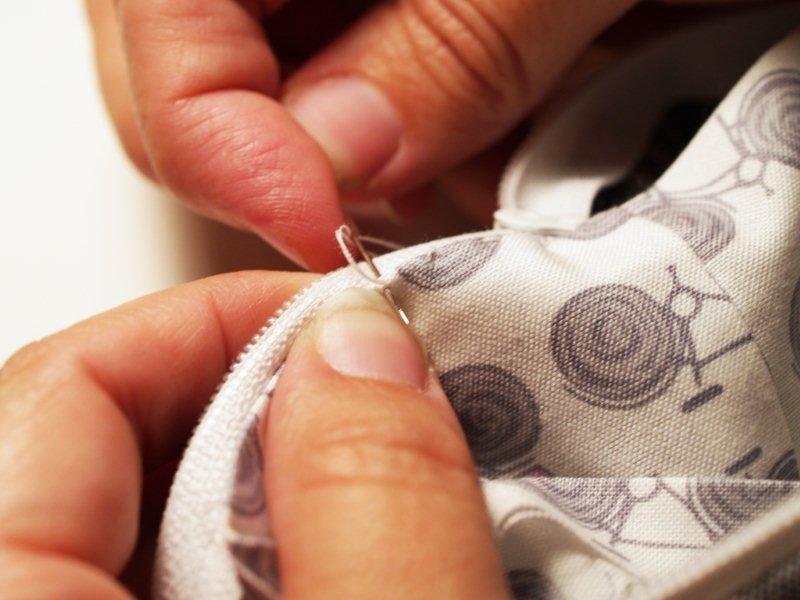
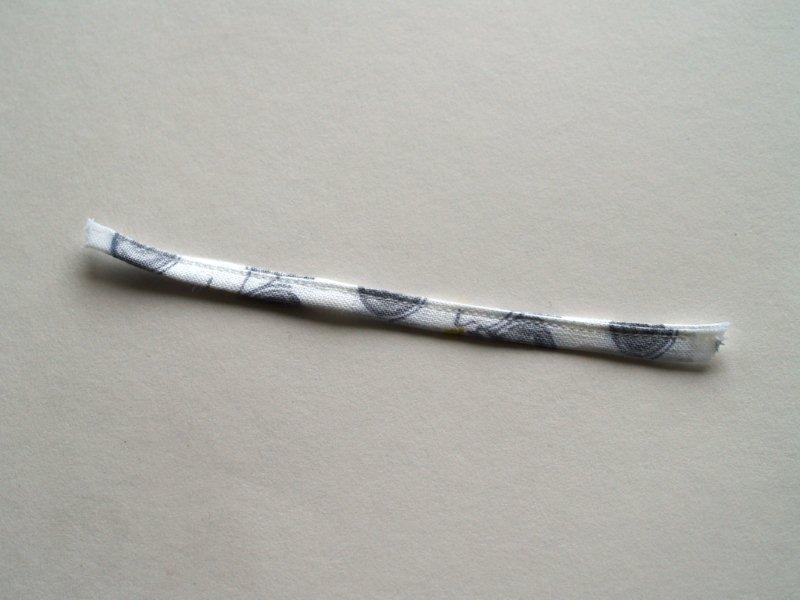
If you would like, make a small fabric tie to knot on the end of your zipper. Cut a piece of fabric 3/4″ x 5″. Fold the two sides in and then fold in half. Sew close to the folds. Cut the ends at an angle and apply fray check to the end. Tie onto your zipper pull.
And you’re all done! You’ve got a super cute school supply pouch – all ready for your little (or big) one for school!

I hope you enjoyed the tutorial! As always, I’d love to see any projects you make from tutorials here at Flamingo Toes.
Click here to download the pattern
[dm]4[/dm]


I can’t tell you enough how much I adore this supply pouch and how much I appreciate you helping me out with a tutorial of it last week. I’m so glad you put the bicycle pattern up I can’t wait to get one made. Maybe tomorrow! Thanks so much!
This is just adorable! I love the stitching. Such a cute idea! And the lining is just too cute! Great project!
I am delighted that you are coming over to my site to show everyone how it is done, this darling little bag is so pretty! Every detail is amazing — you have a talent darling!
just noticed the downloadable pattern, you are amazing!
CUTE! What a fun back to school pouch! If only my sewing machine was working. I’d love it if you’d stop by my Topsy Turvy Tuesday Link party and add this cute pouch.
Thanks for linking up to Topsy Turvy Tuesdays!
that bicycle is SOOOO cute :) come on over and link up to MMM!!!
This is just too cute! I love bicycles! And I think you’re either before or after me on Met Monday…happy new member/follower!
Jeanine
You.are.amazing. Good grief! And you know how I’m obsessed with bicycles! Love it.
Your embroidered bicycle is precious! It totally makes the bag.
That is so, so cute! Thanks so much for the darling pouch, I’ll be linking.
What an adorable artwork! I like this style, it’s just simple but chic! Thanks so much for this great tutorial!
That’s sooo cute! LOVE the bicycle:)Very simple and just darling!
PS Come by and check out my giveaway going on now at my blog:)
I saved this in my to do list yesterday and forgot to tell you how great I think it is, now to get my sewing machine fixed….
I’m coveting your bicycle fabric! Thank you so much for the pattern – it’ll make the perfect gift for my friend. Now I just have to figure out the perfect thing to stitch it on to.
That is so cute. I love the fabric. I’m hosting We’re Organized Wednesday and would love for you to join the party. There’s a great giveaway too. Hope to see you there.
I am in love with your bicycle embroidery! So cute!
Thanks for stopping by our blog! :)
This is so cute. The embroidery really makes it special. I like how you tucked in the ric rac and even made a zipper pull. The detail work is wonderful. Thank you for linking to Fabric Fun Thursday.
These are soooo cute! I love it. I’m going to make some. My son is only in preschool, but we need them for something! :) Maybe I’ll just have to give some away. Thanks for the great tut! I’m your newest follower. Found you on Tatertots and Jello.
Amanda
http://notyetinvented.blogspot.com
This is a really great project. I loved all the details!
Thank you so much for sharing the cute embroidery pattern! I just finished stitching a bicycle for my friend’s birthday and I know she’ll love it…if I can bear to part with it, that is.
I Love this!!!! I just may have to give it a try :)
http://runwithglitter.blogspot.com/
I love this pouch and wanted to let you know that I am featuring it on Monday! Thanks!
oh my goodness!! This is the cutest thing I’ve seen in forever! I LOVE how practical it is, but it is so cute I can’t even stand it! I’m amazed :)
Im not sure how the heck I missed this one but I did. This has got to be the CUTEST pencil pouch I have ever ever EVER seen. I love the fabric and the colors and I love the sweet embroidered bike. Love it. Pinning it.
The bag is fabulous.. I really want to do it this weekend. I better start looking for the fabrics..
Hi, my name is Chelsea and I have recently started trying to promote my craft blog http://www.craftychelsea.com. I just wanted to let you know that your blog was one of the very first craft blogs I started getting into, and it inspired me to get my own blog going. This post was one of the very first pin I pinned on Pinterest, and then actually tried to make. I was wondering if you had any tips on trying to promote my blog. I have a giveaway currently going, but not very many people have entered. Do you have any suggestions about how to get more people to enter and follow my blog?
Thanks!
Chelsea
My daughters friend asked me to teach her to embroider – whew! I’m a novice still myself. But I saw this adorable bicycle and am using it tomorrow to teach my daughter and friend their first few stiches – stem stitch, french knot, and lazy dazy chain. While I don’t like machine sewing enough to do the bag with zipper, I can manage a simple tea towel or apron, so this should be a great first project for them. Thank you!