Have you entered the Black Friday Giveaways?? You have a couple more days to enter!
Click here for links to all 18 Giveaways!
**********************************************************************
How are you doing on your handmade Christmas presents? Need any quick, easy, super cute, jewelry ideas??
I thought you might. ;)
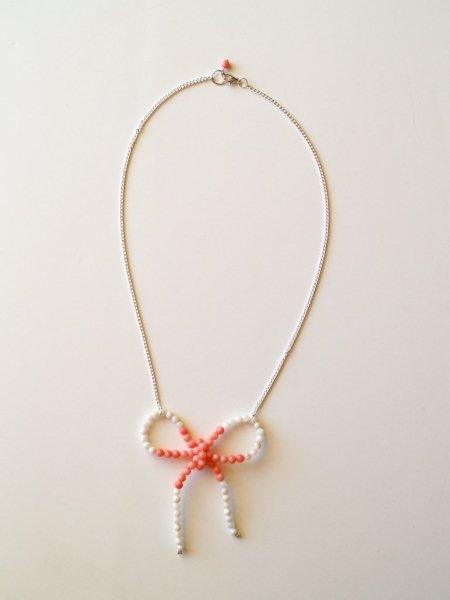
I was browsing around and found the perfect thing. The Anthro Trimmed Necklace.
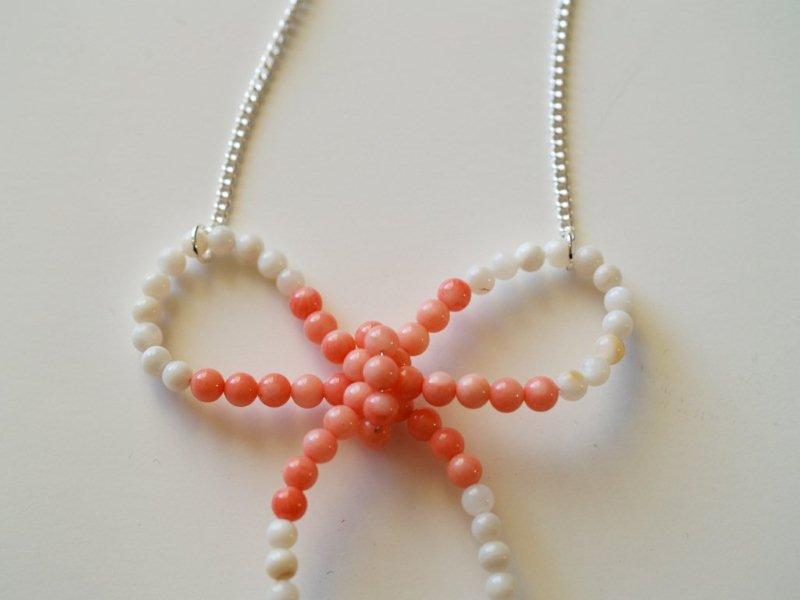
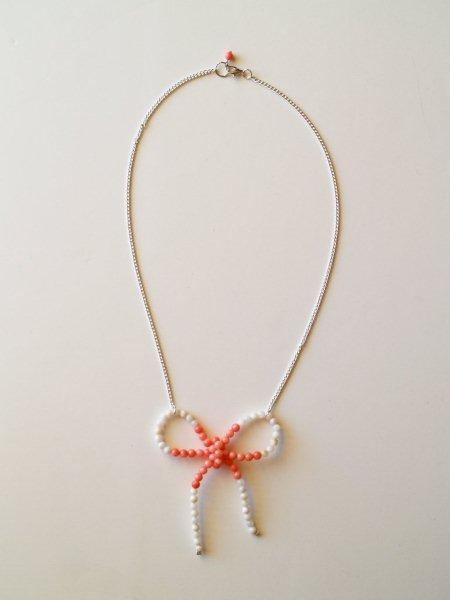
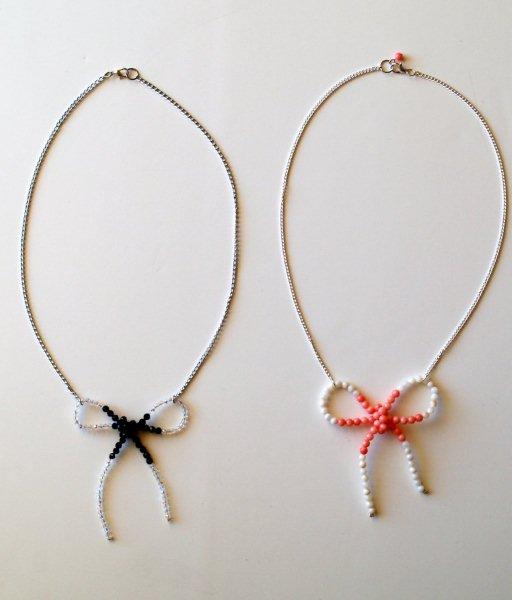
Here’s mine:
And here’s the original – with a $38 Price Tag:
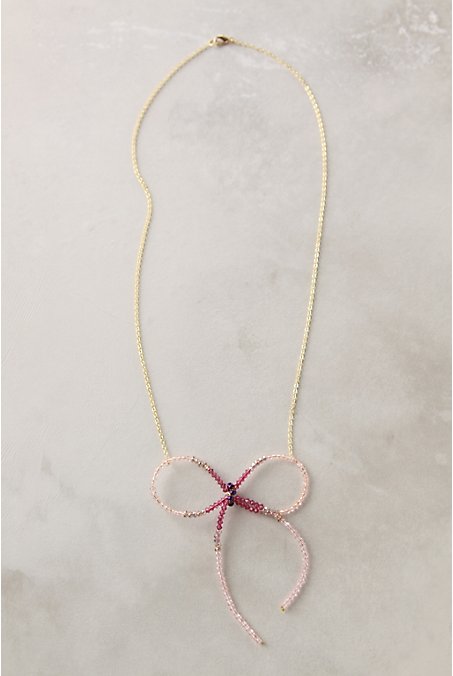
(photo credit: Anthropologie)
I love the simplicity of this one.
Ready to get crafting? You’ll need:
- 2 Colors of small beads (if you want to do the two color bow)
I bought two tiny strands from Michael’s - 17″ of 26 gauge wire
- 3 crimp beads
- 18″ chain
- 3 small/medium Jump rings
- 1 large Jump ring
- 1 lobster clasp
- 1 Head Pin (optional)
- wire cutters, round and flat nosed pliers
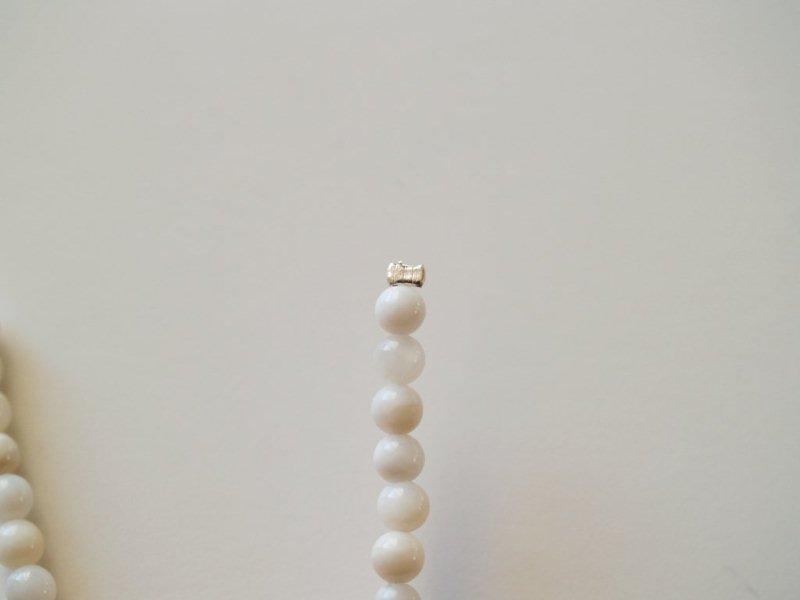
Begin by adding a crimp bead to one end of your wire piece. Place the tiny bead on one end of the wire and crimp it with the flat nosed pliers.
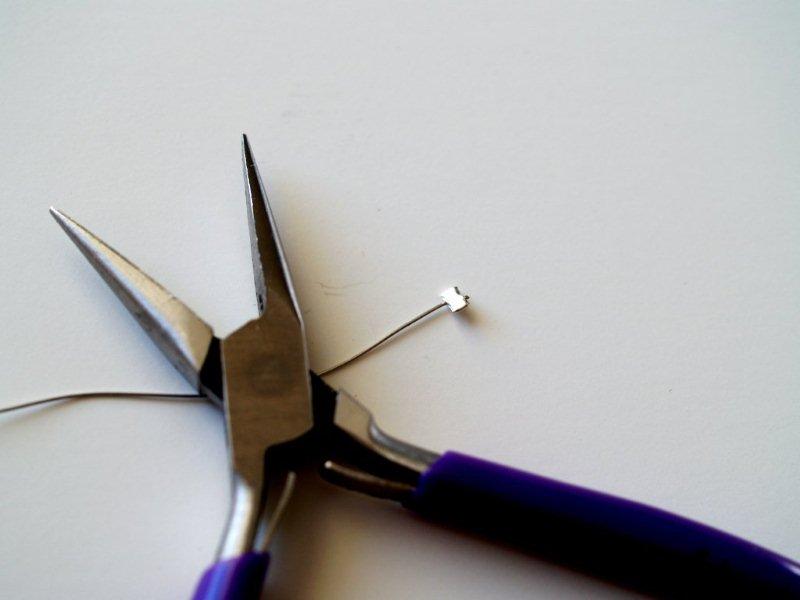
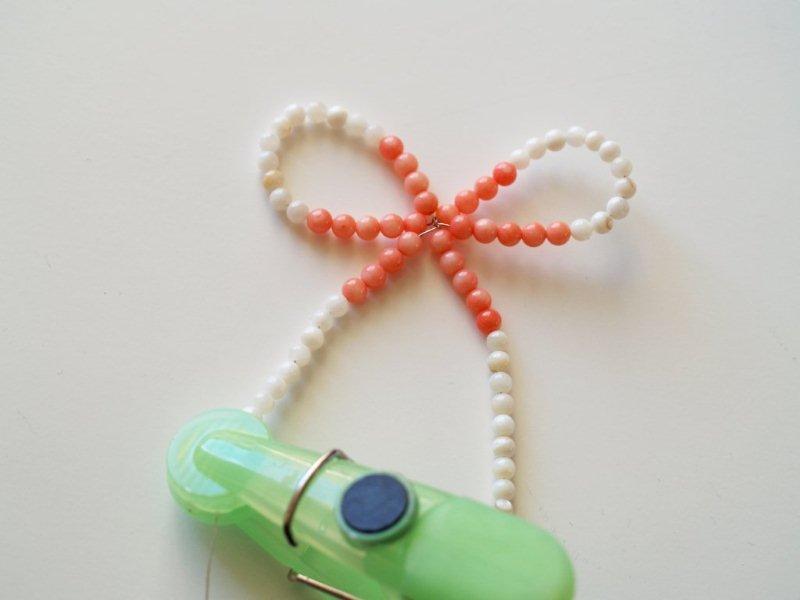
Add beads onto your wire until the row of beads measures 11 1/2″. Place a clip or clothespin on the end of the wire.

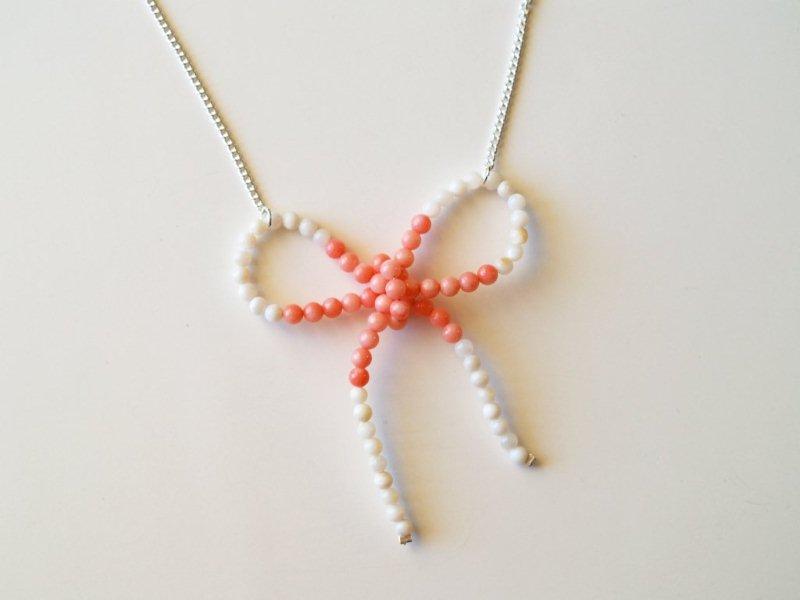
If you are doing the two color bow, add the beads in these measurements.
White: 1 1/2″…Pink: 1 5/8″…White: 1 3/4″…Pink: 1 5/8″…White: 1 3/4″…Pink: 1 5/8″…White: 1 1/2″
Or pretty close to that. :)
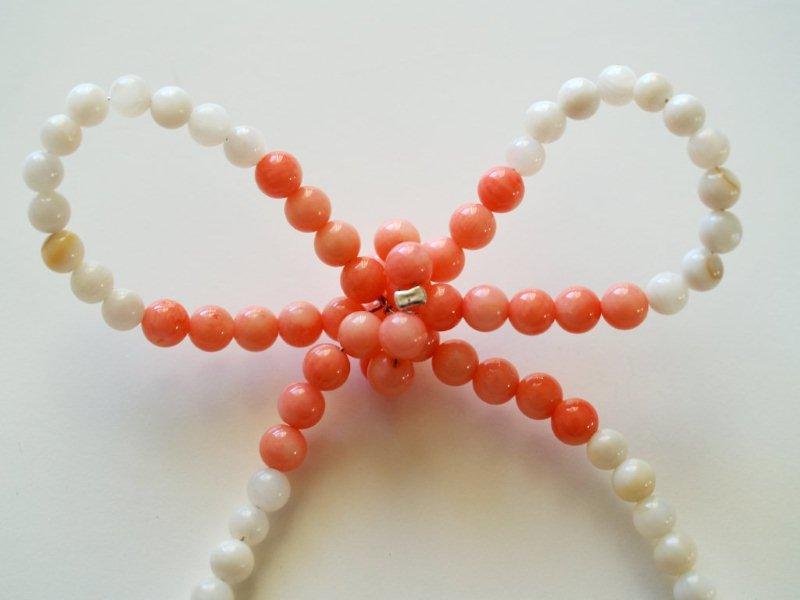
Begin by looping the first part of the bow – the left side. You want a pretty equal amount of pink on each side of the loop. Twist the loop around a couple of times.
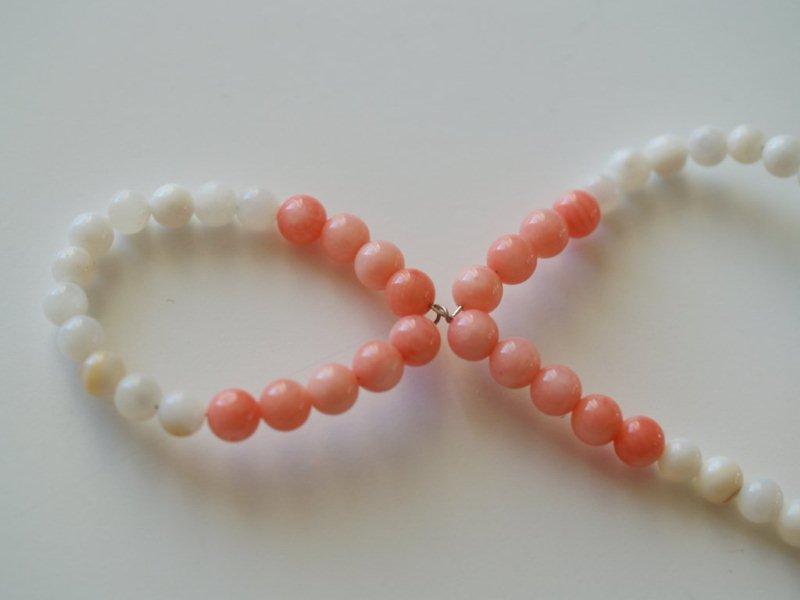
Repeat with the right half of the bow – looping and twisting – but you can twist both sections together.
You might need to move your clip down to give your beads a little more wire.
Add a crimp bead onto the end of the wire and push it up against the last bead. Crimp the bead flat and trim off the wire with wire cutters.
Add about 1 – 1 1/2″ of pink beads to the wire you just trimmed off.
The thicker your beads, the more beads you’ll need on this loop.
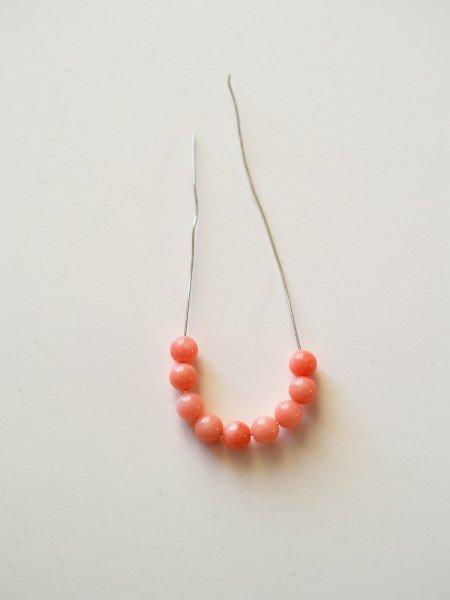
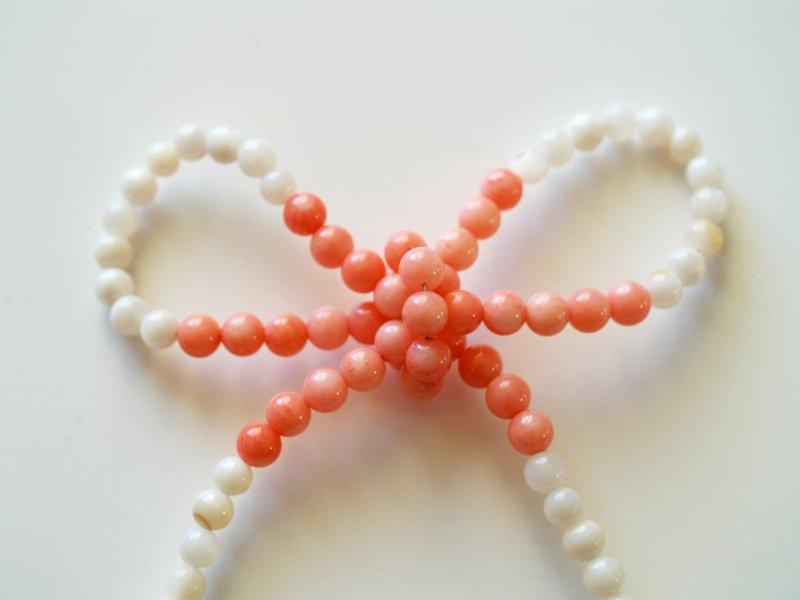
Wrap your beads around the center of your bow. Check the amount of beads. You should have just enough to make a loop as tightly as possible around the center of the bow, without a lot of wire showing. Add or remove beads as needed.
Place a crimp bead on one end of the wire. Feed the other end of the wire through the same crimp beads – so now the ends will point away from each other.
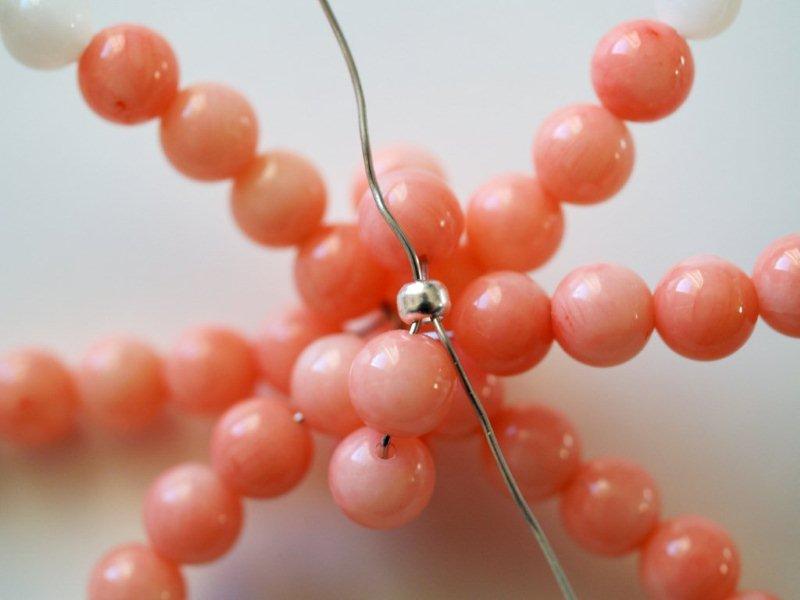
Crimp the bead and trim off the wires.
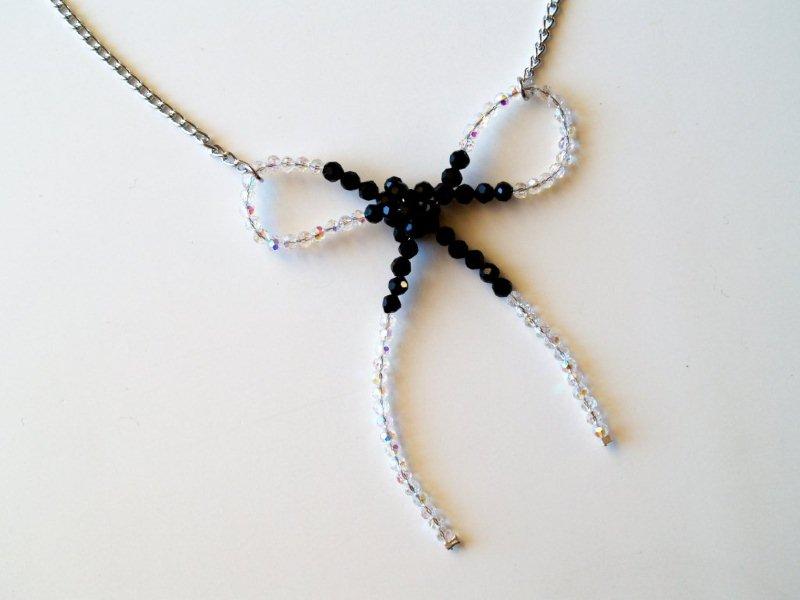
This is what it looks like from the front.
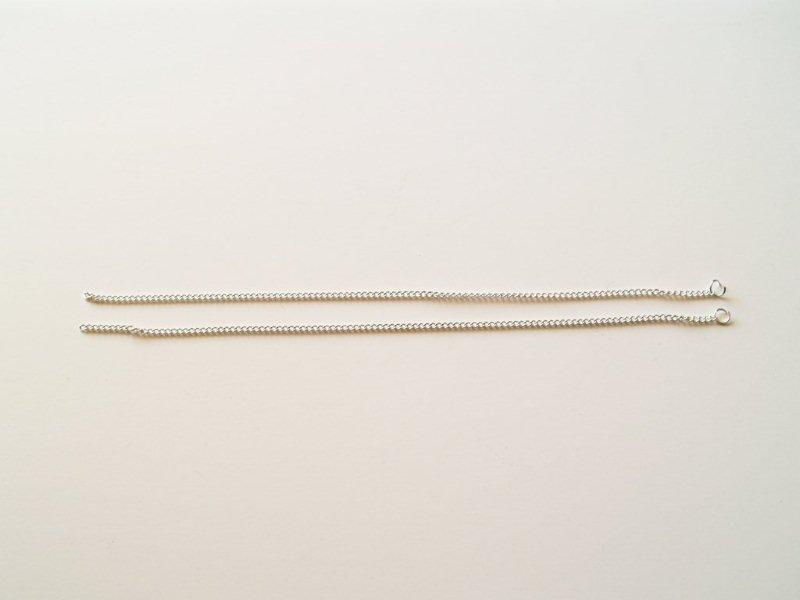
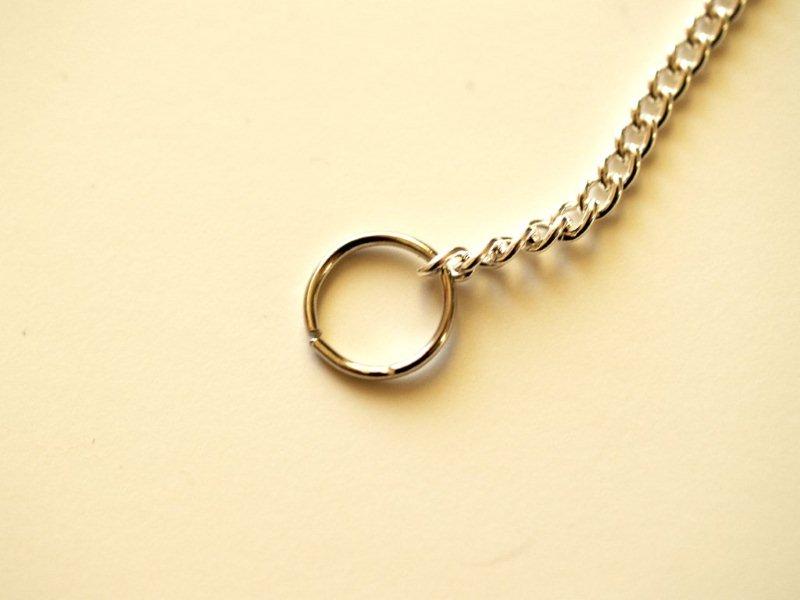
Cut your chain into two 9″ pieces. Add an open jump ring on one end of each piece.
Add one of the open jump rings to the top of the bow loop on the left side. Close the ring.
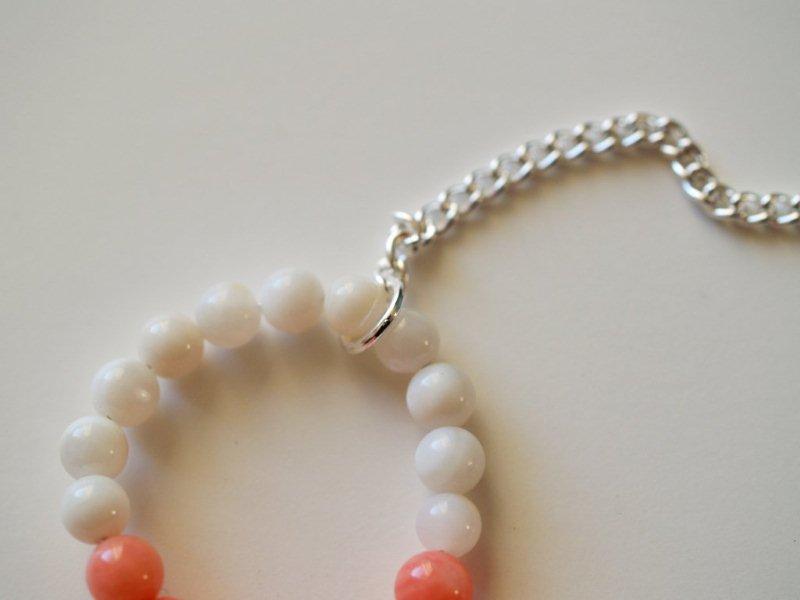
Repeat with the other chain on the opposite side of the bow. Keep them evenly spaced on the loops.
On the right chain, add a small jump ring and a lobster clasp. Close the ring.

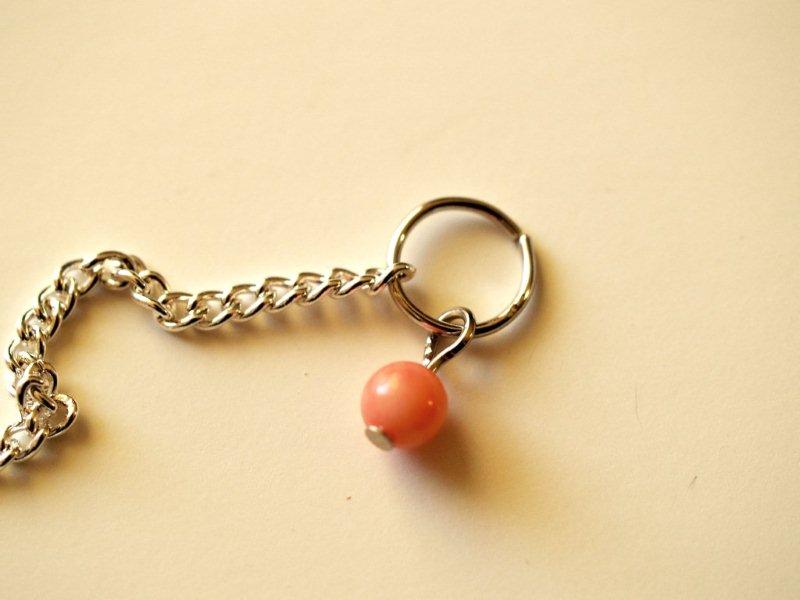
On the other chain, add a large jump ring.
I added in a small bead to my jump ring here. If you’d like to do the same, add a small bead to a head pin.
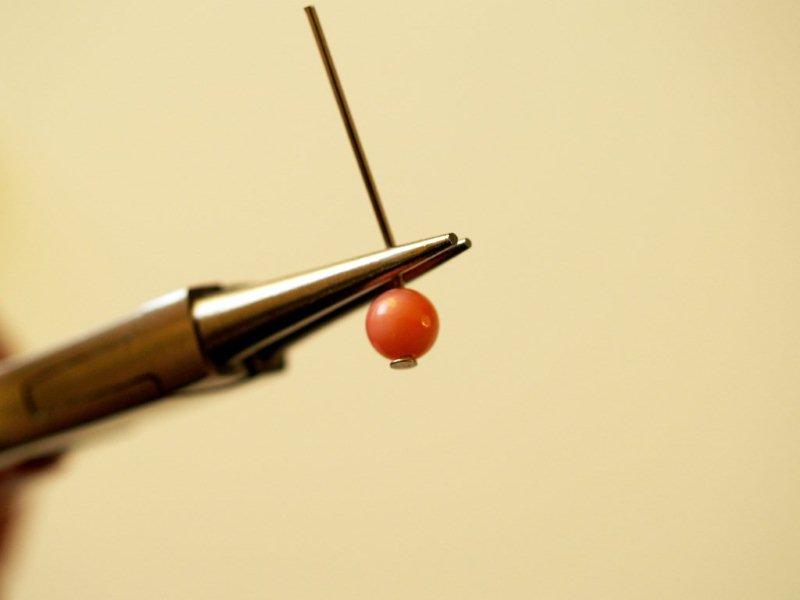
Hold the head pin above the bead with round nose pliers. Wrap the pin around one side of the pliers, looping it back towards the bead.
Clip the end of the wire off where it meets the top of the bead with wire cutters.
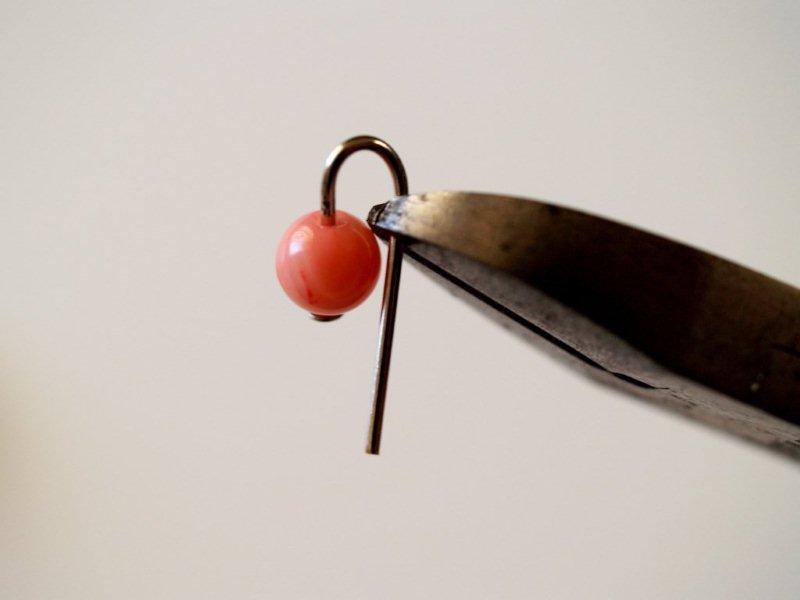
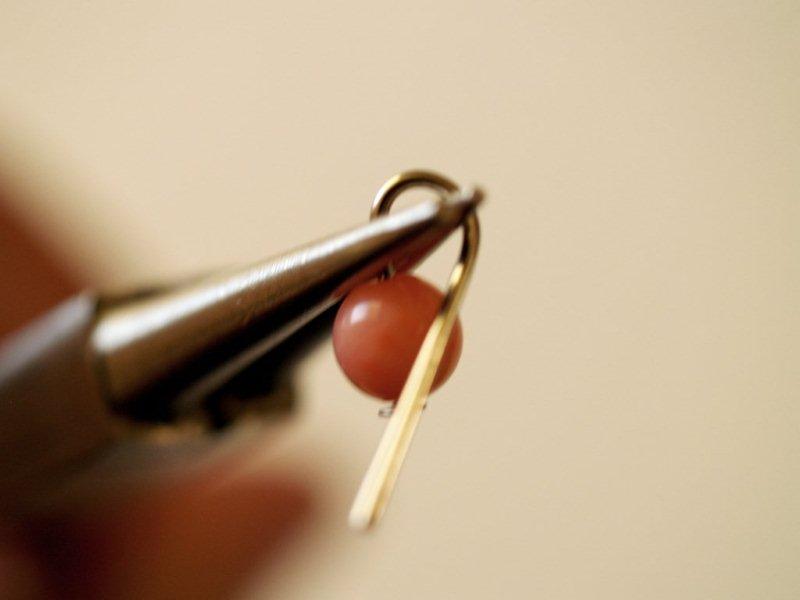
Bend the end of the wire back so that it meets itself at the top of the bead, making a loop.

Add this loop to your large jump ring.
You are all done! Isn’t it pretty?
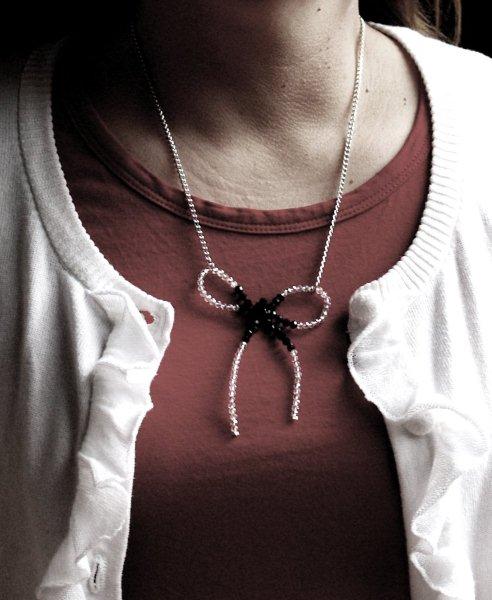
I liked it so much that I made another version with Clear and Black Crystals.
Here’s a little shot of it on so you can see about where it sits.
These are honestly so fast and fun – you could make up several before Christmas! The beading/wire work is minimal so I think beginners could definitely do this one – and for some much less than Anthro’s $38!!
As always – I love seeing your versions – if you make it send me a picture!


Love how you made two versions that look so different with a change in beads. Looks great!
Very Cute and easy to do!
Very cute, and truthfully, I like your a lot better!!
Love the coral and ivory mix! So soft and feminine…
michelle…xoxo
This is gorgeous! I am definitely going to try this.
That is sweet and simple…LOVE! You are the Queen of anthro knock offs! And I love it!
THIS IS AMAZING! Love! Totally going to make it!
I would LOVE/I NEED you to link this up at my TALENT TUESDAY party!
http://vintagewannabee.blogspot.com/
mucho love.
Nichelle
P.S. I’m your newest follower.
Love these, Bev! They are certainly on my to do list! Thank you so much for sharing the tutorial!
I love your version of this necklace. It turned out so cute and would be perfect for accessorizing any holiday outfit.
I’d love it if you hopped on over to my blog and linked up this project at my Hip for the holidays link party. I’m celebrating holiday apparel all week, this would be a fun addition.
http://leafytreetopspot.blogspot.com/p/hip-for-holidays-link-party-and-archive.html http://leafytreetopspot.blogspot.com/p/hip-for-holidays-link-party-and-archive.html
So cute, Bev!! These would look so cute in red and white for Christmas. Another great anthro tute!!
I love this! I just may make myself one today to get me in the holiday spirit!
How cute! Thanks for the tute, I’ve actually been wanting to make one, but I never got to it because I wasn’t sure how to go about it.(:
I saw this from Tea Rose Home’s link party. I love it! I hope I can make one for me. Thanks for the tutorial!
This is so cute! Great tutorial too!
oooh! i love this one! maybe i can break our “no gifts” this year rule for the girls in my fam, esp my new sisters-in-law!
Is it possible to be in love with a necklace? I think I might be! As usual, yours are even better than the Anthro versions!
Crazy good. I love Anthro, just not their prices.
Great idea! As much as I love Anthropologie, I just can’t justify buying it with the prices. But this is a great way to get that look on a budget, and still have fun making it :)
I love this! Your tutorial is great and the bow is perfect for this time of year. Subtle, yet festive! I featured this idea on my blog today!
It’s so cute. Thanks for your tutorial.
This is positively darling! I prefer your versions over the original. Great tut, too.
This is so cute! I like yours better than the original too…
How pretty! Great tutorial too. Thank you for sharing!
hey guess what? i like yours better. don’t tell anthro though! we’re still good friends … even if i can’t afford any of the stuff they sell. *sigh*
YOURS, MINE AND OURS
super
I just adore all of your Anthro Inspired creations! Great job! I would love for you to come visit me at Sew Chatty and link up to Made with Love Monday! http://sewchatty.blogspot.com/
So pretty. I really like the bow.
How cute are those??? Love the black one, I have just the outfit that is screaming for a necklace like that! jules
Just wanted to let you know that you’re on the map!
http://aftrroadmap.blogspot.com/2010/12/anthro-trimmed-necklace.html
Yours totally looks better too!
Very fun!! I really need some jewelry supplies so I can try out all the amazing stuff you make! Thanks for linking up Topsy Turvy Tuesday’s!
I made this tonight! I used all silver beads and I love it!! I have visions of hearts for Valentine’s Day…
Great tutorial, Thank you!!!
I’m a little late to this party, but I wanted to tell you how much I’m enjoying these anthro knock-offs. And, honest to goodness, your version is so much better than the inspiration. I would buy yours whereas I probably would pass on anthro’s. Fantastic!
Now, if you’ll excuse me, I’m gonna go nose around your other tutorials.
Wow i actually love this, and have just made it :) I love all of your jewellery posts
Your tutorial is an awesome inspiration! Many thanks for sharing. I would like to feature your designs at http://www.handmade-jewelry-club.com/
Kindly contact me here if you have a concern.
Jane
http://diylessons.org/
http://www.handmade-jewelry-club.com/
I like yours even better!!!
:-)
Groetjes from Belgium,
Liesbeth
I like it so much!
Thank you so much for this tutorial, very cool! Made my own – http://www.blyssjustbreathe.com/images/2.jpeg
very pretty Alyssa! What size beads did you use? The instructions don’t specify, so I would probably use 4mm.
Hi Everyone; My granddaughter is getting married and it has western theme. This is just right Thanks
Very Cute and easy to do!