We have another fun Scrap Busting Project today! Our special guest today is the adorable Amanda from Kaleidoscope of Colors!
Amanda is so darling and she is another vintage/retro fan so of course I just adore all her projects!
She has such a fun and useful tutorial for us today!

I’d like to share with you my “See My Project” bag, because I’m constantly printing off patterns and putting aside fabrics but when it comes time to working I’ve misplaced all the supplies.
I was inspired to make a bag that you could see the contents because there have been so many times when I tear apart my craft room looking for a pattern only to find it stuffed in a bag out of sight. This way you can see the contents of each project.
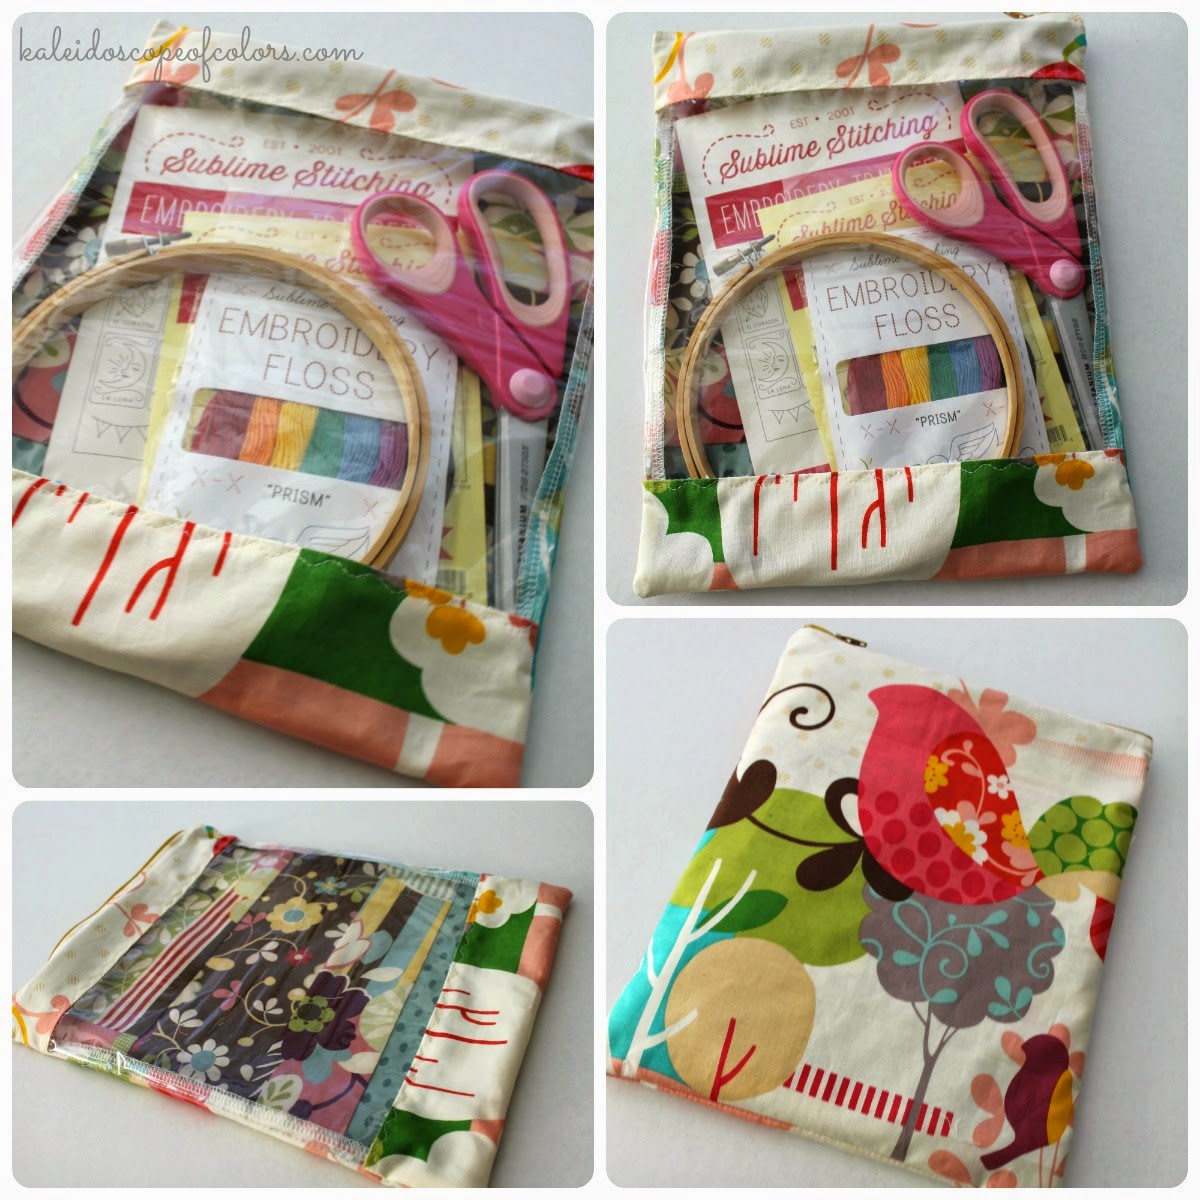
This bag holds printer paper (8 1/2″x 11″ paper) and all the notions you would need to get your project finished. Also the convenience of being able to see which project is in which bag.

When using your scraps, you can piece together fabric scraps to create a larger piece and then cut to size. At the end you can see how I pieced scrap quilt fabrics to make one bag.
Directions:
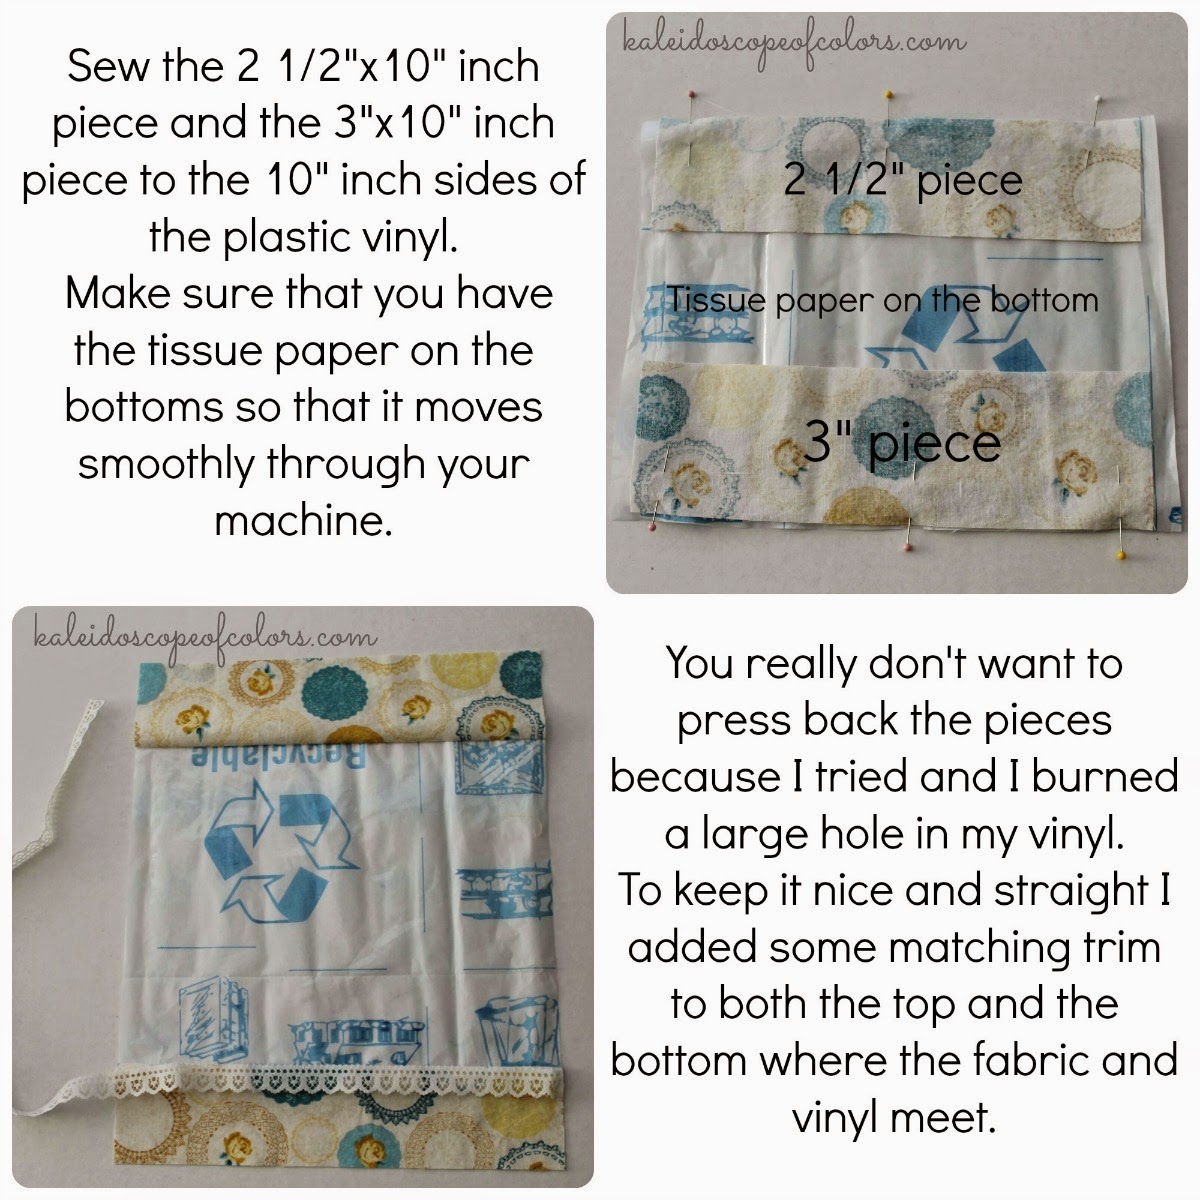
*Keeping the tissue paper on the back side of the vinyl helps & it move through smoothly on the sewing machine.


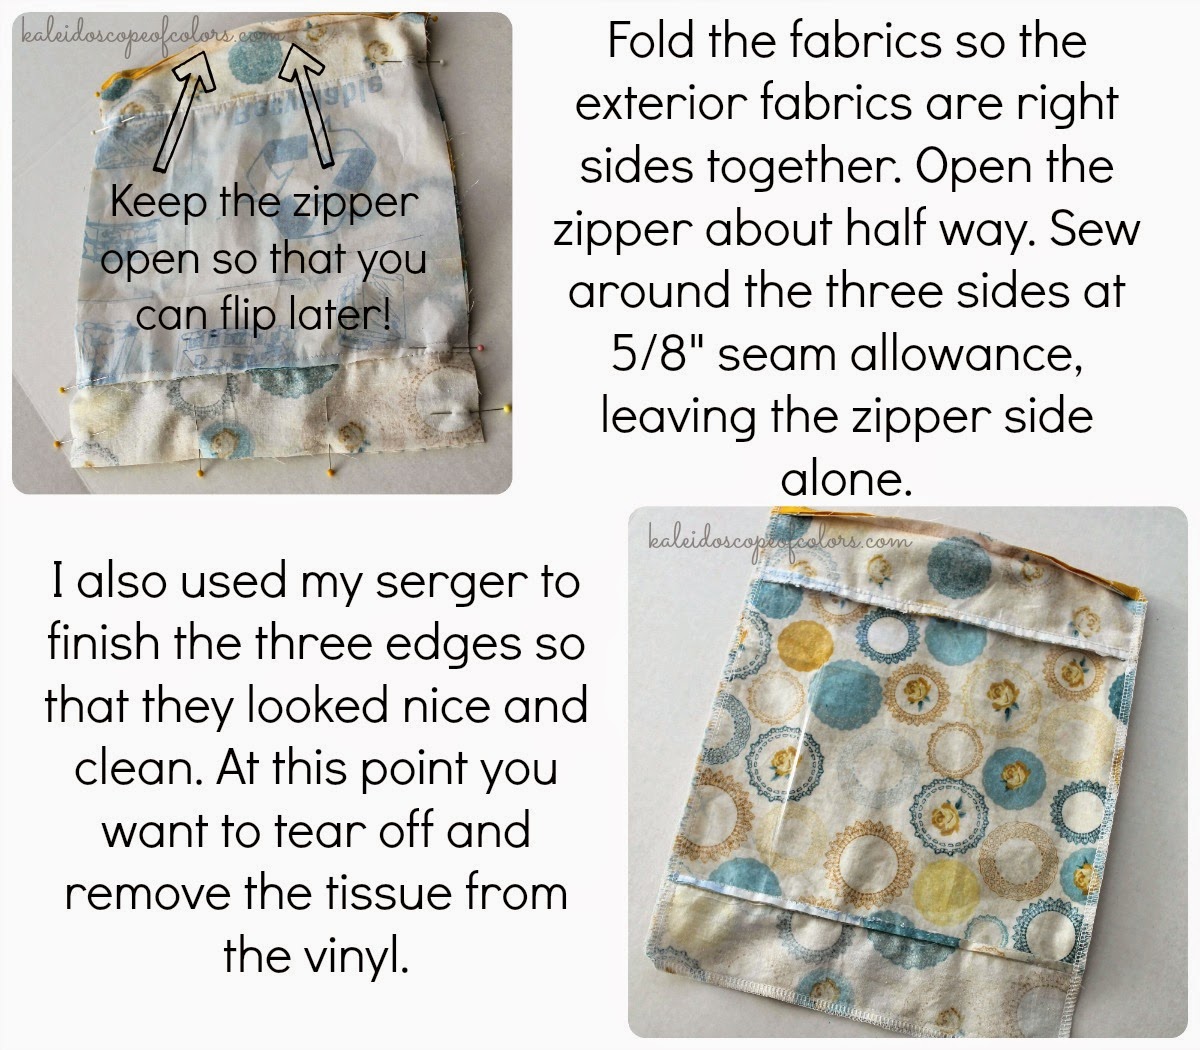
Once you remove the tissue, you can turn the right way out and you have your very own project bag!!

This second is a Mod version completed with leftover quilt scraps. I changed up my contents to some new embroidery patterns, floss, hoop and scissors. Holds everything!!
I hope that you enjoyed my project and it inspires you to create your own project bags. You can follow me on Instagram, Pinterest and Facebook.
Some other projects that you may enjoy:

Strawberry Cheesecake Brownie Valentine Trifle

Carrots, Crate and Flowers Arrangement
Thank you so much Bev for letting me join in on the Scrap Extravaganza fun!!
What a cute project Amanda! I love that it keeps your projects organized too! Definitely something I need to work on! Thanks so much for joining in the Scrap Busting Extravaganza!


This is a great idea. I have some huge plastic zippered covers the were used to shipping wheelchair pillows. I love them but as time goes they lose their form and well they do not look pretty. I’m a big fan of functional and pretty.
Thanks for sharing
L
Brilliant idea! Great for the craft room, and for giving kits as gifts! Pinned for later.
This is such a brilliant idea!! I need to make a bunch of these. Maybe when we have our sewing machine cover party??? ;)
I am not sure why but when I add the second 10x 12 1/2 fabric right side down according to the instructions ….the wrong side ends up showing after it is sewn together :( Did this happen to anyone else ?
Dorothy, when sewing on the interior piece, make sure that the right side of the fabric is sewn on to the back side of the zipper. So when you are stitching across, the two 10×12 1/2 pieces should essentially be right sides facing together. I hope this helps? Let me know.
It looks like in one the pictures you covered both ends of the zipper but it wasn’t in the directions. How do you do this?
What gauge and what kind (brand) of vinyl and where do i purchase ?