We’re in a Mother’s Day countdown here!
Two weeks left to come up with something awesome to thank mom for birthing you – among other things.
So I’m here to help – I have a fun new apron pattern for you!
Cause what mom wouldn’t love – and look super cute – in this fun new Ruffles and Buttons Apron?
Also – there is always the chance that she will be so inspired by your gift that she puts it on and bake you cookies
You can dream anyway.
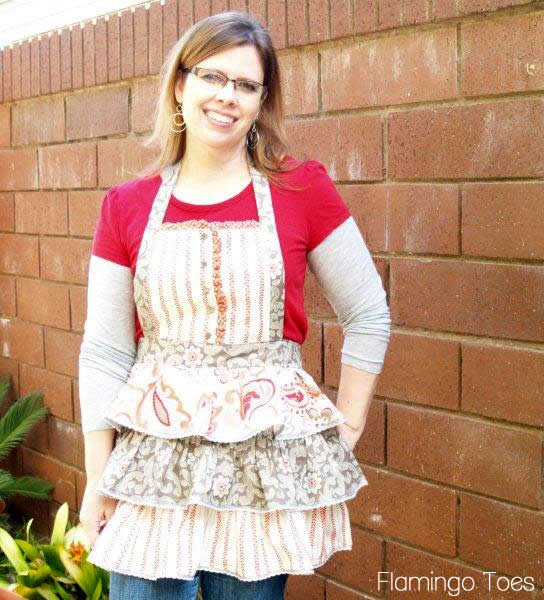
I’m really excited about this apron – it has a sweet little buttoned top and layers of ruffles in the skirt.
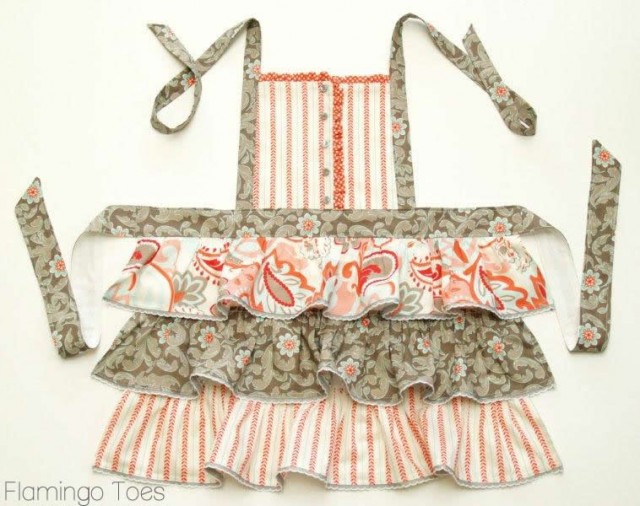
Look – it’s also got some yummy moonstitch ribbon on the ruffles – don’t you love those little thread scallops? Me too. :)
Here’s what you’ll need to make your own:
This amount of fabric makes this Apron, plus the matching Dishtowel and Potholder that I’ll be sharing here soon!)
1 yd Riley Blake Verona – Rouge Main
1 yd Riley Blake Verona – Gray Damask
1 yd Riley Blake Verona – Rouge Stripe
1 fat quarter Riley Blake Verona Rouge Dots for small apron top ruffles
(All this can be found at The Ribbon Retreat)
5 yards Silver/White 3/8″ Moonstitch Ribbon
5 buttons
3/4″ yard white muslin or other fabric lining
Pattern for Apron Top
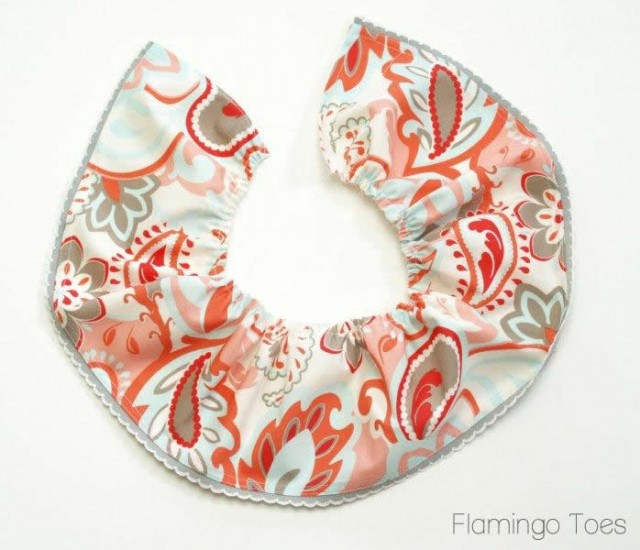
Begin by cutting out your Apron top pieces. You’ll need two of your top fabric and two of lining.

Cut pieces for the ruffles along the top of the Apron. You’ll need one piece 10″ x 2″ and one piece 30″ x 2″ (if you are using a fat quarter, you’ll need to cut two pieces and sew them together to make this strip)
For the short strip, sew a tiny hem at each short end. Fold the strip in half, long ways and sew a basting stitch along the raw edge. Pull up the threads to ruffle the strip to measure 5″.

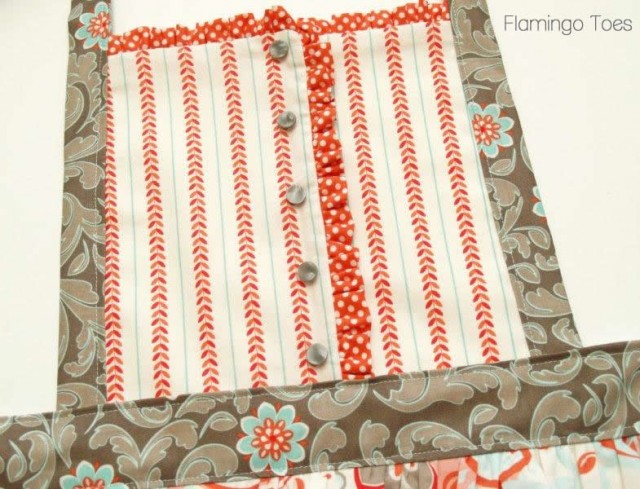
Baste the tiny ruffle to the top edge of the Right Apron Top piece. Make sure to start the ruffle 1/2″ away from the center edge.
Repeat with the longer ruffle strip – Sew this strip to the top and right side of the other Apron Front piece.
Sew the front pieces to the lining pieces, right sides together, along the tops and inside edges. (The sides that will be facing each other once you overlap them)
Trim the corners and turn the pieces right side out. Press. The outside and bottom edges will be open.

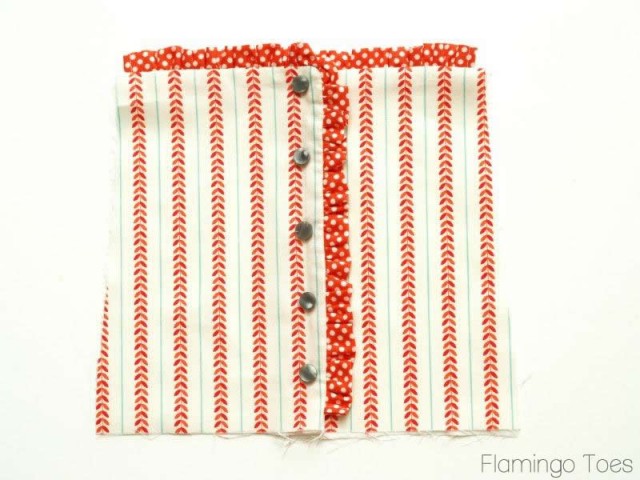
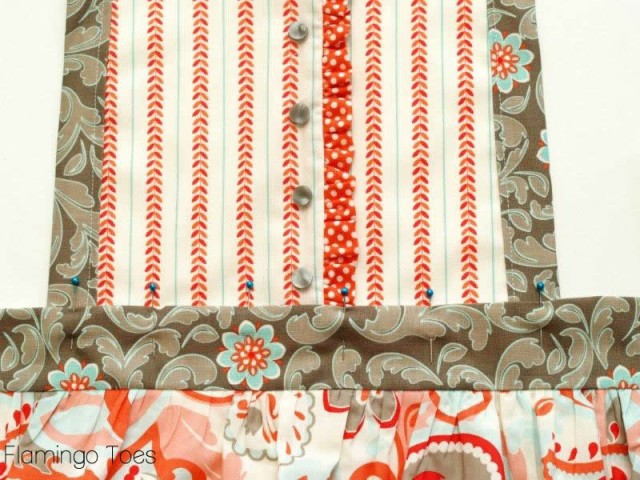
Lay the top pieces so the left side overlaps the right by 1 1/2″. Pin the top pieces in place. Sew 5 buttons evenly down the Apron top, sewing through both top pieces. The bottom button should be 1 1/2″ up from the bottom raw edge.
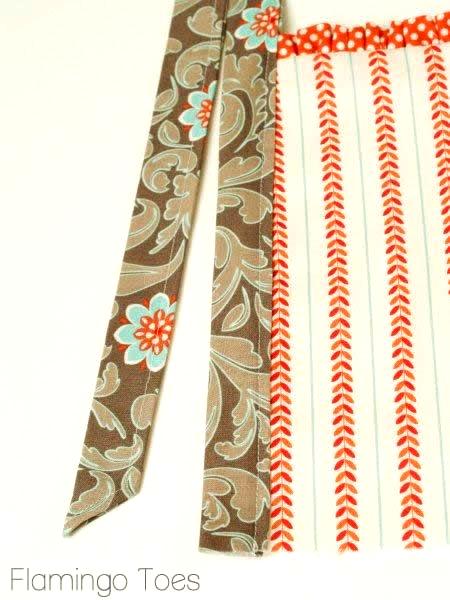
Cut out your top strap pieces. You’ll need two strips 3″ x 36″. Press both long sides of each strip in 1/2″. Press each strip in half.
Tuck the left side of the Apron Top into one of the Strap pieces. Sew along the strap 1/4″ from the edge, all the way down the strap. Fold the end at an angle and sew along the edge.
Repeat for the right side of your Apron Top.
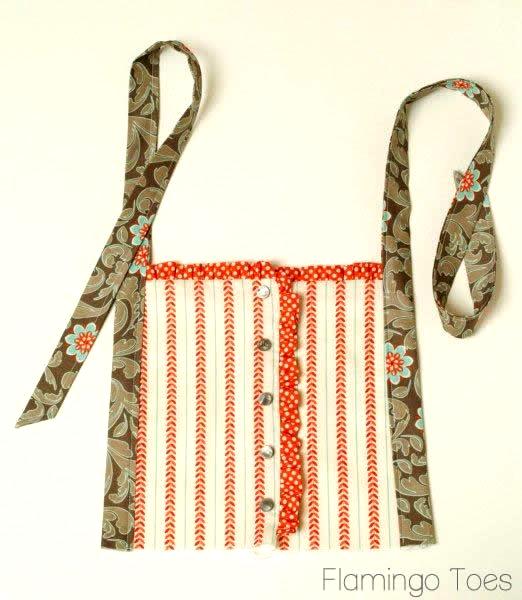
Oooh. Cuteness.
Now we’re going to work on the skirt. Cut out of your lining fabric a rectangle 16″ x 24″.
Hem the two short sides and the bottom.

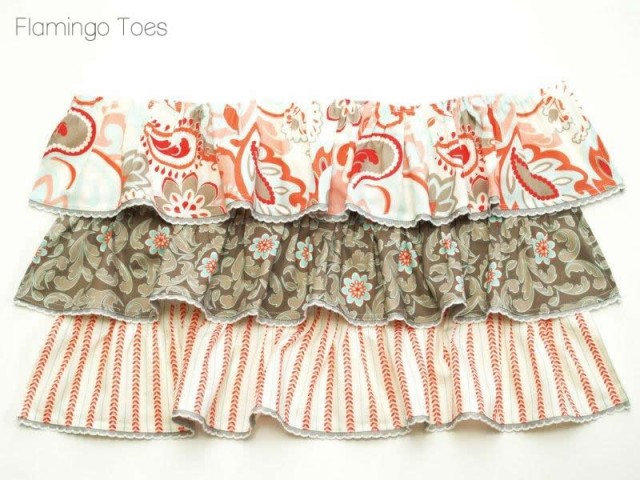
Cut out your Ruffle fabrics next. You’ll need 1 ruffle from each fabric – 6 1/2″ x 44″.
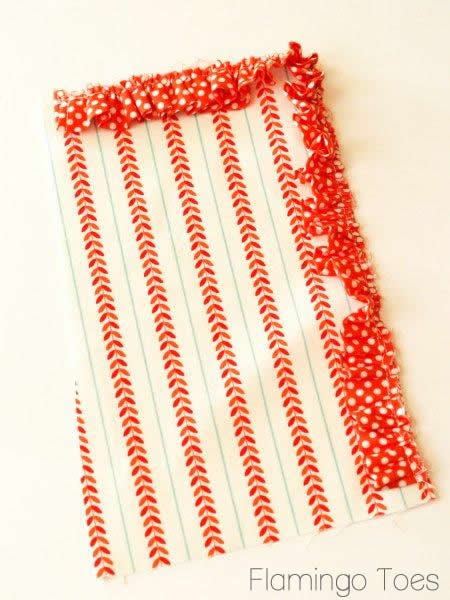
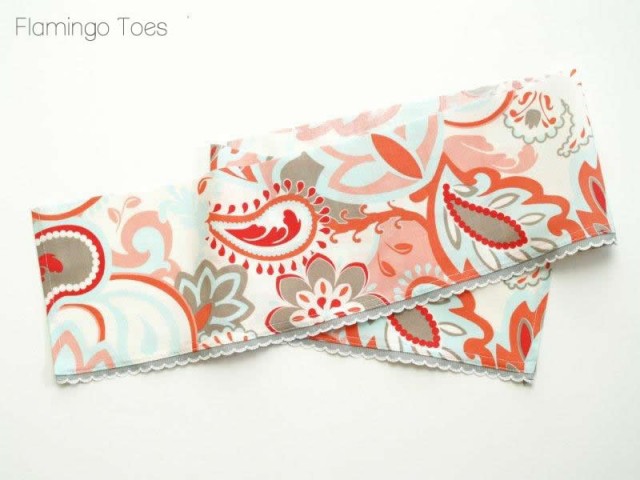
Hem the two short sides and bottom of each ruffle piece.
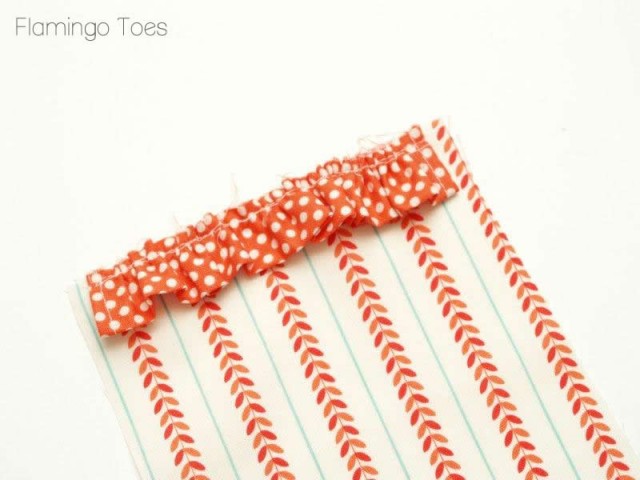
Sew a length of ribbon to the hemmed edge of each ruffle, so it peeks out under the hem.
Sew a basting stitch along the top edge and pull up the threads to ruffle the piece.
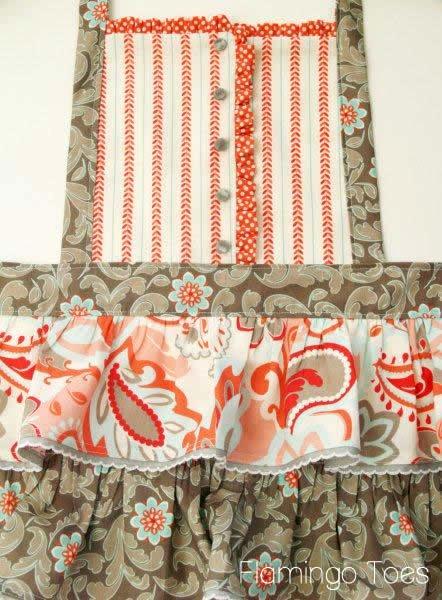
Sew the ruffle pieces to the underskirt, starting with the bottom ruffle. The top of the ruffle should be 5″ from the hem of the underskirt.

Sew on the other ruffles. The second ruffle should be 5″ above the top edge of the bottom ruffle.
The top ruffle should line up with the raw top edge of the underskirt.
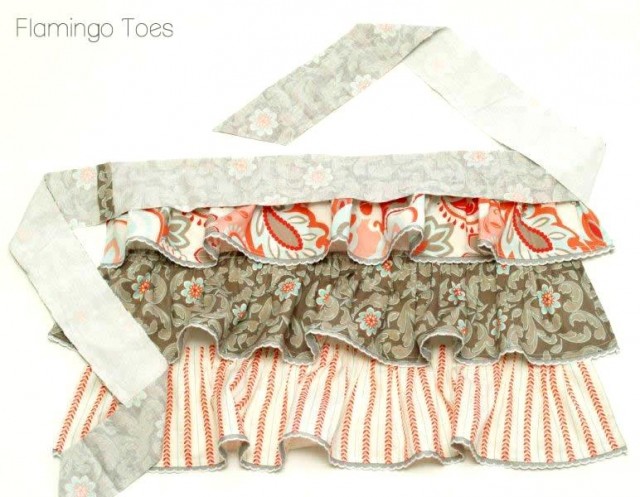
Cut out your waistband pieces. You’ll need a piece 25″ x 3″ and two pieces 27″ x 3″ of both the outside fabric and our lining fabric.
Sew the 25″ piece between each of the 27″ pieces for both the front and back.
Pin the apron skirt section between the outer and lining waistband pieces. The right side of the waistband should be facing the right side of the apron skirt.
Sew around the waistband top and bottom pieces, except for the bottom center section where the apron skirt is. You’ll be sewing the apron ties together to make “tubes”.
Turn the waistband pieces right side out and press. Press under the top, open pieces 1/2″.
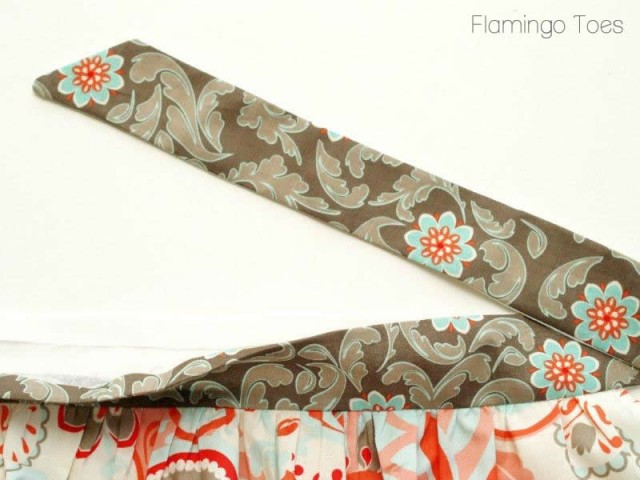
Tuck the bottom of the Apron Top into the opening of the waistband. Pin the Top in place.
(I’m not the only one who matches their pins to their fabric right?)
Topstitch around all the sides of the waistband 1/4″ from the folded edges, sewing the Apron Top into the waistband at the same time.
Now you’re all finished!! You’ve got a super sweet ruffled apron – all ready for Spring!
I think I need to make up some cookies. . . .
I’d love to know what you think!
I’m linking to Sunday Scoop, Today’s Creative Blog, Met Monday, Skip to my Lou, Quilt Story, Tutorials & Tips Tuesday, Shabby Creek Cottage, and the other fabulous parties on the party page – make sure you check them out!
(This was originally a guest post at The Ribbon Retreat.)


gorgeous gorgeous gorgeous!!! I really need to start wearing aprons more, I swear – every time I make pasta sauce it never fails!!!
Its so frilly and dun, Bev! No wonder it was in a magazine. ;) Love the colors, love the ruffles, love the buttons! :)
Oh wow, it’s super cute! I love your choice of fabric, too :)
Bev- its so stinken cute. I hope you come link it up to COM-MONDAY. I love it. P.S. I am mad I never got a picture with you at SNAP. How lame am I. Have a super day. winks, jen
This is really pretty. I love aprons! You did such a good job. Thanks for sharing.
Darling Bev! Maybe if I had a cute apron like this I’d be better about wearing one (lot’s of stained clothes for this girl!)
This is so pretty. I’m hosting a Homemade Mother’s Day Link Party and would love to have you join me. The link is
http://mylifesatreasure.blogspot.com/2012/04/homemade-mothers-day-link-party.html
Thanks,
Karri
This turned out great, Bev! Thanks for sharing it with us :)
It looks great! I just love the fabrics you picked!
This is soo cute!! I love it, I just wish I knew how to sew at all haha Anyway, adorable :)
Lovely apron! The details -like the button top- really make it special!
Lovely Apron!! My Mom will love it. The fabrics you choose blend nicely with the entire design.
So cute Bev!!! Love this!!
i LOVE how this turned out — great job & you look so pretty too!!!! cute. cute. cute.
Gorgeous, I love the fabric you used and great tutorial, nice and easy instructions. Thanx, I’m always looking for a great apron tutorial. :)
Natalie
http://www.projectdowhatyoulove.wordpress.com
That has got to be one of the cutest and sweetest aprons I’ve ever seen. You do such a great job with your tutorials. Thanks for sharing
. I won’t be making this right away but when all my zillion projects are somewhat cleared away and I have a quiet afternoon I’m going to give this a shot. I’ll go thru my stash of fabric to see what I can make this with. Might be cute for 4th. of July also, I have lots of fabric for that or hmmmm, lets see what I can come up with. My sewing room is very tiny but it’s crammed with Iris carts and shelves and who knows what all. Enjoy your apron.
For some reason my pc wouldn’t save it so I printed it out, didn’t want to pass up such a great project.
I am giving you a new nickname…Ms. Apron (although you could also be Ms. Jewelry) oh well…whatever the case…this is darn cute! Love the fabric…love the ruffles!
This is an adorable apron!! I love the fabric!! TFS!
Stopping by from The Train to Crazy’s linky party and a follower.
Her eis what I shared this week: http://craftybrooklynarmywife.blogspot.ca/2012/04/another-coat-for-holly.html
So so so so so so SO cute!
Bev, you always add those extra special details that elevate your creations from a craft to an art!
Oh my goodness! How darling is this apron?! I think I have just enough time to whip one up for my mama! I am pinning this to my project board. Super tutorial!
YOUR TALENT IS FEATURED IN COMS- SATURDAY SPOTLIGHT TALENT SHOW. hugs, jen
AAaaah!! Love it and all the ruffles! Beautiful!
<3 Christina
http://igottacreate.blogspot.com
Wildly Original Roundup linky party is open!
Just love your ruffle apron….I must make it it for one of my daughters.
deb
Looooooove this totally cute apron! You’ve inspired me to make this AND to
attempt a tutorial for one I’m developing.
I’m touched by the sweet face on the talented lady wearing this awesome apron.
I believe we share a common inspiration and I give HIM all the glory!
Thanks for sharing this!
I’m so lovin this apron I’m new to seeing but I’m going to give this a try you have inspired me ,thank you x
nice little apron great as a gift or to cheer yourself up