I love taking Road Trips.
Pack me up in a car and I will go pretty much anywhere.
Especially if it’s somewhere I have never been before.
But I do have some requirements. I need to have my “stuff” along with me.
Stuff to read, stuff to sew, stuff to bead, etc.
If I don’t have things to do I get a little itchy.
So usually, I have at least two tote bags when we go anywhere over 6 hours.
That sounds kind of weird now that I type it out – but there it is.
Despite the fact that we have NO trips planned this summer yet (which I am telling everyone loudly and often) I thought it would be fun to do a little pre-trip prep.
I decided I needed new, snazzy tote bags for our yet-to-be-planned vacation and I found the perfect fabric for my little obsession here.
I made these tote bags with my sister while she was visiting last week. We made two for each of us.
One for Books and one for Sewing.
Want to see?
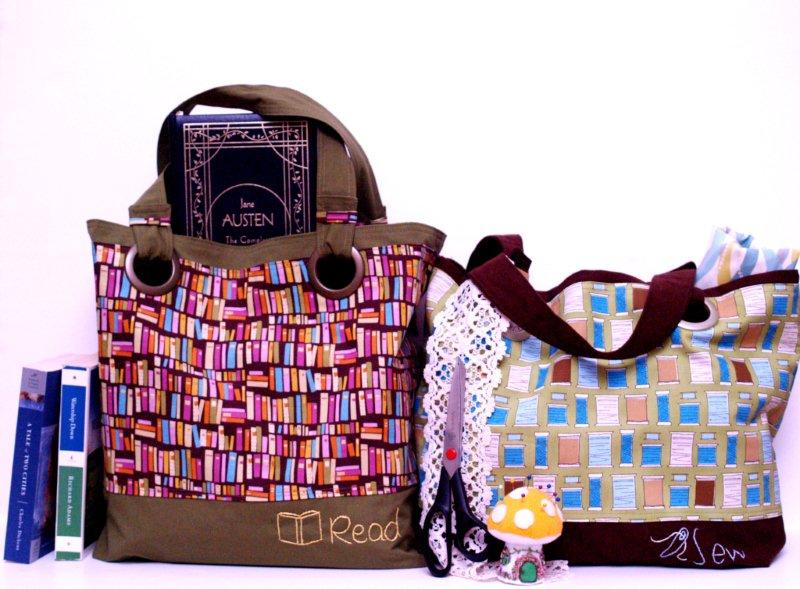
I’ve even got them all packed and ready to go. ;)
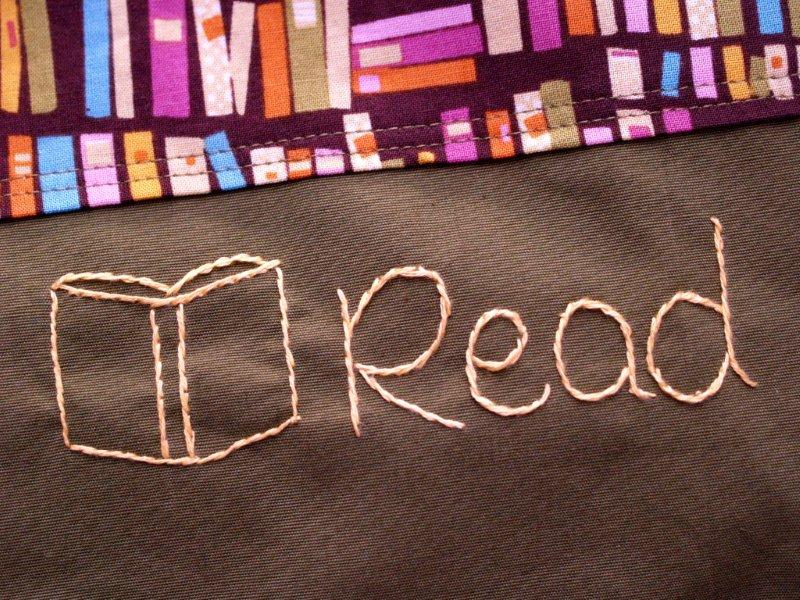
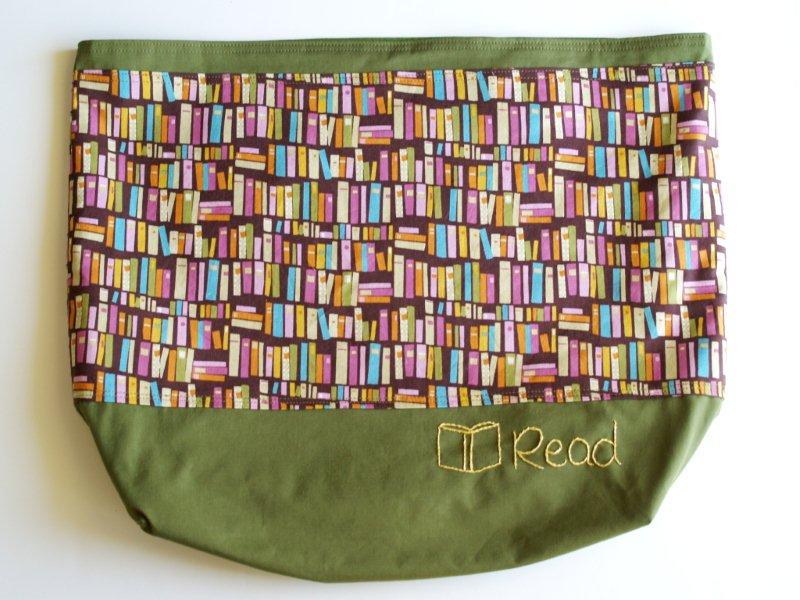
They’re nice and roomy – and decorated with great fabric and embroidery!
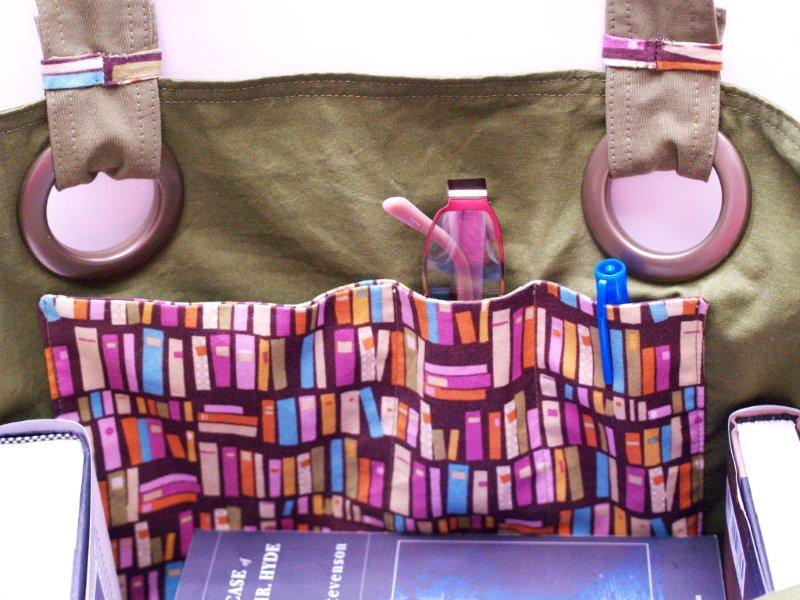
They even have a pocket. :) For stowing extra, small stuff.
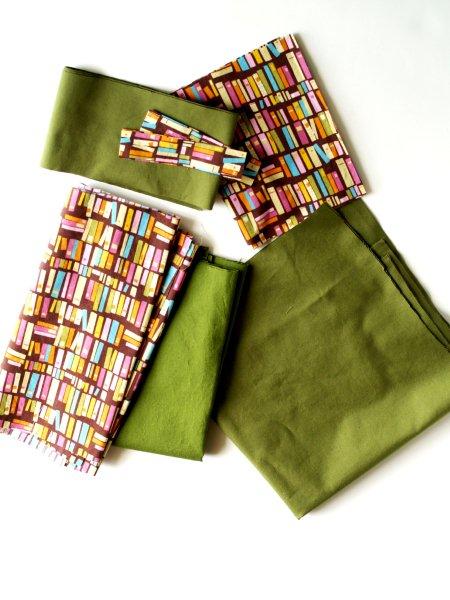
The sewing is easy too!
Ready to make you’re own?
These instructions/materials are for ONE bag. If you want to make two – you’ll need double of everything.
Materials:
• 3/4 yd twill or heavier weight fabric
• 1/2 yard lining fabric
• 1/2 yard print fabric (this could change depending on the direction of your print. Check the piece sizes and see what fits best for your print)
• embroidery floss and pattern
• 4 – 1 3/4″ grommets
Begin by cutting out your pieces.
Of your Twill you’ll need two 18″ x 20″ pieces and two 4″ x 28″ pieces for the straps
Of the Lining you’ll need two 18″ x 20″ pieces
Of the Print you’ll need two 11″ x 20″ pieces for the body, two 10″ x 7″ pieces for the pocket and four 1″ x 5″ pieces for the strap loops
For each of your print fabric body pieces, press under the long sides 1/2″.
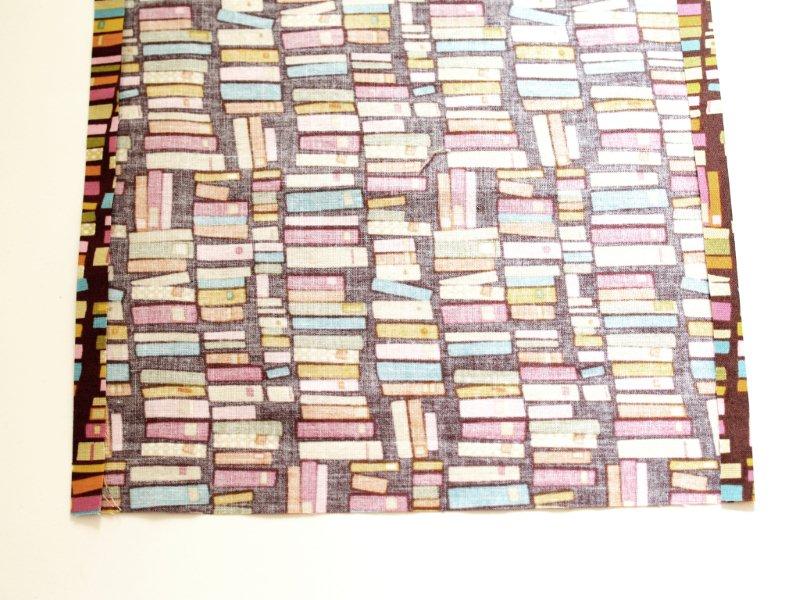
Lay the print pieces on the 18″ x 20″ twill pieces with the wrong side of the print to the right side of the twill, 1 1/2″ down from the top.
Sew along the long sides with two rows of stitching, one right along the edge and the other about 3/8″ in.
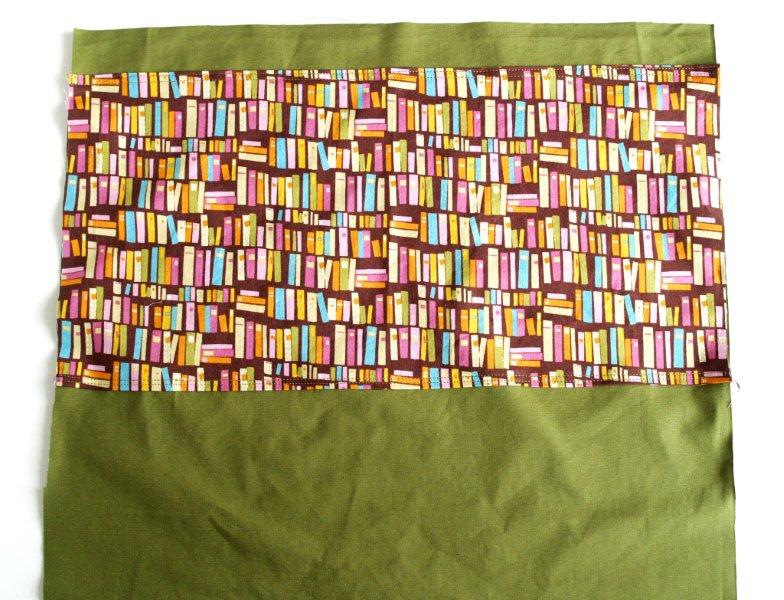
Sew your embroidered word on now. Measure over from the right side 9″ and down 1/2″ from the print and trace your design.
Embroider everything with a contrasting color using a stem stitch.

Lay the front and back tote bag pieces together. Sew around the two sides and the bottom with a 1/2″ seam allowance. Leave the top open.
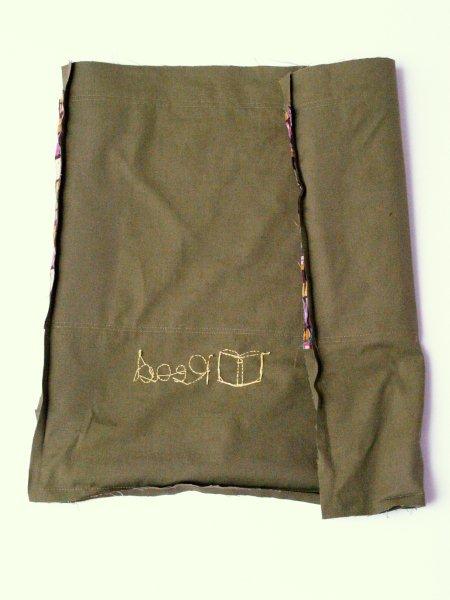
To make the base of the tote bag squared off, lay the corners so that the point of the seam forms a triangle.
Measure up 2 1/2″ from the point and mark across. Sew a seam across the triangle.
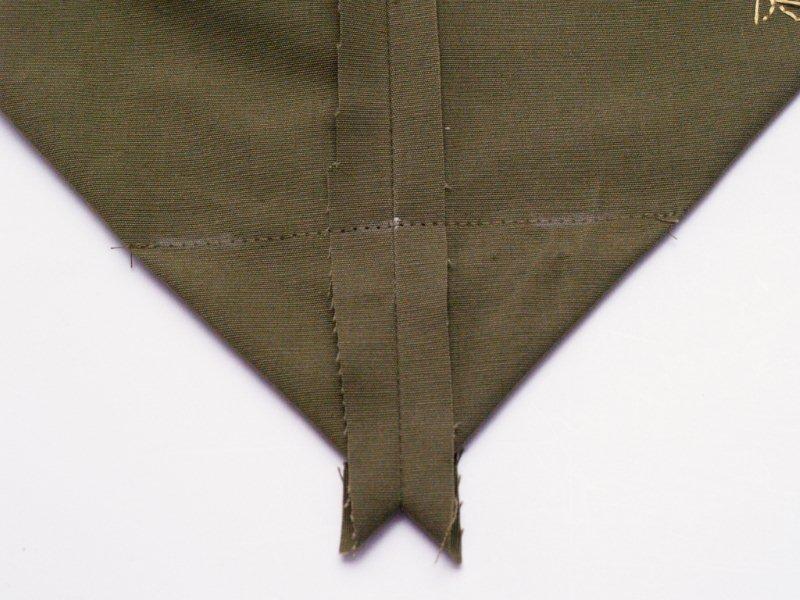
Trim the triangle part off, so there is a 1/2″ seam allowance left.
Lay the outside of the bag aside for now.
Place your pocket pieces right sides together. Sew around all four sides, leaving a small opening for turning in the bottom.
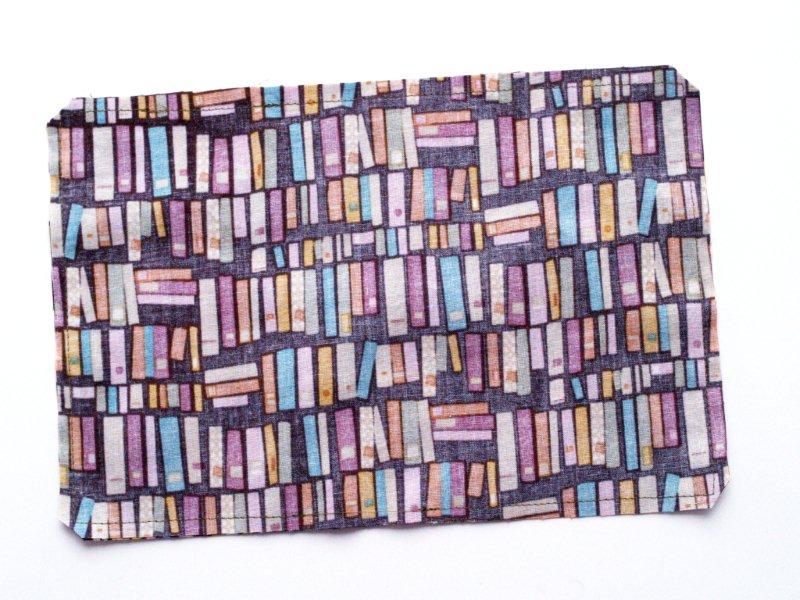
Clip your corners, turn right side out and press.
Place the pocket piece on one of the lining pieces in the center, 4″ down from the top.
Sew around the two short sides and the bottom.
Divide the pocket into smaller sections by sewing a seam down the center of the pocket, and then another seam halfway between that seam and the right side.
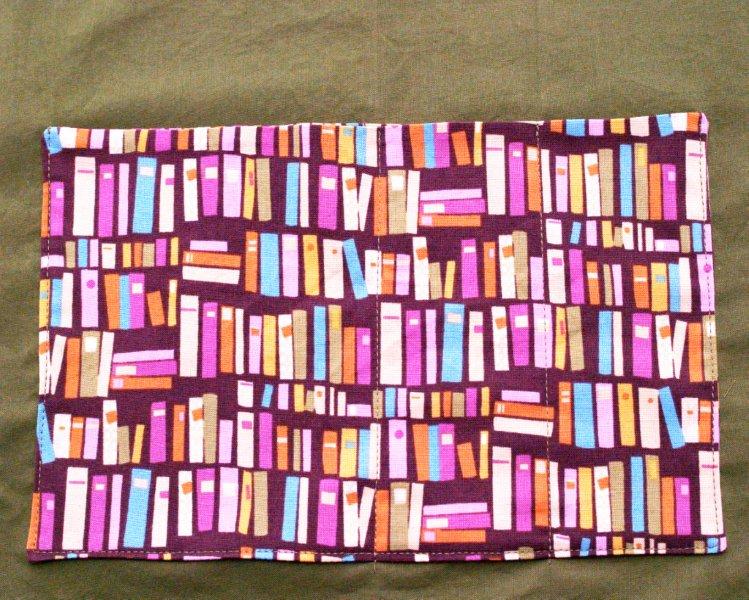
Sew your two lining pieces together just like you did the outside, corners and everything.
BUT leave a section in the bottom open for turning about 3″ long.
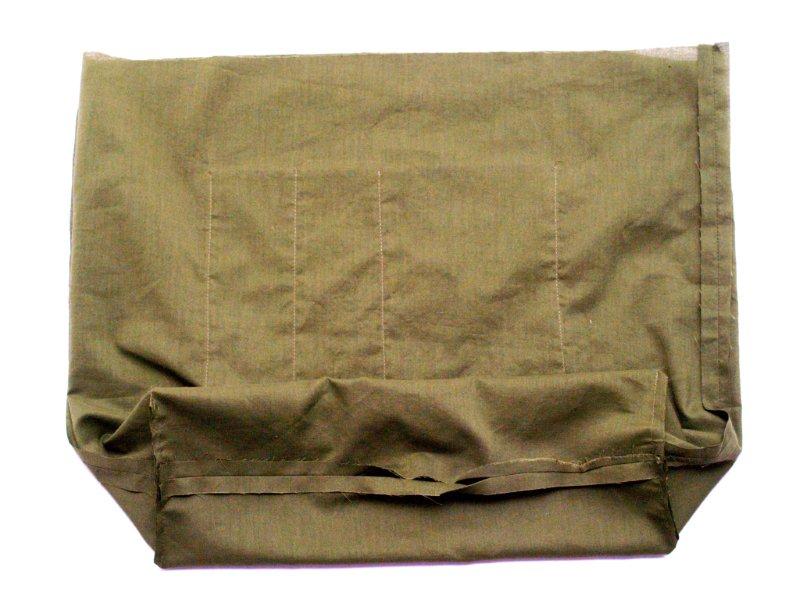
Place your lining and the outside of your bag, right sides together.
Sew around the top.
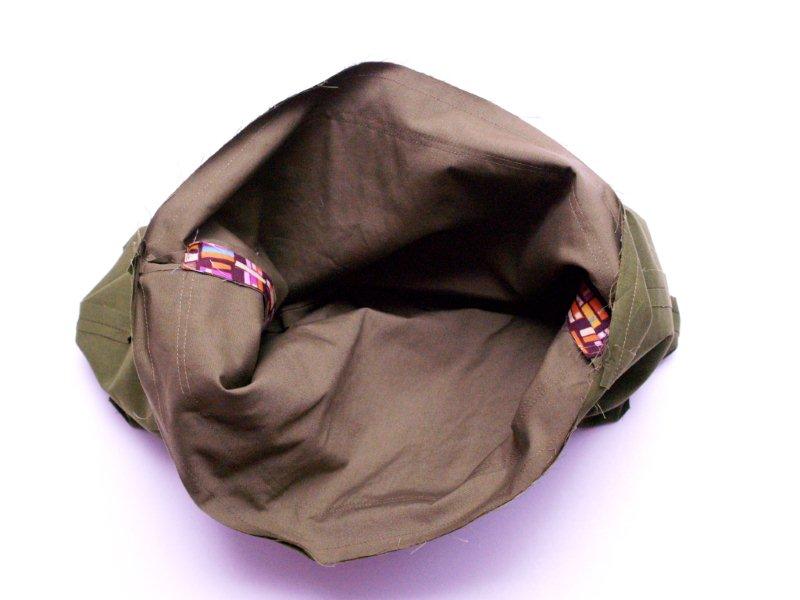
Turn your bag right side out and stuff the lining into the outside. Press the top edge down and top stitch all the way around with two rows of stitching.
Hand sew the opening in your lining closed.
Time for grommets!
In the beginning we had some grommet drama (which is fun to say but not fun in real life) in which we had bought metal purse grommets that we determined were not meant to actually snap together in any way.
After much weeping and gnashing of teeth – we gave up on them.
We ended up using grommets from the Home Decor section of Joann’s. They’re nice and big and plastic and they were super easy to put in.
They give you a template for cutting and you just snap them together around the hole.
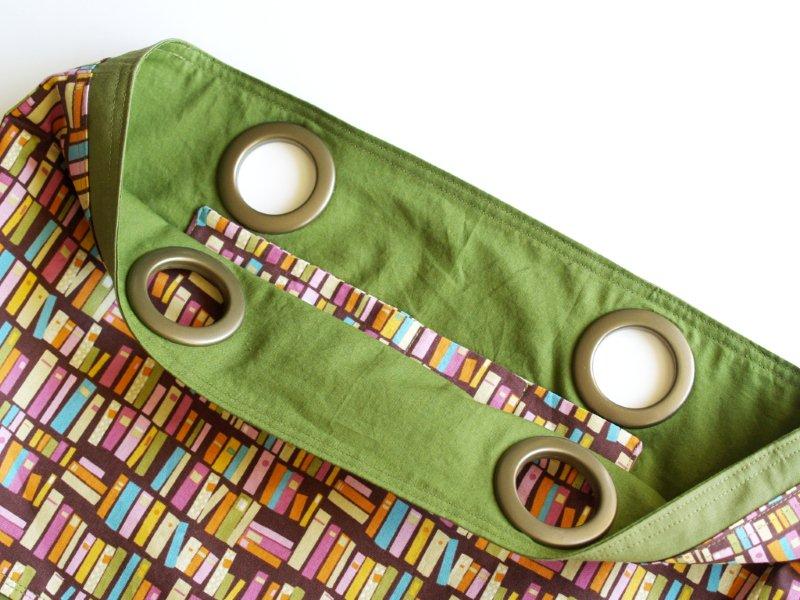
Easy peasy.
For the straps, fold each strap in half, right sides together.
Sew together along one short side and the long side. Clip the corner, turn right side out and press.
Also press in the open side 1/2″ so the raw edges are inside the strap.
Sew together your small strap loops by folding them in half, right sides together and sewing down the long side with a 1/4″ seam allowance.
Turn right side out and press.
(I found the best way to turn these right side out was to pin a small safety pin in one end and feed that through the tube, pulling it right side out as you go)
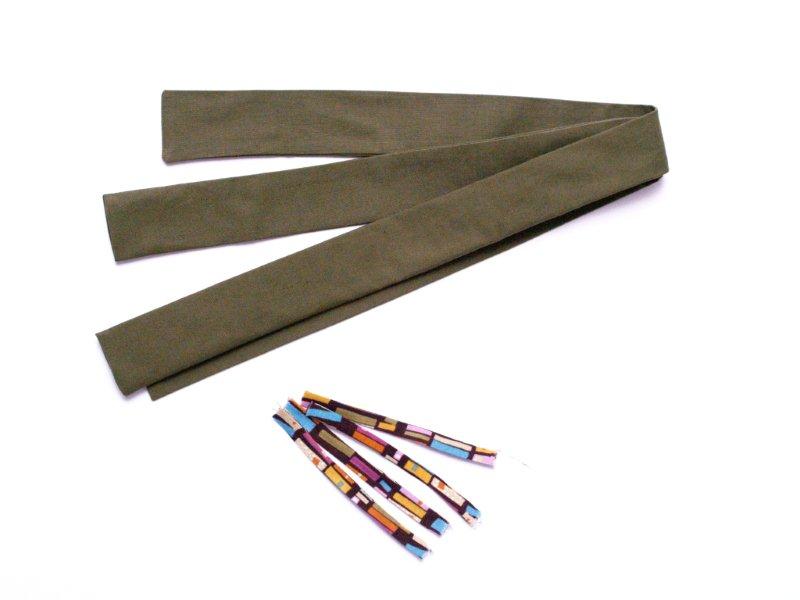
Top stitch around the straps with two rows of stitching.
Measure around your straps with the strap loop and sew the ends together to make a loop just a tiny bit wider than the strap.
Press the loops so the seam is in the center back of the loop.
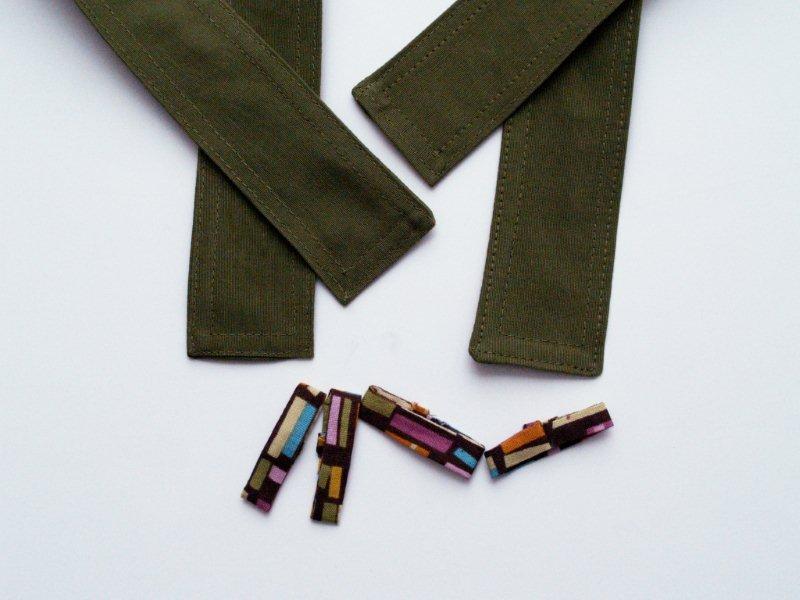
Add a strap loop to each end of the strap pieces. Push it back so it is out of the way of the next step.
Feed the end of the strap through the grommet from back to front.
Fold the short side up so that the tail is above the top edge of the bag about 1 1/4″. Pin.
Mark down the tail 3/4″ from the top and sew across the strap.
Repeat for all the strap ends.
You should have one strap that loops through the grommets on the front and one that loops through the grommets on the back.
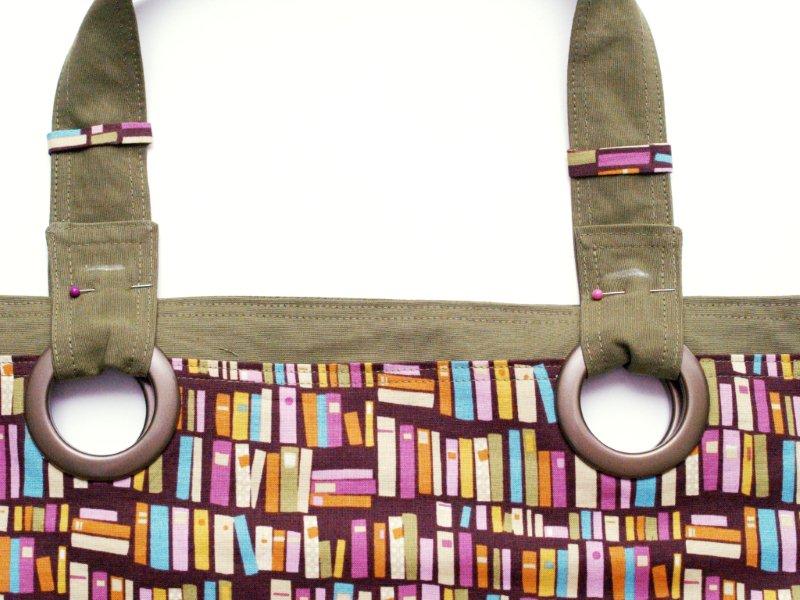
Move the strap loop down over the tail and cover the stitching line.
Hand stitch the loop down on the back of the strap around the seam so that the raw edges are covered and the loop is held in place.
And that finishes your totes!!
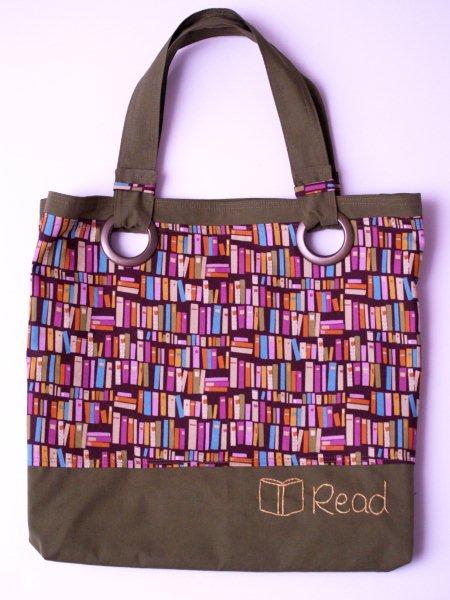
Unless of course you don’t pay attention to what you’re doing and sew the straps on your second tote on wrong.
I call this the “Suspenders Tote Bag”. Which is fine if you want to carry your tote bag over your shoulder sideways.
Or Not.
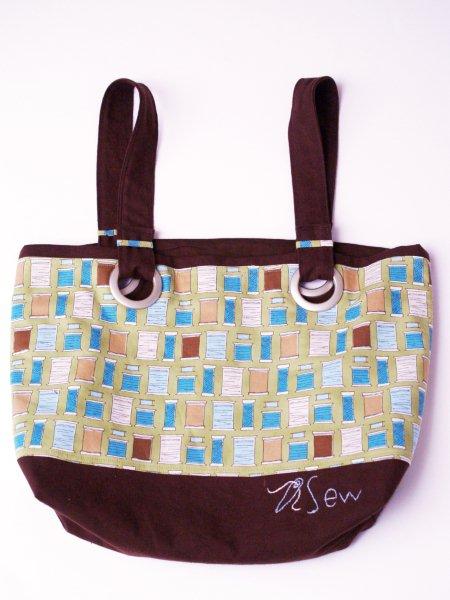
Seam Ripper to the rescue!!
Ahhh. Much better.
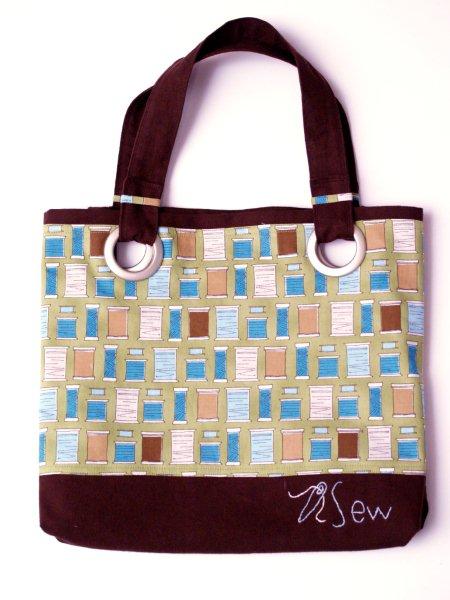
(You might notice that my “Sew” bag is just a little shorter than my “Read” bag. About 2 inches actually. Due to some crazy cutting I didn’t have quite enough fabric.
Which was fine. It’s still plenty roomy.)
I love all the little details in the bags –
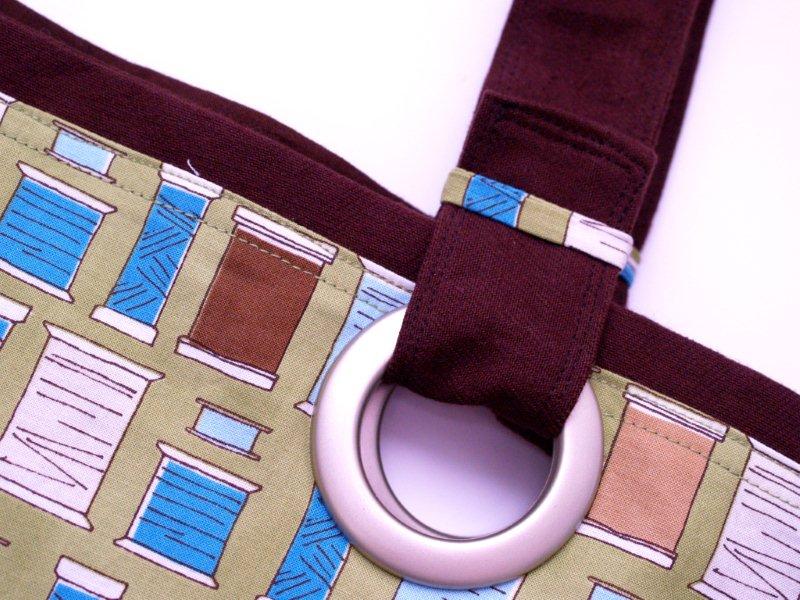
Isn’t the spool fabric fun? And the book print too! I love them.
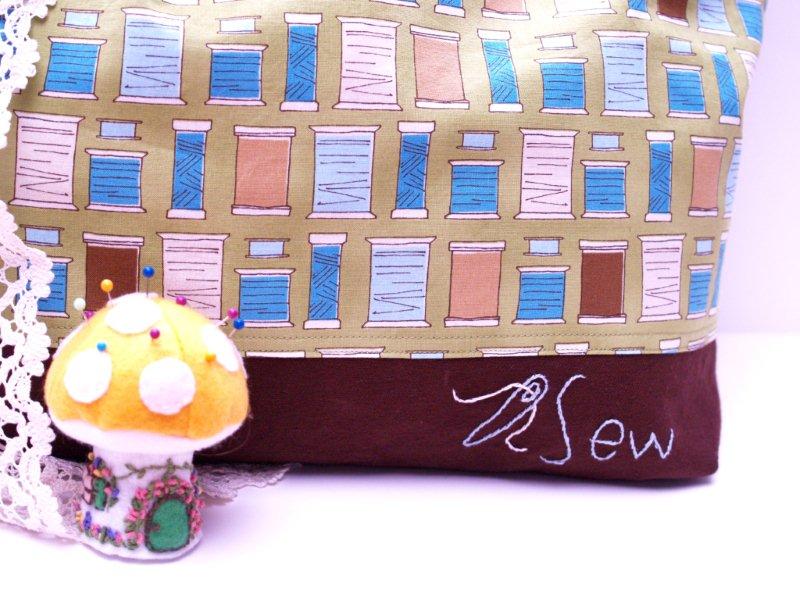
My needle is a little chunky on my “Sew” bag. The pattern is not like that. I apparently decided to forge my own path for some reason and now I have a fat needle. Still cute though.

What do you think? I hope you like them too!
I think I need a bead bag now too. Anyone know any cute fabric with beads on it? ;)
So tell me – do you pack stuff to do on road trips? What do you take along?
I’m linking to Sunday Scoop, Today’s Creative Blog, Met Monday, Skip to my Lou, Tutorials & Tips Tuesday,
Quilt Story, and the other fabulous parties on the sidebar – make sure you check them out!


Beverly, your bags are super cute and your tutorial is awesome! I bought some of that thread fabric a while ago and still haven’t used it. This would be perfect! Have you used those big grommets before? I am wondering how they hold up with alot of weight in the bag. I am going to get some on my next JoAnn’s trip. Blessings!
Love your tutorial … I made about 6 Cinch It totes which also use grommets, for my daughter, a dancer and her dancer friends .. she’s 21 .. well, in spite of using hot glue on the grommet inside then pushing them together, they still gave out when they overloaded their bags with their gear … yet they said we love the bag!! Ok, then don’t pack it so full that you need a U Haul to get to work!!
I’m the same way, i need to pack some ‘stuff’ to keep me busy: i might not use it, but feels like my ‘safety blanket’!!
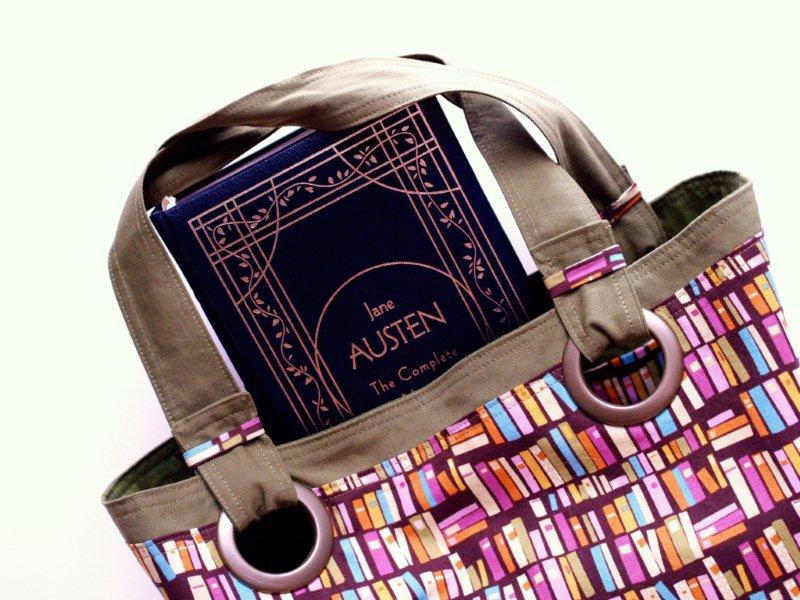
and … hey, Jane Austen ??? you can’t get tired of her!!!
love the handles details in the totes, with the loop!!
Very cute! You even chose the perfect fabric for both totes – I love it :)
Those are adorable!!! and it gave me a great idea – starting aug. 1st we are going to be in transition for about 8 weeks(and everything we need has to fit in our car…) – so it would be perfect if I could be all cute and organized with bags for different things in the car. Toys, books, sewing…Thanks Bev!
So cute, Bev! You have the perfect fabric. I try to cram everything into one bag, but it makes it difficult to find anything. Two bags may be in order for the future! I’ll tell my husband he has you to thank for that… lol! Um, and how adorable is that little mushroom pincushion??
Those are adorable, Bev! I’m always amazed by your sewing skills. The fabric on the bags is so cute! I wish I enjoyed road trips as much as you. I got so antsy on our drive to Colorado. 3 house in the car is my limit, after that I get kinda cranky :)
These bags are so freaking awesome! The embroidery is too cute on both!
I always take a knitting project with me on road trips – it’s the only thing that keeps me from getting too bored in the car. :)
Hi! Thank you so much for sharing this tutorial. I have been teaching myself to sew through reading fabu blogs, and this tute is going to take me so much further! Thank you!
Love them Bev. I’m going make one this week. ‘will send a pic of the finished product. Be well. Claudia
Super cute and really useful. I love it!
Love them Bev! They are “sew” cute!
(Sorry, sorry…I just couldn’t help myself!)
Tote bags are so fun! I really enjoyed your design. I used to bring along projects that I didn’t have to really “think” about, like cross-stitch or crochet. So that I could still enjoy the journey. I think I need to start doing that again!
Adorable! Perfect fabric choice.
Love the fabric! Such a great idea :) Thanks for sharing the tutorial!
Tote-ally awesome! I love the fabrics you’ve used, it’s so cute! I like that you used grommmets to attach the straps, it makes the totes more interesting. The embroidered words are a really cute touch, too.
Road trips are great, I always end up taking a pile of books, iPod, sketch pad and notepad with me! I don’t very often take projects along since I like to spread out when I’m making things and usually road trips mean being crammed into the car with four other grown adults!
Thanks for the tutorial!
I love your totes. I always pack two bags, one for reading/navigation/reservations, etc…. and one for sewing projects. And then I always have my handy purse(suitcase my husband calls it) Full of all the essentials a person will need if away from home. He gives me a hard time, but knows I will have lotion, headache medicine, bandaids, a safety pin, etc… if he ever needs it and he always needs something from my “suitcase”, I mean purse.
Thanks for sharing I love your tutorial.
Love your bags! So you’re saying you’re like an infant who needs all this stuff brought along? I completely get that!
LOVE this idea!! Thanks for sharing.
Those are soooo cute! I love the stitching. Thanks tons for the tutorial, I’ll be linking.
These were super fun to make and work on together…but suddenly I’m thirsty for a margarita remembering all the grommet drama!! ;-)
Oh my! I love these and i so need them for our car trips! Thank you so much I need to be making these right now!
I’m like you – the first things I need to pack for a trip are the reading and crafting things I’m taking along. Then, if there’s room, I add clothes.
Lovely bags. Thanks for the tutorial on making them.
Stopping in from Fabric Tuesday. My link is http://carolburris.com/family-life/a-tunic-for-chase/
I love these totes, especially the read one I always take heaps of books with me whenever we go away, I don’t always read them but I like to have them with me!
These tote bags are fabulous!! Love the different fabrics you have used for them too!
Those bags are great! You used some great fabric. Thanks for sharing your tutorial! Came over from Quiltstory.
These are adorable! Well done, the fabrics are just the cutest.
Aren’t metal grommets the worst?! I’m still waiting to hear from someone that they actually work for! I’m baffled they still sell them! :) Good tip on the plastic version, I’ll be trying that next time!
Great bags and thanks for the tutorial.
OMG so cute!! Thank you so much for the tutorial…I just love the grommets and the handsewing! Eek!
Bev, these are absolutely adorable! Is there anything you can’t do or make?! Thanks for linking up to this week’s Catch a Glimpse party.
OH WOW!! They are FANTASTIC! :)
You did such a great job on both of these! What a wonderful tutorial too. They are so cute and boy can someone go crazy making these in so many fabric combinations! It similar to the way I made my camera bag insert. I just added foam for padding.
Oh, these are so cute. I love the grommets, I’ve never tried those before.
I’m totally with you. I’ll go anywhere in the car but I need to have my stuff. Magazines and / or book? Check. Portable crafts ( still working on variety here) check. These cute tote bags? NEED! Thanks for linking up to this week’s BFF Open House!
What a great looking bag(s). Great tutorial as well. I have to admit however, that when I saw your ‘suspender’ tote I started laughing and feel as if I have every right to do so. You see, a few years ago I made an awesome breast cancer tote for my MIL to take to the hospital after she had her reconstructive surgery following a double mastectomy the year prior. I filled it with all sorts of goodies like bath gels, shower pouf and anything else I could find in the color pink to spoil her. She was just thrilled to get this bag and all the goodies and then learned later that she actually had to practically lay on that thing in her hospital bed because all the nurses wanted to take it from her. LOL I knew there was just something wrong with the bag but figured it was just my perfectionist ways again so I let that feeling go. Finally she had to admit to me she’d taken the top part of the bag apart to ‘fix’ the handles on that bag. OMG I had not only done the very same thing you did BUT, I actually gave it to someone. ACK! HOW embarrassing. So yea, I laughed when I saw yours. It looked pretty much the same as my handles did. I really could have smacked my head against the wall when I found out why I kept thinking there was something not quite right but never saw that myself.
i have a book blog, and i love awesome crafts! i’m going to feature this piece in a “bookish DIY” post if that’s ok :)
Your totes are awesome! I have to tell ya I didn’t read the tute, cause I hate to sew! :)
gail
I love road trips too, Bev! Your book totes are beautiful as well as being practical and stylish!
Thank you so much for linking up to last week’s “A Little Birdie Told Me…”. My apologies for the belated vist — with July 4 falling on a Monday, it threw my whole schedule off, and I’m just now making the rounds to visit the party-goers from that week. Best, Jenn
Lovely tute! Great pictures! The little loop of contrasting fabric on the handles is a great touch! Thanks for sharing!
Love your bag! Just wanted to tell you I made tote purses like these, only I looped the handles through and tied them together in a bow on each side. But someone finally fessed up to me (awww!) that with the weight of the stuff in the bag, the rings pulled loose from the fabric. To fix them, I unsnapped the rings, zigzagged The fabric together around the holes really well, applied some fabric glue to the rings and snapped them back on. Just wanted you to know in case you had the same problem. But I continue to make them, I LOVE the look of the rings. Apparantly they just need some reinforcement for everyday use. Hope I explained this enough. This may be what VickiT’s MIL had to do.
Thank you so much for the tip!! I made one for my niece & it pulled out! I felt terrible! I will try this on hers!
Wow, this is my 1st time to your site and I think your attention to detail and you simple instructions are great! You have “great” pictures for those of us that do not sew all the time which brings it all together. I hope I will see much more of you. signing up for your site made me wonder if I did the right thing though, so I hope I did it right. Thanks so much!
My first time, too, but it won’t be the last. This tote is ME!!!! I love it.
I’m going to make one, or two, and I’m going to learn from other people’s experience and reinforce the ring sites before I attach the rings. Those rings make this tote look so perfect. – so professional.
Thank you for sharing your knowledge and thank you for those great instructions and pictures..
Fabric with beads on it here – (if you haven’t any yet) –
http://www.etsy.com/listing/76904601/green-beads-riley-blake-designs-my-minds
I’m wondering about the grommets… I tried them on a purse, and while they weren’t the kind that snap on (they just had metal tabs that you had to fold over the second circle), they pulled away from the fabric when I tugged on the fabric a little–I can’t imagine that they would have held up with all the stuff I put in my purse. Have you had any problems with this? I’m wondering if they make these extra large grommets like the ones that hold together like eyelets (where the two pieces of metal are hammered together). I would appreciate any help/advice you can give. I love the look of grommets, but I am just nervous about cutting the big holes in the purse if the grommets are just going to pull out with the first use. Thanks so much!
You can email me directly at [email protected] :-)
I love this tote! Sweet.
I’m rather new to sewing and I was desperately searching the internet for a simple tote tutorial I was able to follow and yours was just right for me because it was both the size and the ‘type’ I was looking for. Since I didn’t have grommets I just made a handle the length I wanted it to have and stuffed it with fleece so that it would be nice and soft even when the bag would be heavier. It took me a whole afternoon but it was well worth it. Also I was running out of fabric for the inside pocket so I just used whatever size the piece was I still had and I was so lucky, the bigger pocket fits my phone just right and the smaller pocket is perfect for glasses or pens! I’m already thinking about making another one :)
I love this bag! I made mine to say “Beach” with an embroidered sun. The tutorial was so easy to follow! I just have one question on the placement of the grommets – is there a standard number of inches from the side seam that I should be using?
I discovered your blog/bag tutorial, and thank you for such a clever bag! This will be fun to make for our trailer travels this summer. I also want to make some for Christmas gifts, and it will be such fun picking out novelty fabrics appropriate for the special people in my life. Many thanks!
These are SO beautiful! This is me – a sewing bag and a reading bag! And, I need a drawing bag, too! I love your designs ♥ I would be interested to know where you got the book fabric?
Thanks so much for this tutorial!
April
This is so me!! I always have some type of craft with me, whether it be knitting, sewing, reading, etc. I’m the only one in my family who does this, so I’m the odd ball of sorts. Anyway, I am so excited about finding this pattern. It looks like so much fun!!