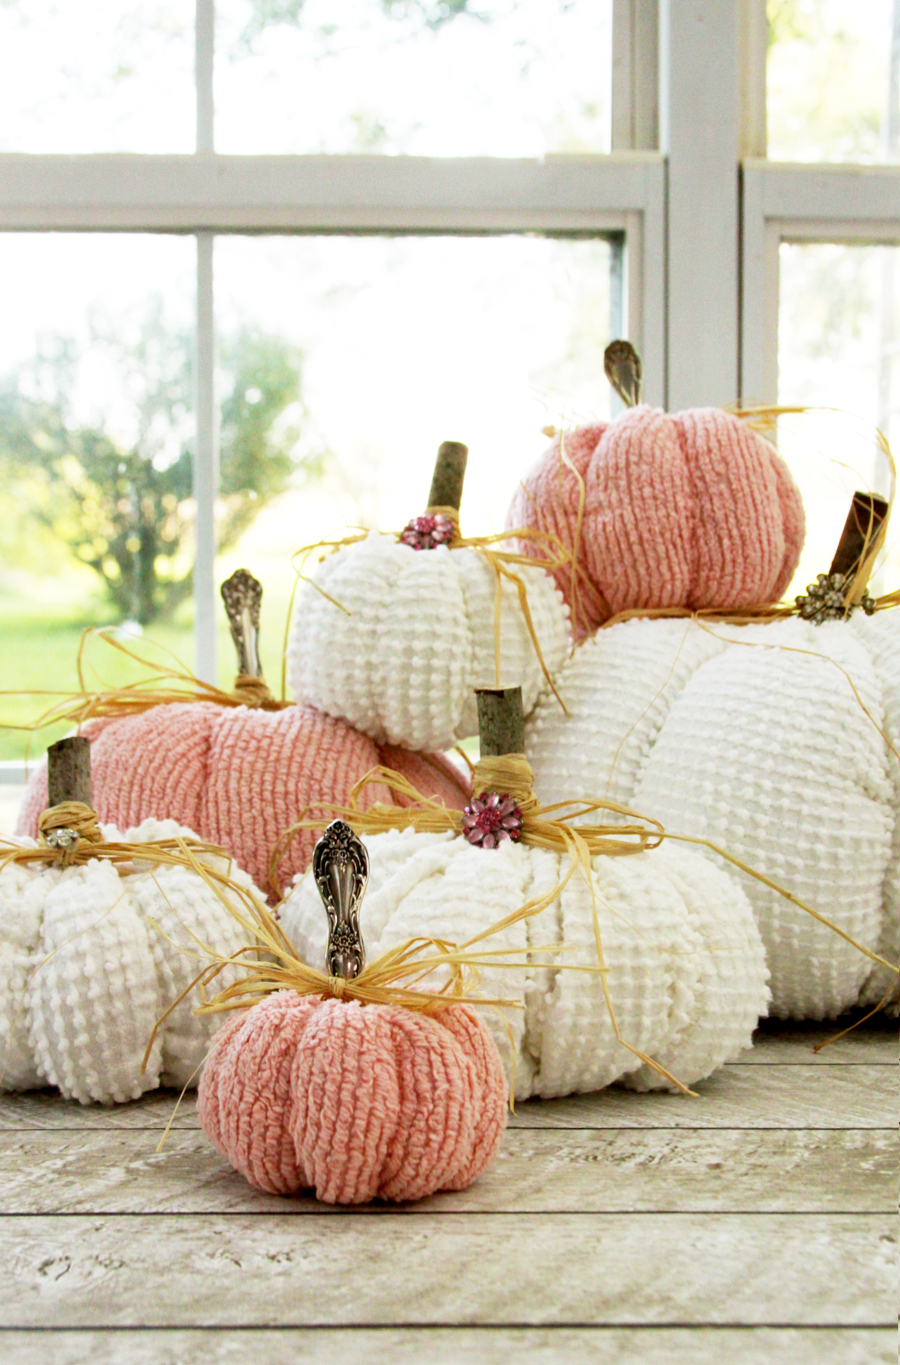
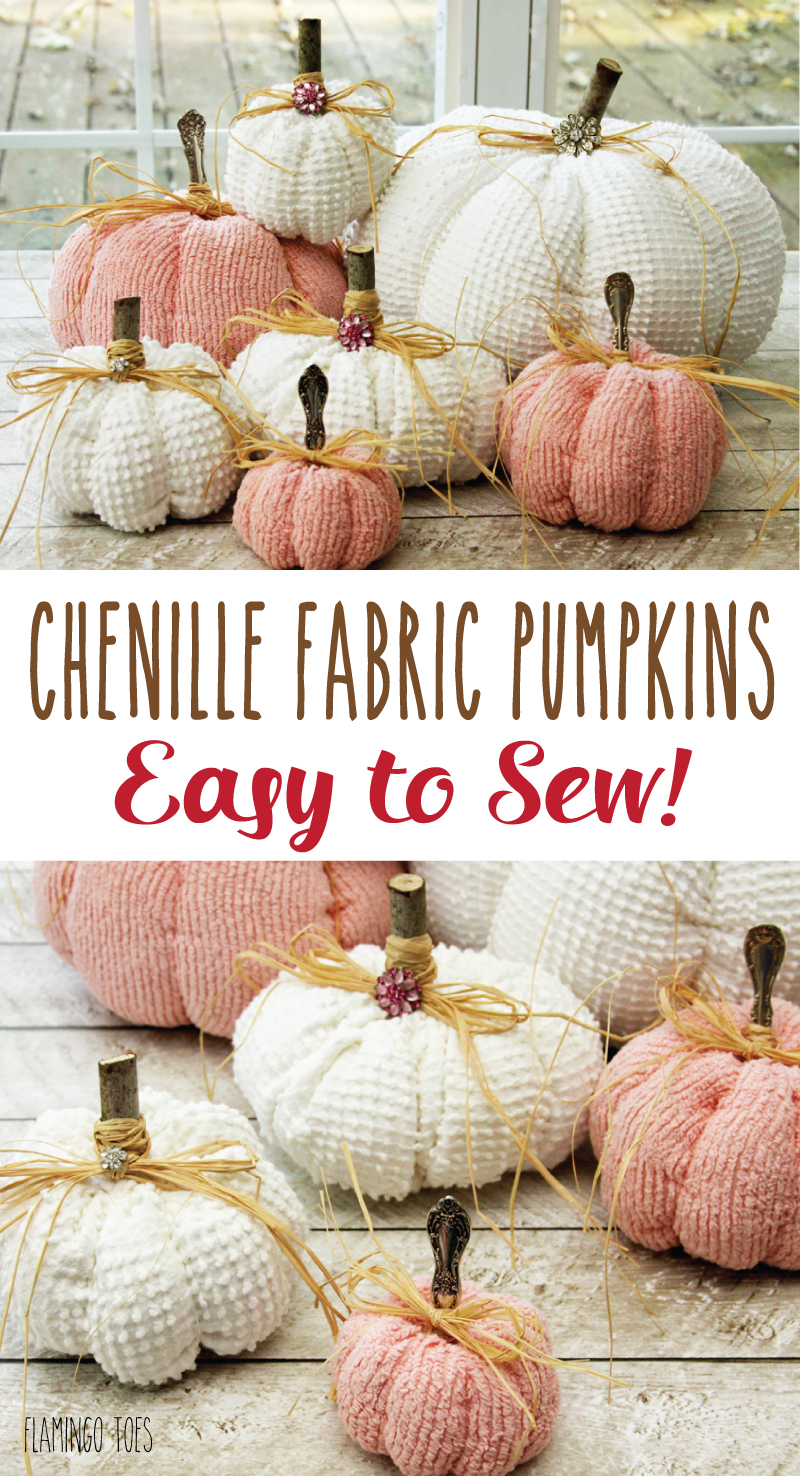
I have had these Chenille Fabric Pumpkins on my to-do list for years – I am so excited to have been finally able to sew up some of these cute pumpkins!
My sweet friend Michele from The Scrap Shoppe and I had an epic girls day on Saturday! We started the day with some shopping at a local Fall Festival, then more shopping at one of our favorite shops, Daisy a Day Vintage, then lunch (because food) and then all the pumpkin sewing!
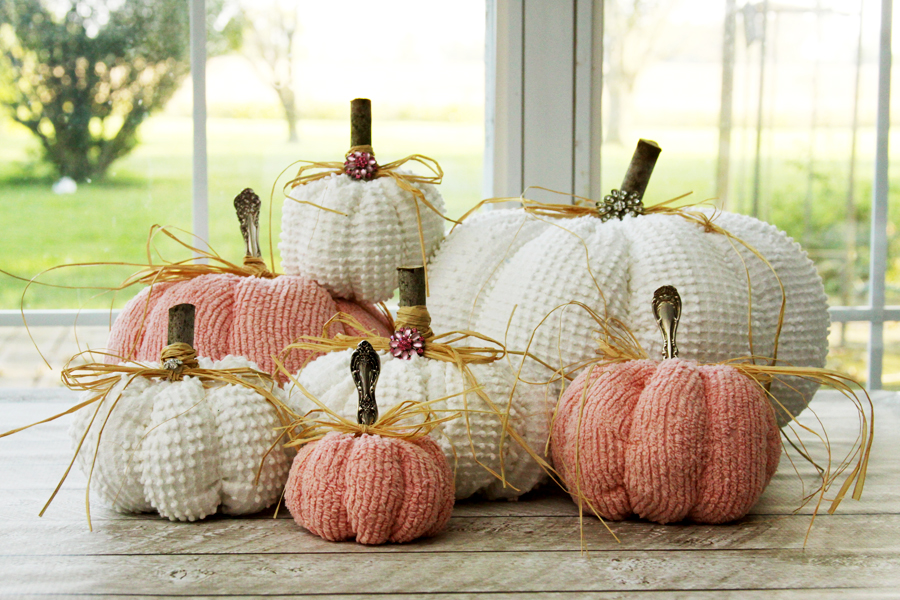
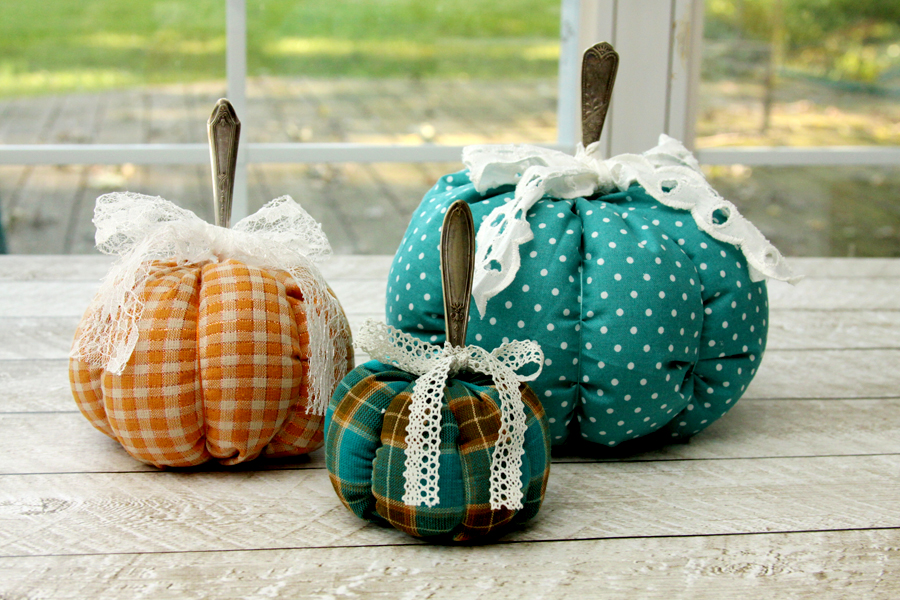
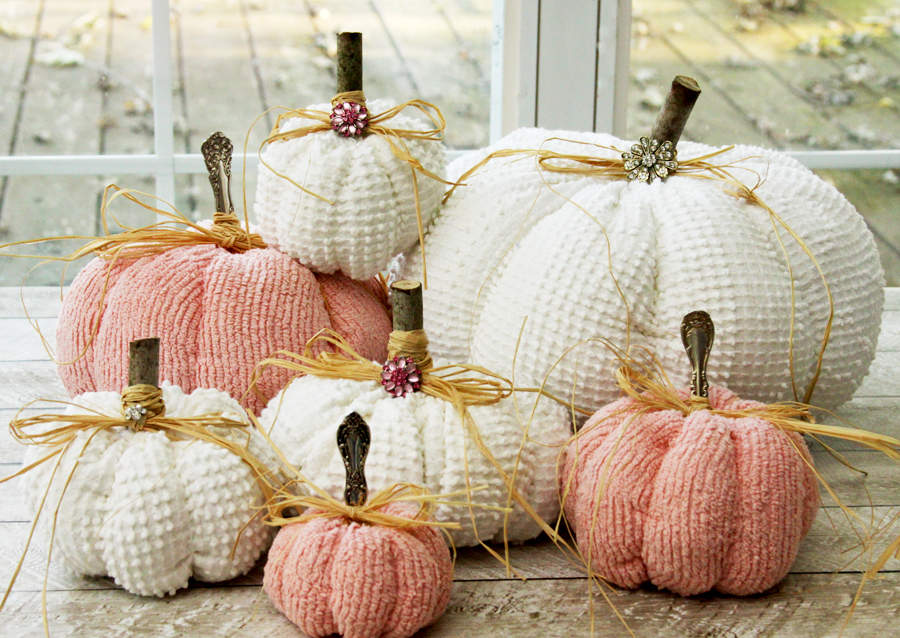
I have sewn up fabric pumpkins before but I’ve been wanting to do some chenille versions, I just love how pretty and vintagey they are. We had to add in come fun fall cotton fabrics too – between the two of us we made 20 pumpkins! It was like a pumpkin factory – but with yummy treats.

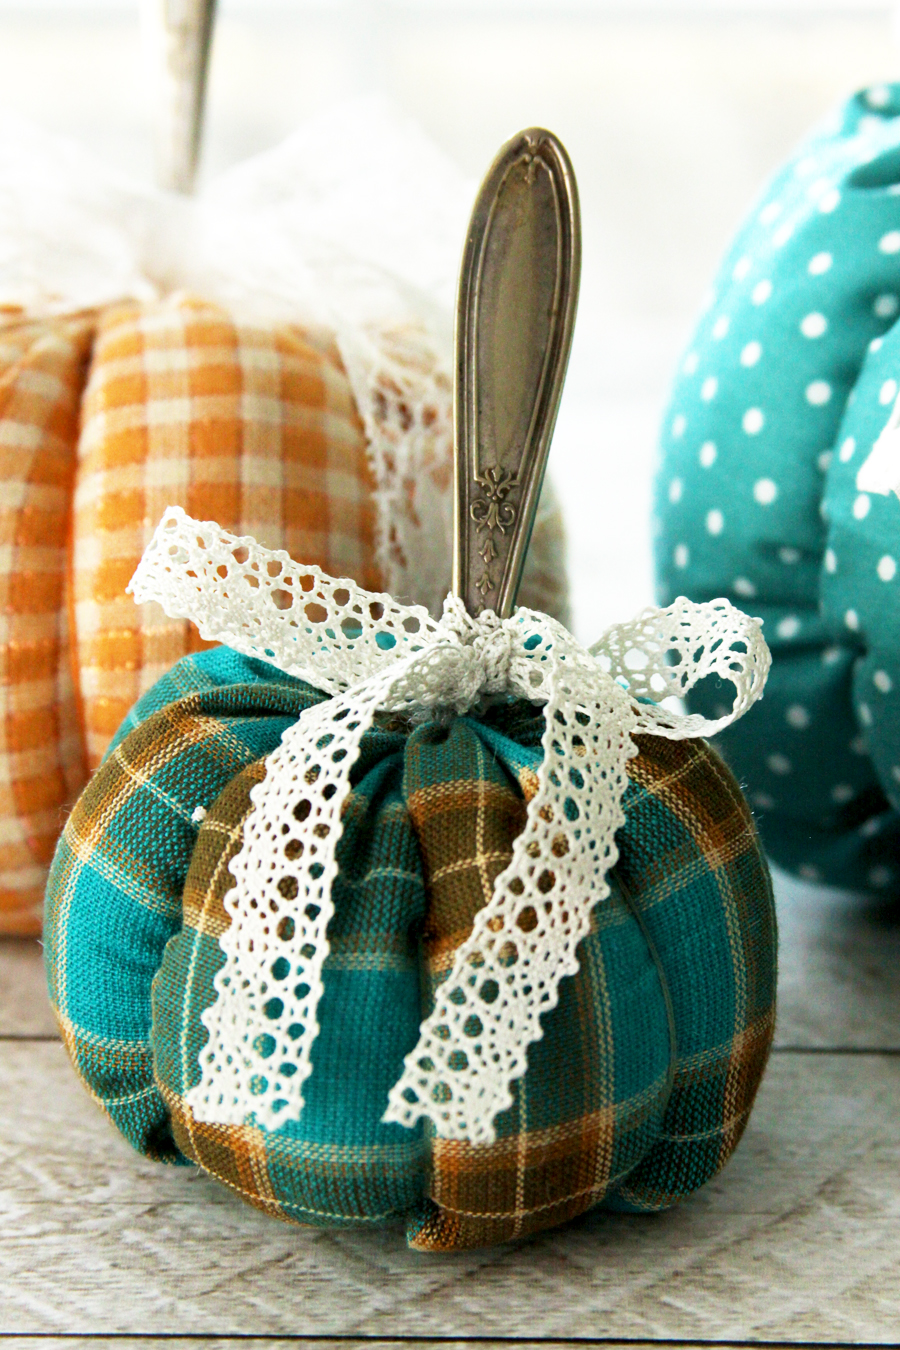
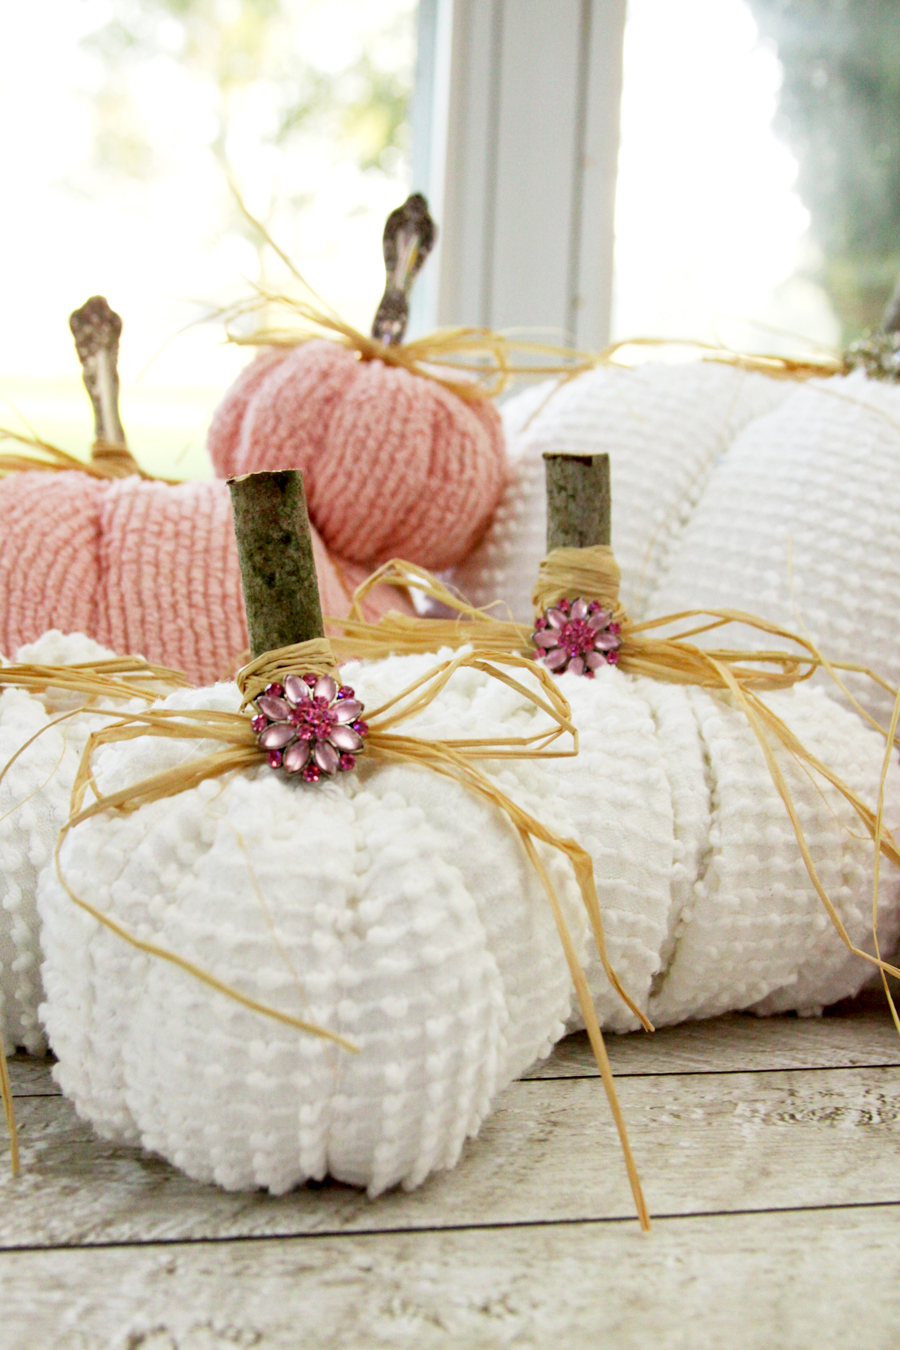
While at the fall festival we found some fabric pumpkins with little vintage spoons for stems – so of course we had to add those to some of ours! Fortunately, Daisy a Day had chenille fabrics and vintage spoons for us. Yay!
We added spoons to our regular cotton pumpkins too – aren’t they fun?
If you want a full tutorial with photos, check out my Black and White Striped Pumpkins tutorial here!
We decided not to do striped pumpkins – so we made a few changes to my original tutorial. Here’s the basics:
Easy Chenille Fabric Pumpkins
Our pumpkins are a variety of sizes. There’s no hard and fast rule for these, but you generally want the width of your fabric to be over twice as wide as the height. Here’s what we cut ours:
- 5″ x 12″ – makes a 2 1/2″ x 3 1/2″ pumpkin
- 7″ x 17″ – makes a 3 1/2″ x 5 1/2″ pumpkin
- 10″ x 25″ – makes a 4 1/2″ x 8″ pumpkin
- 15″ x 41″ – makes a 7″ x 11″ pumpkin
-
- Fold your fabric in half so the short edges are together and right sides are together. Sew a seam down the end with the raw edges to make a fabric tube.
- With a strong needle and either doubled thread or a light cotton thread like pearl cotton or thin crochet thread, run a gathering stitch all the way around the bottom edge of the tube. Pull of the threads to close the opening. If you need to, make some stitches across the opening to completely close it.
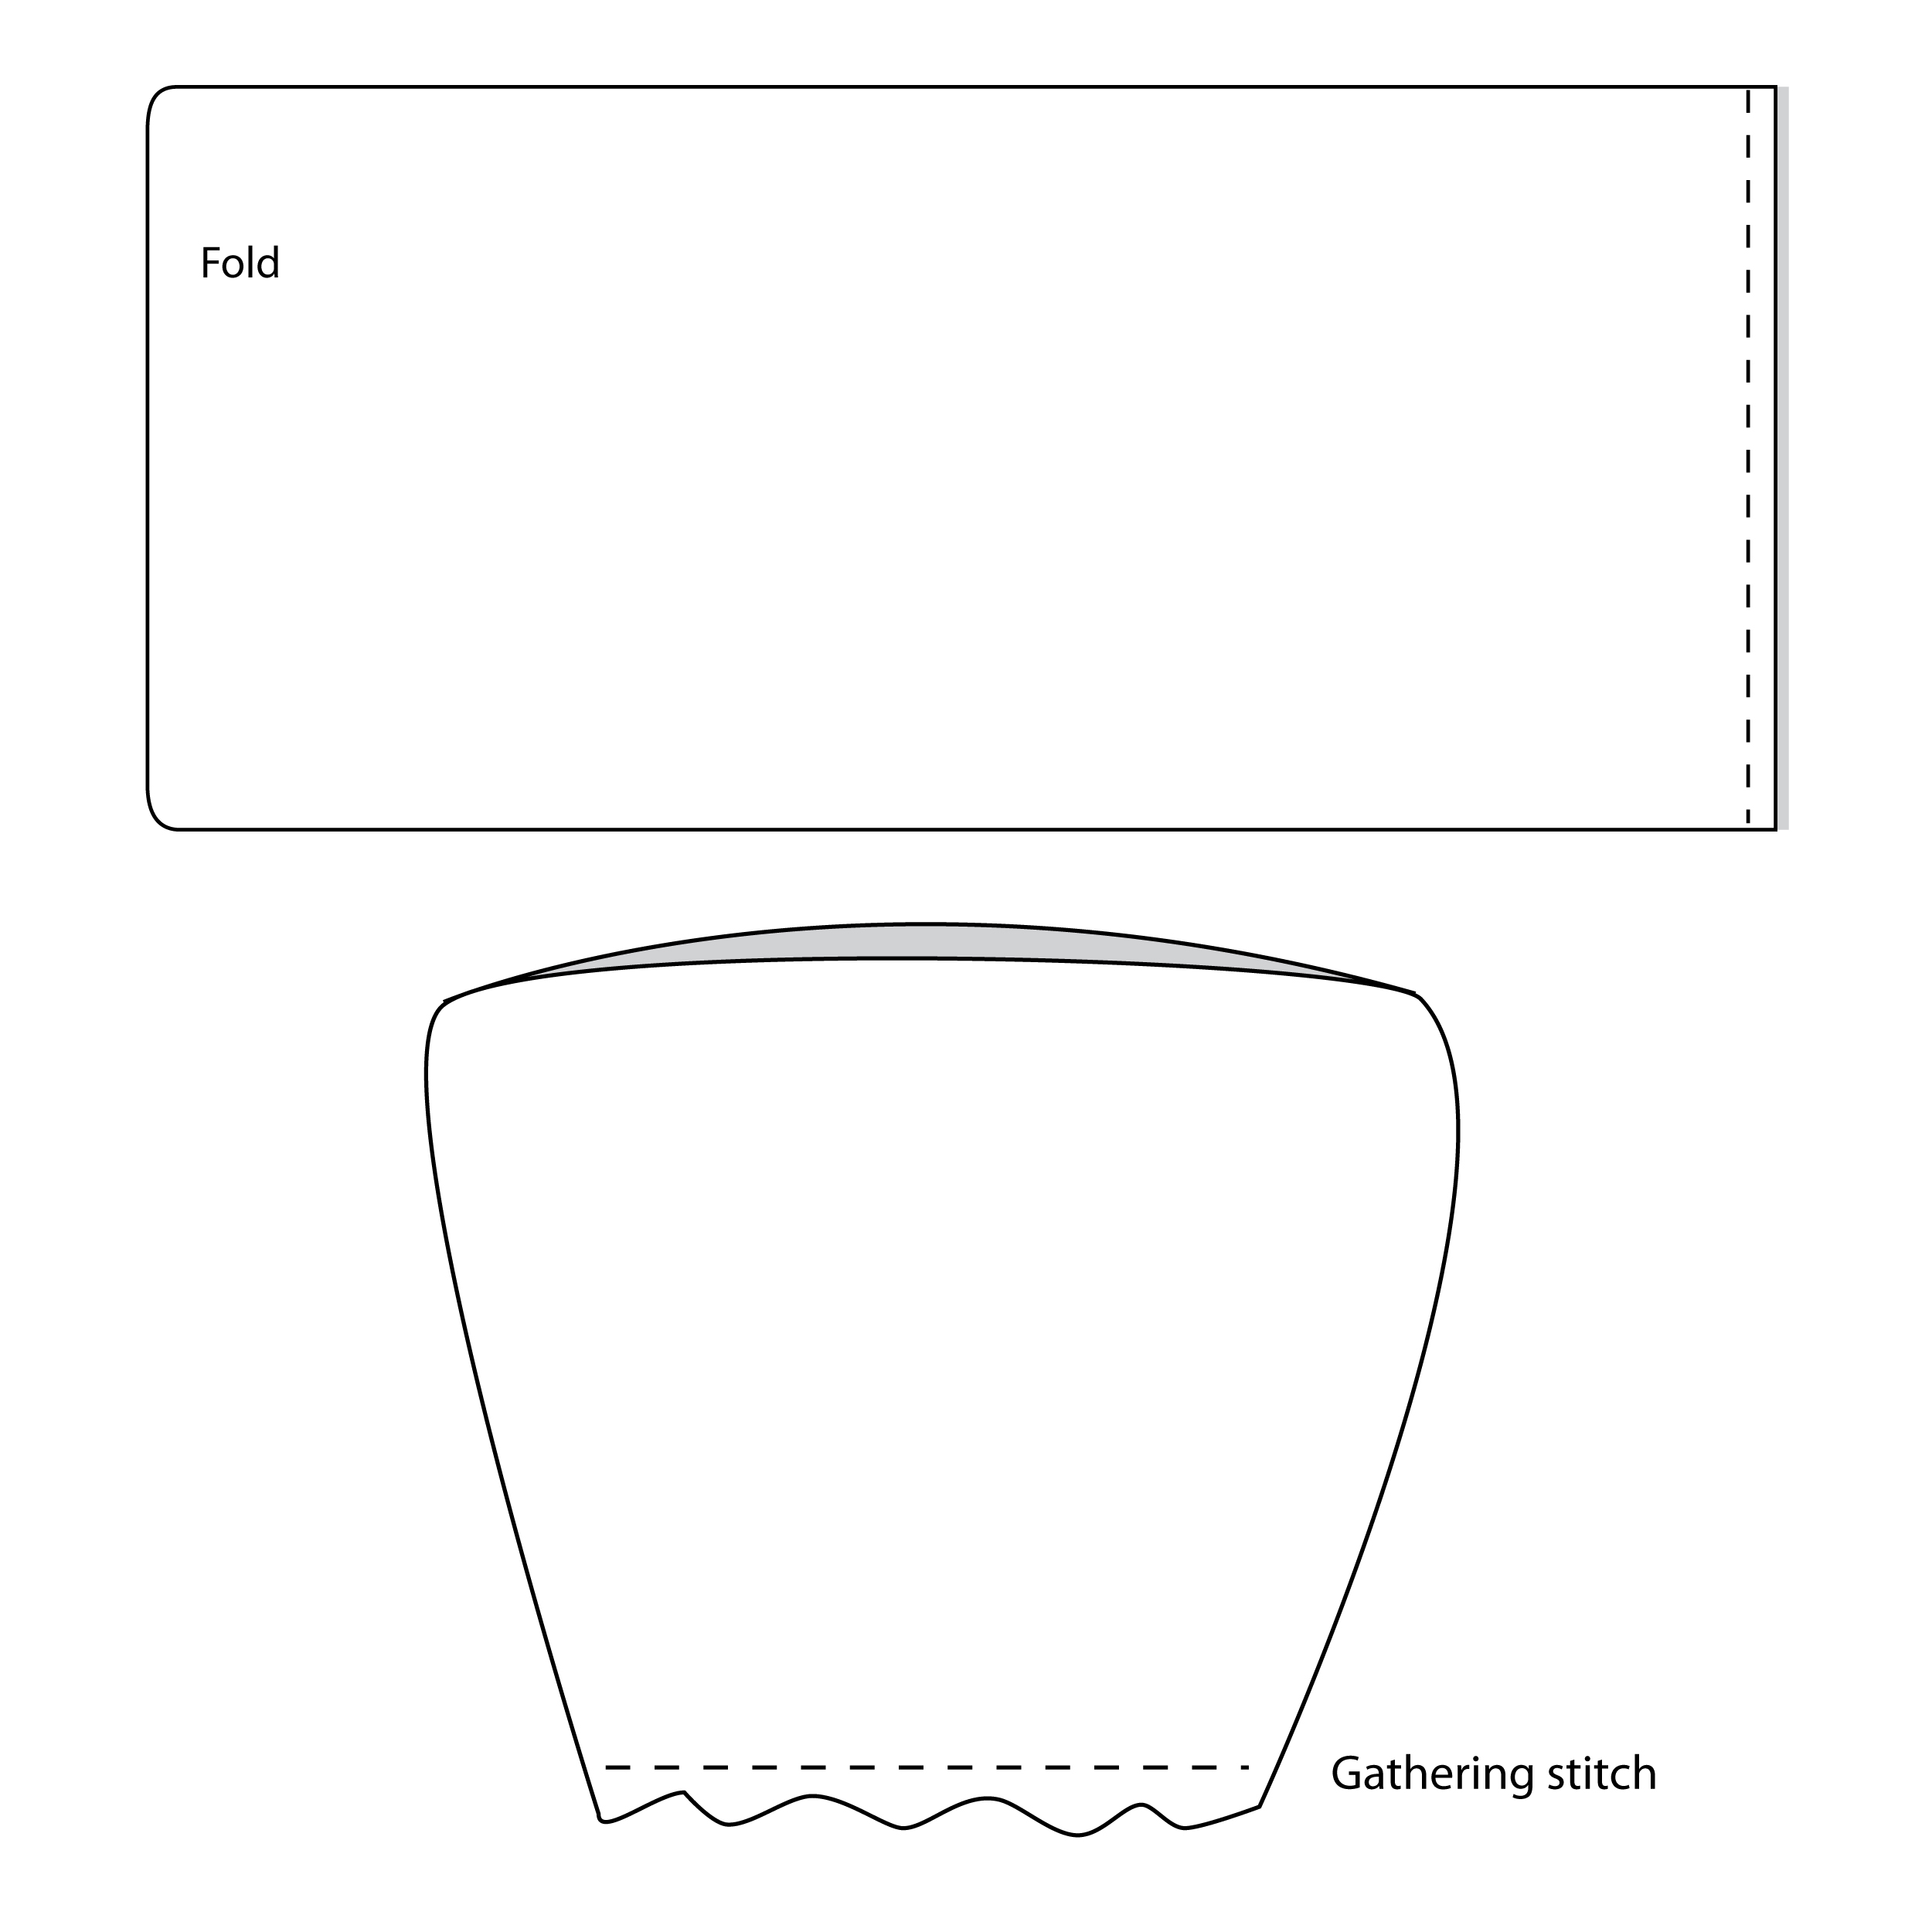
- Turn your fabric right side out, so the seams are on the inside. Fill the pumpkin with fiberfill, then sew a gathering stitch around the top opening. Pull up the threads to close this opening, but before you completely close it add whatever you are using for a stem. Tighten the threads and close the opening. (If you are adding a spoon, I recommend bending the spoon, especially for the small pumpkins.)
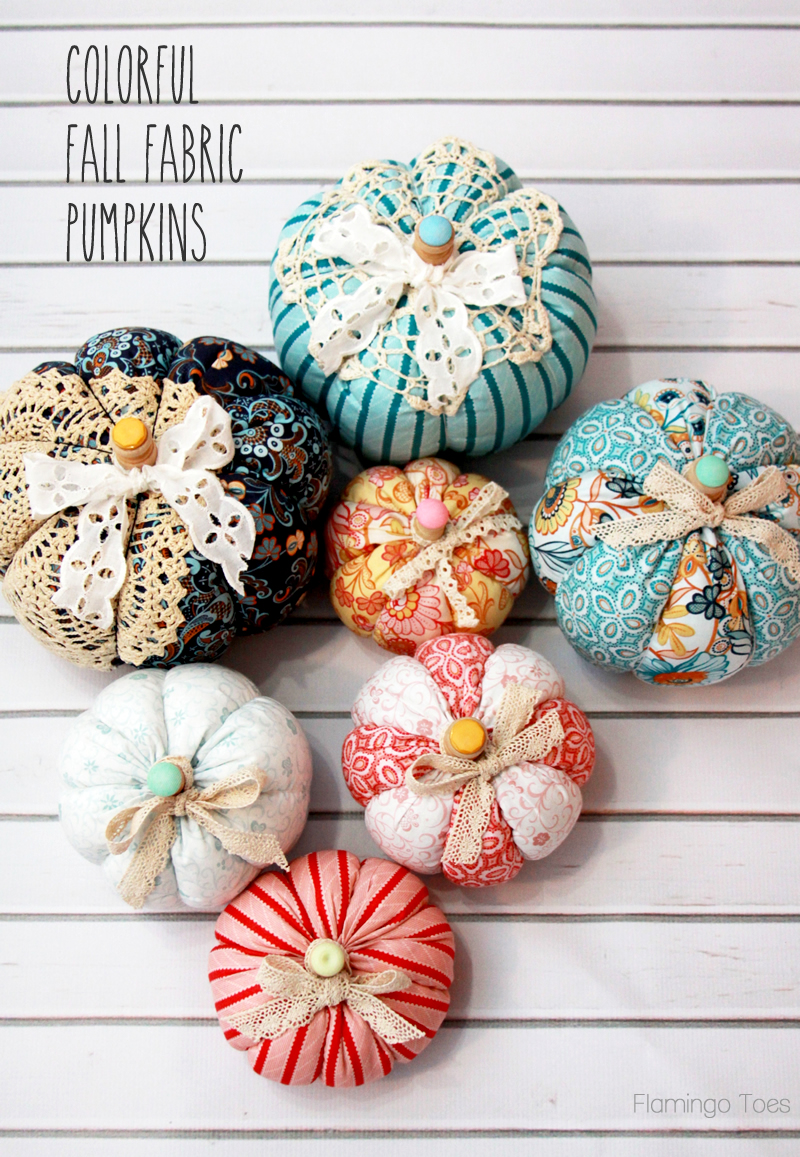
- With a long strand of floss or cotton thread, knot the thread and make a small stitch at the bottom of the pumpkin. Bring the thread around the pumpkin crossing over in front of the stem and back around to the bottom. Pull the thread up to make segments in the pumpkins. Take a small stitch and knot the thread so it stays locked. Repeat three more times, segmenting the pumpkin sort of like a pie with the threads. Now you can add a cute embellishment to the top, like raffia or lace! We added some beads and buttons to some of ours as well.
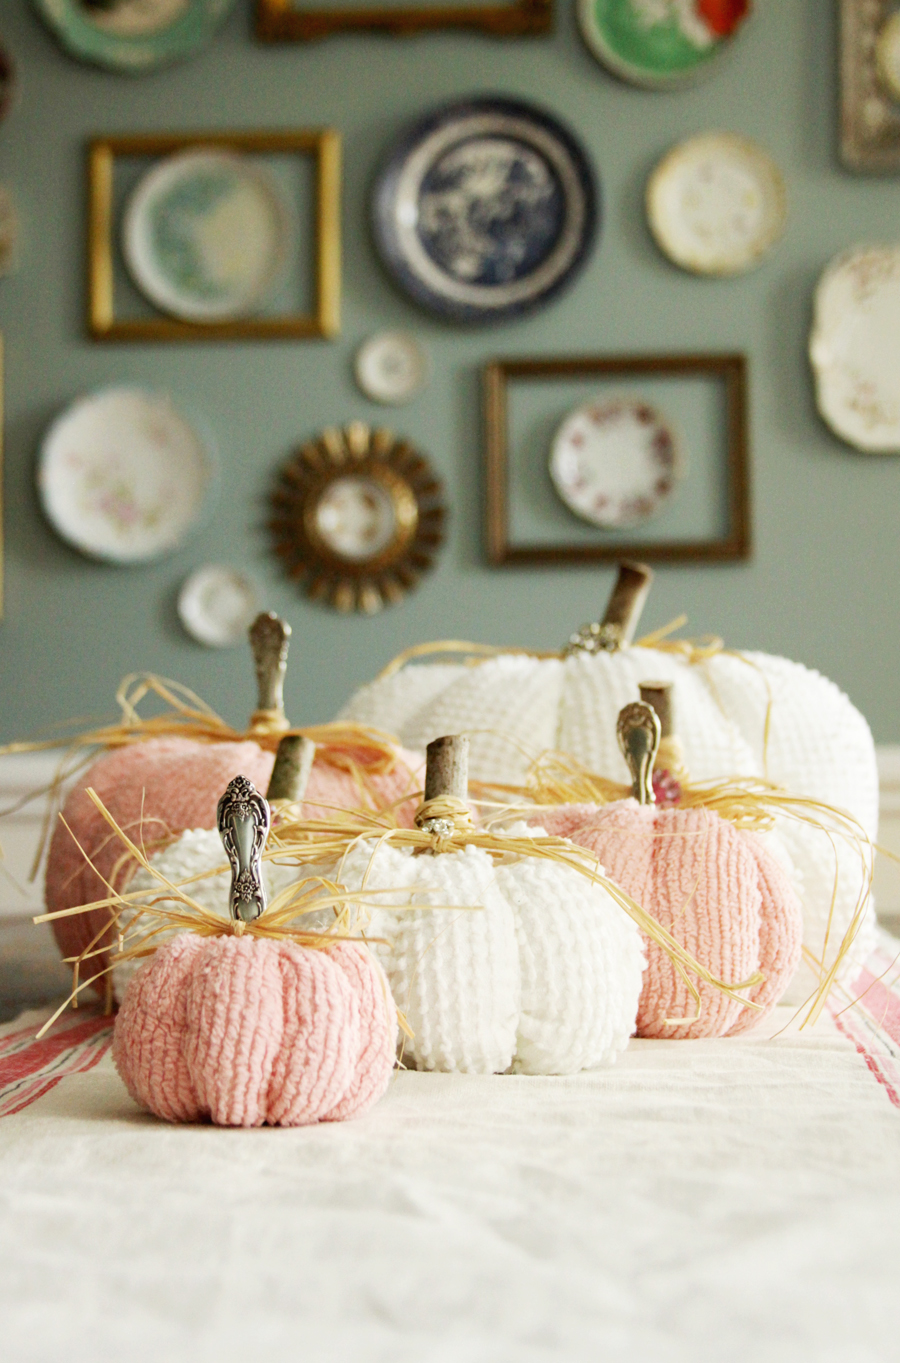
I keep carrying mine around the house – I can’t decide where I want them! I’m kind of leaning towards my dining room – I love the way they look on the table.
I’d love to see a photo if you make some up!
Something else you may want to try:


Bev,
Love your pumpkins. What a cute idea to use a vintage (or any other) teaspoon for the stem. I run out of good twigs for this purpose and it’s often hard to find real pumpkin stems for these fabric pumpkins! The added bling from necklaces add a nice touch as well. Thanks so much for sharing your creativity!
adorable, where did you find the Chenille fabric?
What a lovely idea. The pumpkins are so pretty. Thanks for sharing.
Marilyn
Thank you for showing all the pumpkins. Everyone is gorgeous.
Joan
The pumpkins are so pretty,it is hard to pick a favorite. Thanks for the tutorial.
Marion
Bev, I’ve always wanted to make chenille pumpkins and you just gave me the push. I hope to make some for next year.
I love your pumpkins! Pinned.
I love these pumpkins! I will be looking for some chenille now! I even love the pink. So shabby chic! Pinning!
I have seen a lot of pumpkins made but these are so unique. I love chenille and the spoons for the stems is “icing on the cake.” Thank you for sharing your directions and drawings on how to make them. These are just so darn cute and sweet. Beautiful work too!
Love these – your choices of size, color and style – awesome! Very well done, indeed!
Pinned it! : – )
These are so pretty. Thanks for sharing at the Inspiration Spotlight party @DearCreatives Pinned & sharing.
Saw these on facebook and love them. Love the idea of using spoons! I’m bringing back my Monday link party @ DIY Home Sweet Home (first one will be Oct. 16th) and I would love for you to stop by and link up your pumpkins or any new projects your working on! http://diyhshp.blogspot.com
Oh my goodness, I love those. The chenille is so perfect!!
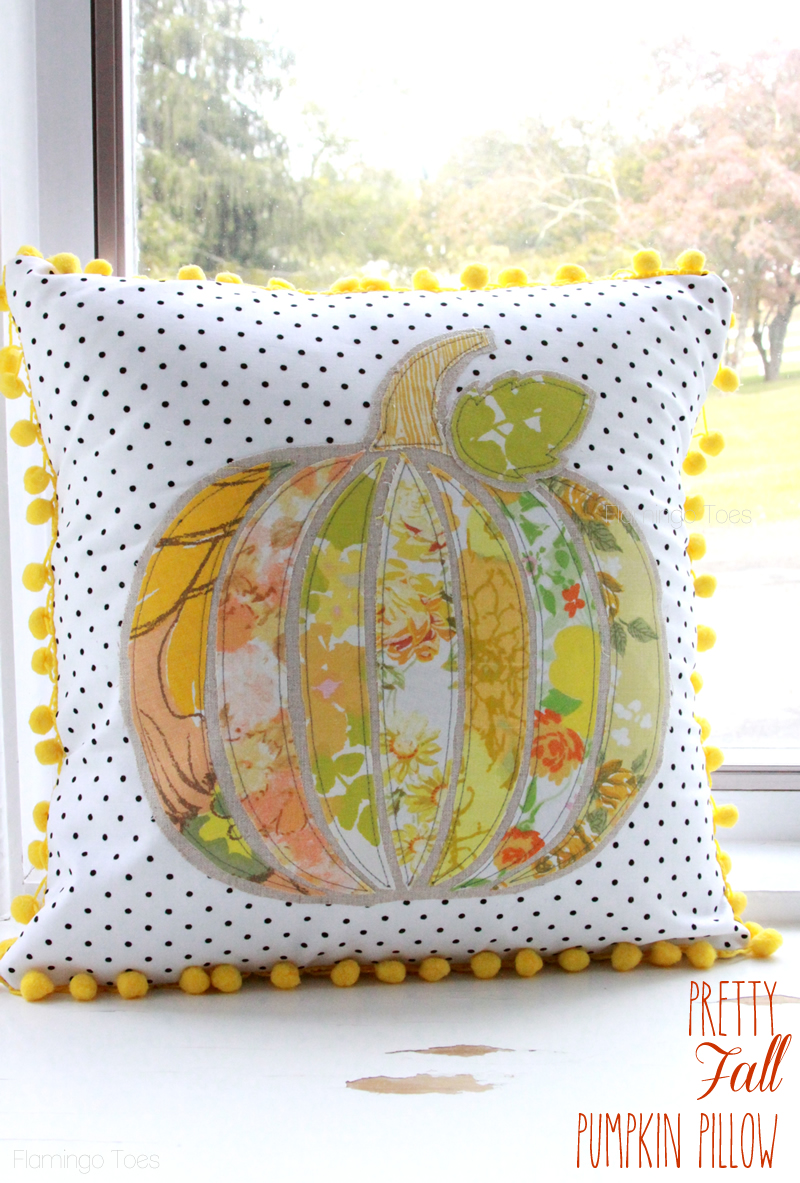
Beverly, I can’t stand this!! I absolutely LOVE the chenille pumpkins SO much!! PINNED. And the pumpkin pillow??? Swoon….
You are super creative and have the talent to make things, too. Wow. I really, really want to make the chenille pumpkins. Did you buy the fabric or (probably) have old chenille spreads? I need to make these.. and the pillow? It’s so beautiful. Pinned. Your friend, Linda @Crafts a la mode
Love, love, love these chenille pumpkins! It is so hard to try to replicate a real pumpkin stem so I like the spoon idea for the fabric pumpkins. The spoons looks so vintage-y with the chenille (don’t know if fabric was vintage or not but who can forget our grandmothers’ chenille bedspreads?) Thanks for sharing your wonderful instructions!
These are so cute! I love the blush pink ones – I struggle with fall decor because I don’t loooove oranges and red but I could totally do pink pumpkins!
Thanks for sharing with the Share Your Style link party :)
Your pumpkins are wonderful and I love the spoon idea! Thank you for sharing at Party In Your PJs!
Thank you so much for the tutorial on these pumpkins! I love them! I bought some chenille pumpkins years ago and could not figure out how they made them. Now I know! Have a great one!
Bev, I love the soft colors on these – I always go for non-traditional holiday colors – congrats – you are one of our Featured Guests once more at Inspire Me Monday at Create With Joy!
These pumpkins are lovely. Thank you for sharing.
I love your pumpkins and I have chosen them for my feature at Totally Terrific Tuesday. Thank you so much for linking up with us!
I loved your pumpkins and wanted to feature you at SYC this week, but I could not find a link back to the party. :( Sorry, that is one of the requirements.
hugs,
Jann
These are stunning! Thank you for sharing with us at TFT! I am featuring you at today’s party. Have great weekend ahead!
https://followtheyellowbrickhome.com/the-softer-side-of-autumn-at-thursday-favorite-things/
omg they are so cute!! I love them all. But I’m so stingy with my vintage silverware! And that pumpkin pillow is adorbs too!!
In Love with these!!!
I want to make all the pumpkins!
I love, love your pumpkins. So creative a cute.
What a clever idea to use all the objects you chose for the pumpkin stems! I have a few empty plastic thread spools that I was saving for some kind of project. You gave me the best solution….pumpkins! I do have wood stems for pumpkins previously made, but will make more using my spools as stems. You are so creative! Thanks so much…and Congratulations on your new home!
I love the use of doilies on top of the pumpkins. Because really, what can you do with a doily? Can sometimes find them at antique stores.