One of my favorite things about being a Riley Blake Designer is working alongside all the other amazing and so talented designers! It’s such a blessing to be part of such a fabulous group! And one of the best perks about being a designer is getting to play with new fabric collections as they come out – and show them off to you!

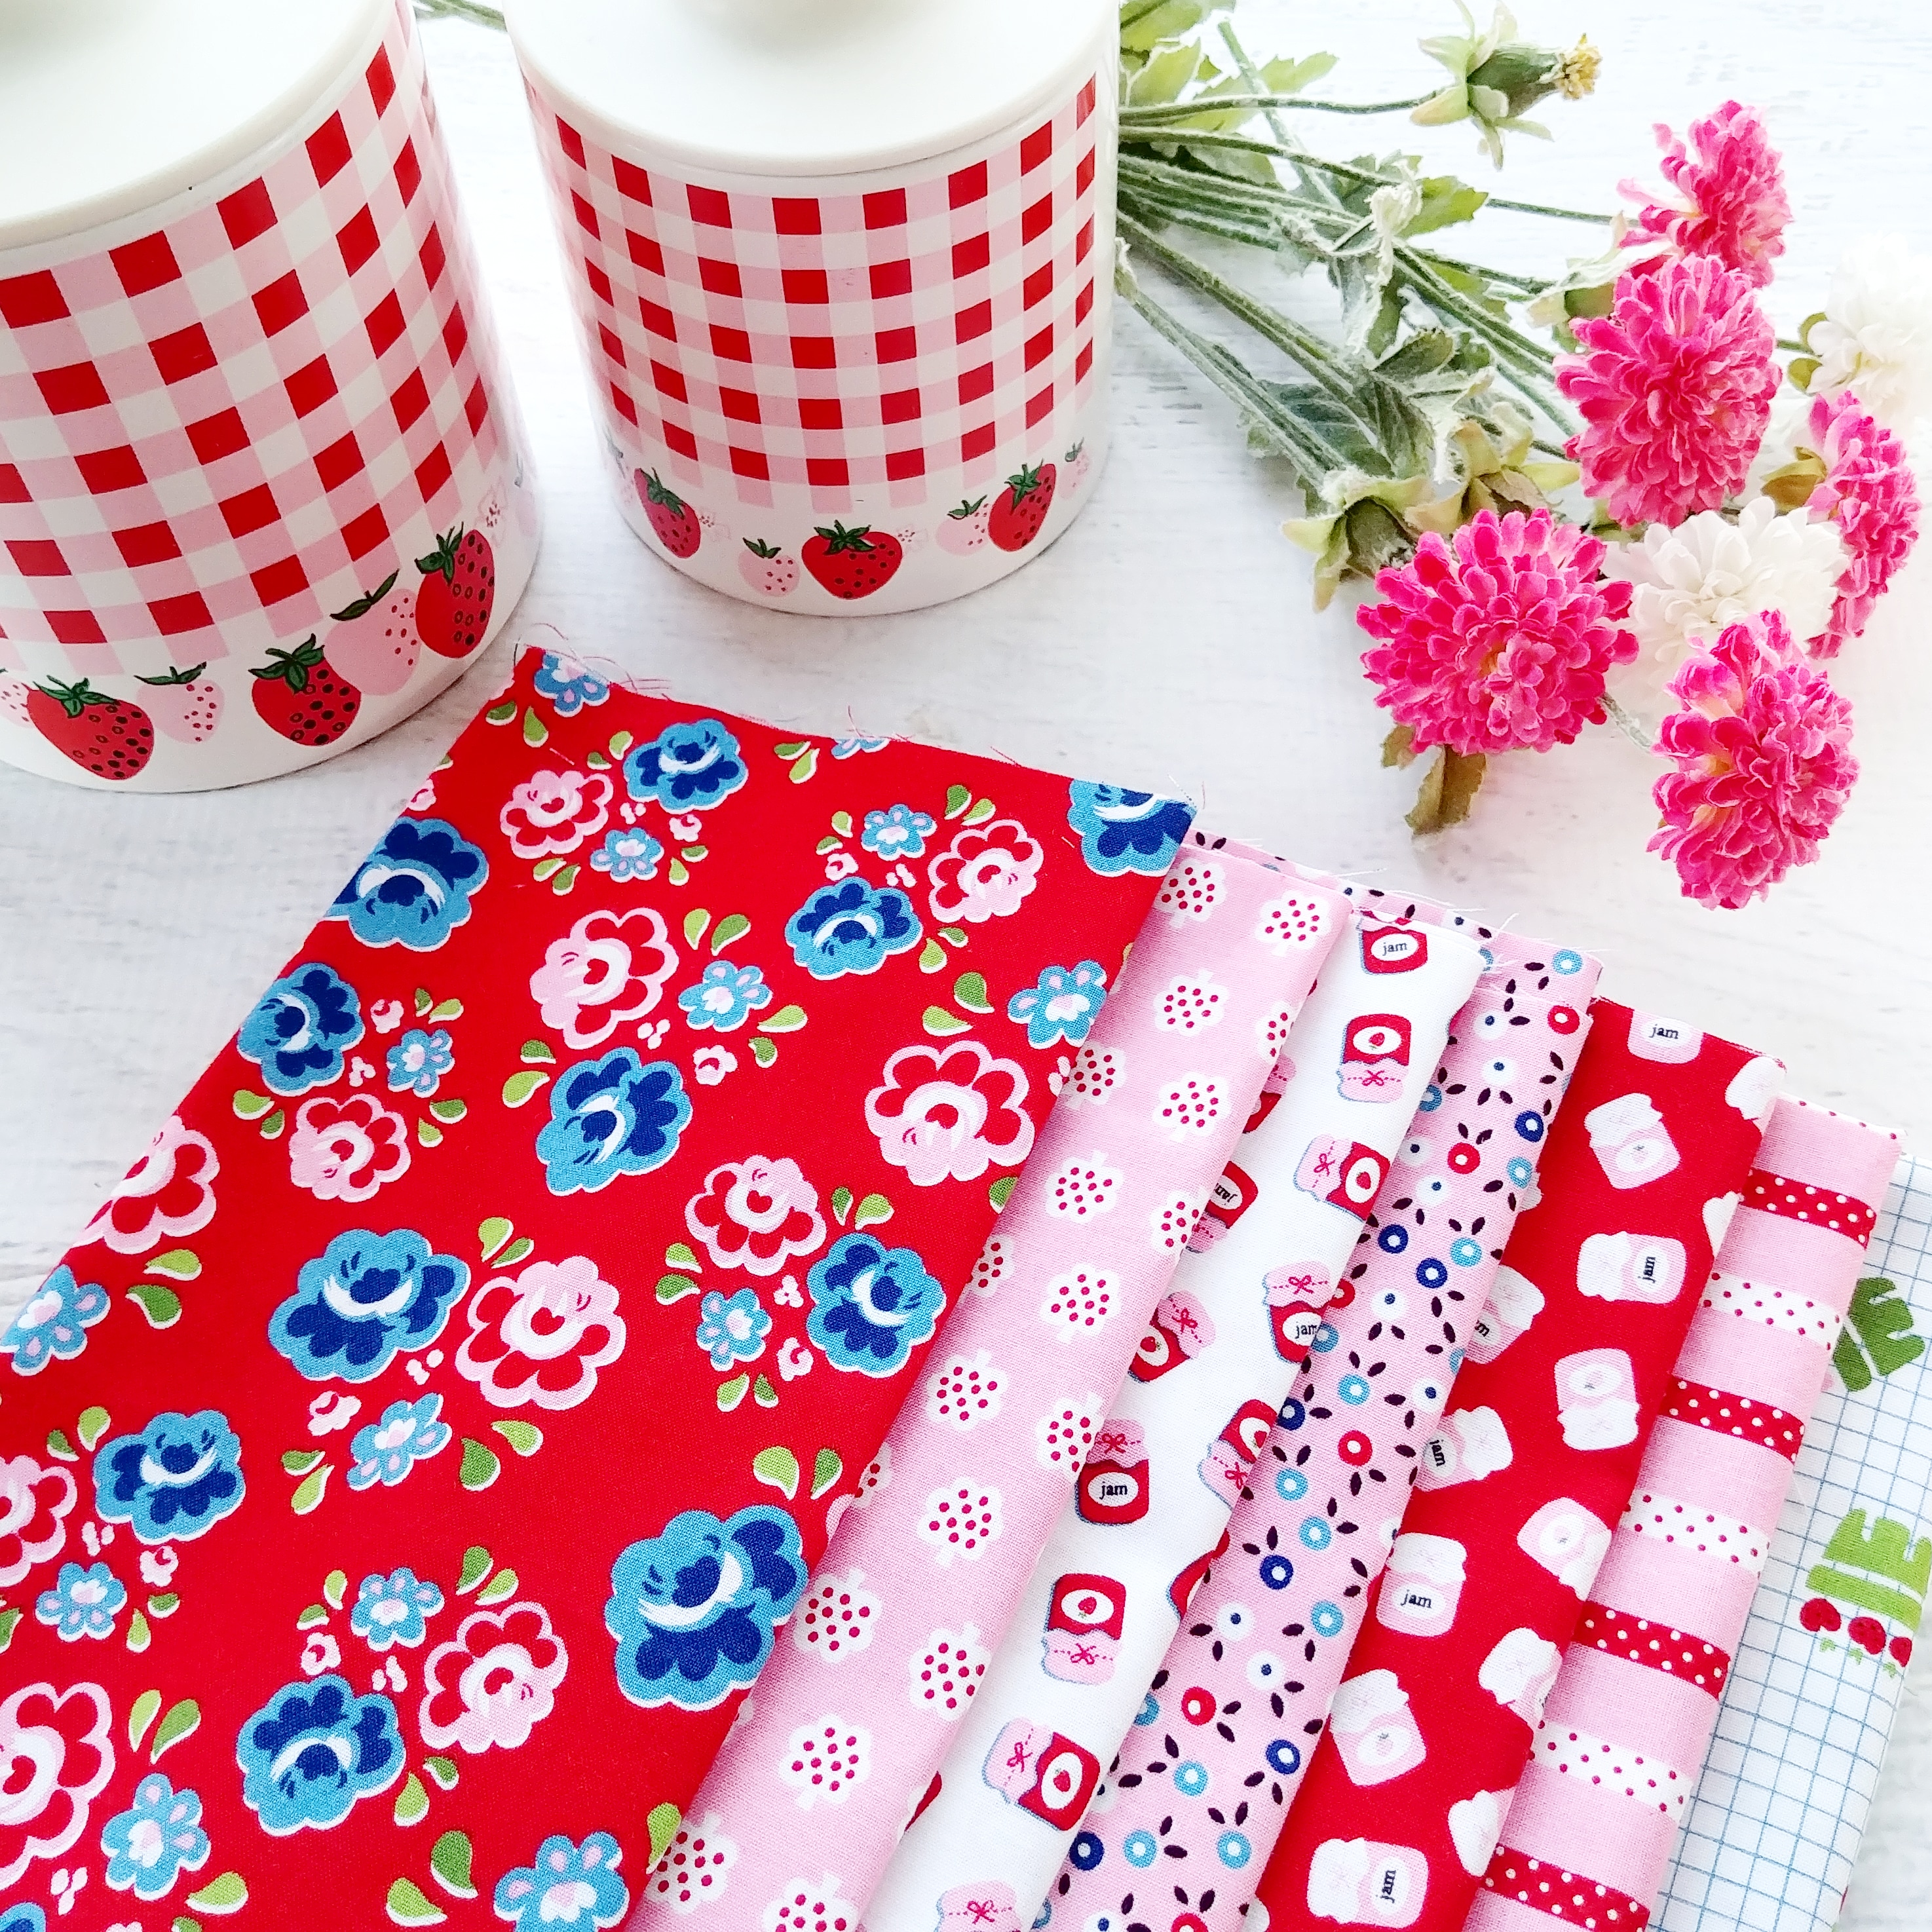
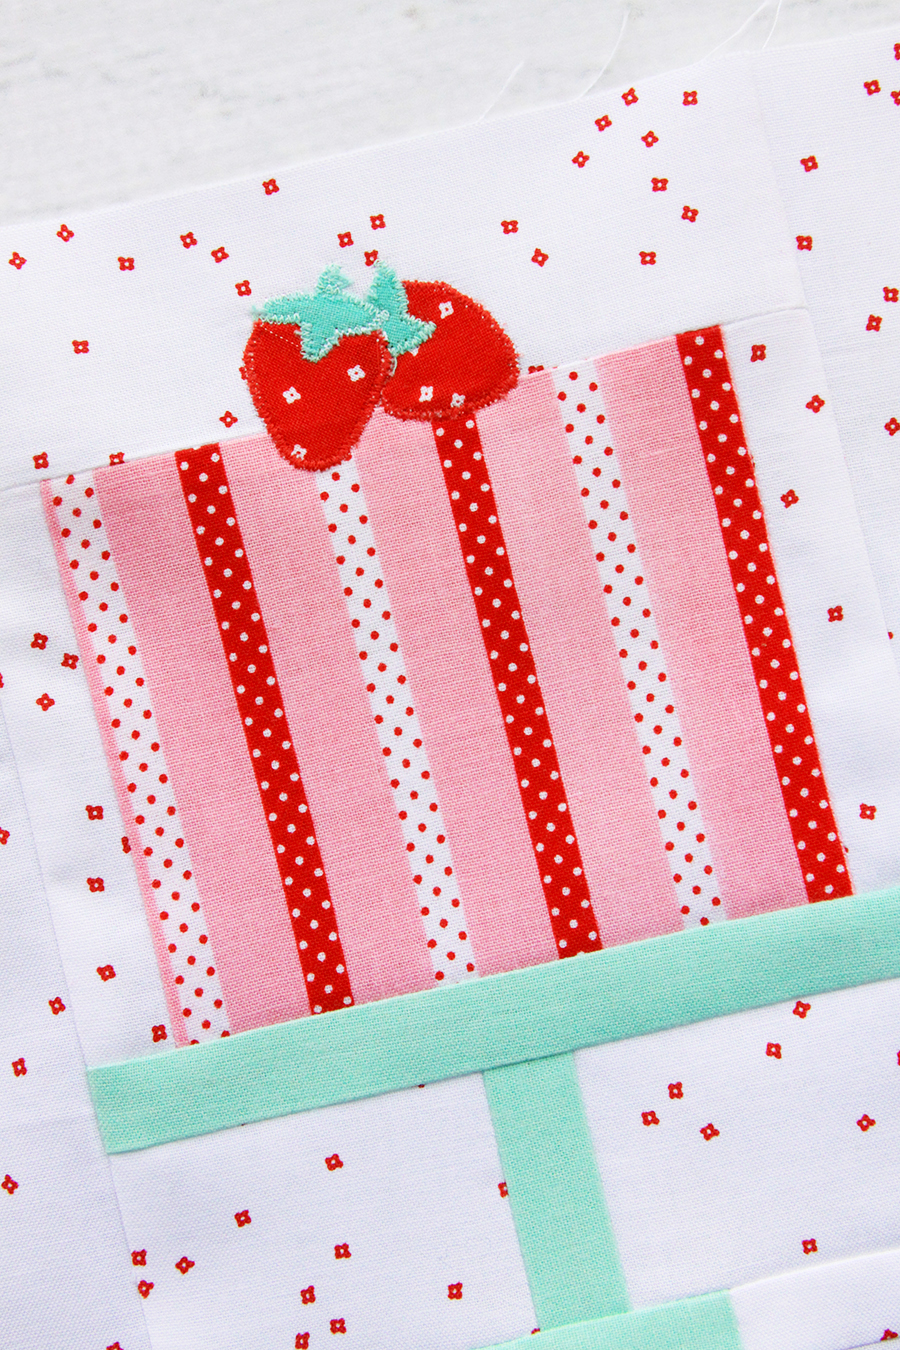
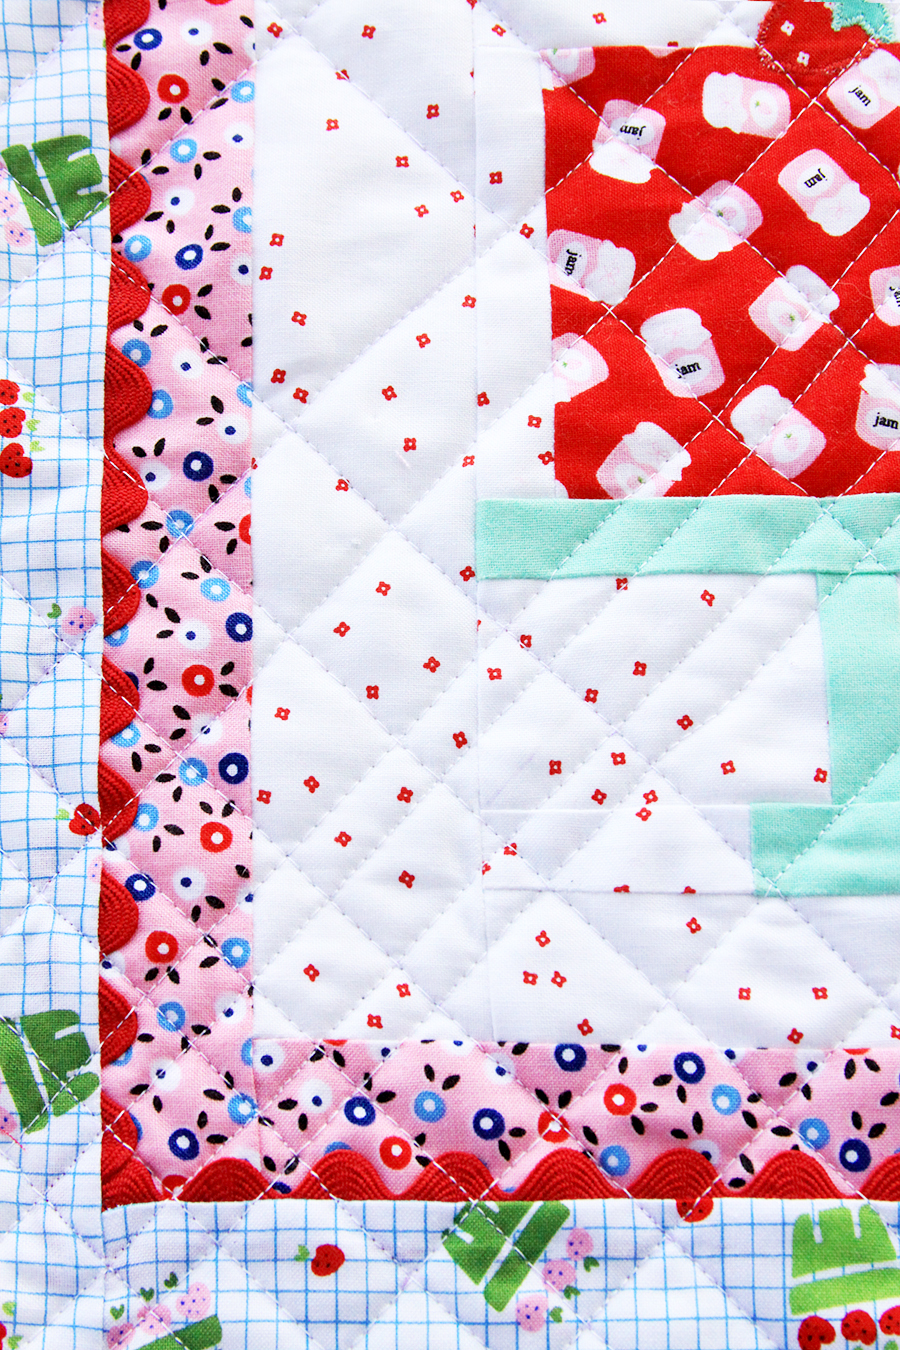
Today’s project was just a blast to sew up with this new collection, Shortcake from Heidi Staples! It’s full of pretty florals, berry baskets – even tiny jam jars!! I mean – the cuteness is off the charts.
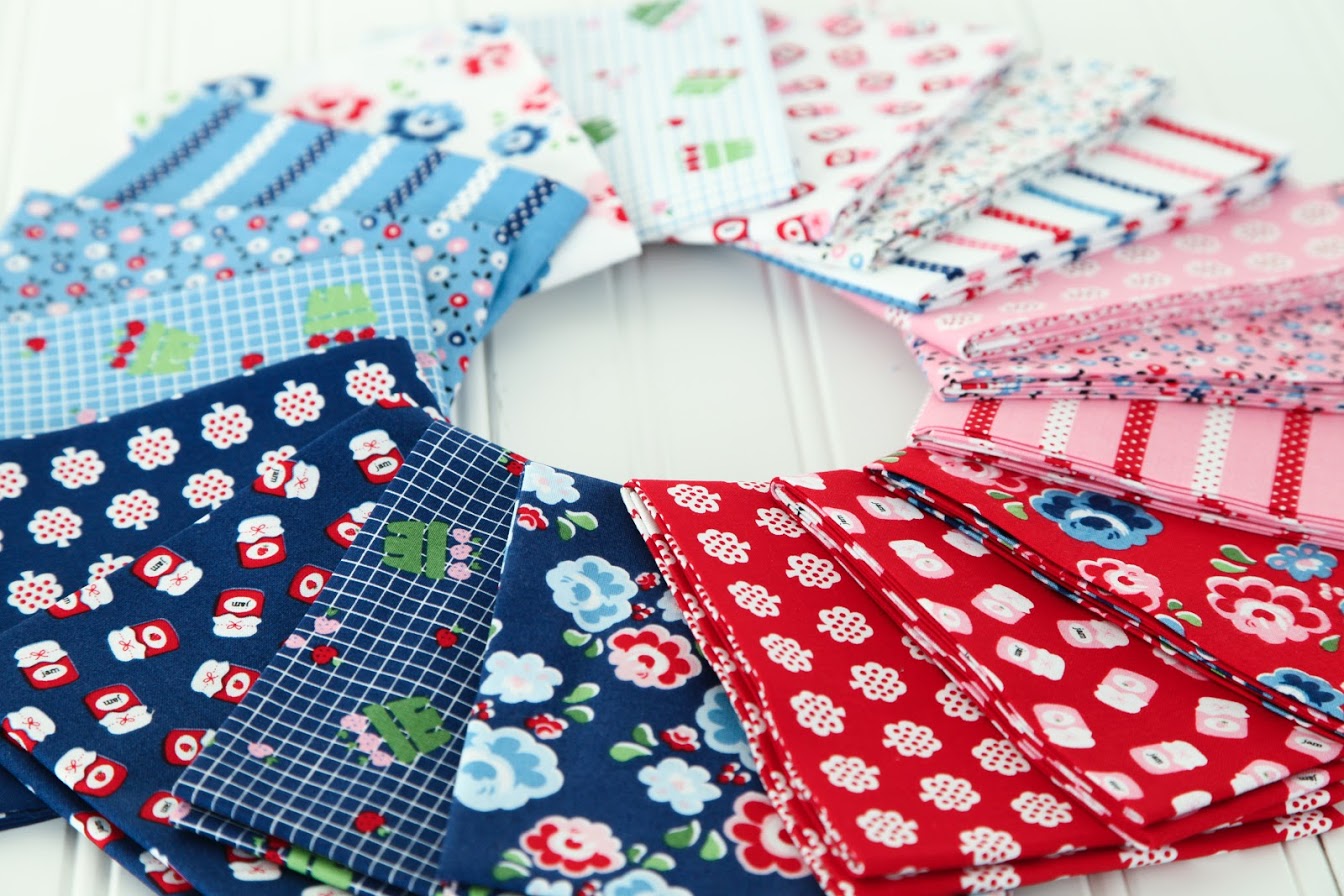
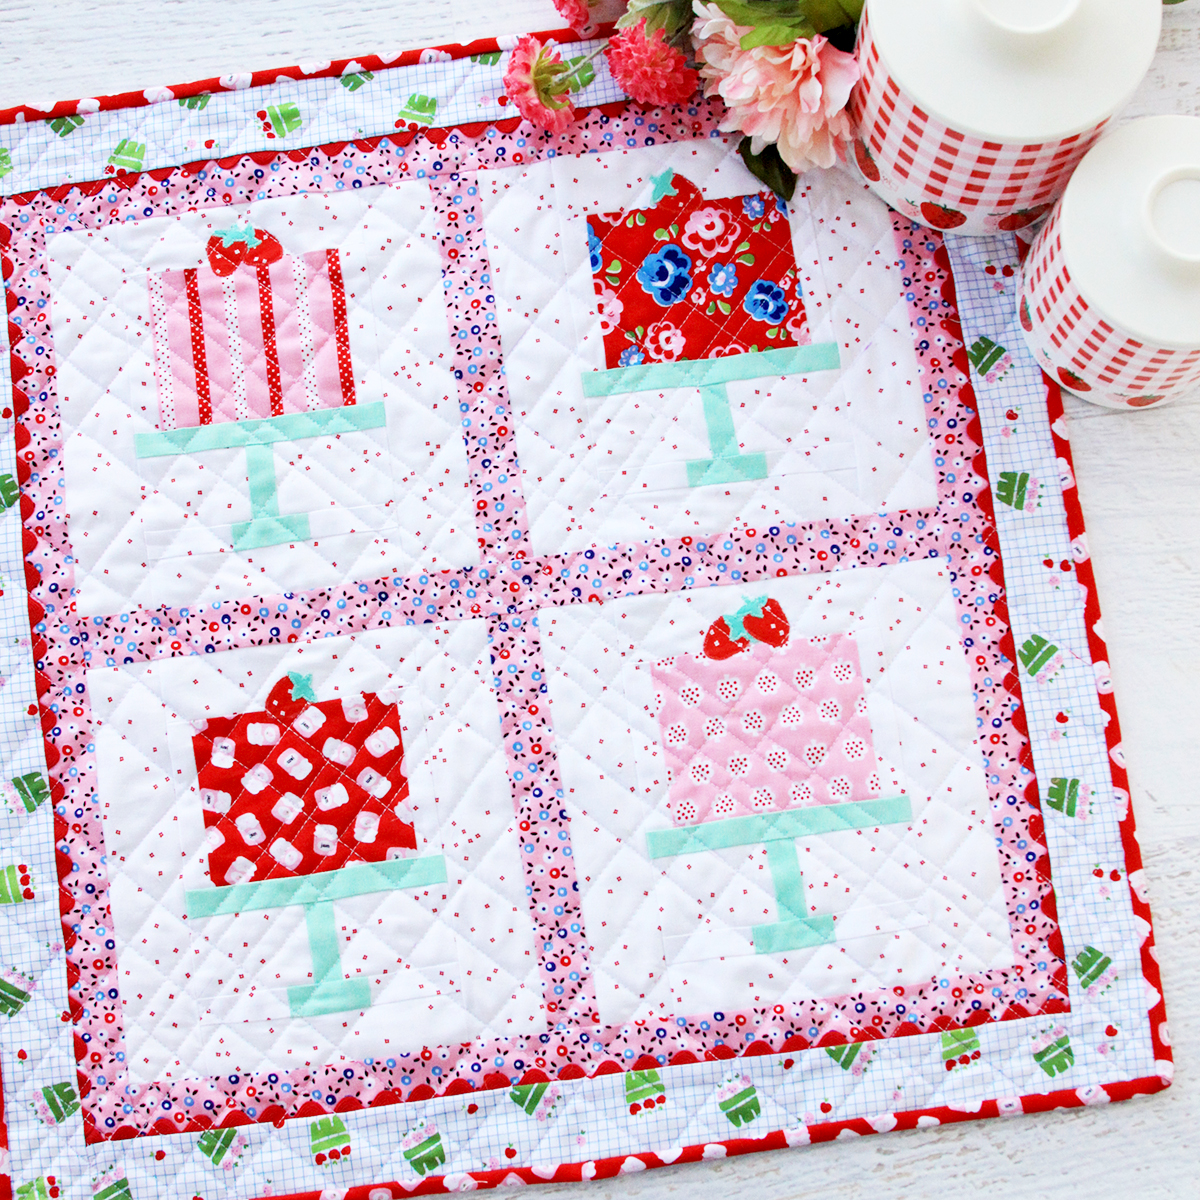
I picked out mostly reds and pinks to use in this mini quilt. I think they’ll go perfectly with the vintage look to my kitchen! Also – they match my vintage gingham/strawberry canisters it’s like they were made for each other!
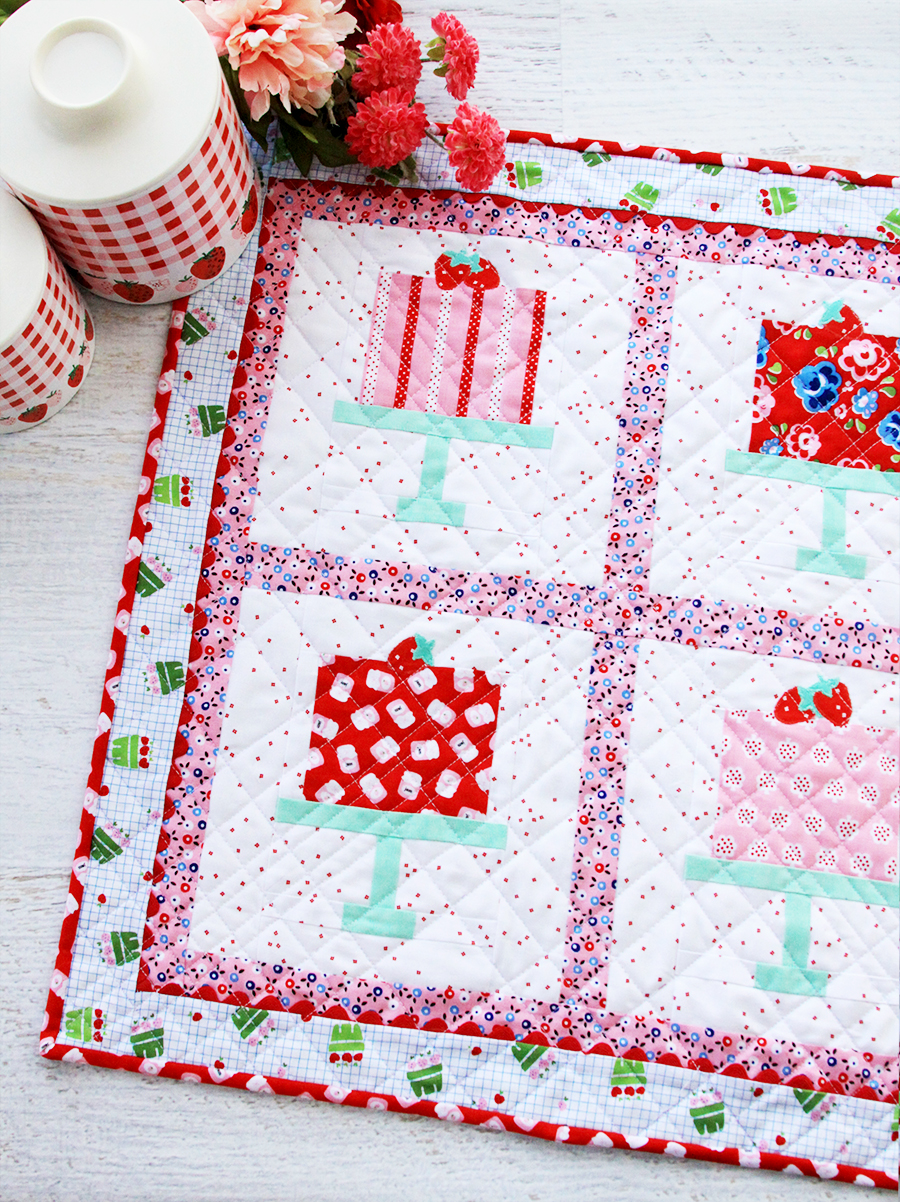
And since the fabric is called Shortcake, I thought a fun little Cake Mini would be the perfect way to show it off! I love how cute the fabrics look on the little “jadeite” cake plates!

Always Time for Cake Mini Quilt
Finished Mini Quilt Size – 22″ x 22″
Materials:
- 4 pieces 5″ x 5″ for cakes
- Light Mint Green for cake stands – Fat Quarter
- Strawberry fabric – 5″ x 5″ – I used Blossom White on Red
- Strawberry Leaves – medium green scrap fabric
- Background fabric – 1/2 yard – I used Blossom Red on White
- Inner Border fabric – 1/4 yard
- Outer Border and Backing – 1 yard
- Batting – piece 24″ x 24″
- Binding – 1/4 yard
- 2 1/2 yards ric rac
- 10″ x 10″ piece of HeatnBond Lite fusible webbing
- Strawberry pattern
Cutting:
- From each cake fabric cut a piece 3 3/4″ x 4 1/2″
- From Light Green (for cake stands) cut:
- 1″ x 9″, 2″ x 5″, four pieces 1″ x 5 1/2″
- From Background cut:
- eight pieces 1″ x 3 3/4″, two pieces 2 3/4″ x 9″, two pieces 2 1/4″ x 5″, four pieces 1 1/2″ x 5 1/2″, four pieces 1 3/4″ x 5 1/2″, eight pieces 2″ x 8 1/2″
Sewing:
Begin by ironing pieces of the fusible webbing to the wrong sides of your strawberry and leaves fabric. Cut out 6 strawberries and 6 leaves.
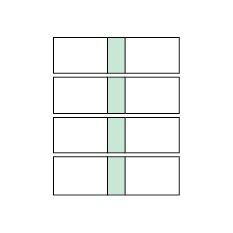
Piece together fabrics for base of cake stand. Take the two background pieces that are 2 3/4″ x 9″ and sew the cake stand piece that is 1″ x 9″ between them. Press the seams towards the cake stand fabric.

Cut the fabric piece into four pieces 5 1/2″ x 2″.
Sew together two 2 1/4″ x 5″ background pieces on either side of the 2″ x 5″ cake stand piece. Press the seams towards the center piece.
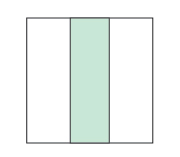
Cut the sewed piece into four 1″ x 5 1/2″ strips!
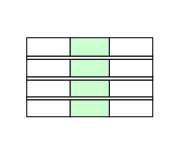
Sew a 1″ x 3 3/4″ background piece on each side of the main cake piece. Press the seams towards the center piece.
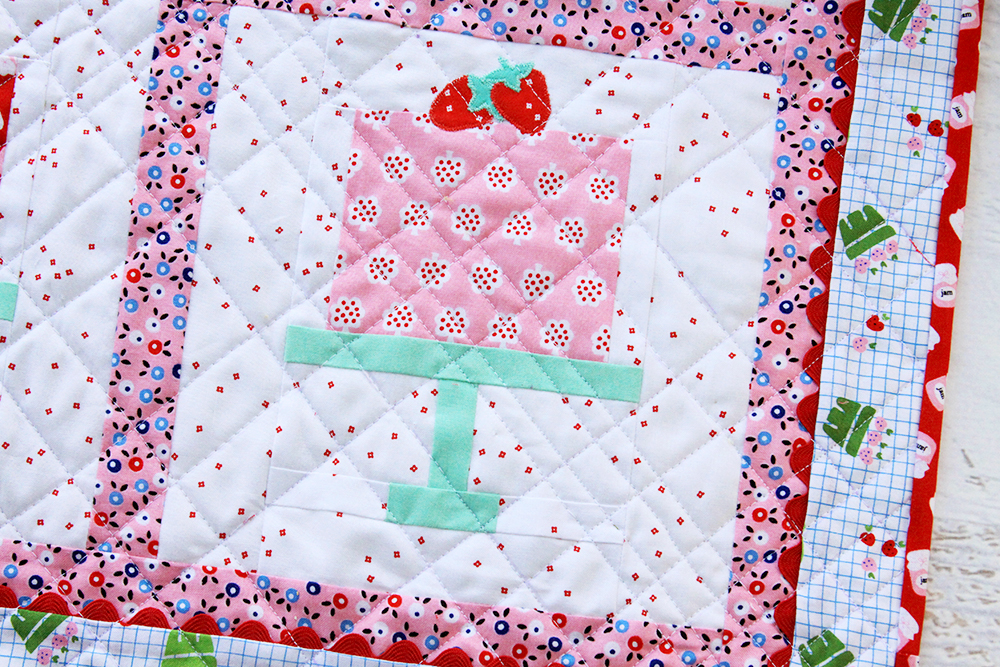
Assemble center cake section of quilt block. Sew together a 1 3/4″ x 5 1/2″ background piece, the cake piece, the 2″ x 5 1/2″ center cake stand piece, the 1″ x 5 1/2″ cake stand base piece, and a 1 1/2″ x 5 1/2″ background piece. Press the top seam towards the “cake” piece. Press all other seams towards the cake stand pieces.
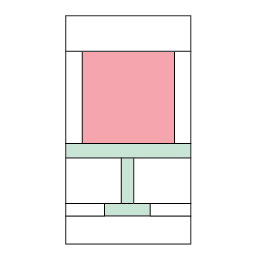
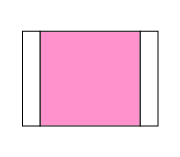
Sew the two background 2″ x 8 1/2″ side pieces on either side of the center cake section.
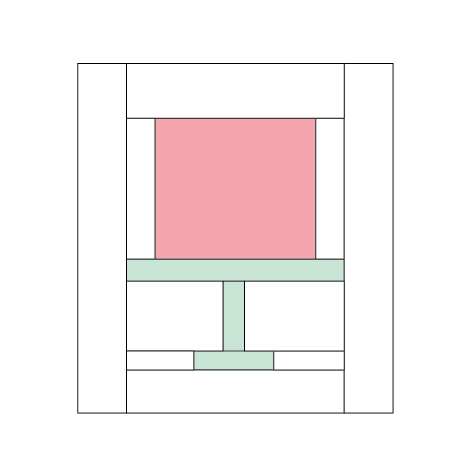
Your cake block should now measure 8 1/2″ x 8 1/2″! Repeat the steps for as many cake blocks as you’d like to make. Remove the paper backing from the strawberry and leaves if you’re adding them to your cakes. (I think candles or other decorative features like embroidery would look so great too!). Iron your strawberries to the top of the cakes and applique them down. I used a mini zigzag stitch but you can applique them however you’d like.
Piece together your mini quilt top. From your inner border/sashing fabric, cut two pieces 8 1/2″ x 1 1/2″. Sew the two sashing pieces between two of the quilt blocks. Press the seams towards the sashing.
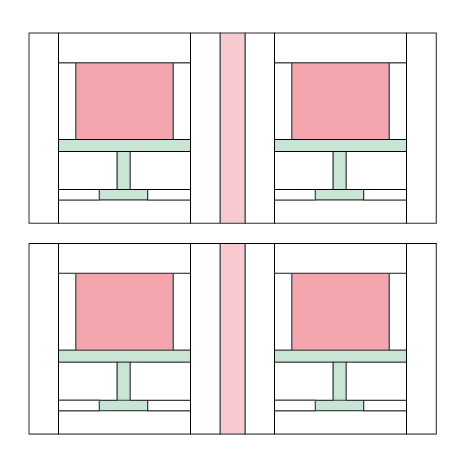
Cut three strips of border/sashing fabric 1 1/2″ x 17 1/2″. Sew one strip between the two block sections and the other two to the top and bottom of the mini.
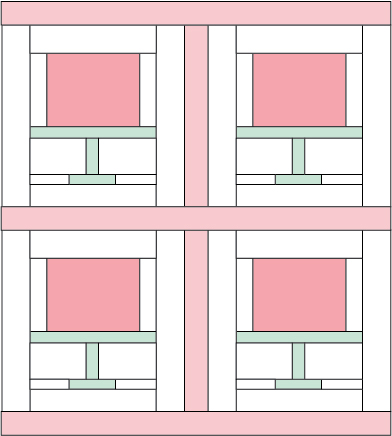
Sew 1 1/2″ border strips to each side of the center section.
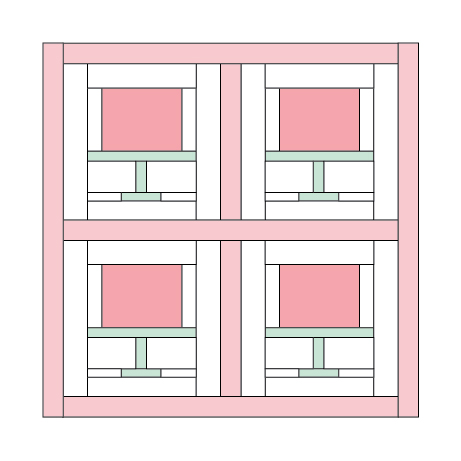
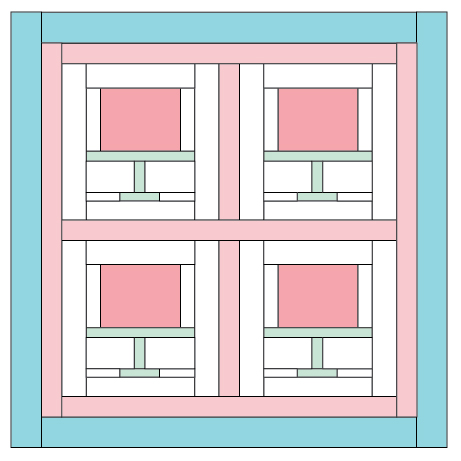
Sew strips of ric rac on each side of the mini quilt so the edge of the ric rac overlaps the outer edge of the border. You want the rick rack to show when you sew on the other border.
Cut 3 strips of outside border fabric 2″ x width of fabric. Sew a strip on the top and bottom of the mini, then sew strips on the left and right side.
Finish your quilt by layering together the top, batting and backing. Quilt as desired! I used some diagonal lines – I think they give it kind of a window pane look!
Bind your quilt – I used 2 1/4″ double fold strips for binding.
I think this is such a fun mini!! It would be super easy to make into a larger quilt as well! The cake sections can be made from a charm pack and then you’d just need yardage for the cake plates, backgrounds and borders. If you make one up, I’d love to see a photo!

You can find this darling Shortcake fabric at regular quilt shops as well as online shops. Make sure you visit Heidi’s blog, Fabric Mutt for all sorts of inspiration as well!


This is the most adorable quilt! It has been a while since anything inspired me, but this really does! Love it!
Super cute! However, the top of the cake stand is missing in the pattern?
Bev, I don’t see directions for the top of the cake stand and the illustrations don’t show it either. The cutting guide shows 4 peices of
1 x 5 1/2 and I’m assuming that’s the top of the stand. I just wanted to be sure before I cut my fabric that ìt’s going to be the right dimensions — especially since it’s not in the illustration. Sorry to bother you. I love the quilt and want to make it for a birthday table topper for my grandkids.
Hi Linda! Oh my goodness – I left them out of the illustrations! Thank you so much for letting me know.
You are correct – the top of the cake stands are the 1″ x 5 1/2″ pieces. I didn’t have a separate illustration for them since they don’t need piecing together. You’ll sew that piece between the cake piece and the middle of the stand. I’ve updated the post with the correct illustrations!
So adorable! I love the strawberries on top of these cute prints. Thanks for the pattern and the inspiration.
So cute !!!
I can’t get the pattern for the strawberries to print. The message says the .pdf was not saved. :(
Sorry about that Rachel! It’s all fixed now!
Really cute cute! :)
I have tried to get the pattern for the strawberries too and it is 1:35 and I have tried several times and still get a 404 message that said it isn’t working.. Thanks for this pattern. Love the design, fabric and it looks like spring. YEA! Thanks for your help on the strawberry issue.
Hi Dianne!
I am wondering if the browser just hasn’t refreshed? Maybe try closing and opening the window again, or opening the page in another browser? Or you can try clicking this link – it should take you right to the pattern!
https://flamingotoes.com/wp-content/uploads/2019/03/Bakery-Window-Strawberry-Pattern-1.pdf
Such a fun mini for a little teaparty! Thank you
I LOVE CAKE!!! this little quilt has it ALL..beautiful colors, design and whats not to love..Thank you so much..
Hi Bev, I just wanted to say Thank You for all the hard work & fun work you do for all of us peeps. I love your fabric and your big heart to constantly giving us great ideas & patterns to sew. :)
Bev, this is just adorable. A perfect gift for anyone’s birthday! I love the rickrack in the border, must do that too.
Will you have a PDF download for this pattern?
Love it!!! We have a wedding (okay there is always a wedding) and I’m making this in shades of white and dark off white with all the cakes facing outward for the cake table. Might repeat pattern for table runner for sweets table. Thanks so much for the great pattern.