How is your Holiday shopping going? Have you started? I will confess I have not. But I have been talking about starting. Does that count?
I have been browsing online though – and of course I inevitably wandered over to Anthro. You will not believe what I found there. Well, you probably will believe it if you read the post title. :)
At the risk of sounding like a broken record, I absolutely fell in love with this necklace. I actually gasped when I saw it. Don’t you think this would be perfect for just about any outfit – or a holiday party? It’s just yummy.
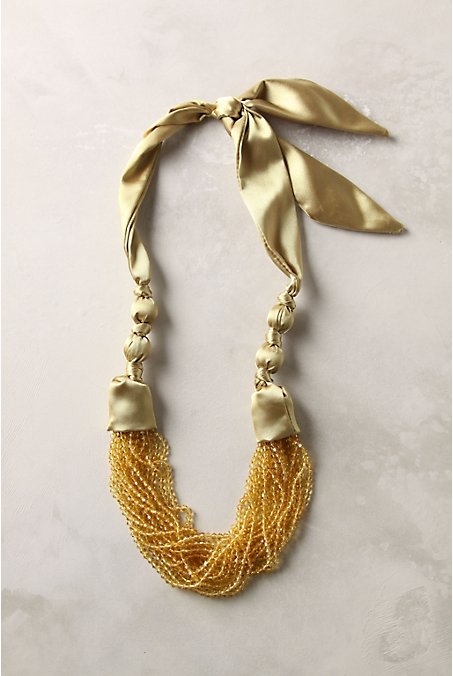
I thought I’d help us both out by creating a knockoff – you can never have too many options for Christmas ideas right?
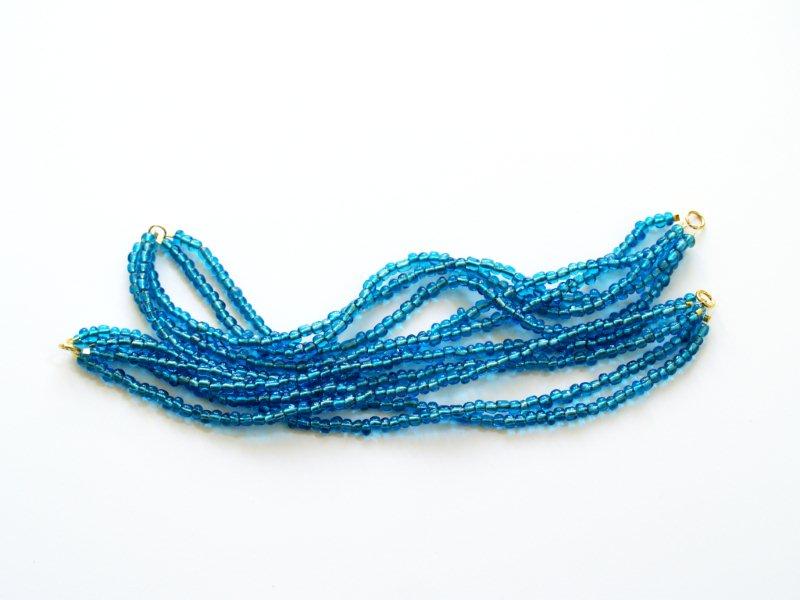
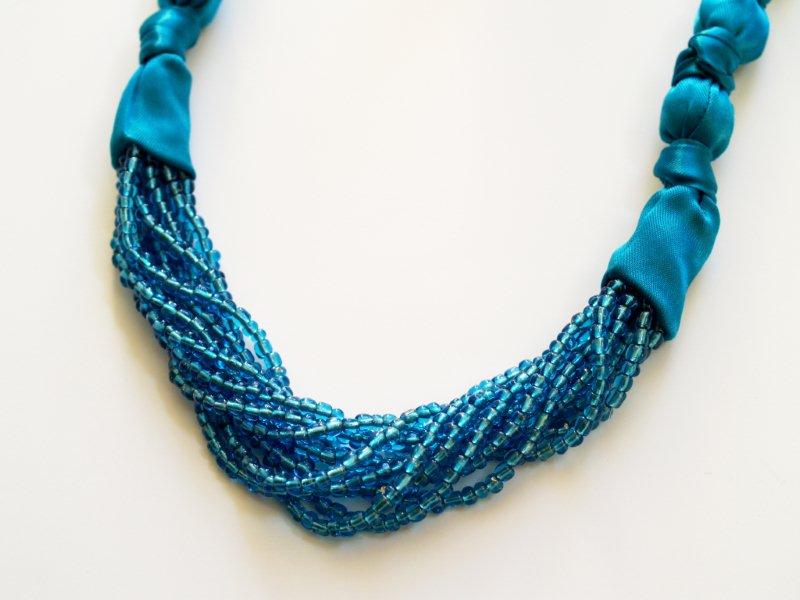
Here’s my version . . .
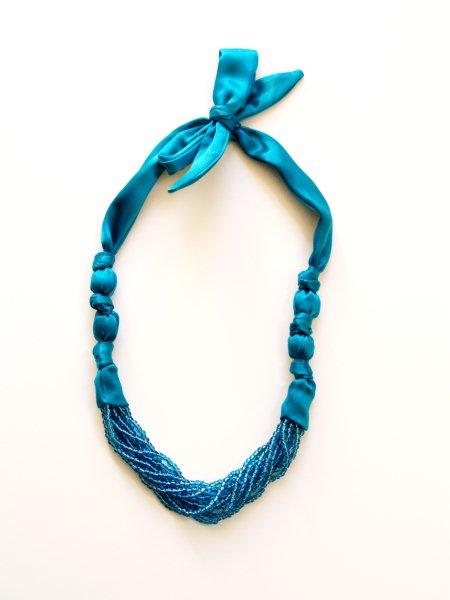
Mine is a little less “strandy” than theirs but that was intentional. You could easily just add more strands to yours though if you would like it fuller. Other than that I didn’t change much because hey. Yummy.
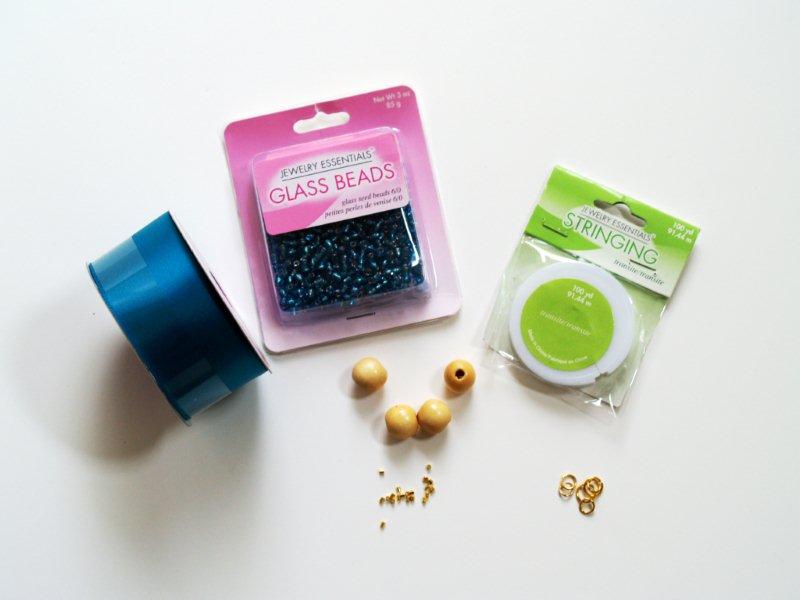
Here’s what you’ll need to create this cutie . . .
- 1 1/2″ Wide Ribbon – 3 1/4 yards
- Stringing Cord
- Small Glass Beads
- Large Round Beads – 5/8″ (any type)
- Crimp Beads – 20
- Jump Rings – 6
- Thread
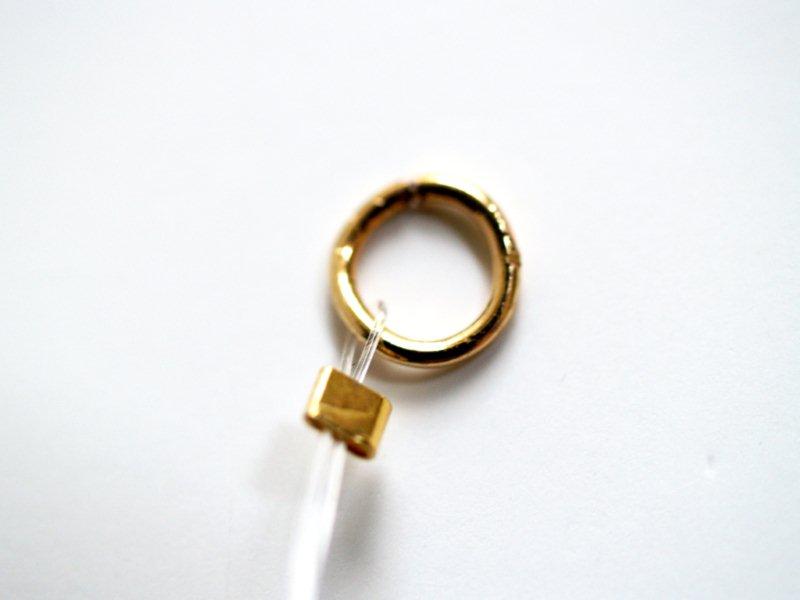
Start by stringing your beads. Cut an 11″ piece of stringing cord.
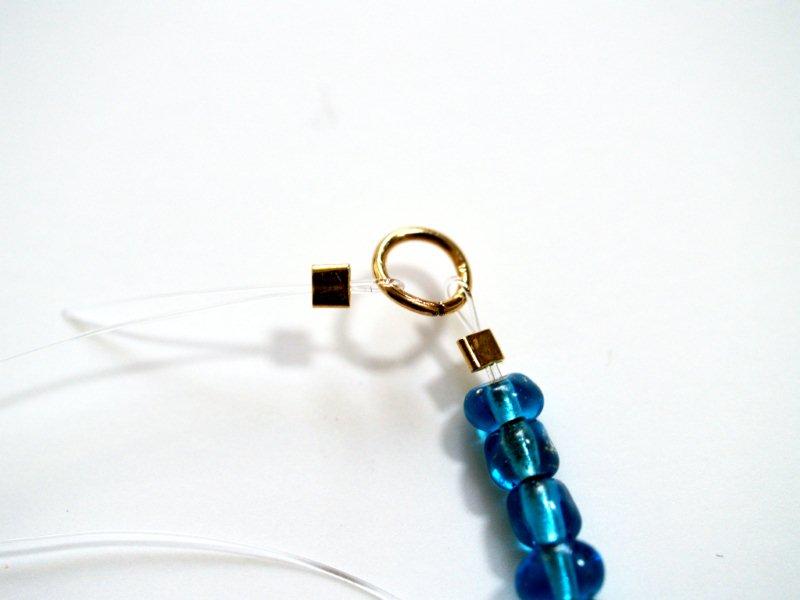
Thread a crimp bead onto the cord and loop the end around a jump ring, then thread the cord back through the crimp bead. Leave a tail of about 1″. Crimp the bead tightly, but leave a little loop so the crimp bead is not right up against the jump ring. When you start adding more cords to the ring you don’t want them too tight and all smashed up against the jump ring. It won’t lay nicely.
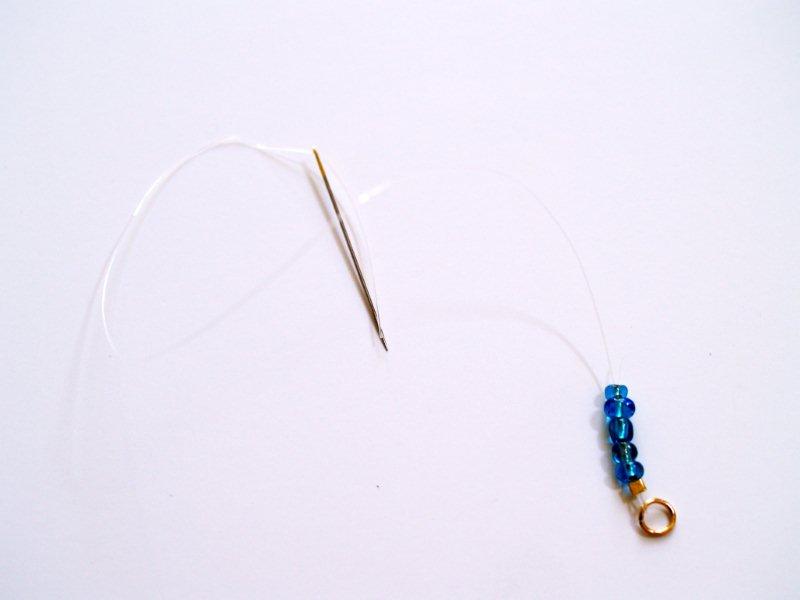
Thread beads onto the cording – it will help control the cording if you thread the loose end through a needle.
As you thread the beads, make sure they cover the small end of the cording as well.
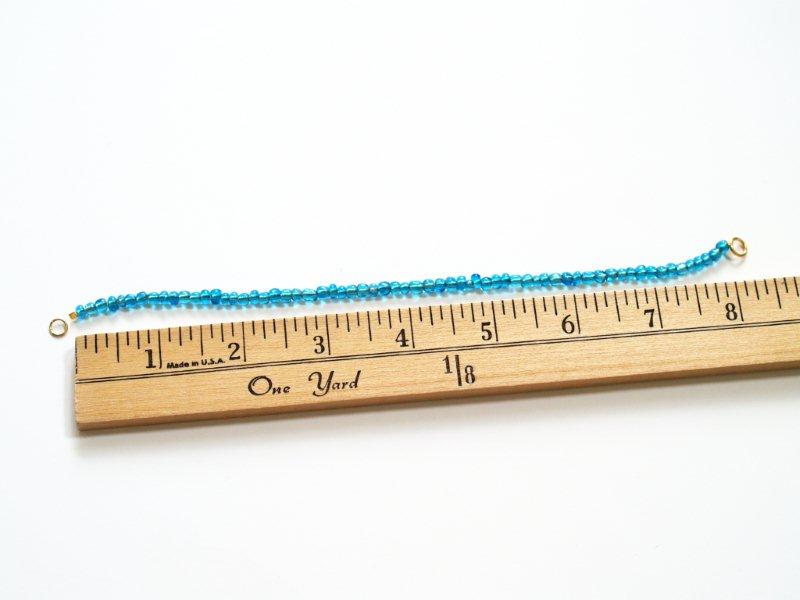
Continue threading beads until your cord is about 8 inches. Finish the cording the same way you did the other end, with a crimp bead and jump ring. Cut your cording so you have about one inch left and feed that back through your beads.
Repeat this process, adding another strand of cording to one of the jump rings on the strand you just made.
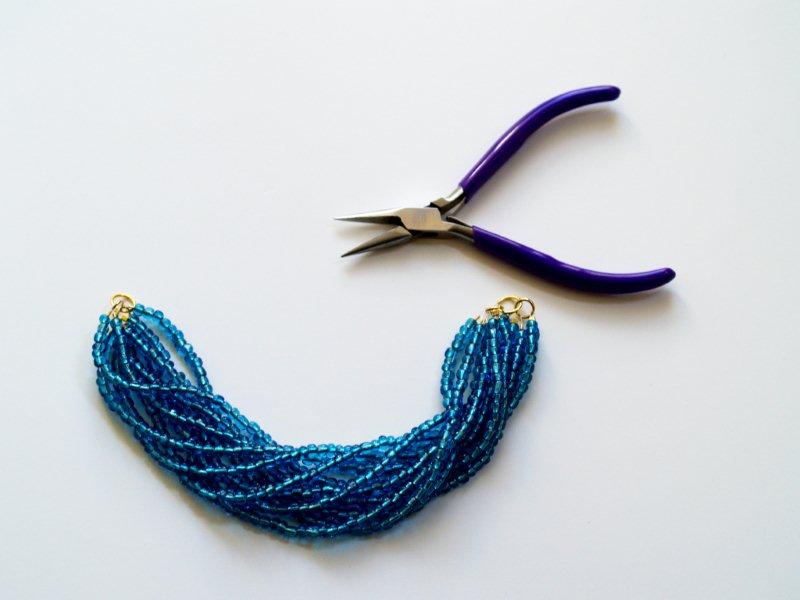
Continue adding strands and beads until there are five strands on the jump rings.
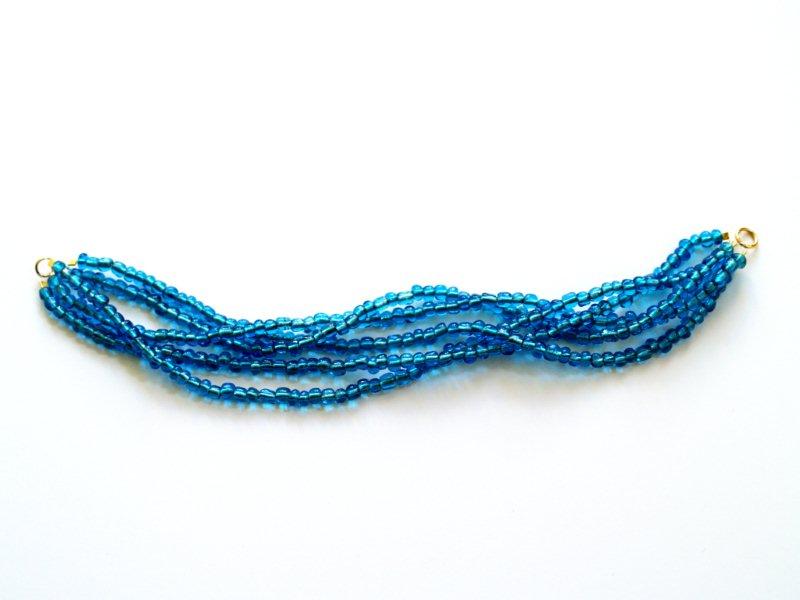
Make a second group of five strands.
Link the two strand groups together with a single jump ring on each end. It might seem to have made more sense to added all the strands to one large jump ring but I was afraid that they wouldn’t lay straight – that all those loops on one ring might be too much.
Cut your ribbon into four 28″ pieces. Turn up one end of each of the strips and sew the edge down to hem it, about 1/4″.
Lay two of the strips together, with the hemmed ends touching and facing together, and sew the long sides together using a 1/4″ seam allowance. Taper the end opposite the one you hemmed to a point. Repeat with the other two strips. Trim the ribbon off the ends that are tapered around the stitching lines.

Turn the strips right side out.
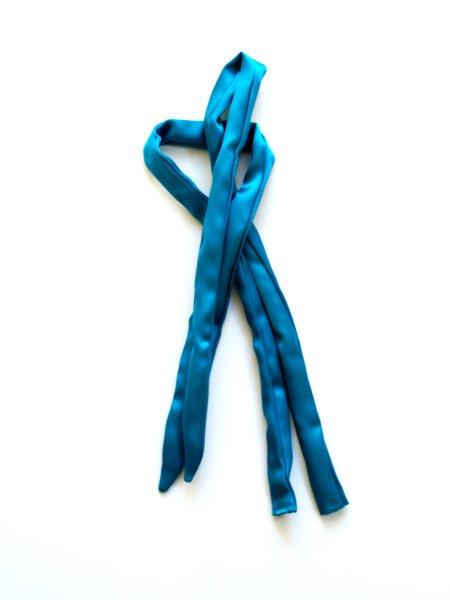
Press the strips lightly.
Feed two of your large beads into the casing of one of the strips. Hand sew one jump ring to the hemmed end. Don’t clip your thread.
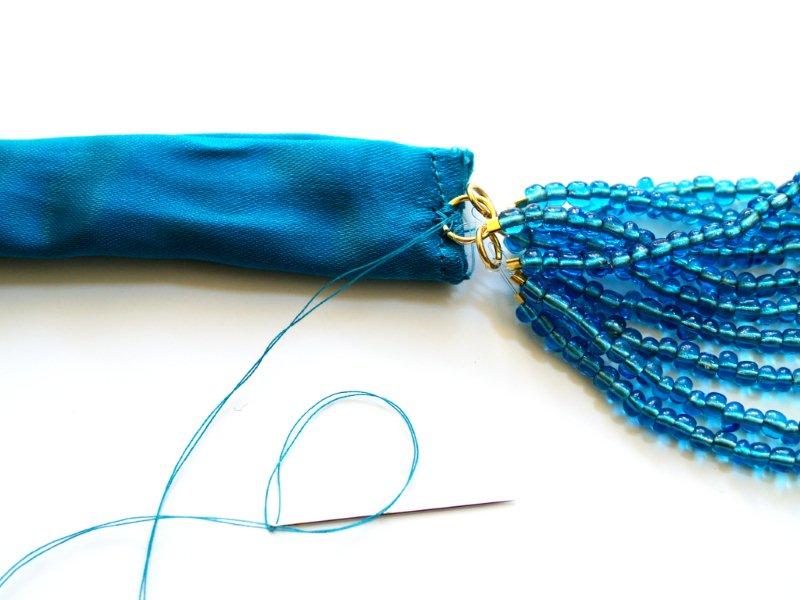
Push the ring and strands into the casing so it begins to fold over itself. Work the strand into the casing so the ring is about one inch in. Insert the needle into the casing and bring it out at the point of the hem and ring.
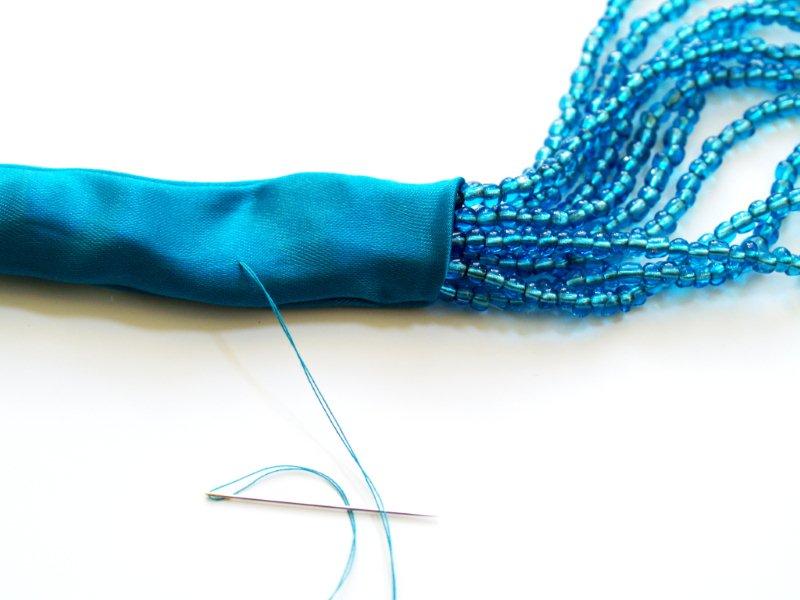
Random Comment: It looks kind of like a pretty squid in this picture. :)
Make a few stitches sewing the ring and hem in place. Knot and clip your thread.
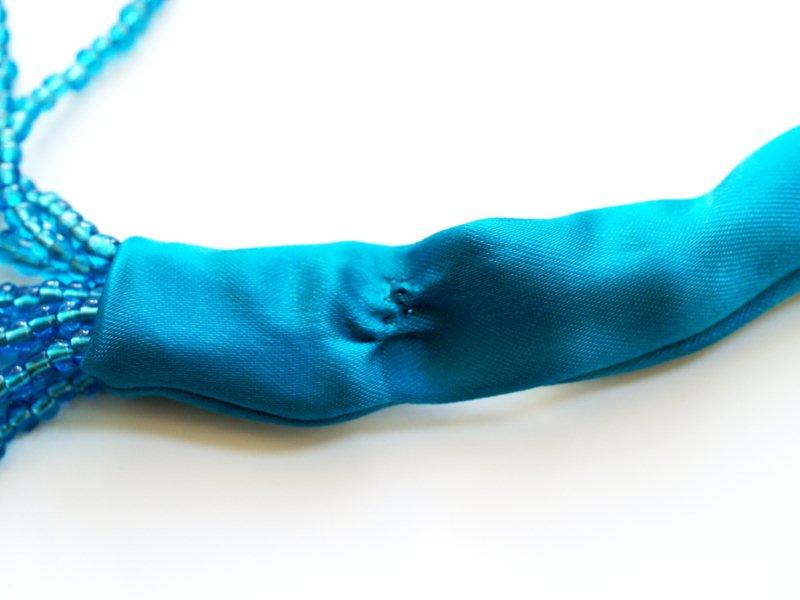
Make a knot in the ribbon casing so that it covers your stitching.
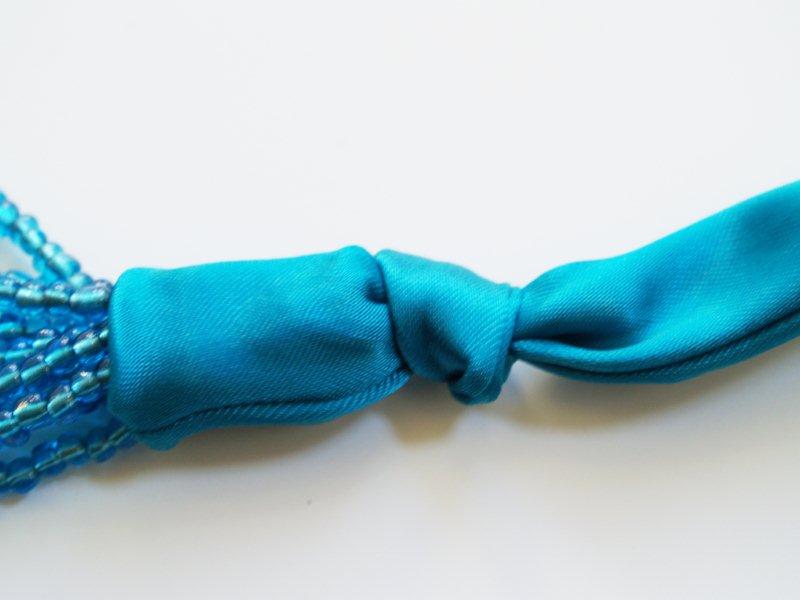
Push one of the beads down that are in your casing already up against the knot. Tie another knot on the other side. Repeat for the last bead. So you should have three knots and two beads between them.
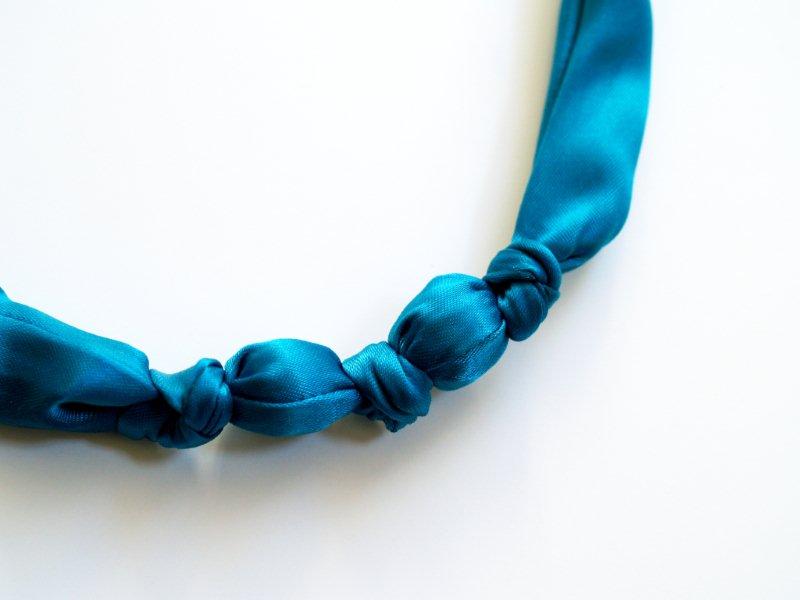
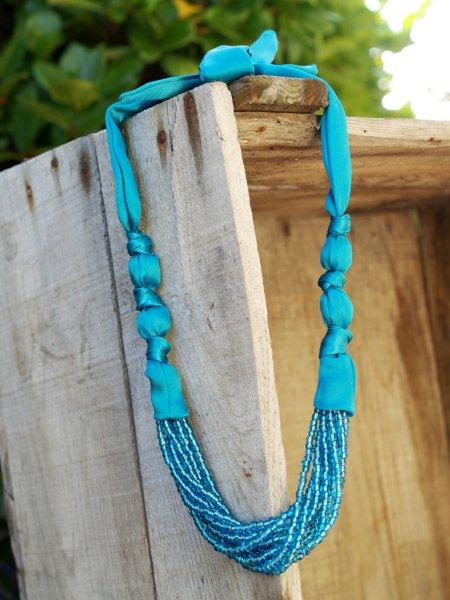
If you’d like the necklace a bit longer, you can just knot the end. I like it shorter so I tied a bow.
I love the combo of the beads and the satin ribbon – they’re so pretty together.
Is there an Anthro necklace you’ve fallen in love with? In case you’ve missed it, there is a new Tutorial Request Feature here at Flamingo Toes. You can fill out this handy form and let me know all about your item and I’ll try and create a tutorial for it!
What do you think? Are you in love with this one too? Or at least strong like?? :) I have a few more knockoff pieces planned in the next month or so – hopefully they’ll be a piece you’ve been wanting to create as gifts too!
Entering this in Kim at 733’s great contest!


What a great tutorial! Thanks so much for sharing.
Great job, as always. Have you seen the copycat contest over at Sew Much Ado? YOu should enter some of your necklaces. Esp. the Paisley Rebirth one!
LOVE it!
That turned out so GREAT! So close to the original and thanks for the wonderful tutorial!
LOVE it. That blue you picked is yummy, and as always your tutorial is well explained and beautifully photographed. Thank you for sharing this…did I mention I LOVE it?
I love this tutorial, thank you, hmmm now who to make this for… me perhaps???
LOVE THIS ONE! OMG! I think I need to plan to make one and plan my Christmas party outfit around it I love it so much!
that’s awesome, your version rocks!
This is just beautiful! Love the satin with the beads. Perfect for a special occasion!
As always, it is STUNNING! And I’m absolutely in love with the color. I don’t’ know what it is about twisted and wound beads, but I’m always drawn to them. Fantastic job, Bev!
Yes. (am agreeing with everyone else!) Personally, blue is not my color, but you amaze me at your talent for knowing how to recreate these pieces of jewelry. I recreate sewn items, but my mind does NOT wrap around jewelry! Your tutorials are so clear…I think I’ll be trying this one out! LOVE IT!
Julie
vibrant-designs.net
This necklace is so pretty and you made it look easy to make. Thanks for sharing.
Holy moly, you are so talented!
LOVE, LOVE, LOVE, LOVE, LOVE!!!! Yours is way better than their’s! The color you picked is FABULOUS!!! ♥
You are so amazing, every time I stop by, I can’t believe my eyes. So innovative. I think my sister needs one of these :)
That is STUNNING!
love this necklace, wish I knew how to sew. if I ever learn I’m coming back here to learn how to make this necklace.
Wow Bev! You are so so talented!
Gosh, I love your Anthro knockoffs! Thanks so much for taking the time to show us how to make our very own little bit of lovliness. Woohoo!
holy smokes! that is DARLING!!
You do realize how amazing you are, right?! This has got to be my new favorite!!
yup – I am indeed in love with that necklace!!! Thanks for sharing the tute!
Your tutorials are the greatest. I made your willy nilly bracelet. Now I have to try this one.
Your creativity is limitless.
Your necklace turned out just as cute! You are just amazing with your talent! Thanks so much for popping in to see me.
be a sweetie,
Shelia ;)
You are SO talented!!! It looks exactly the same as the Anthro version!!!
This one is going to drive me crazy because I just broke my hand,soI can’t play with my toys for 6 weeks, and this is so gorgeous I want it NOW!!!! I like yours better than the original by far! Greatjob!!
I love it! There are so many great ideas on your blog and I only have so little time. It’s not fair. ;-)
Another great project! I love it the color is Beautiful!
You are fabulous!! I have never tried making one, but this oen is definitely on my to-do list.
The color is gorgeous! The style beautiful. I need to finish my Paisley Jade and then start in a new necklace.
I love your necklace!!! Is sooo beautiful!!! love the color!!
That is gorgeous! Way better than the original! I love the blue color :). How did I not find your blog earlier?!
LOVE IT!! I actually would agree yours is even nicer than the original. Anthrologie has all the great ideas!
wow! yours is much nicer than the antro verson…
love it! thanks for posting it.
Gorgeous, Bev! Perfect for the holidays!
Haha, a friend and I were just talking about this necklace, particularly the “cone” part of the fabric that hides the ends of the bead strands. First thing in my head was “I bet Bev can make it!” and POOF! here it is! Beautiful as always!
Yep. I like yours better!!
this is super cute.. i love this..super cute colors & awesome tutorial…thanks for sharing…you are always smart..
How are you so awesome?? I don’t understand. Thanks so much for sharing this!
PERFECT! You are getting great at all of these. Great tute. Thank you.
Wow, this is gorgeous. Your tutorial is wonderful, and may even have me trying my hand at this necklace. Thanks for sharing!
Oh my goodness – this is FABULOUS! I know just the person on my gift list who would love this for Christmas! Thanks so much for the fantastic tutorial!
this is beautiful! can’t wait to attempt one on my one for gifts…. :)
Great job! I love satin necklaces right now. It would be a great way to revamp those old 80’s strand necklaces. Then I won’t have to do the beading :)
Love the blue, Bev! You’re going to own one of every necklace in the Anthro catalog:)
so pretty!
Great job! You make it look so simple to do. You really inspire me! Going to look at your other knock-off pieces. Have a great weekend!
That is really beautiful! I think it’s the best “Anthro-knock-off” I’ve seen out there. I’d love to try this someday–Thanks for the tutorial!
http://im-in-the-loop.blogspot.com/
So cool! Very professional looking!
I’m having a Christmas card giveaway on my blog. Stop by and enter!
Lovely! i love the color you chose. What a clear tutorial. Thanks
You had me at hello! I like yours better than Anthro! Thanks for the great tutorial, you made me feel like I could make one of these!
Laura
Wow, I absolutely love this. The color you chose is gorgeous to boot… And what a great Christmas present this would make! Thank you so much for sharing!
You are so talented! That is great!
Pam
thank you for the tute!! I saw this last month and thought it was great. then I went to find it and could not remember the website. Thank you so much, this is beautiful!!!
Love your website!!!! Thank you for sharing how you made this necklace. I wanted to figure it out myself, but this saved so much time and headache! :-) I’ll be back!
you’ve done it again and again and again! You are amazing! Just gorgeous. Thanks for linking up to Topsy Turvy Tuesday
Absolutely B-E-A-U-T-I-F-U-L!!!! Need I say more!!! Thanks for sharing!
Yhe funniest thing about this is your looks way better made!
My oh my, amazing. I saw your black and silver one being given away on MFTM and had to check if you listed a tutorial. I’m so glad you did. Your jewelry is lovely and the tutorial is just perfect. Thanks again.
Alright, I had to make one… mine is not as nicely finished as yours but I only used what was on hand. Next time I’ll be better prepared with supplies. Great tutorial. Here’s the link to mine.
http://sarainakko.blogspot.com/2010/12/anthropologie-jewelry-not-mis-spelled.html
featured this adorable necklace on my blog today
http://www.kimboscrafts.blogspot.com
Wow, yours looks better than the original! Great tutorial!
WOW, love it!! Sue
L.O.V.E. it!!!! I am in the middle of making my first one right now and have plans for at least two more. So glad I ran across your blog. Thank you!
Absolutely GORGEOUS and a great inspiration. I’m adding this to my “to-do” list! Thanks! :)
Wow!! This is awesome!
Thank you so much for posting this! It is super cute and I can’t wait to make one!
Melanie
youmadethat.blogspot.com
I linked to this in my blog. Great tutorial!
Featured this today Bev! http://www.copycatcrafts.com/bevs-limitless-strands-necklace-an-anthro-knock-off/
This turned out gorgeous! Thanks for the bright, clear tutorial pictures, I want to try this.
Great tutorial! I agree that your necklace looks better than the original. I actually have a short beaded necklace that I bought ages ago but never wore because the beads in the back would pull my hair. I’m going to try using it instead of stringing the beads myself :) Can’t wait to try it!
You may also find multi-strand beads on etsy.com at EunicesTickleTrunk’s shop. They are CHEAP!
OH, and THANK YOU for a wonderful tutorial !!!! Keep up your awesome work and God Bless!!!
wow this is so pretty, i think yours looks nicer than the gold one. thanks for the tutorial
Thank you for this great tutorial! I was wondering what size jump rings you used and what size stringing cord? This is my first attempt at jewelry making and I’m not sure where to begin! Thank you!
Gorgeous! I actually like yours better than the anthro inspiration!
I Love this!
Great and inspirational!
Beautiful! This is an awesome tutorial. I can’t wait to start making them. Hopefully the come out as nice.
This was awesome. I loved it !
Its so cool. First I thought it would be difficult, but no. And it looks so elegant too.