So I was scrolling through Anthropologie the other day and Ooh-ing and Ahh-ing over all the new fall things.
(I can’t quite believe it’s time for the Fall lines to be out yet. Didn’t we just finish July???)
And while ooh-ing and ahh-ing and bookmarking and plotting, I came across the cutest little purse!
It was such a fun color combination – and miraculously enough, I had just that same color combo of fabrics in my stash.
(which maybe isn’t so miraculous when you consider what’s in my stash) :)
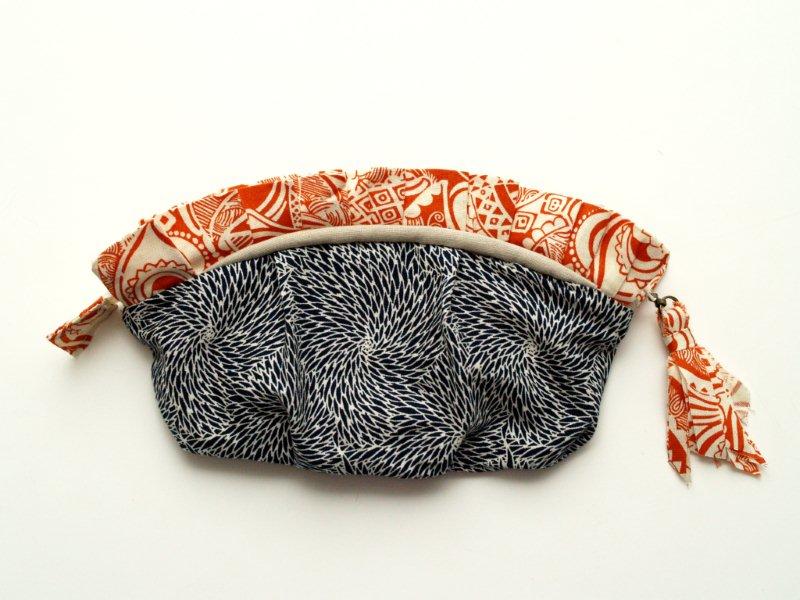
Here is what I came up with, and I’m pretty much in love.
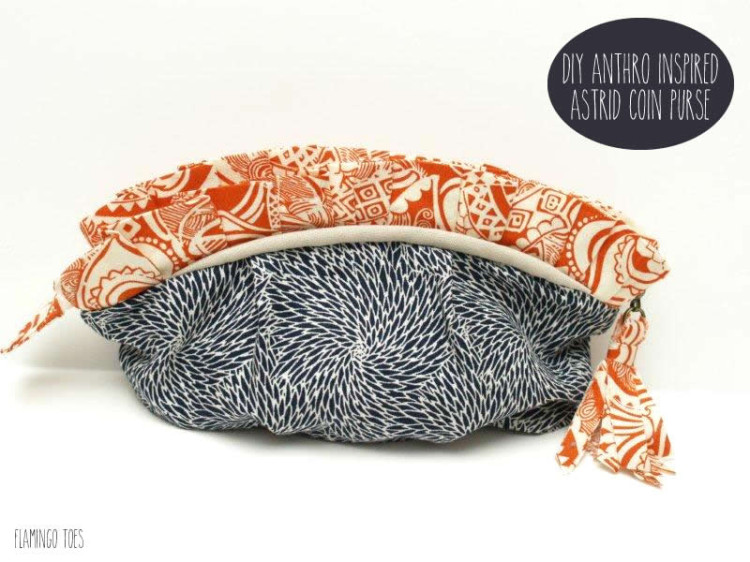
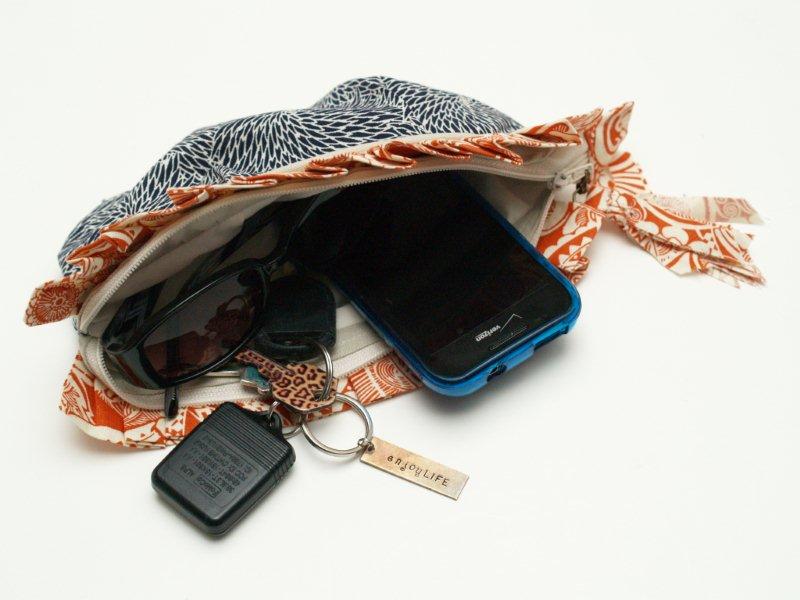
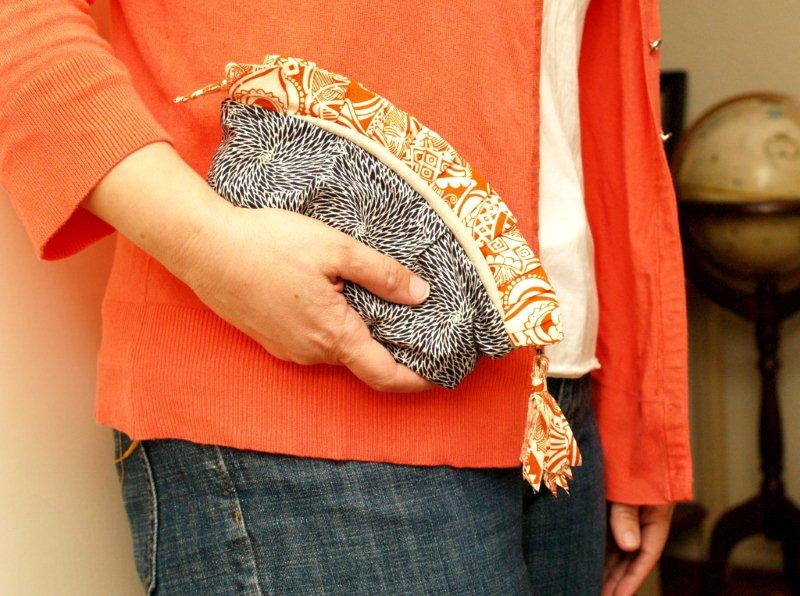
It’s small, but just the right size for my phone, keys and sunglasses!
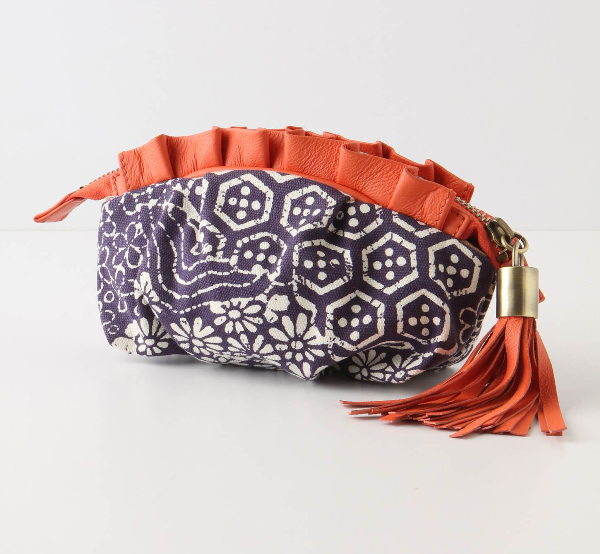
Here’s Anthro’s version. I love the orange leather, but I’m all about working with what you’ve got. And I am all out of orange leather here.
They call it the Asterid Coin Purse.
Because I’m a nerd I looked up “Asterid”. In case you were curious, it’s a kind of plant. Well, even if you’re not curious it’s a kind of plant. :)
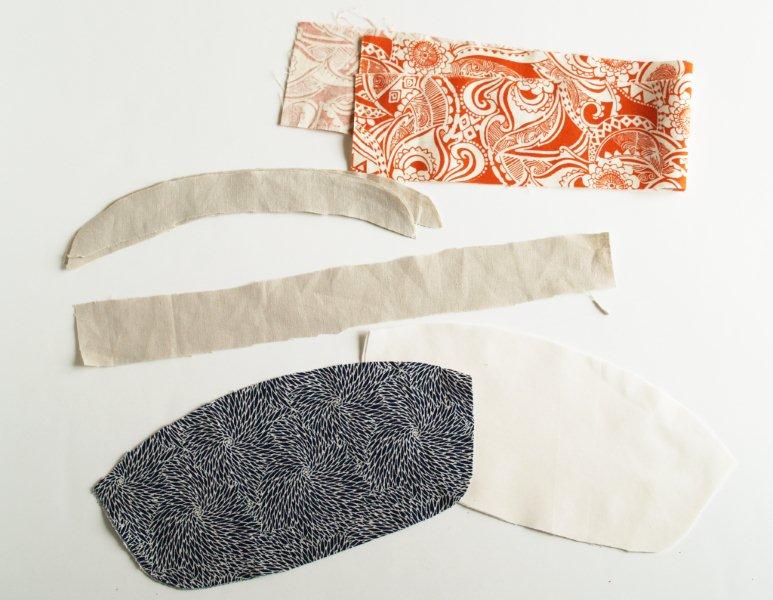
Here’s what you’ll need to make your own:
Outer Fabric (Piece of fabric about 8″ x 20″)
Lining Fabric (Same – about 8″ x 20″ piece)
Accent fabric 1 (mine is orange) – 2 pieces 3″ x 20″, plus small amount in scraps for the zipper end and the tassel
Accent fabric 2 (the linen pieces on the purse) 1 piece 14″ x 2″ for piping, and a small piece about 10″ x 10″ for the top pattern pieces
1 – 12″ zipper
14″ of cording
Some sort of ring to attach the tassel to the zipper
Pattern Piece (click link to download PDF)
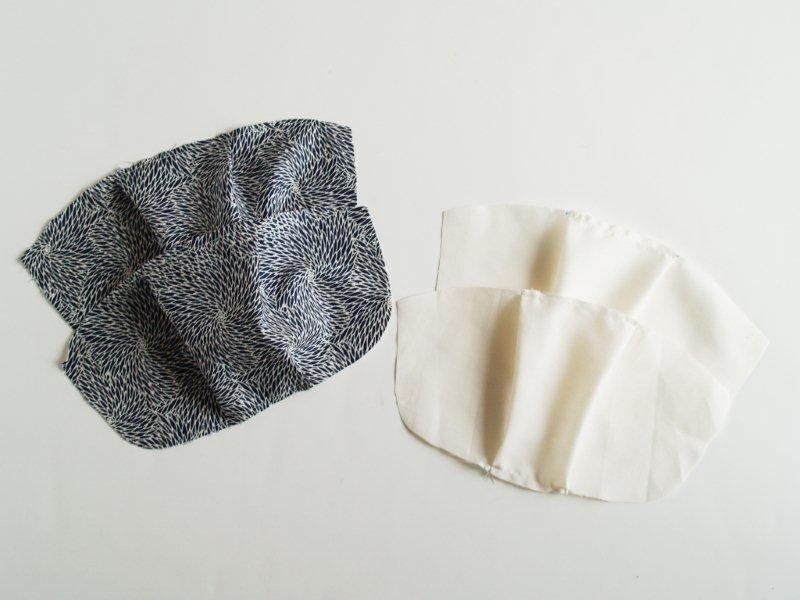
Ready to dive in?? :) Begin by cutting out all your fabric pieces.
Mark the location of your pleats on the body pieces using the straight and dotted lines on the pattern.
Here’s how to make the pleats. The blue pins represent the solid lines and the yellow pin represents the dashed line.
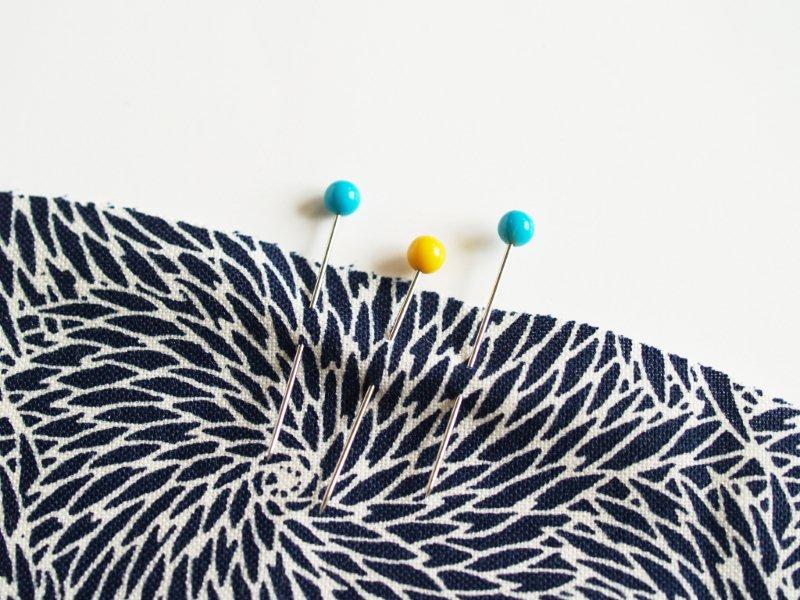
Bring the two blue pins together, creating a fold at the yellow pin.
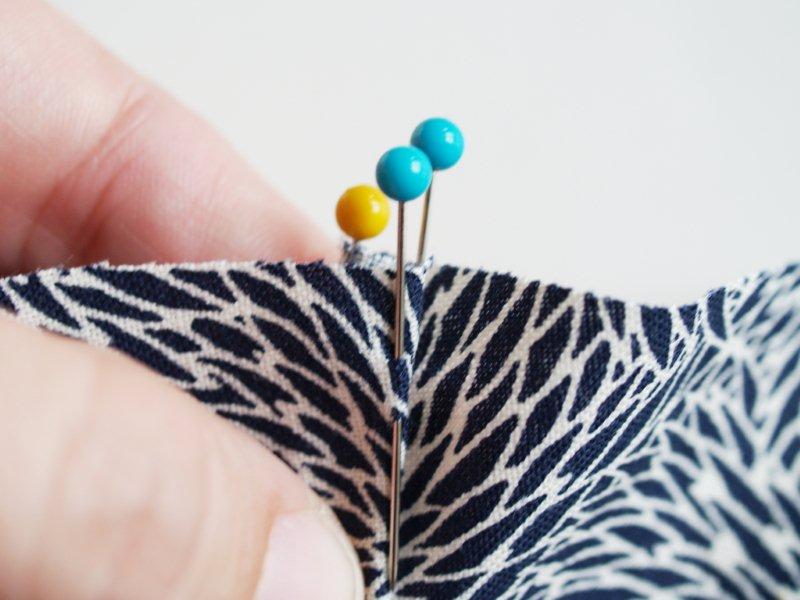
Pin the pleat in place, with the fold pointing in to the center of the fabric piece.
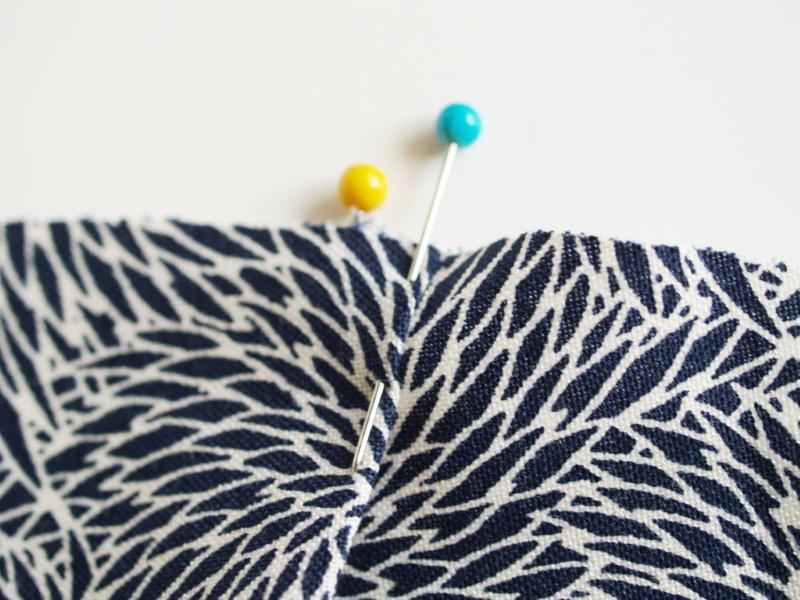
Pin the other three pleats in place on the body piece.
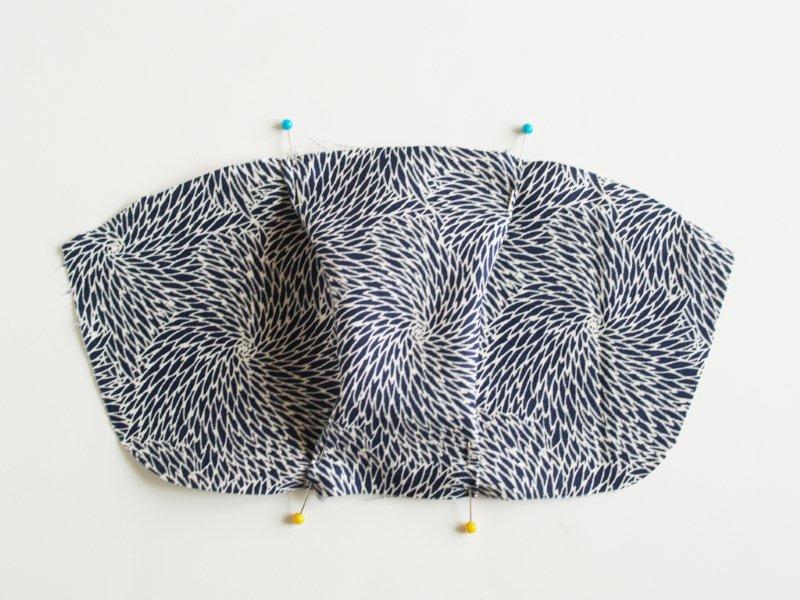
Baste the pleats down by sewing 1/4″ away from the edge.

Repeat for the other outside body piece and the two lining pieces.
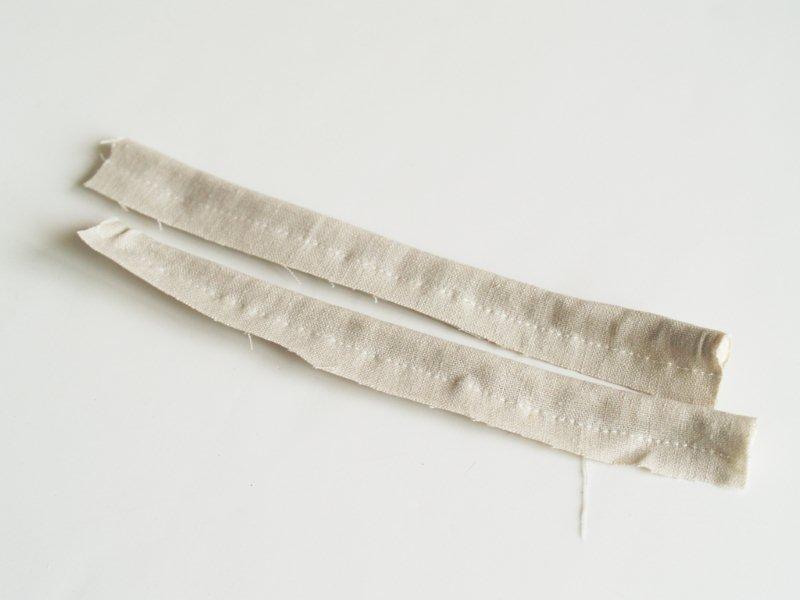
To create the piping, wrap the 2″ x 14″ rectangle of linen around a 14″ piece of cording, so that the raw edges and wrong sides of the fabric are together.
Sew down the long side, 3/8″ away from the edge.
Cut the piping piece in half to make 2 – 7″ pieces.
Line the raw edges of one of the piping pieces up with the top edge of one of the body pieces. Center the piping on the body piece.
Pin in place, then stitch down along the top. Angle the piping so that the two ends are above the edge of the fabric. That way when you sew it down, the ends won’t show.
Repeat for the other body piece and piping.
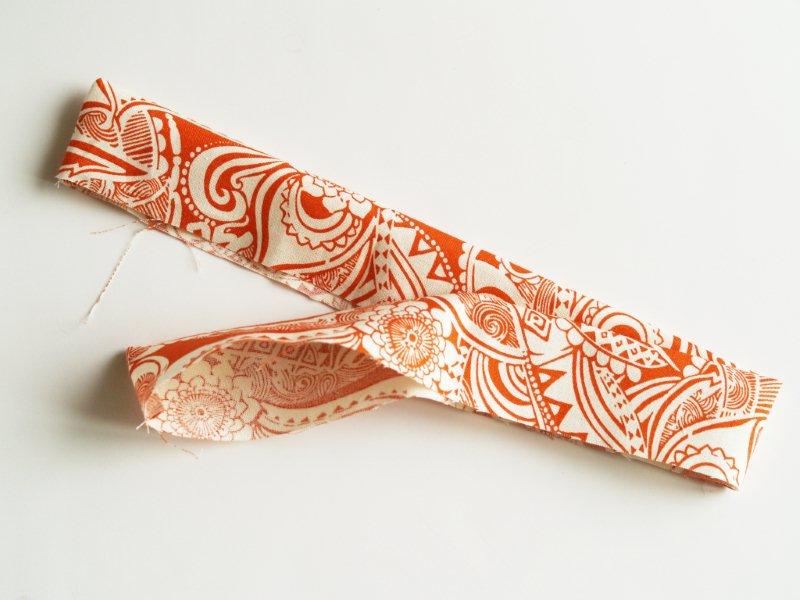
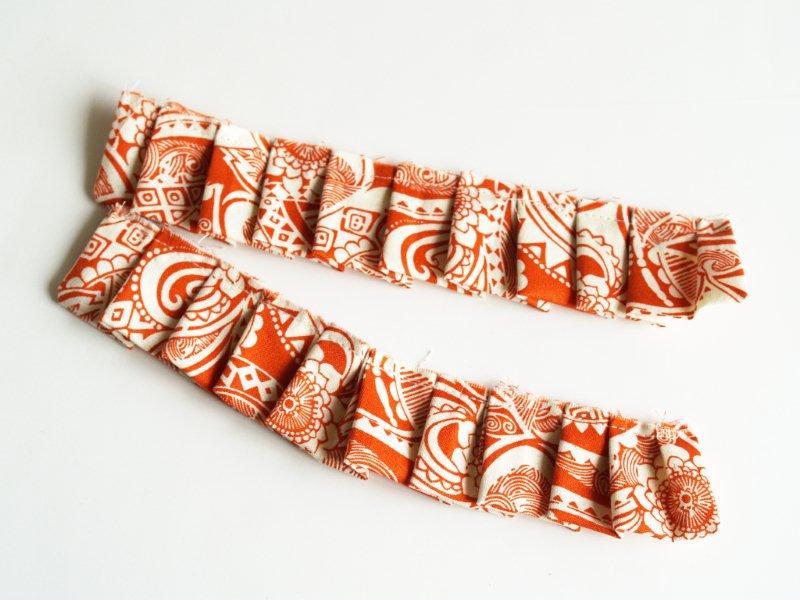
Fold the long orange rectangle right sides together. Sew down the two short sides and turn right side out.
With the raw edges together and facing up, pin pleats into the rectangle like you did with the body.
Measure 1/2″ from the left side. Now measure 1″ away, 1 1/2″ away, and 2″ away, adding pins at each point.
Bring the 2″ pin to the 1″ pin, creating a pleat. Measure 3/4″ away from the fold and create another 1″ pleat. Keep adding pleats until you reach the end. You’ll have a little left, just create a small fold at the end.
Your pleated piece should measure around 8″. If it doesn’t, make your pleats larger or smaller as needed.
Baste the pleats down, 1/4″ from the edge.
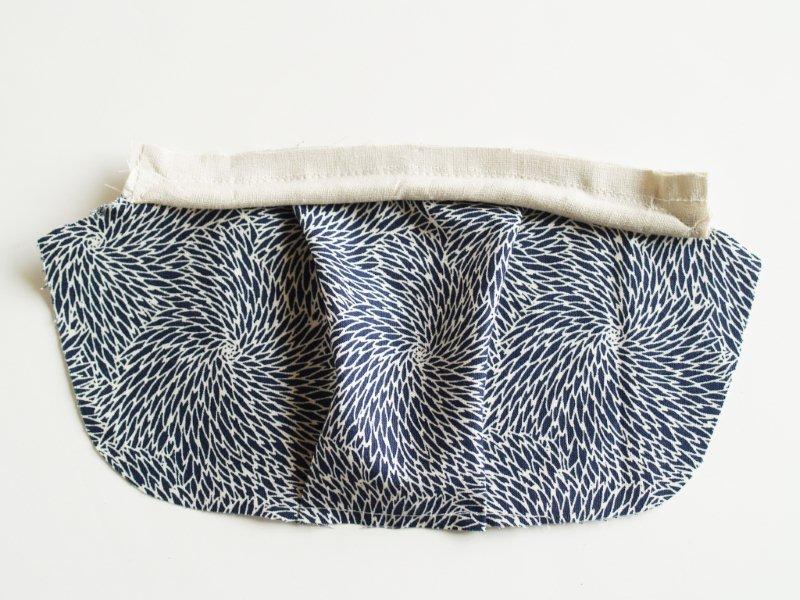
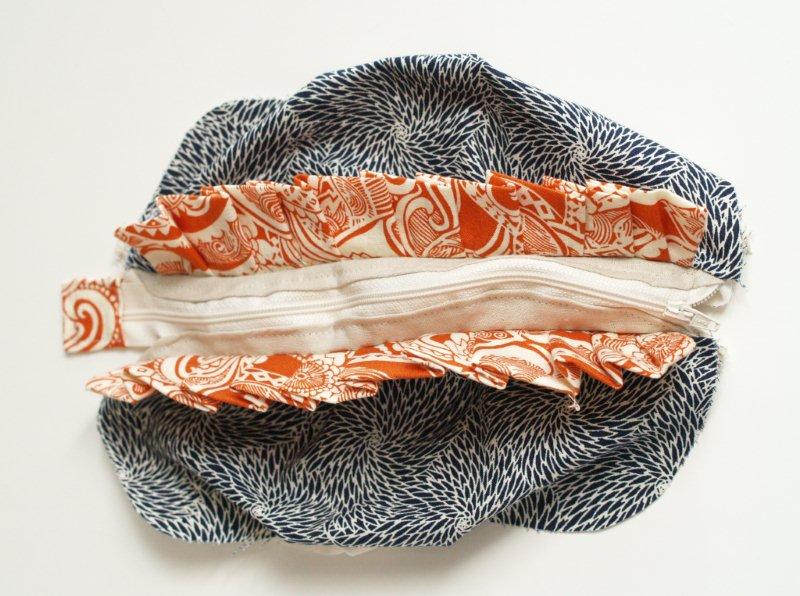
Place the pleated sections along the top of the body sections, centered over the piping. The raw edges should line up. Pin, then sew into place with a 1/4″ seam allowance.
The top piece in the picture shows you what the piping looks like under the pleats after they have been sewn on and folded up.
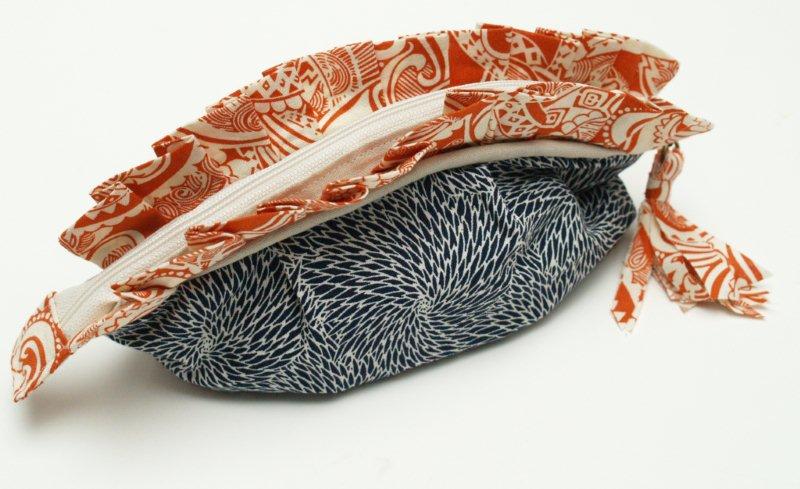
Now we’re going to work on the zipper. It’s not too bad. Promise. :)
Open up the zipper. Sandwich one side of the zipper between two top linen pieces. The side of the zipper without teeth should line up with the top curved side of the linen.
Start the zipper about 1/2″ from the left side of the linen and stick the top of the zipper out of the curve. About 1″ from the right end of the linen pieces, tuck the zipper under so that it isn’t sewn down from that point on.
Sew along the top of the curved edge with a 3/8″ seam allowance.
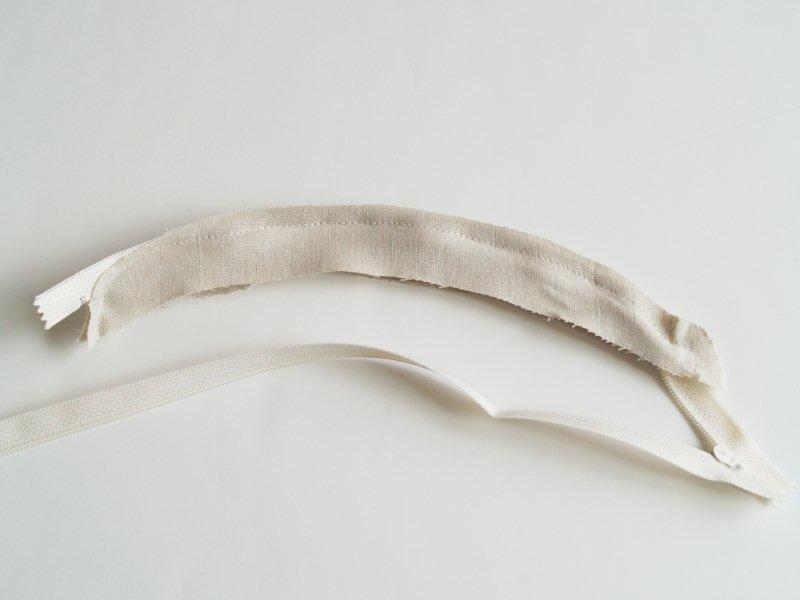
Repeat with the other two linen top pieces and the other side of the zipper.
Turn the pieces right side out.

Trim the tops of the zipper off just inside the seams. Trim the bottom of the zipper off about 2″ from where it comes out of the linen pieces.
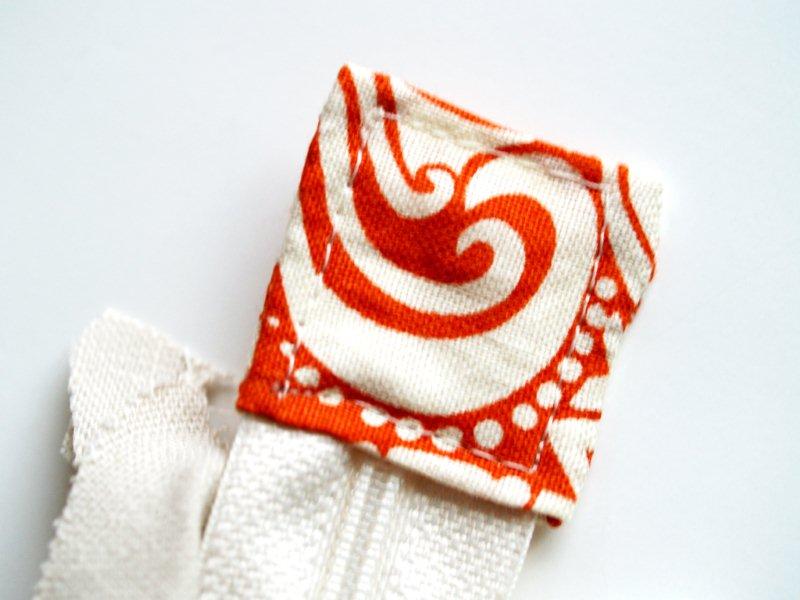
Cut a piece of orange fabric about 3″ x 1 1/2″. Fold the rectangle in half with the right sides together. Sew up both sides with a 1/4″ seam allowance.
Turn right side out.
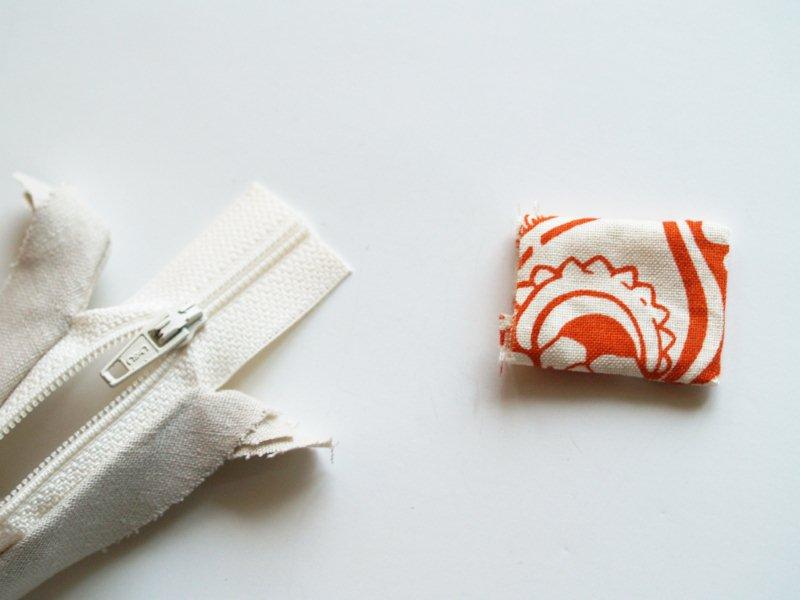
Tuck the raw ends of the orange fabric under and slip the square over the cut end of the zipper. Sew around all four sides of the square.
Now for the assembly. We’re going to make more sandwiches. :)
Lay one of the body pieces right side up. Line up the raw edges of the linen top piece with the top of the body piece. Your zipper should be facing right side down.
Now lay a linen piece on top of that, with the right side facing down. Pin along the top edge.
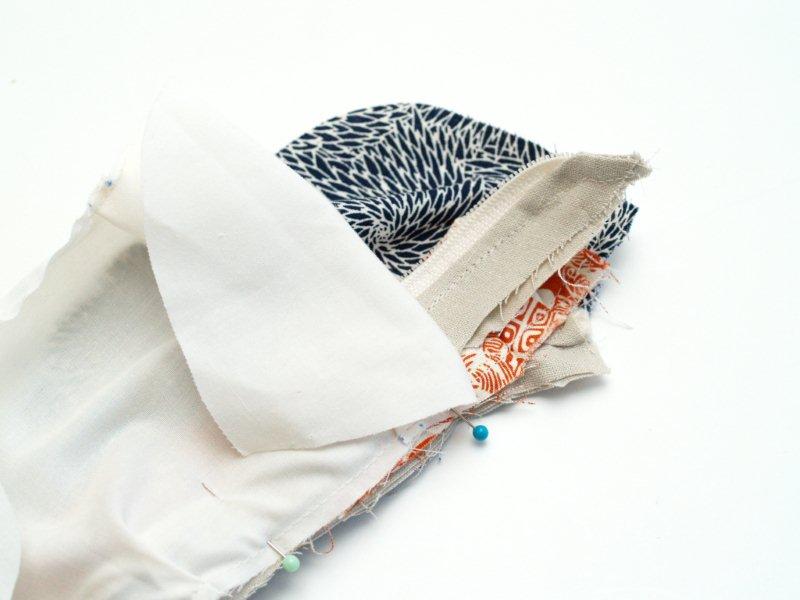
Sew down with a 1/2″ seam allowance. This should take you right up to the edge of the piping inside the sandwich.
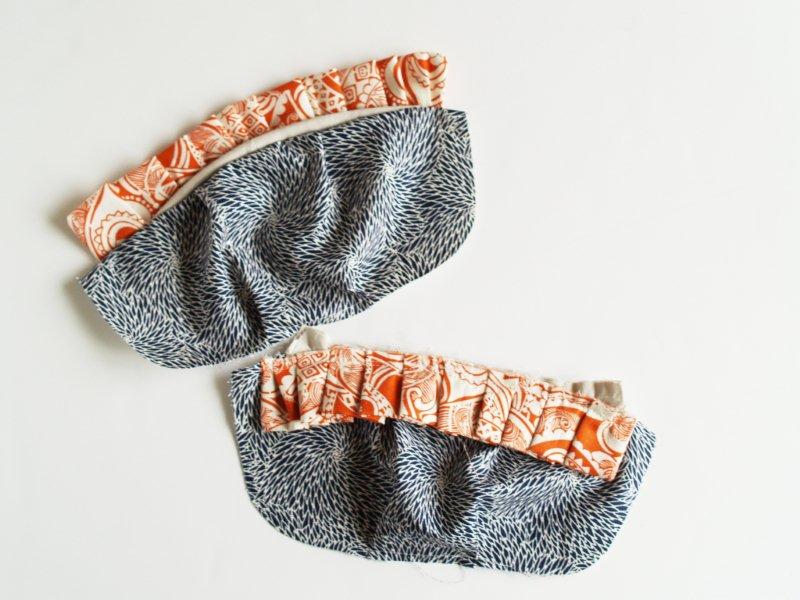
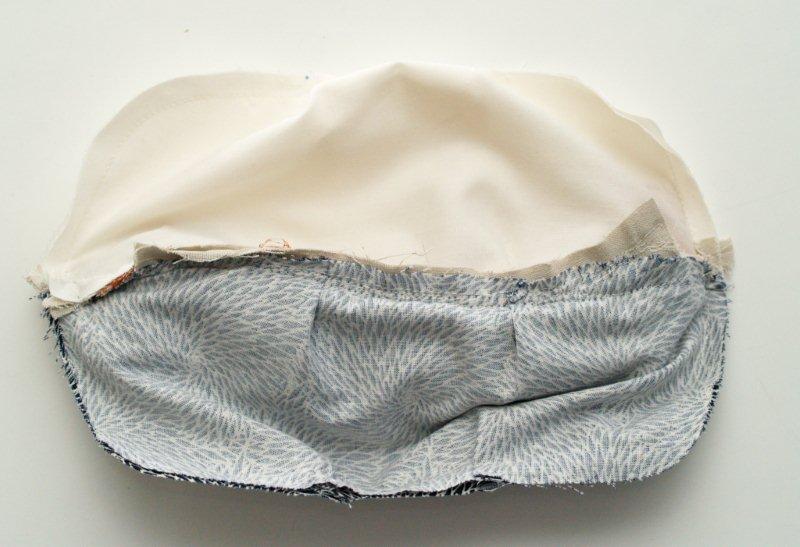
Fold the pieces so they are wrong sides together. The is what it should look like from the lining side.
This is what it should look like from the outside.
Repeat with the other side of the zipper and the other outside and lining pieces. Make sure you have it laid out correctly before sewing. :)
Your should now have two sections on either side of the zipper.
Now we’re going to sew everything together. Hard part’s done – smooth sailing from here on out. :)
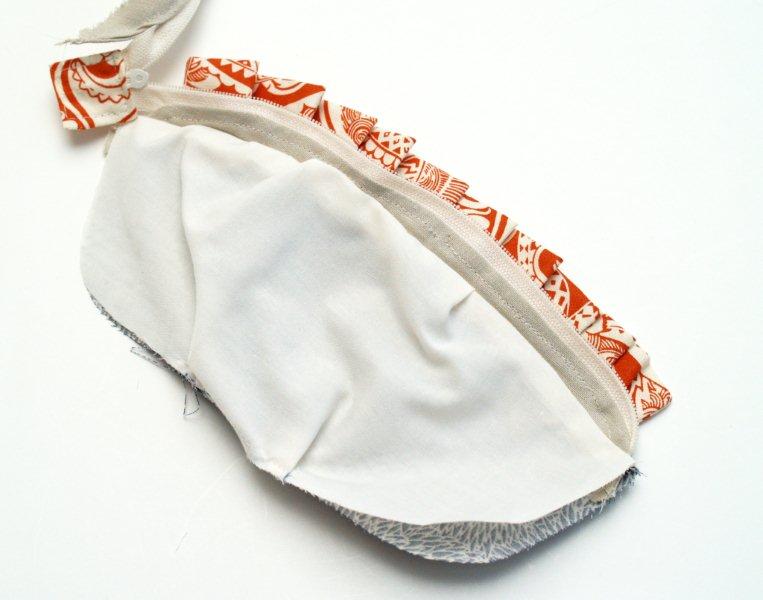
Turn the pieces so that the outside body pieces line up and the lining pieces line up, right sides together.
Tuck the loose, tail end of the zipper inside so it doesn’t get sewn down.
Pin around all the edges.
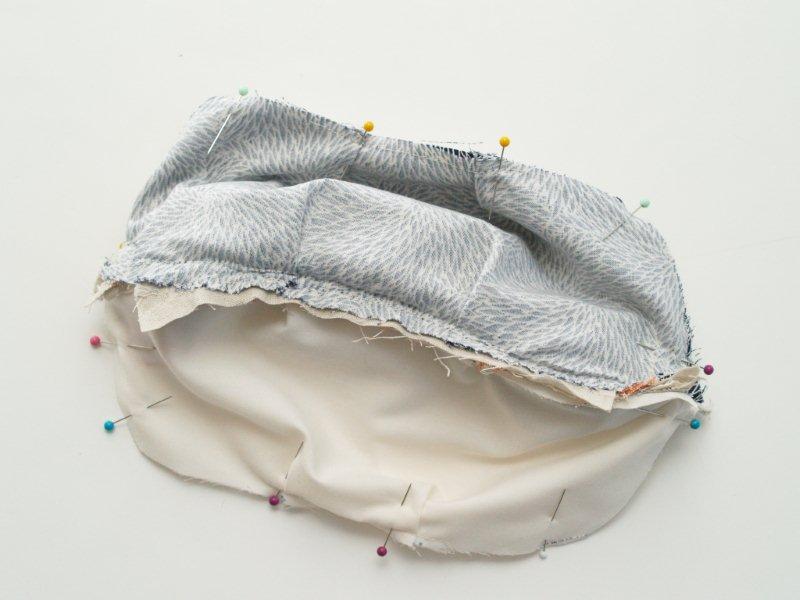
Sew around the outside edge with a 1/2″ seam allowance. Leave an opening in the bottom of the lining about 2″ – 3″ for turning.
You might have to go slowly over the center part where the zipper ends meet, but you shouldn’t have too much trouble.
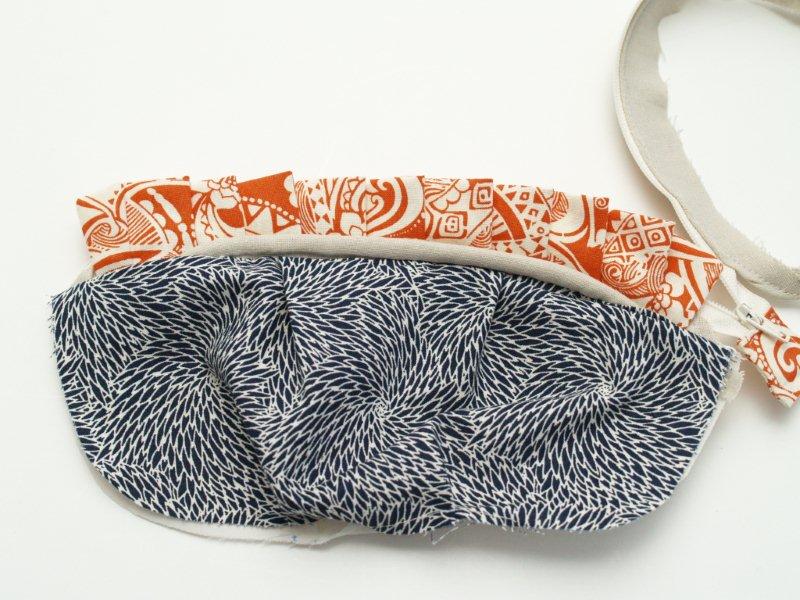
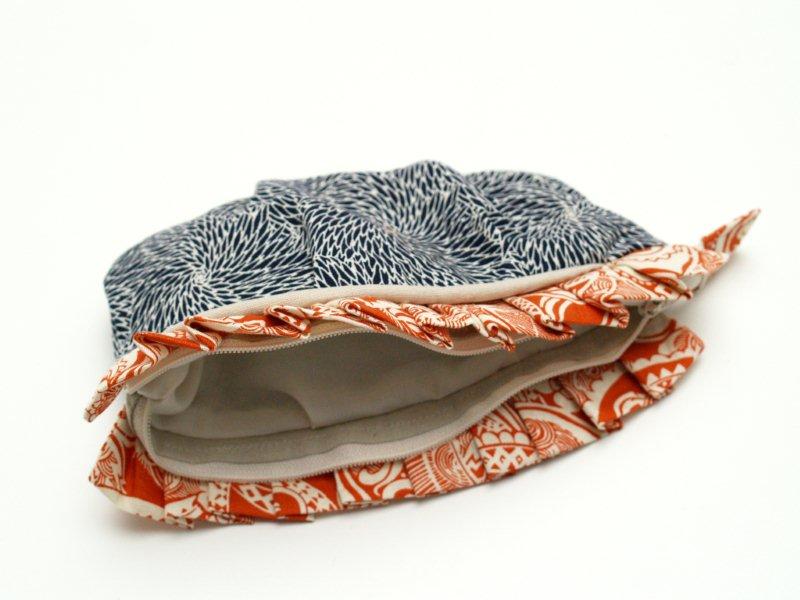
Turn the purse right side out through the opening. Sew the opening closed and tuck the lining inside the bag.
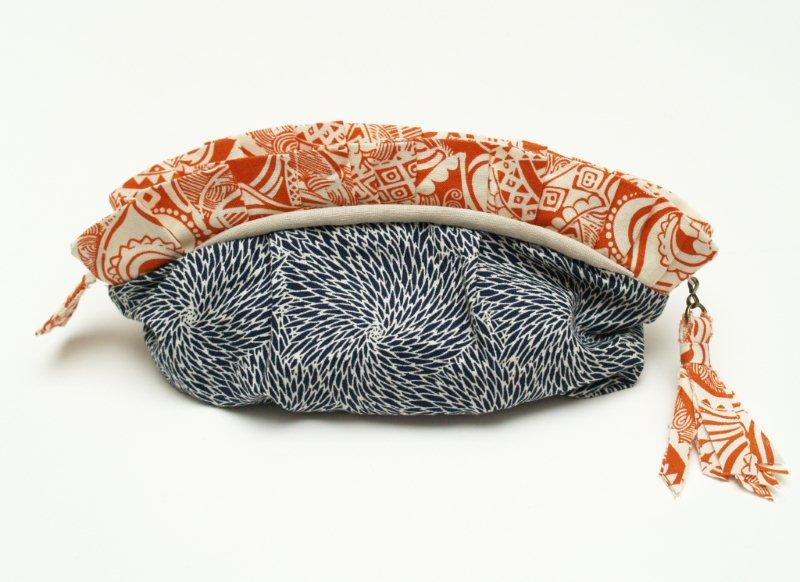
Press everything down so the lining fits smoothly inside and the orange pleats point up towards the zipper.
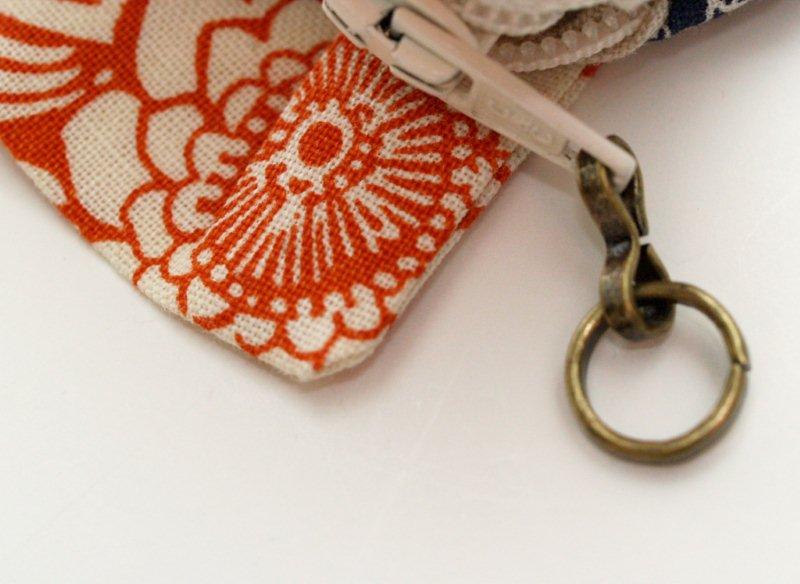
To add the tassel to the zipper, I used a link of chain that I had saved. (See? Pays to be a hoarder! :)
You could also use a heavy weight jump ring or a small D ring.
Add the ring to the small opening on the zipper pull.
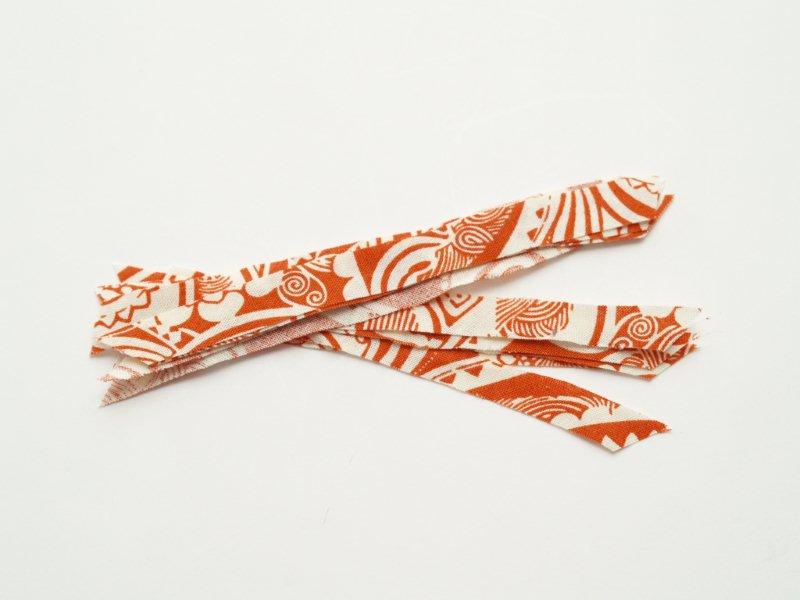
Cut small strips of fabric on the bias (diagonal to the grain). You need 10 strips that are 3/8″ x 5″.
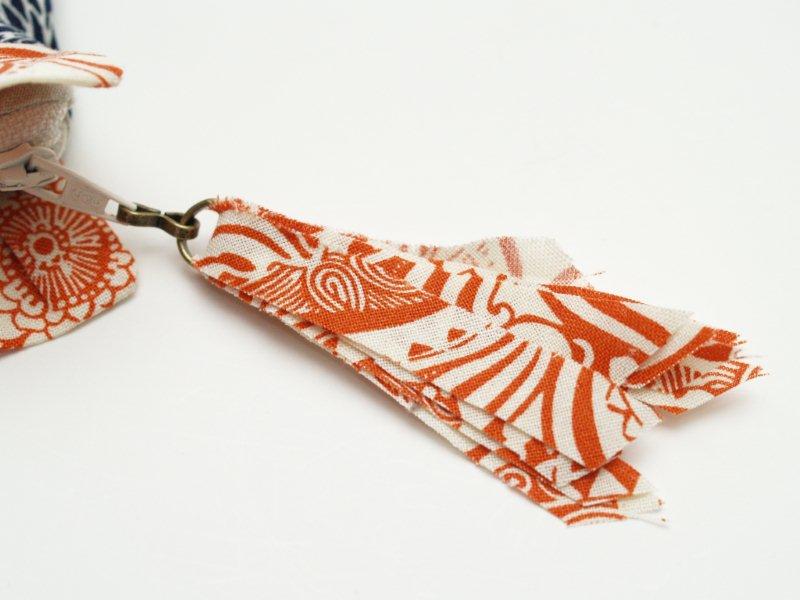
Feed the strips through the ring, folding them at the halfway point.
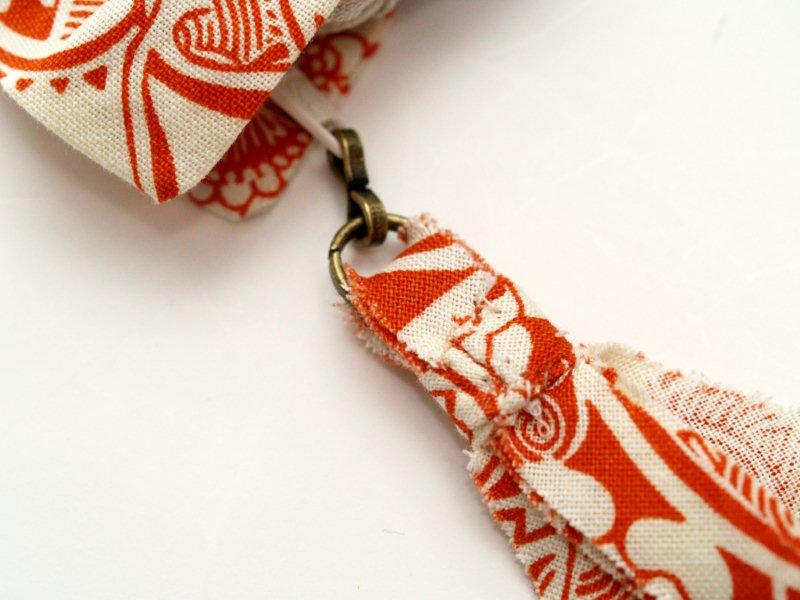
Cut another small strip of fabric about 3/4″ x 1″. Fold the sides under and wrap the strip around the top of the tassel strips about 1/2″ below the ring.
Tuck the ends under and sew down to create a band for the tassel.
And that finishes off our cute new bag!!
Don’t you love it? I think I need to make a few more of these . . .
What do you think? I’d love to hear!!


Very cute Bev, I love the fabrics you chose!!
I love it! I really like yours even more than Anthro’s. I love the blue fabric you used. You really inspire me to want to up my sewing skills.
Lovely :)
When I spotted the first picture of the purse in my blog reader I thought it was Anthro’s, the fabrics you used really captures the image of their purse I am tempted to make one tonight!
awesome! i’ve been trying to figure out how to make this purse, because I loved it sooo much in the anthro store. Thanks for the tutorial!
I love it! And I agree with others – yours is cuter than the Anthro inspiration! I linked to your tutorial on Craft Gossip Sewing:
http://sewing.craftgossip.com/tutorial-anthropologie-inspired-zippered-pouch/2011/08/08/
–Anne
This is wonderful, you always give me such inspiration. Thank you so much.
Katy
TOO stinkin’ cute, Bev!! I need to learn to make pleats. (You know, when I learn to sew…) I love the little tie on for the zipper, too. Great touch!!
Bev, seriously, have you ever thought of sending your resume to Anthro? i’m pretty sure they would hire you !! it’s be-a-u-t-i-f-ul!!!
That is awesome!! You did a really great job! One of these days I’ll get better at sewing!
Hey Bev, I just added this coin purse to my Pintrest! It’s under lollylinens.
Katy
I love these two fabrics together! I’m just starting to play around with sewing so I book marked this post and plan to come back and try and recreate this cute clutch when I have the proper skills. This clutch would be perfect with a navy and white dress or even a LBD! Great post and beautiful bag!
That is so cute! Great job!!! I love it!
This is pure genius.. I love the fabric, the color everything about this cutie.. I am going to share this project in my Wednesday wordplay party tomorrow.. :)
Have a great day!
I love it!!! what would you charge to make me one?? I can’t sew worth a lick and that is so stinking cute, I must have one!!!
You certainly did a good job on the little purse. Love the colors!
A job well done! I’ve been eyeing up this coin purse at Anthro for a while now: ) Thanks for the tutorial!
THIS ROCKS! Thanks so much for the tutorial… I’m already drooling at the thought of whipping one of these up! :)
Yours is cuter than Anthro’s. Thank you for the tute.
Love the color choices! Great knockoff!
Very cool! Love your fabric choices, too!
awesome… will share this on my blog
I have had this anthro bad bookmarked for a while now trying to geour versiont my mojo going to dupe it. Thank you for showing the way! Love your version!
OK, here’s whatI was tyring to say before my fingers fudged and botched it!
I have had this anthro bag bookmarked for a while now trying to get my mojo going to dupe it. Thank you for showing the way! Love your version!
WOW! Lady is there ANYTHING you can’t do? I LOVE this. Awesome job. Thank you.
I think it’s the bees knees!!!!
Super cute! Is there anything you can’t do?
Thanks for sharing!
Super cute!
I totally think yours is so much better. I really like the colors you used.
Great job!
Nice work….and a tutorial! Thanks for sharing!
This is so smart and creative. Discovered your blog today. Superb work. Whoever gets the giveaway will be purely delighted. Good luck all.
http://craftideasforall.blogspot.com
http://navankacreations.etsy.com
Hi! I’m hopping on over from “A Glimpse Inside.” I just LOVE anthropologie, but their stuff can be out of my price range, and you did an awesome job with the knock-off! I wish I could sew…currently trying to find a good reference book to start learning. Thanks for the inspiration!!!
XO’s,
Jessie
acozycottageinthecity.blogspot.com
So cute!!! Great tutorial :)
I was wondering if you had a pricepoint for about how much the real one was, and about how much the fake one cost to make?
Thanks :D
Christa
Would love to buy one already made up. I really can’t sew except straight stitches. How much would you charge for one??? thanks…..
Very nice! You have made a lovely purse. And such a good tutorial too. Thanks for sharing:)
The orange and black are beautifully together! Love it Bev!
Jenn
The purse looks super cool :) Love the combination of fabric you used.
We have a link-up party going on – Tea Time Thursdays @ Kreative Korner. I would really appreciate if you’d link up some of your awesome posts there. Hope to see you at the party.
http://tanyaanurag.blogspot.com/2011/08/tea-time-thursdays-2-and-features.html
love it. Can you just make me one and I will buy it??? I have zero sewing skills.
Made it…and LOVE it!
Great tutorial, will be making this one for sure. Love the added touch of the piping and this method of inserting the zipper in the pouch. Thanks!
We liked this so much over at Copycat Crafts that we have decided to feature it today! You can view it here
http://www.copycatcrafts.com/anthropologie-inspired-asterid-coin-purse/
We’d love it if you’d like to display a featured button! You can grab your button on the right hand side of your post. Thanks!
To be honest, I like yours best.
One thing you could do, on the ruffle is to use some interfacing to stiffen it up a bit, making it stand up like the model purse. Or to use doubled fabric to give it body. Very cute & a great tutorial! Thanks for posting it
I love this purse. I am surely going to make one. thanks for sharing.
:)
This is a great tutorial. I loved that you showed lots of pictures Thanks.
the leather gives it some stability. You should have used some stabilizer in your project. I’m sure it feels kinda soft. Beautiful work.