Thank you so much for all your sweet notes about my Grandma. They’ve meant so much to me.
Your stories and shared losses have really helped me.
If you missed the first Part of this story, you can read about my Grandma here.
I knew that I wanted to make something for some of Mamoo’s broken jewelry pieces and I thought a necklace would be the perfect thing.
So our teaser yesterday was this jumble of items (that I used most of). . .

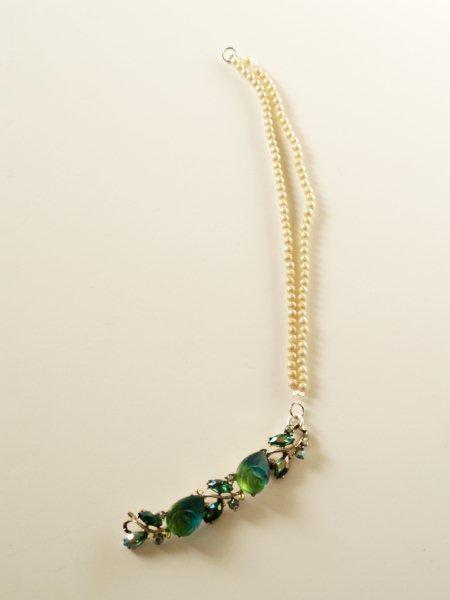
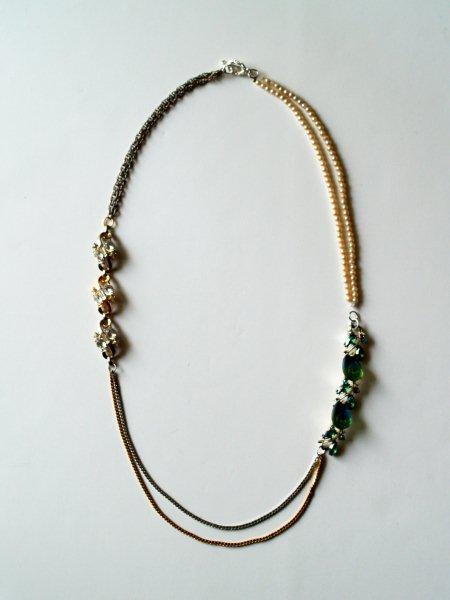
And that –
went to this!!
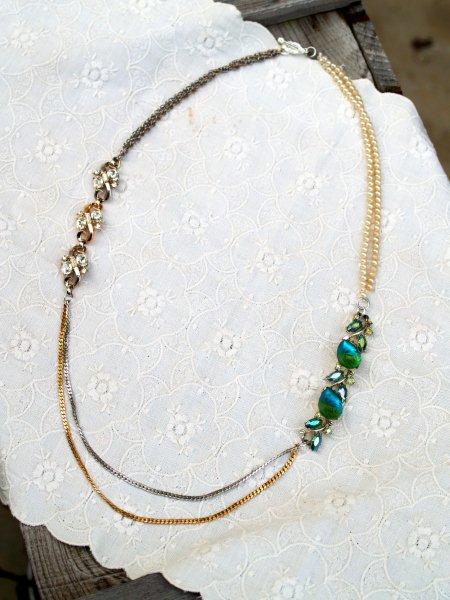
I’m so happy with it. :)
And I realize that this might be a limited-use tutorial – but hopefully these tips will help you with re-purposing jewelry that you have, or that you find at thrift stores or garage sales!
It’s pretty simple too – it’s just taking the useful parts of whatever pieces you like and linking them together.
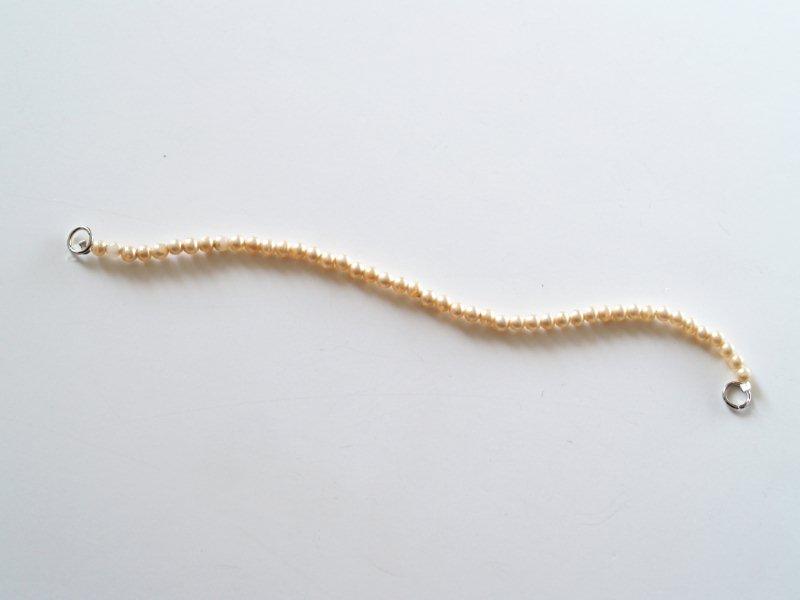
I started with the pearl necklace.
My grandma was very fine-boned. Her necklaces make me feel like a yeti – minus all the hair. ;)
Also, this was pretty old and I wasn’t sure of the condition of the thread it was strung on. I thought the best thing to do would be to restring it.
I started by cutting the fastener off the end.

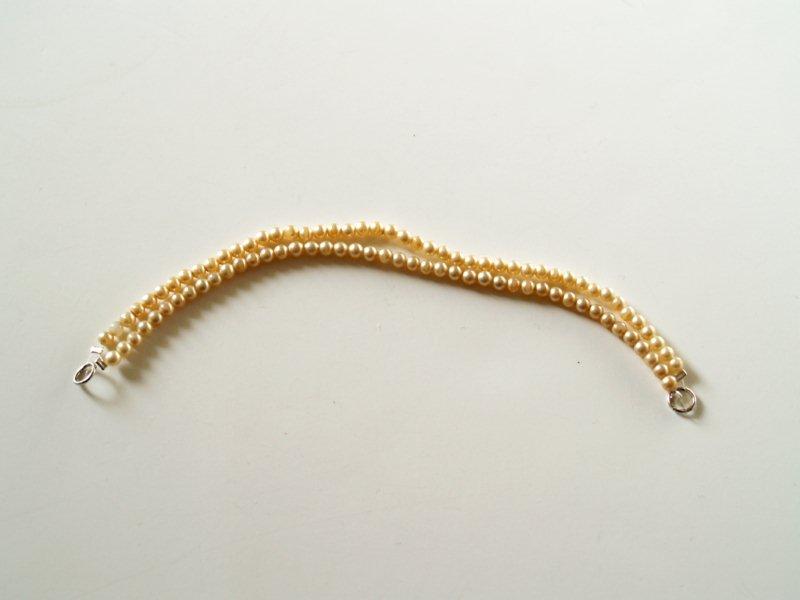
I cut two pieces of stringing cord (.25mm) a few inches longer than half of the pearl necklace length. (Since I wanted two strands instead of one.)
I put the cord through a crimp bead, around a jump ring and back through the crimp bead, so that it was looped around the ring.
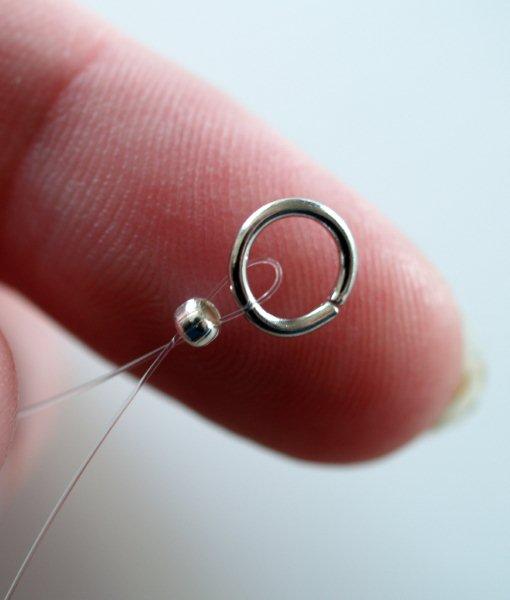
Gotta love that Macro lens. My fingerprint looks so weird.)
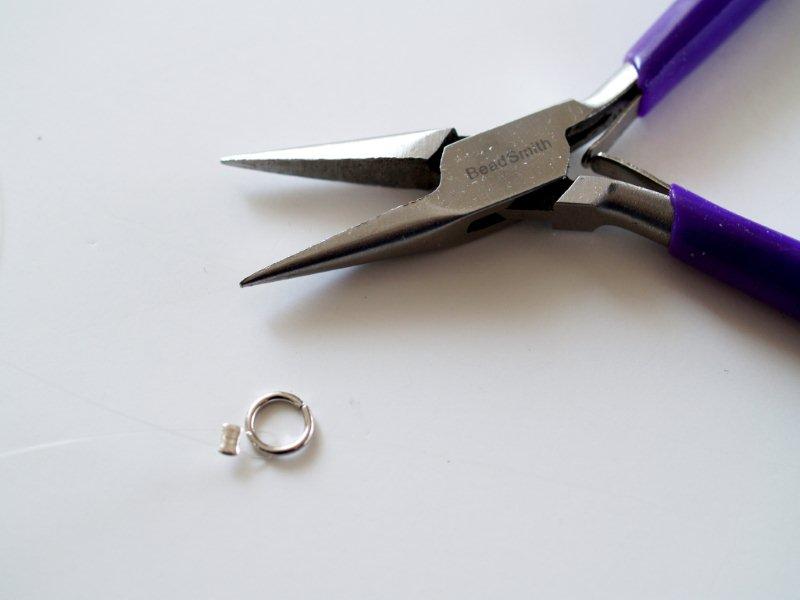
I crimped the bead tightly with flat nosed pliers.
I started moving beads over to the cord, feeding them onto the wire and covering the loose end of the cord with the beads as well.
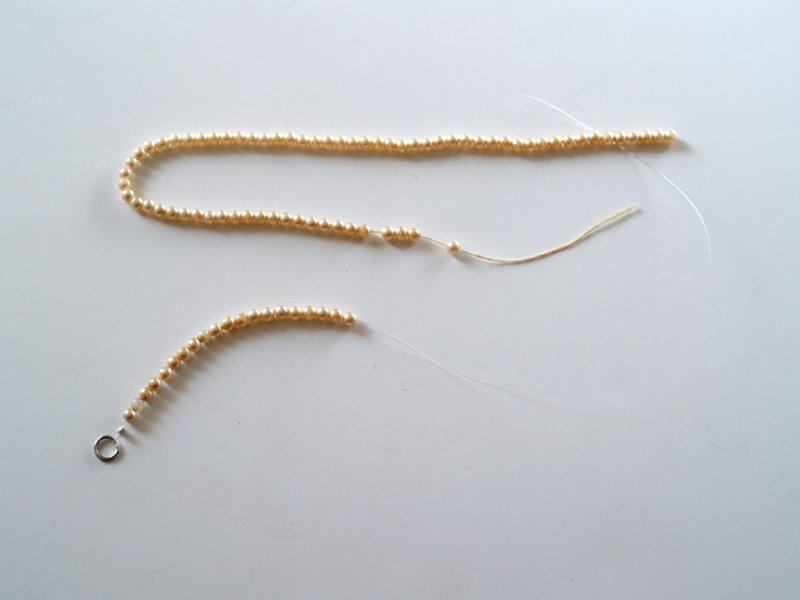
Once I’d used half the beads, I finished the strand with another crimp bead and jump ring on the other end.
I repeated this process with the remaining beads and added the second strand to the same set of jump rings.
You can use this same process for a whole necklace and just add closure findings on the end to finish it off.
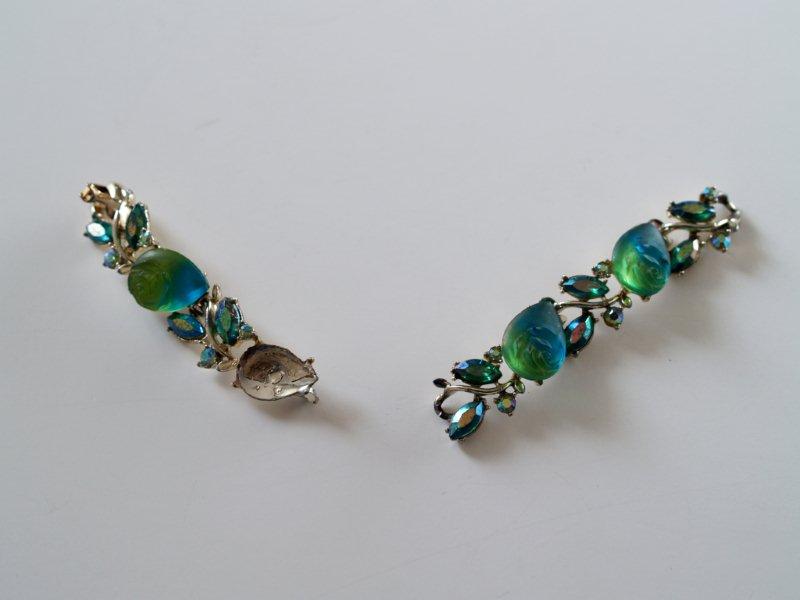
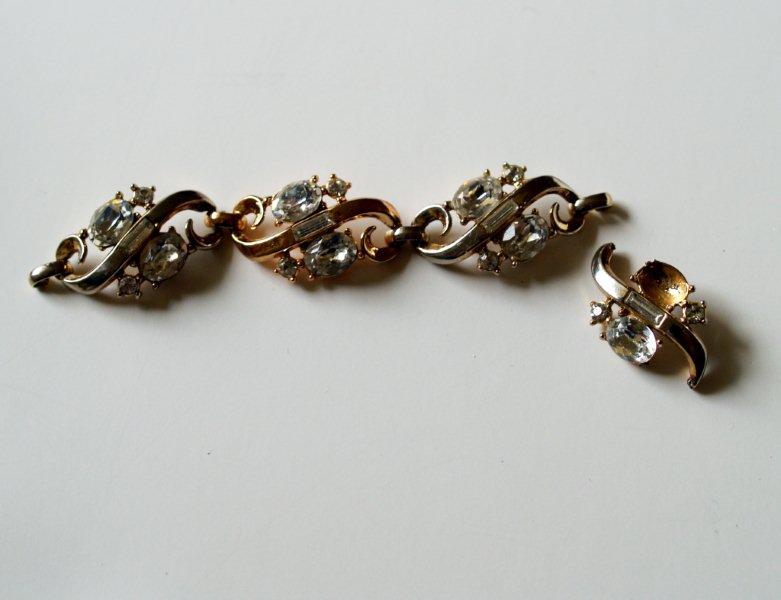
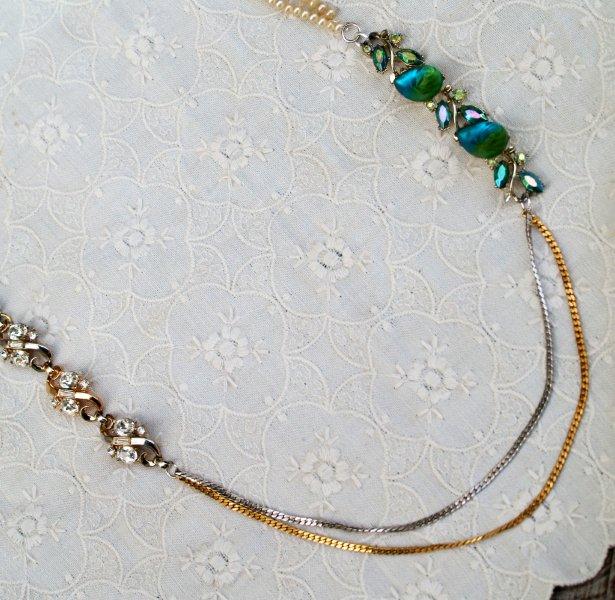
For the second section I removed the damaged link in the blue bracelet. For each of these it just takes looking closely to see how they link together and then clipping that section with wire cutters. (Yes, this was the whole bracelet. Her wrists were ridiculously tiny also.)
I added the two sections together (blue bracelet and new pearl chain) with a jump ring.
Remember to open your jump rings at an angle rather than pulling them open wide.
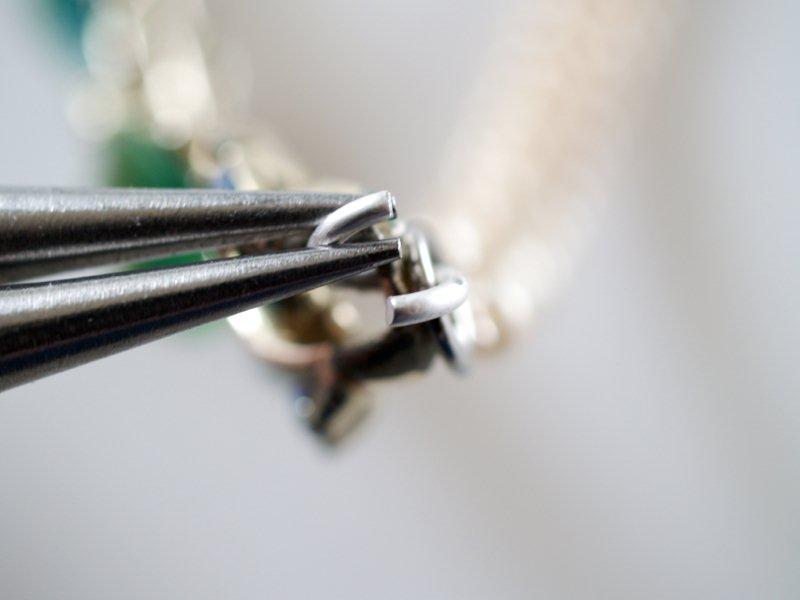
I closed the jump ring. Two sections complete!
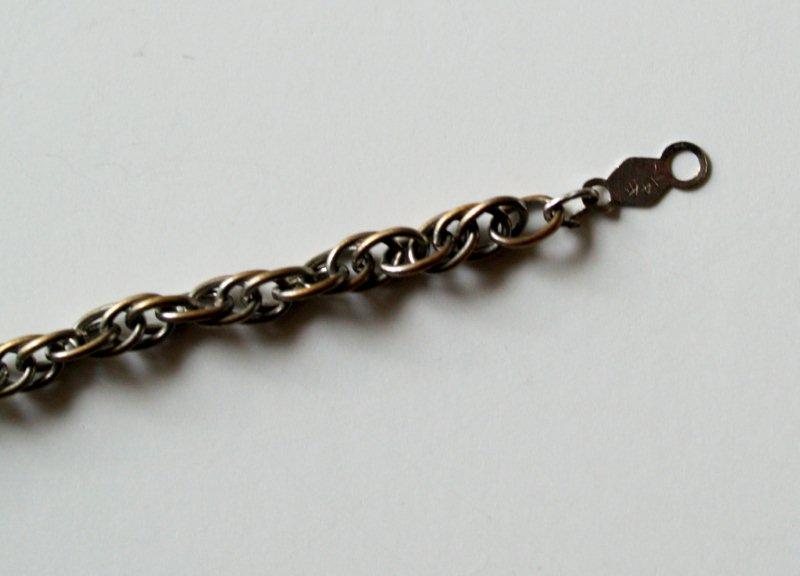
For the next section I seperated two serpentine chains. I wasn’t sure how well these would work, but they clip apart just like a regular chain. The opening that is left on the chain is pretty small though so you’ll need to use fairly thin hardware with it.
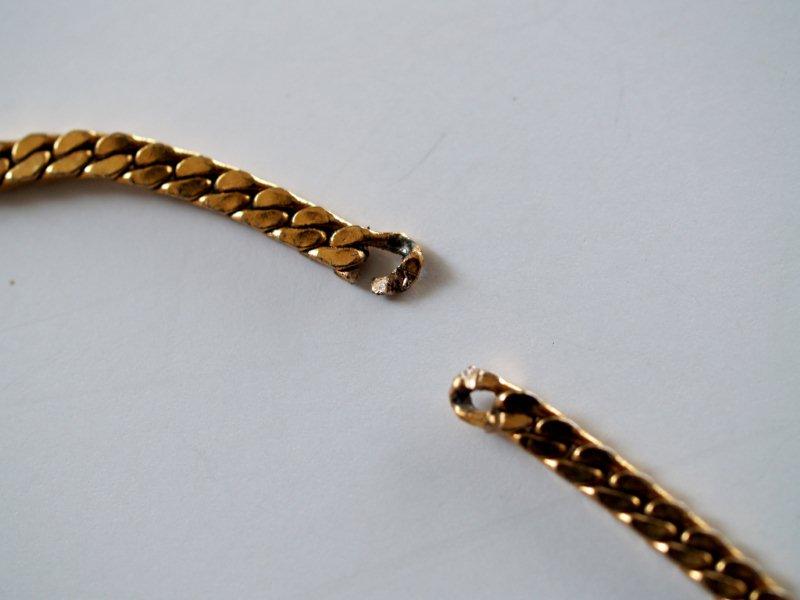
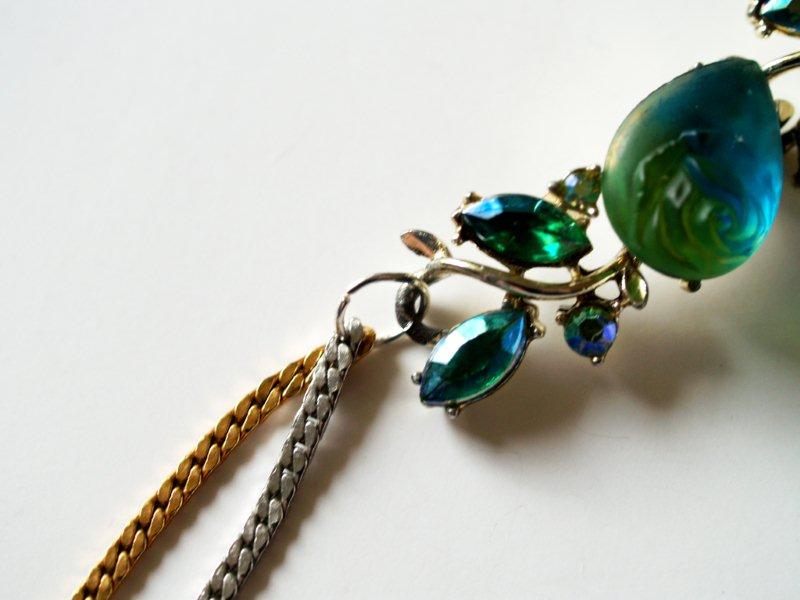
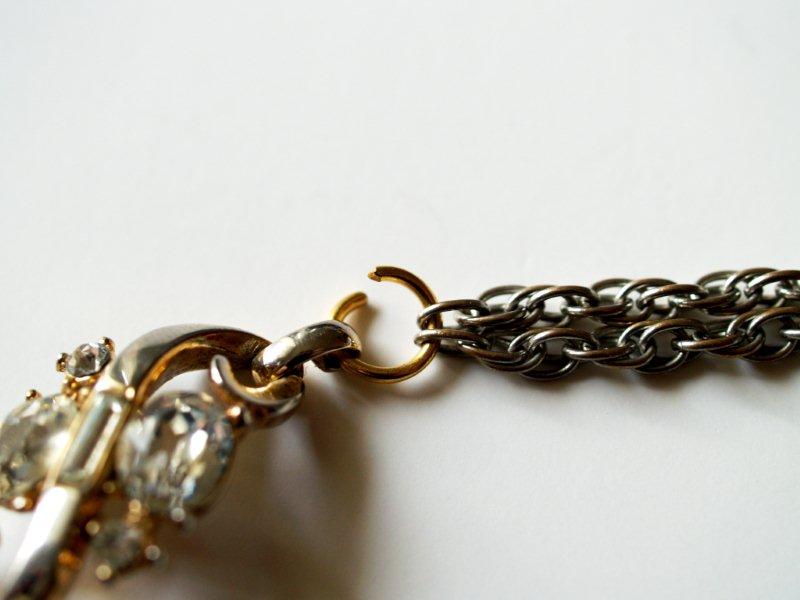
I cut off a section of the gold and silver chains (the gold piece was a little longer than the silver) and attached them with a thin jump ring.
I then added this jump ring to the bottom link of the blue piece.
I cut apart the other broken bracelet.
I connected one end of this piece to a jump ring and the other ends of the gold and silver chains.
For the last piece I tried it on and determined how much longer I wanted the necklace.
I detached the closure from the last chain – for most pieces like this you can either cut the ring or just open the jump ring with your pliers.
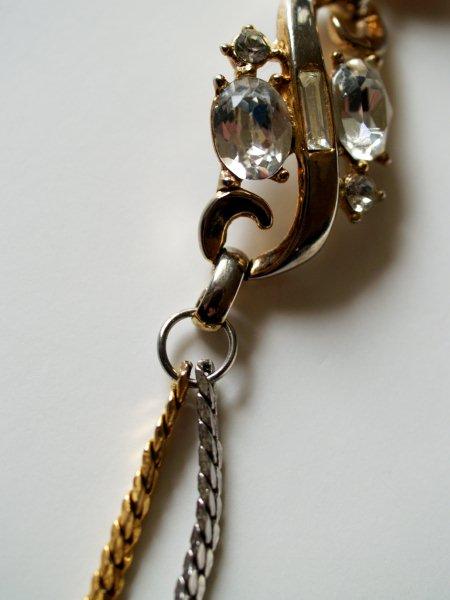
I cut two pieces of chain the length that I wanted and added them to the crystal section with a jump ring.
I alternated using gold and silver jump rings since the necklace is a combination of both.
I finished the other end of the two chains with another jump ring.
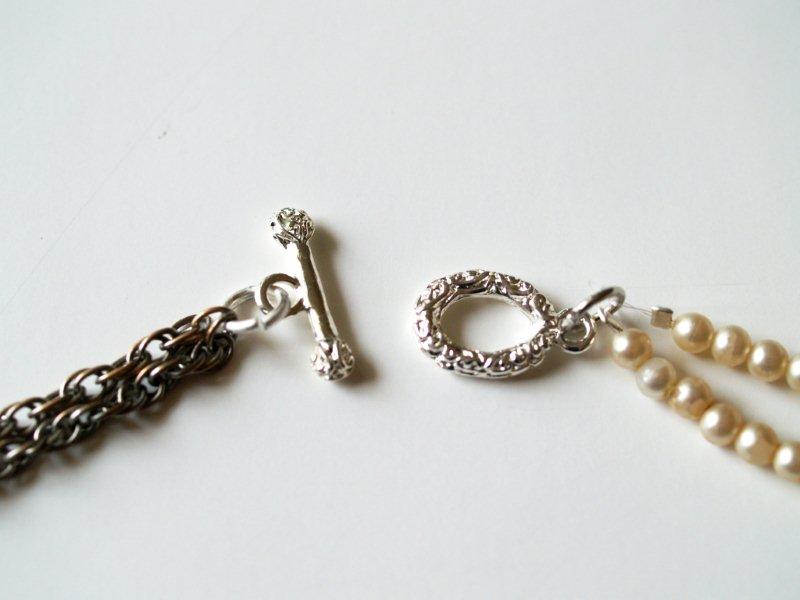
I used a toggle closure for the ends – they’re easy to attach. Just add the loops on the pieces to the jump rings at each end of the necklace.
All Done. ;)

I love that I was able to use up the broken pieces of her jewelry.
I think she would have loved it too. :)
Thanks again for your support and for reading along!
I’m linking to Today’s Creative Blog, Met Monday, Skip to my Lou,
and the other fabulous parties on the sidebar – make sure you check them out!


It is beautiful!
I love it Bev. You are so talented!
That looks so amazing! It’s gorgeous! I hope you realize how talented you are!!
So pretty! What a great tribute to your grandma!
It looks so great ! I love how it turned out. I am amazed at your talents! What a fabulous way to remember your Grandmother. Thanks so much for sharing:)
Bev, what a beatiful tribute to your Grandmother. I’m so sorry for your loss. She seemed like an amazing lady. Huge hugs.
The necklace is gorgeous and this is an absolutely amazing and touching way to remember her and have her near you when you wear it. Amazing.
beautiful! this is stunning and so amazing. I love how you transformed this.
So lovely! I have that “yeti” feeling too, but I refer to myself as the hulk!
beautiful! What a special piece of jewelry.
Sooo pretty!! I am a grandma(NANGY) to 1 girl and 2 boys,I have stored my jewelry in a box for my Hannah so that when she grows up,she will have my stuff and my FLAMINGO TOES library that I have saved for her to get inspiration.Thank-you for all the hard work that you do to inspire and encourage others.
A beautiful necklace and tribute to your grandmother!
nice…love the blue green bracelet part the most
Beautiful!! I love this idea. Thank you for sharing.
I think it represents the wonderful, interesting person you pictured in your last post. Colourful and unique.
A great way to honour her!
I wish I had more old jewellery of my late auntie, I still vividly remember every piece.
I am really sorry for your loss, thank you for sharing your story.
What a great necklace..and a special way to remember your Grandmother! So talented!!!
Beautiful outcome of the jewelry pieces. Bet your Mamoo is looking down on you and is so proud that you wanted to keep her close by cherishing the items she used. You are a Grandmothers dream granddaughter.
What a perfectly sweet way to remember your grandmother! The necklace is stunning. I’m sure she would have LOVED this seeing as how all of the pieces were originally hers. This is a fantastic keepsake, Bev!
beautiful.
Really beautfully done! What a great keepsake and how wonderful to take all the broken elements and make a beautiful piece. Enjoy and so sorry for your loss. Laura
Love this, what a great idea.
So very pretty. You really did a good job. What a great way to remember your grandma. :)
Ah, this turned out so good! What a special piece to keep and pass on to your daughter down the road! :)
WOW! not sure what I was expecting to see, but it’s a whole lot better!!! I’m sure you’re Grandmother would be very flattered. & proud.
That is just flat out beautiful! That will be a great keepsake for you.
It inspires me to do something with my grandmother’s costume jewelry. It’s in a box in my mother’s closet and she hasn’t looked at it in years. Maybe I can make something for both of us!
That’s awesome! It is not only beautiful but will hold such special meaning to you and it’s super unique! I absolutely love it!
This is so perfect! It’s such a special way to remember your Grandmother and keep her close to you and it’s beautiful . Win win!
awesome & lovely..how nice…
Wow! What a lovely transformation… what vision you have. LOVE IT! :)
WOW! That turned out so pretty! You’ve inspired me to look through some of my grandmother’s jewelry bits and make something a little more fashionable. I’d actually be wearing her jewelry instead of just letting it sit in a box.
The necklace is simply gorgeous! All we need now is a photo of you wearing it!! :D
That’s totally lovely. What a great and unique way to remember your grandmother and use those great jewellery pieces!
Wow…it turned out great….now I have a plan for some old and damaged pieces I have. Thanks for that awesome idea.
Wow! What a great idea! I have broken pieces of jewellery left from after my Mother passed and it is so hard to let them go……and now I don’t have to. Thank you.
Super cute and really creative…I will keep this in mind for sure! That is really special!
what a beautiful and special necklace. something to treasure.
megan
craftycpa.blogspot.com
Once again you have inspired me! I have some broken pieces that belonged to my grandma and my husband’s grandma. I’m excited to see what I can do with them.
Your necklace is so beautiful! I think I need to pull out my stash of broken jewelry and see if I can make something equally (or nearly) as fabulous. Thanks for sharing!
I love how you mixed such different pieces for a elegant a cohesive design. It’s very pretty, and such a wonderful homage to you dear Mamoo. You could even make some mismatched dangly earring with the pieces you haven;t used on the necklace.
PS: can i get a jewelry design class please ??
Ooo! Purty! I will have to try this sometime. Thank you SO much for sharing!
What a special necklace you have created! You’re right, your grandma would LOVE it! :)
So special!
That really turned out to be gorgeous and what a cherished memory for you too.
It is beautiful. What a lovely way to remember her!
where can u buy these charms…
ooooooo…… I’m so EXCITED!!!! I have so many “parts & pieces” from my grandmother’s jewelry box… now I know EXACTLY how I’m going to use them… for me AND my girls!!! Thanks for the inspiration!
That’s a great way to keep a sweet memory together. I’m sure your grandmother would have loved it, too.
A little while ago, I wrote a tutorial about how to make new jewellery from old. Here’s the link if you’d like to find out more:
http://merrymakes.blogspot.com/2010/09/new-jewellery-from-old-in-6-easy-steps.html
So pretty and even more special! Love those family heirlooms and you really made a good one here!
WOW! This is absolutely FANTASTIC! Just gorgeous! What a stunner!
Thanks for linking up to Making It With Allie! I can’t wait to see what you have for next week!
AllieMakes.Blogspot.com
This is so touching Beverly. What a fabulous way to celebrate your grandma.
Beautiful! I’m sure she would have loved it <3
My goodness that is beautiful! You are quite talented.
That is such a beautiful necklace, and I love that it means something.
Gorgeous! I love that you made this out of your grandmother’s jewelry. So sweet.
Beautiful and meaningful too, Bev. Love it!
There’s a boutique jewelry store up in Santa Cruz where people drop off their old jewelry (mostly costume jewelry), and the artist that owns the shop uses bits from the old pieces to create new jewelry creations. She comes up with some amazing stuff. Your beautiful necklace made from your grandmother’s jewelry reminded me of that lovely little shop.
Thank you so much for being a constant quality contributor to “A Little Birdie Told Me…” at Rook No. 17!
I LOVE the scripture on your blog! Im right there with ya! I love meeting sisters in Christ!
I LOVE this! Come on ova’ and link up to WHASSUP!!! xoxokara
*ENTER LINKY PAR-TAY Here! *
I’m so sorry for your loss, I can tell you love mamoo very much!
You making fresh new jewelry for yourself from her vintage jewelry is something my jamie would really be in to.
thanks for a great tute!
gail
Wow, so impressive!!! You have just inspired me to go back to vintage remakes – I’ve been in a rut lately! here is what I made previously: http://karboojeh.wordpress.com/lady-karboojeh/
Thanks for sharing all those lovely jewelery tutes,
Karboojeh
What a lovely reminder of a special relationship. You’ve taken something of hers and made it uniquely yours. I’m sorry for your loss, but believing that His comfort is healing your heart. Hugs and prayers, Christie
Thank you so much for this! I have been hoarding some jewelry of my grandma’s as well. It never occured to me to make them into one piece I could wear.
I’m so sorry for your loss. It’s been 15 years since my grandma passed away, and it is still hard coping with it. I wish you all the best.
I love this idea. I have made many new pieces w/ my grandmothers and great grandmothers jewelry.
Thank you so much for this idea on how to recycle my mom-moo’s (grandma) jewelry. I never heard of anyone else calling their grandma mamoo besides in my family. Im so excited to connect these memories together into one piece! There’s nothing like going through grandmas jewelry box… the first lessons of fashion…
What an awesome way to use old jewelry! And the coolest part is that you are actually getting more than one necklace. It doesn’t matter how it spins on your neck, it will be something new. Fabulous and very creative, and I can see why you are happy with it! Keep on smiling! :)
Bev, I love Flamingo Toes and So many of your projects. I was especially touched by your story about your Grandma. (My grandma also had a vanity about which I have many happy memories. No one uses a vanity anymore. Seems a shame…) I have acquired a bit of old jewelry that is crying out to be made beautiful again, but I have been afraid to try it. Your necklace as inspired me to try it. Thanks for the encouragement! God bless!
Bev, I love Flamingo Toes and SO many of your projects. I was especially touched by your story about your Grandma. (My Grandma also had a vanity about which I have many happy memories. No one uses a vanity anymore. Seems a shame…) I have acquired a bit of old jewelry that is crying out to be beautiful again but I have been a little afraid to try it. You have given me the inspiration to go ahead and try it. Thanks for the encouragement! God bless!
What a lovely way to keep your Mamoo close to your heart. The necklace is beautiful and your tutorial is so helpful. I’ve collected old and antique jewelry for years. I have some pieces from my mother who passed away four years ago from cancer and a few pieces from my Nana who passed when I was a child. The others I found at yard sales, consignment shops and thrift stores. They inspire me, but have yet to use most of them. Your thorough tutorial gives me the push to just start. I have long hair that I often wear up and can not find interesting hair pins and barrettes that everyone else is wearing, so my plan is to make some of the pins, earrings and shoe clips into pieces to use for this. My problem is figuring out how to attach the pins to barrette blanks. I can glue some of them, but others won’t work well with glue. Also, the barrette often shows through the pin. Do you (or anyone else) have tips on how I can attach them to the blank barrettes? There are holes in the blanks, but I’m not sure how I can tie and knot them so they’re secure. I’d also love to find a source for better quality barrette blanks. Any sources would be greatly appreciated.
I know your original post is from a few years back, but I’m hoping it’s not too late for some help. I’m so sorry for your loss, but you’ve found a way to keep her spirit alive and with you.
Thank you for any help you can offer.
Peace, Jennifer
Thank you Jennifer.
For your barrettes, could you attach the pieces that you can’t glue to a small piece of felt, then either sew or glue that to the barrette piece? You might search Etsy if you haven’t looked there, they have a large selection of findings. Hope that helps!
Thank you, Beverly! I hadn’t thought about attaching to felt: excellent idea. I’ll also check Etsy for better findings.
I hope you have a safe, happy New Years Eve and 2015 is full of peace and joyful creativity.
Jennifer
It’s just Beautiful and you did such a great job thank you for sharing this, I would love to be able to do something like this, May give it a try, this is a great first time project for beginners, such as my self,and since I am always collecting old jewelry at yard sales, and wear some of it, I Will now have a fun time bringing new life back into the old jewelry, thanks to you,and your grandmother, God Bless you, and will be looking forward to seeing more of your beautiful pieces.