I’ve been thinking about making a new clutch for a while. I just couldn’t decide what to do.
What can I say? I’m wishy-washy.
So to solve the problem I came up with a fun idea! Today I am showing you the Applique Version of my Simple Clutch!
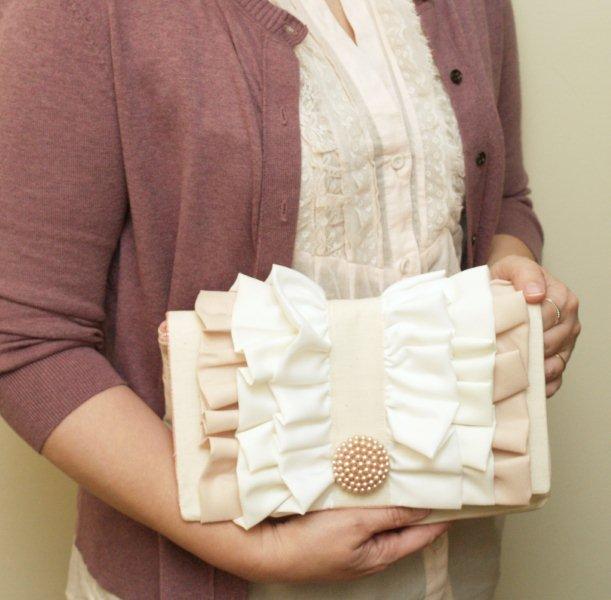
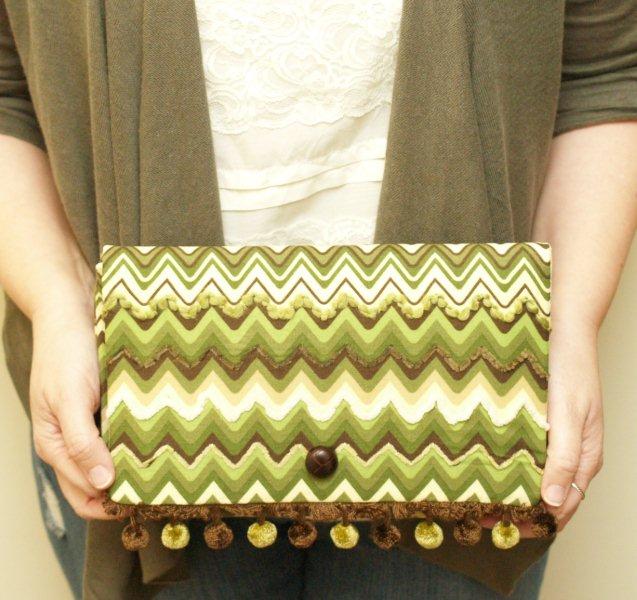
And then this week, I’m going to take the same pattern and show you ways to change it up – for completely different looks!
Ready for Version 1 – the Applique Simple Clutch?
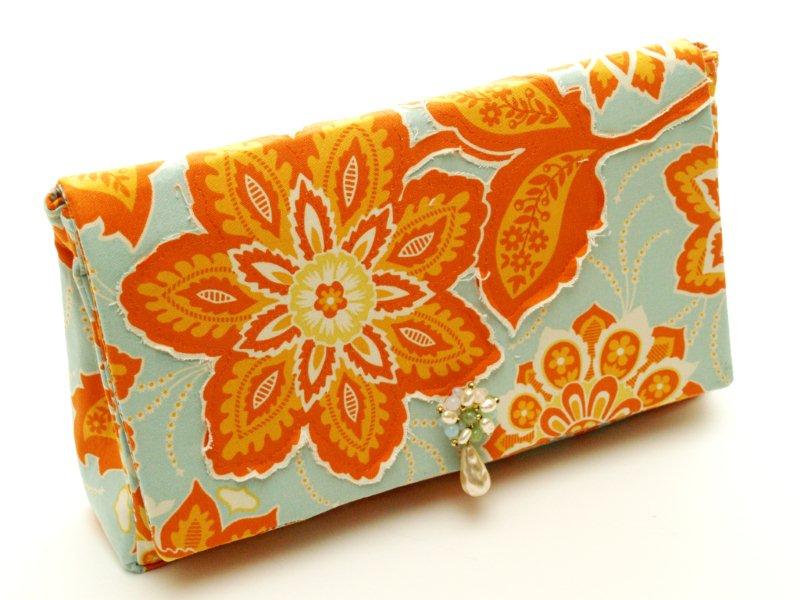
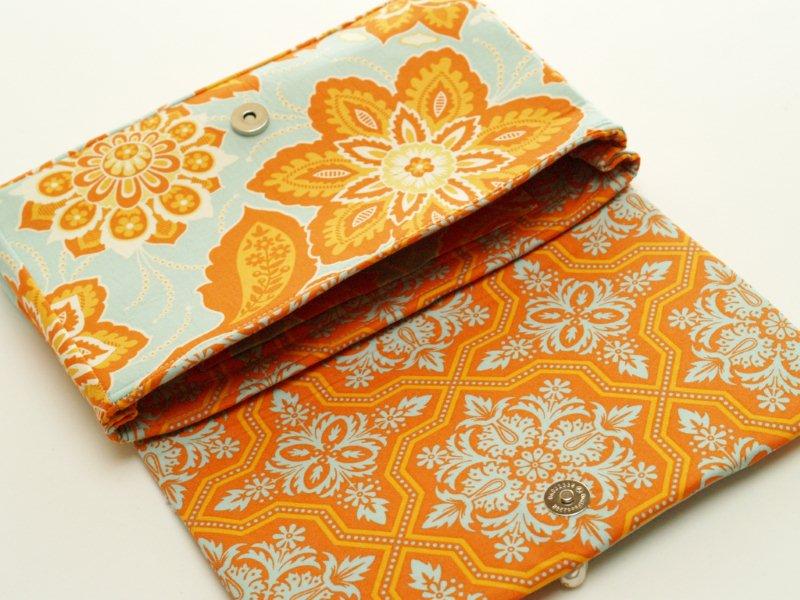
This clutch is fairly easy to sew – no zippers, just a simple snap closure. And it’s sooooo easy to change up for different looks and fabrics!
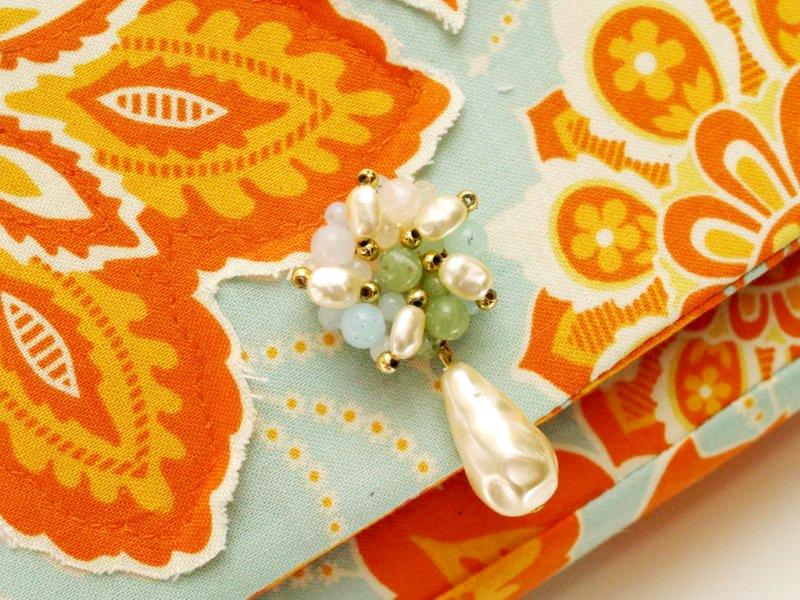
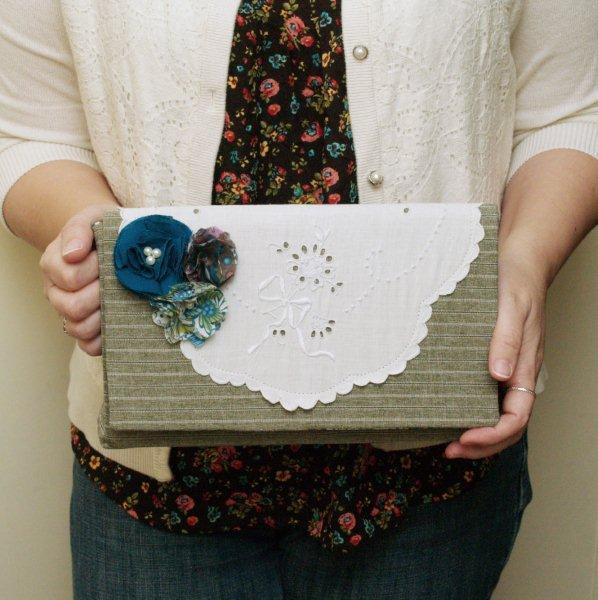
This version has a fun raw-edge applique on the front flap and is decorated with a vintage beaded closure.
Ready to get started? Here’s what you’ll need.
**Update: I had listed the fabric amounts incorrectly when I posted this – I had said you needed a fat quarter each for the outside and the inside fabrics. You will need 1/3 yard of each. So sorry about the error!!**
• 1/3 yard for outside fabric
• 1/3 yard for inside lining
(I used Joel Dewberry, Heirloom by Free Spirit, Ornate Floral in Amber & Tile Flourish in Amber)
• 1/4 yard of fusible heavyweight Pellon interfacing (Peltex 71F – Ultra Firm Stabilizer)
• 1/2 yard of fusible interfacing (950F – fusible nonwoven interfacing)
• 1 magnetic snap closure
• 1 vintage beaded item (mine was a clip earring with the closure cut off)
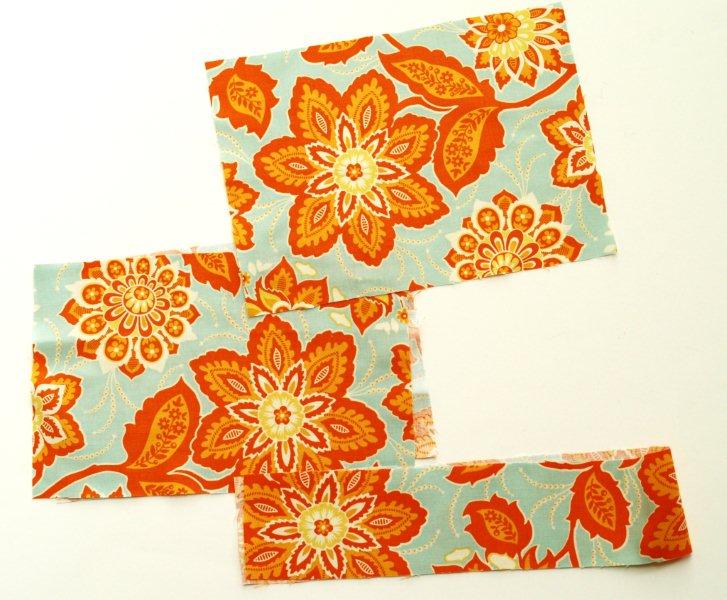
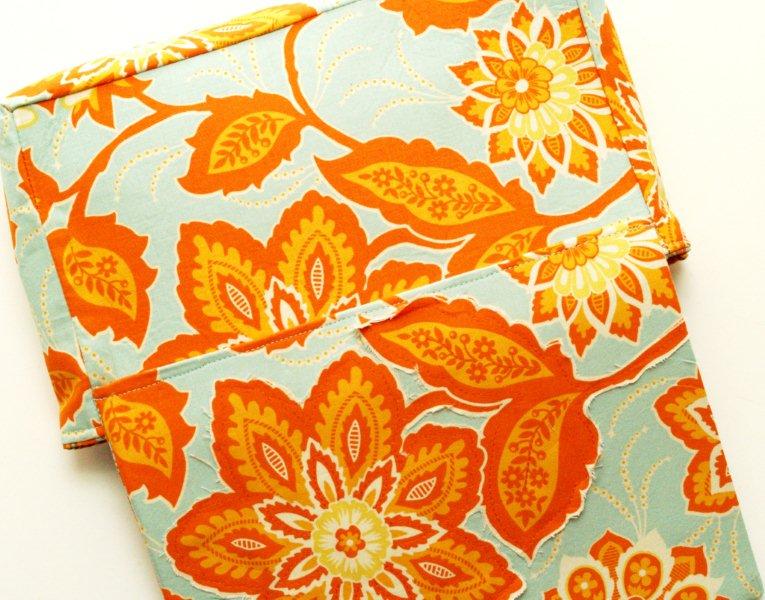
Begin by cutting out your outside pieces. You’ll need 2 pieces 11″ x 7″, 1 piece 11″ x 8″ and one piece 3″ x 25″.
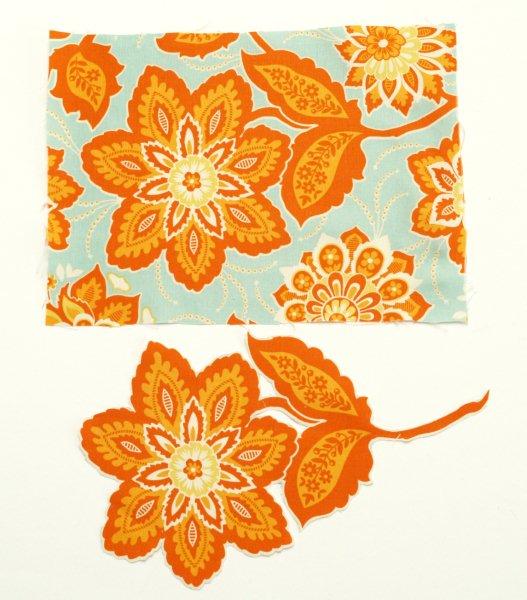
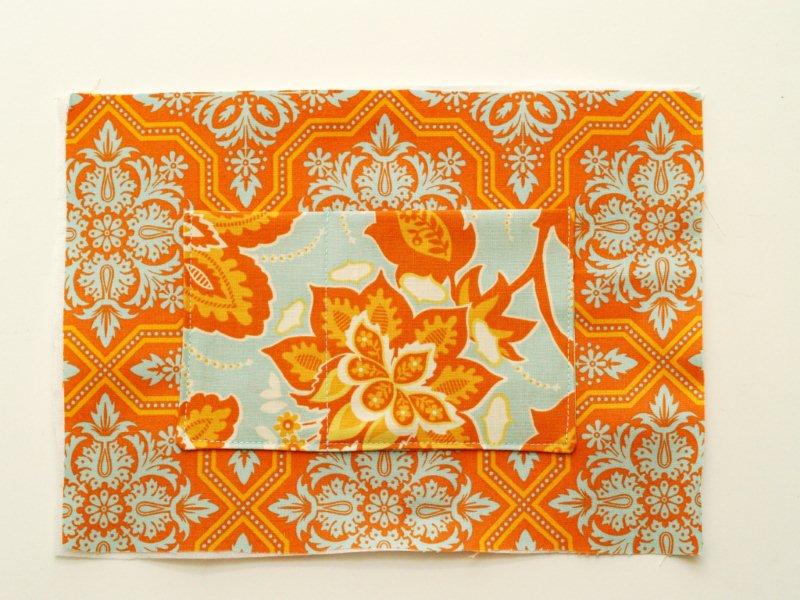
When you cut out the pieces, pay attention to the placement of the 11″ x 8″ piece that will be the front flap. Center the piece on a section of fabric that has a feature you want to highlight, like a large flower, bird, whatever.
Make sure that there is another section of the fabric with this same design that will be left after you cut out the other pieces.
Cut out the section of the fabric that you want to use for the fabric applique on the front flap. It should match the design on the front rectangle piece.
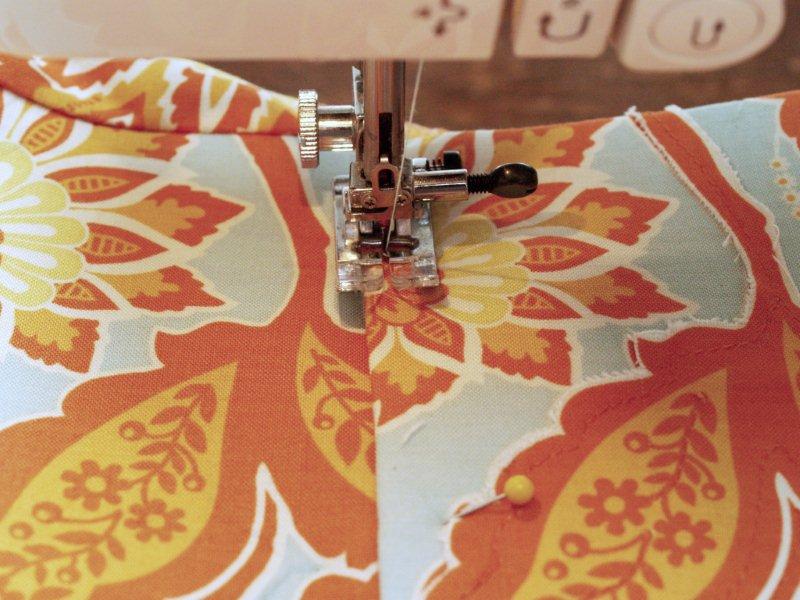
Lay the applique piece over the fabric rectangle so that it covers the piece below it.
Sew the applique on, about 1/4″ inside the edge, following the lines of your design.
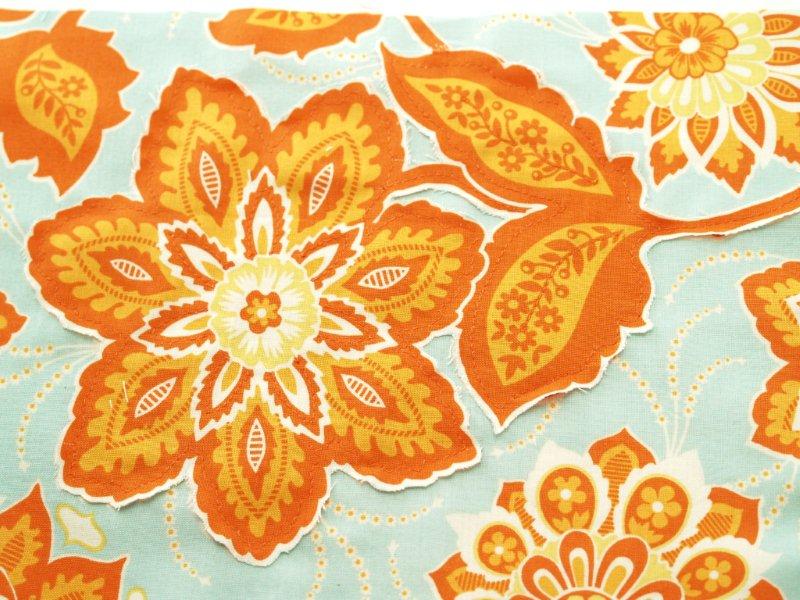
This will give you a subtle applique look with frayed edges.
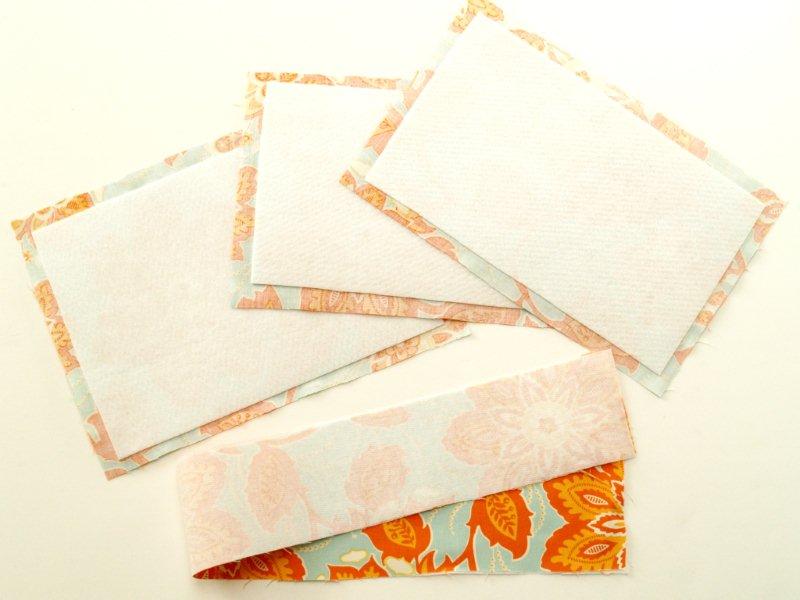
Cut out your Ultra Firm Stabilizer – 2 pieces 10″ x 6″ and 1 piece 10″ x 7″. Cut out fusible interfacing for the two long, thin rectangles and all lining pieces.
Iron your interfacings onto the outside fabric pieces.
Sew the long rectangle piece to one of the 11″ x 7″ rectangle pieces along the two short sides and the bottom. Use a 1/2″ seam allowance.
Clip the corners up to the seam but not through it so they will lay nicely.
Sew the other 11″ x 7″ rectangle to the other side of the 3″ piece.
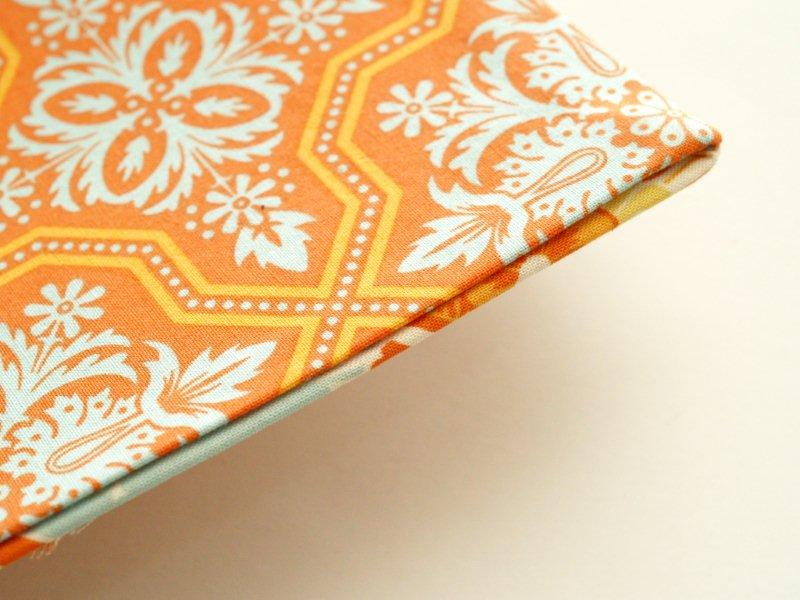
Turn the rectangle right side out and press.
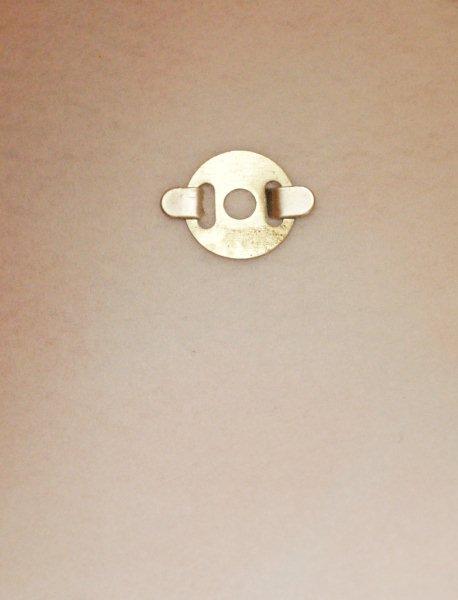
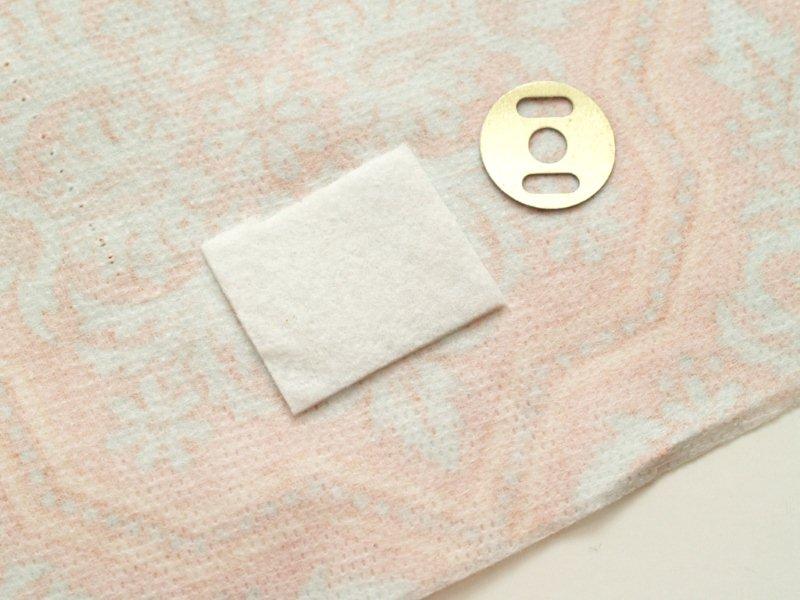
Mark the placement of the large side of the magnetic snap. You should have a snap piece and a metal piece with three holes. Use the metal piece as your guide.
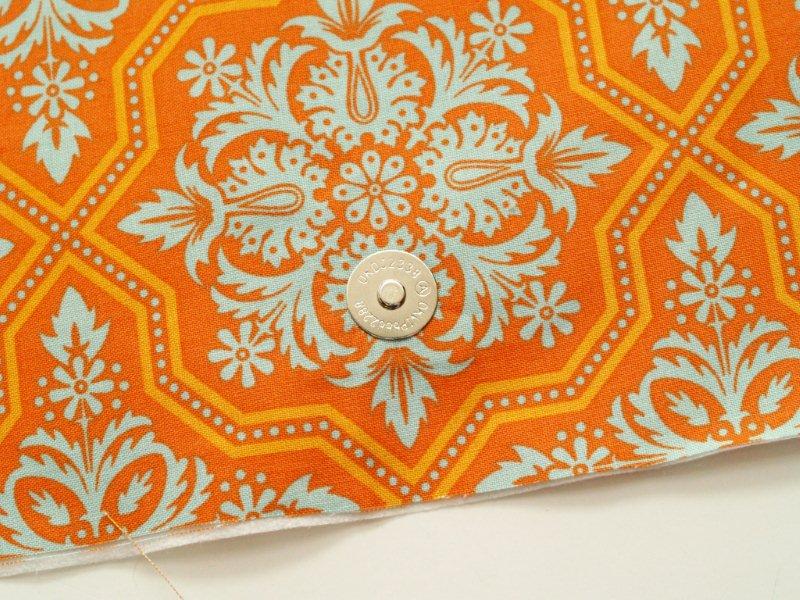
Place the piece in the center of the front rectangle, 1 1/2″ up from the bottom seam. Draw marking lines inside the holes.
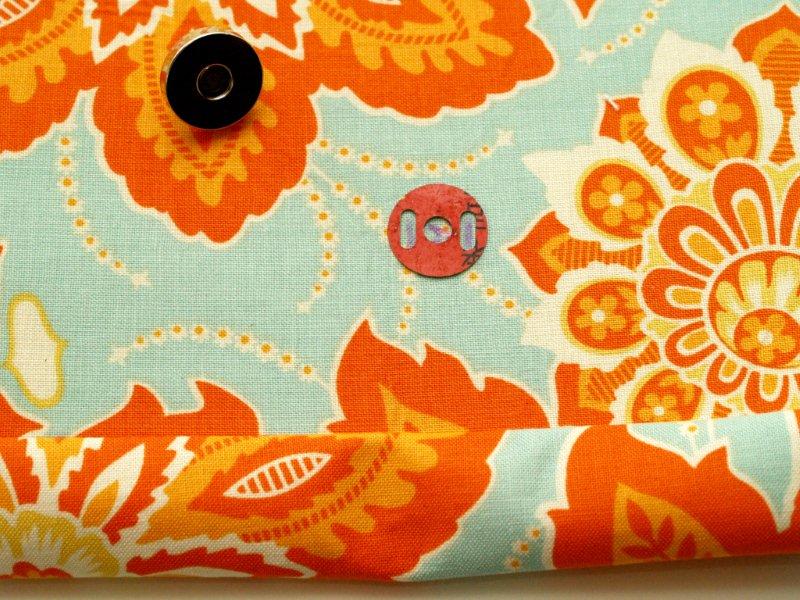
Cut small slits in the fabric and interfacing where you have marked it. (A sharp exacto knife works great for this.)
Place the two prongs of the snap through the slits. On the back side (the interfacing side) slip the metal piece over the prongs and fold them to the outside.
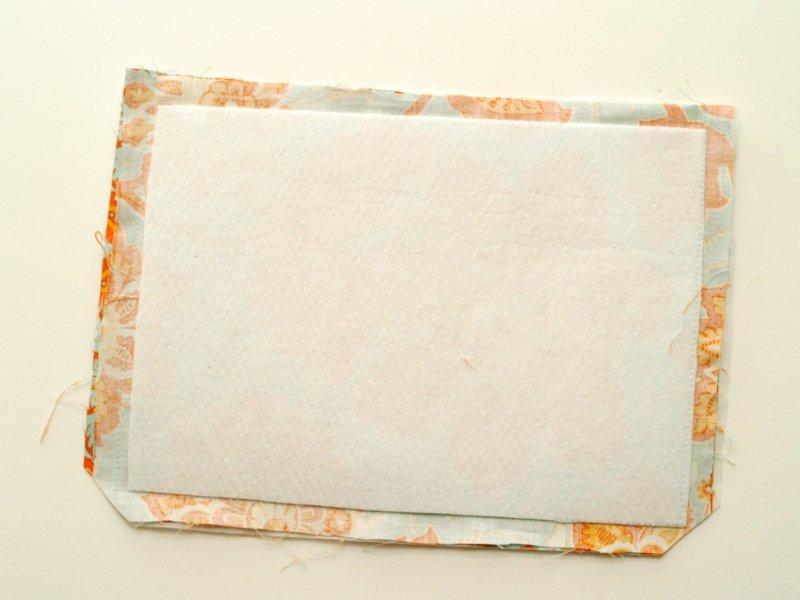
Here’s what it looks like on the inside.
Now cut out your lining pieces. You’ll need 2 pieces 11″ x 7″, 1 piece 11″ x 8″ and one piece 3″ x 25″.
You will also need a piece of your outside fabric 9″ x 8″ for the pocket.
Iron your fusible interfacing pieces to all the lining pieces.
Fold your pocket piece in half, right sides together, to make a 4 1/2″ x 8″ rectangle. Sew the three open sides together, leaving a small opening at the bottom for turning.
Clip the corners.
Turn right side out and press.
Center the pocket on one of the 11″ x 7″ lining pieces, 1 1/2″ from the top edge.
Sew the pocket to the lining piece on the two short sides and the bottom, right next to the edge. Sew a seam down the pocket to divide it.
Mine is 2 1/2″ from the left side.
Sew your lining pieces to the 3″ x 25″ piece like you did with the outside pieces – but leave a section on the bottom open for turning.
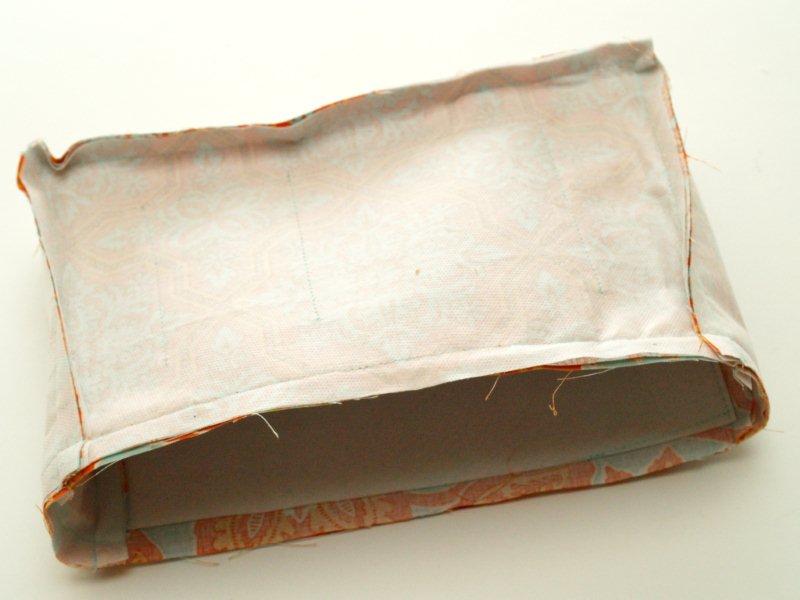
Place the outside section inside the lining pieces, matching up the top edges and seams. Make sure that the pocket lining piece is matched up with the back piece of the bag, not the piece with the snap.
Sew around the top edge with a 1/2″ seam.
Turn the bag right side out. Press all those wrinkles out.
Sew up the opening in the lining by hand and tuck the lining into the outside of the bag.
Top stitch around the top edge of the bag, 1/4″ from the edge. This might be tricky since the interfacing is so stiff. But you’re tough. You can handle it.
Now we’re going to add the other side of the snap to the front flap lining piece. Mark the placement for the snap piece, in the center of the lining piece, 1 1/2″ up from the bottom of the piece.
On the back of the lining piece, iron a small square of the heavy-duty stabilizer. This will reinforce the snap so it doesn’t pull out over time.
Add the snap to the lining piece by marking, then cutting slits like you did for the other piece.
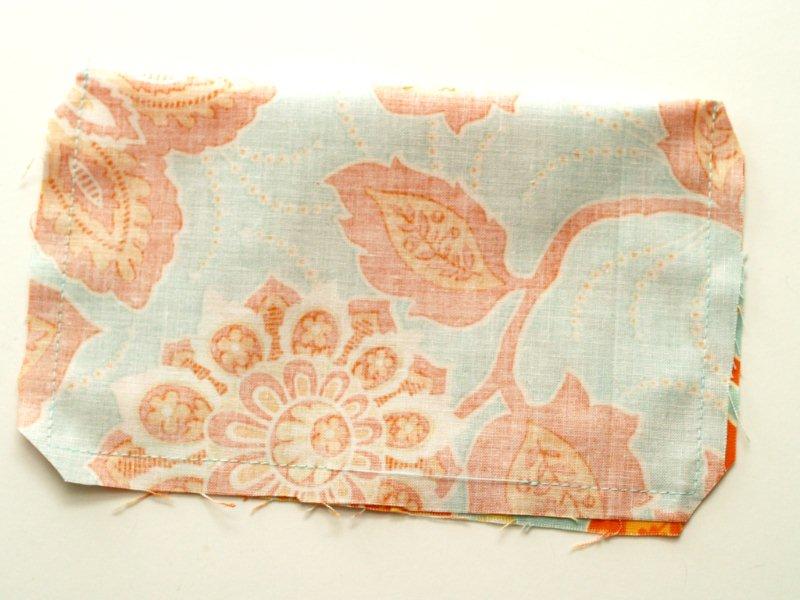
Place the two front flap pieces, right sides together. Sew the two side seams and the bottom seam with a 1/2″ seam allowance.
Clip the bottom corners.
Turn the piece right side out and press. Clip a little out of the seams at the top open section. Tuck the open ends in and press them down.
Pin the flap to the back side of the clutch, so that the wrong side of the front flap is facing the right side of the back of the clutch. The front flap should overlap the back piece by 1″.
Sew the front flap piece to the back of the clutch, 1/4″ from the folded edge of the front flap.
(Again, this will be a little unwieldy. A heavy duty needle will help.)
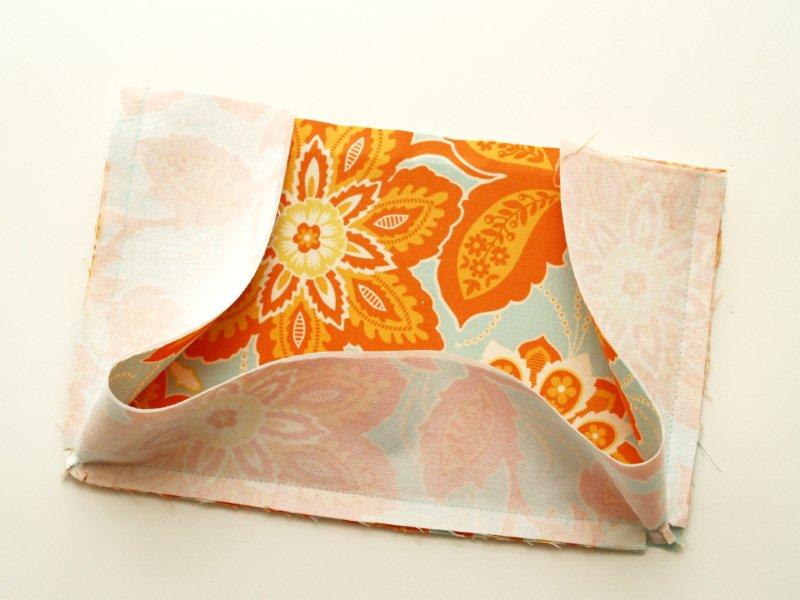
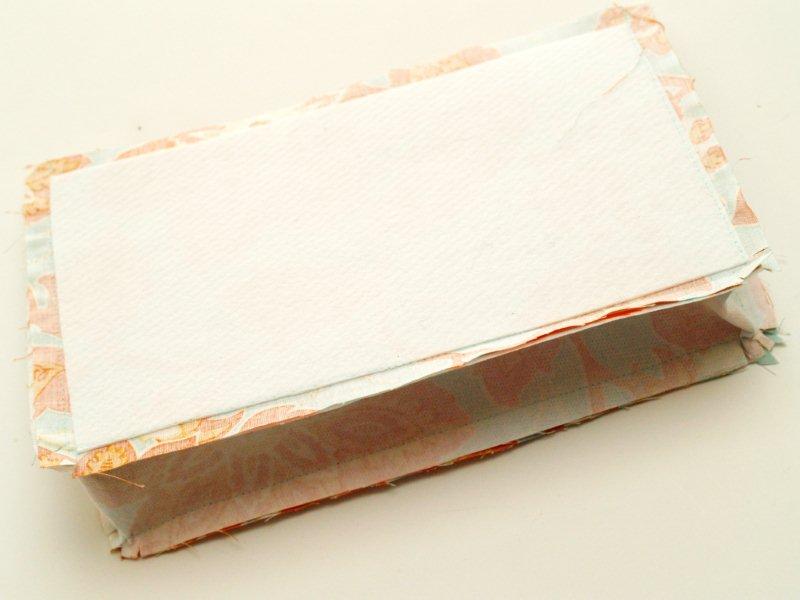
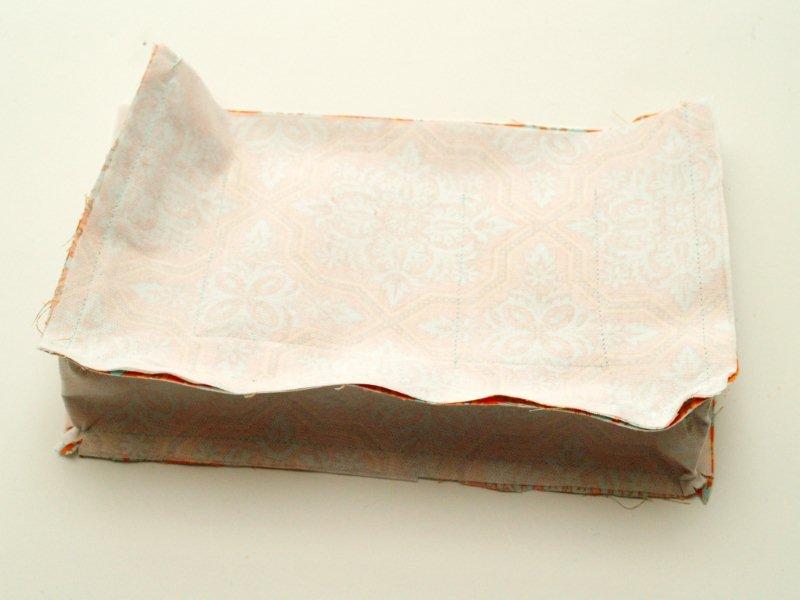
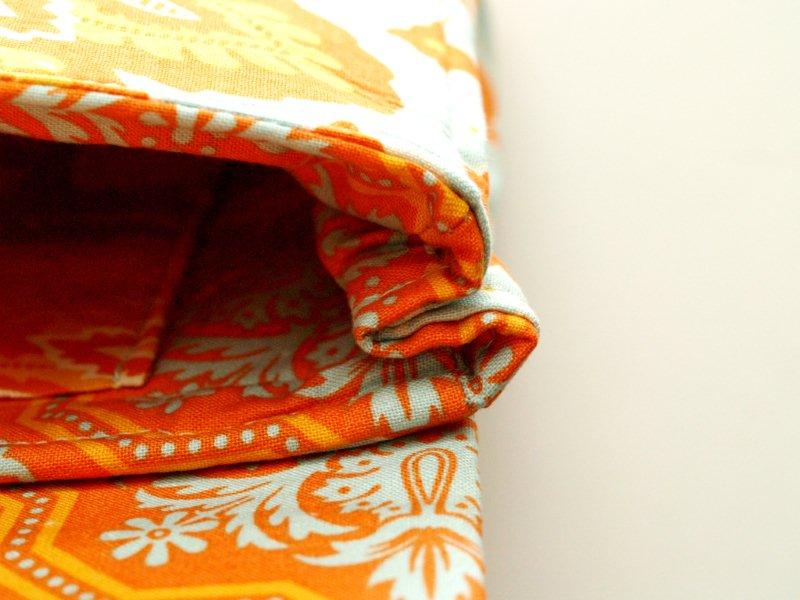
Pinch together the top of the clutch, with middle section folded to the inside, like the picture below.
Tack this tucked section in place by hand with a few stitches through the fold.
Now if all is right with the world, your front flap should fold over and snap closed!
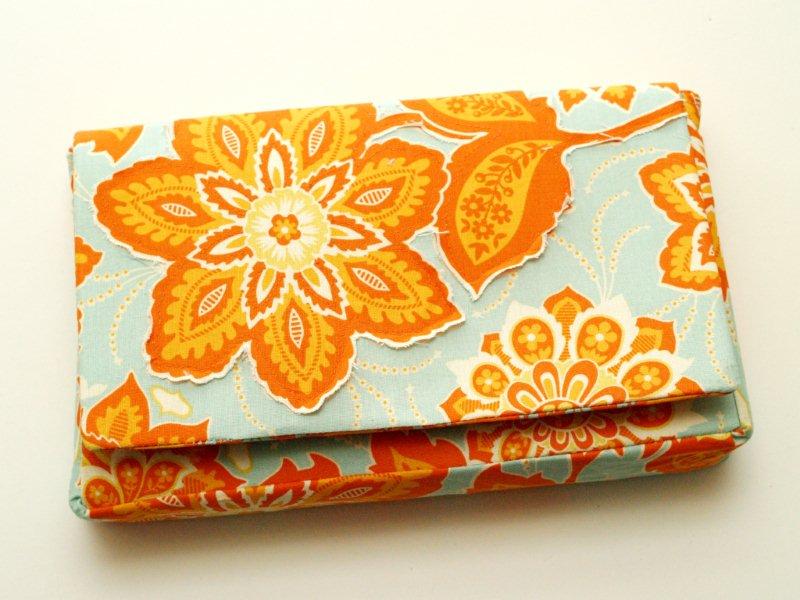
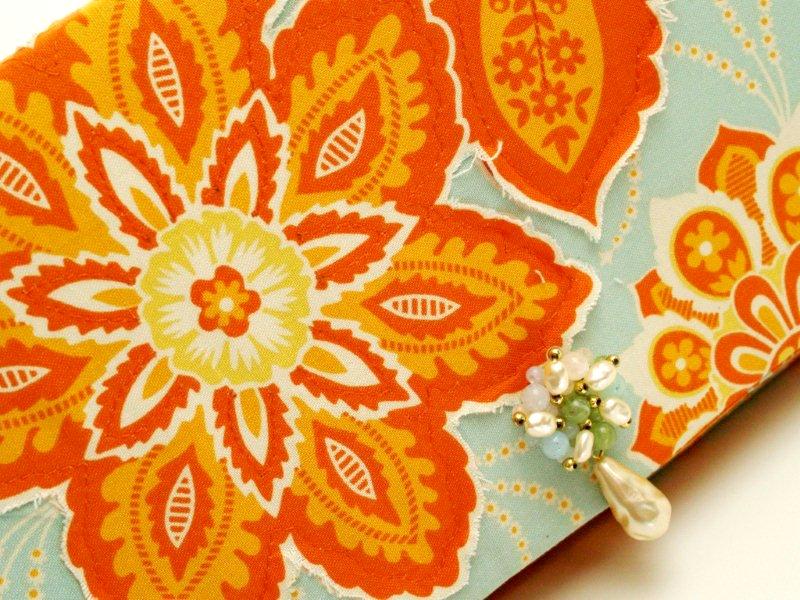
If you want, add a little fun decorative piece at the bottom of the front flap. You could use a button, pin, anything really that matches your style and fabric. This will look like the outside of the snap, but it’s just for decoration.
I used one of my Grandma’s clip on earrings. I cut off the clip portion with wire cutters and glued it to the front of the flap, over the snap.
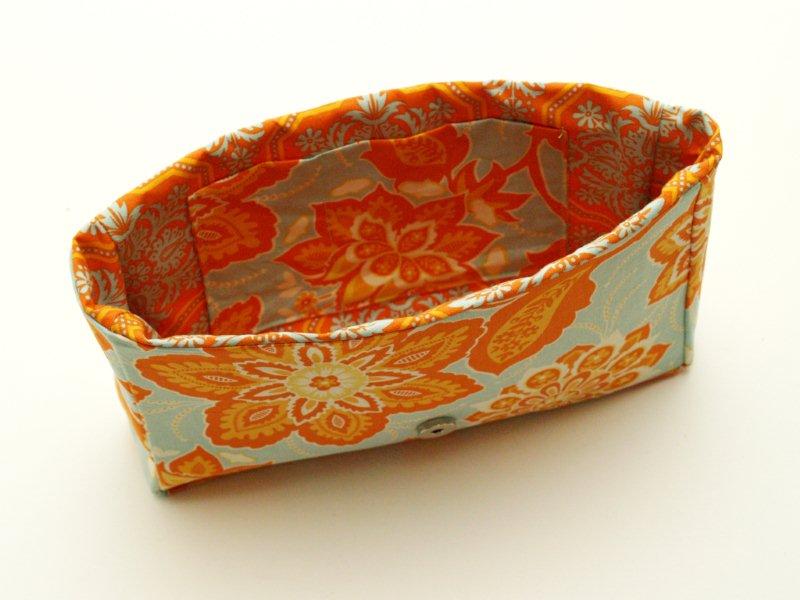
And that finishes it up!!
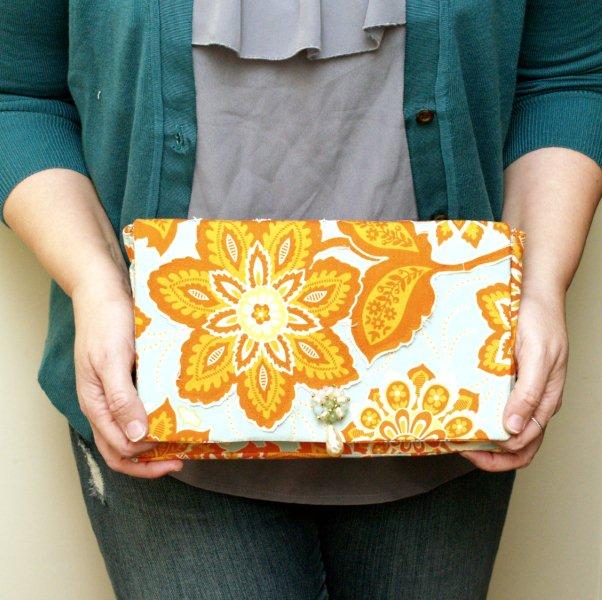
Such a cute clutch – with plenty of room for your wallet, phone, and keys – and we even have a pocket for lip gloss!
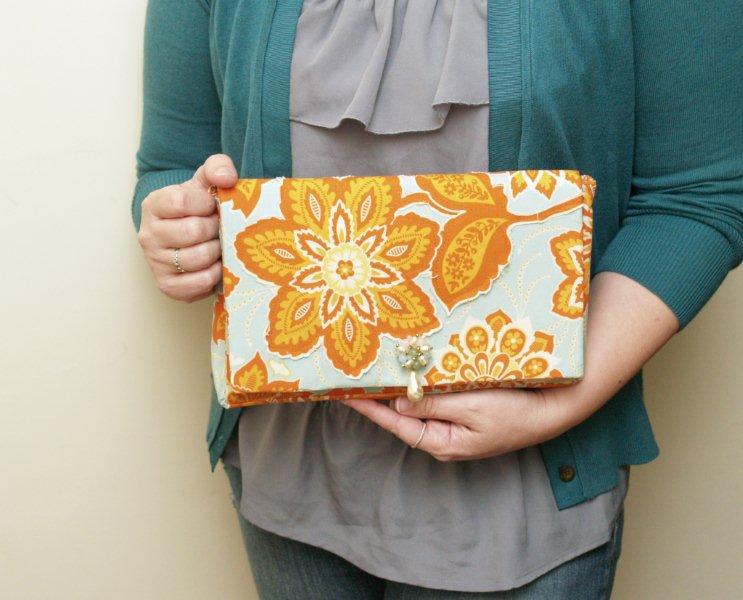
I just love the fabric of the clutch!! So perfect for brightening up an outfit.
Even if your shirt is all wrinkled. Oh. That’s just me.
So that’s our Applique version – come back this week and see what else I do with the same pattern!
I’d love to hear what you think!
*Update – you can check out the other versions below!


Awesome! How perfect it is..Lovely floral print !!!! :)
wow!…that, I would love to make! It has been awhile since I last used a sewing machine! I used to be good with it..mmm at least that I think so….
Adorable and wonderful directions! I enjoy reading your blog and my post today I made a version of your Astrid coin purse and noted you as my inspiration :-) Great job!
Cindy
This is so cute! I’m a huge fan of applique. I especially LOVE you beaded closure. Great pictures :)
Cute! Cute! Cute!! One day I will master my sewing machine…until then I will just drool over everything you make! Love the fabric and those colors just pop. Your sweater is pretty cute too!
It is gorgeous Bev! Oh the colors make me happy (and it is dreary here today – so I need that!). Your tutorials are always so good!
Love this clutch! The tutorial is great and love the fabric choice!
this is a super cute clutch. i hope i get to try it sometime. i just found your site via a blog hop & will take a look around now! drop by sometime. theresa @ http://www.dearcreatives.com/
PS love the fabric & the tassel you added!!
The cluth is so addorable. Print is / perfect. Your directions are something I can do. Self taught sewer. Small stuff. Have so much material OH IM SO EXCITED. Thank You. Happy Heart Dayxxxxx
Your clutch looks so sweet and I love the fabrics you used! :) Thanks for the tutorial!
Super cute Bev. Great job. Thank you.
Very nice!
Thanks for the great tutorial, Bev; I think I’m now brave enough to make my very first clutch! And, I LOVE the vintage earring!
That is so adorable! LOVE those fabrics, and the whole way you did the applique. xo
This is absolutely adorable, Bev!!! I love the bright pattern, and the clutch itself is too cute. Its even bigger than I originally thought after seeing you model it. I can’t wait to see what else you do with the pattern!
SUPER CUTE!!
Thanks for sharing, can hardly wait to see more!!
Thank you! I have been wondering how those magnets are sewn in!
Visiting through QuiltStory’s link-up.
Mrs.Hearts
http://www.busyhandsquilts.blogspot.com
What a beautiful clutch!
Visiting through Fabric Tuesday…Such a cute clutch!
This is beautiful! Love the vintage earring detail.
I do have one question: you call for fat quarters, but the long rectangles are 3″x25″. How do I cut a piece this size from a fat quarter? Thanks!
oh dear Amanda!! You are so right! I’m glad you caught that. Sheesh. I should have paid more attention to my fabric size. :(
I will correct the directions. You will need 1/3 of a yard.
Thanks for pointing that out!
Oh I love it, such a cute clutch! I love your fabric choice. I featured this at So Creative today.
http://soverycreative.blogspot.com/2012/02/simple-appliqued-clutch.html
Gorgeous & thanks for a great tutorial :)
The lining and the fabric you chose is so cute – this seems fairly straight forward! Thanks for sharing!
Love it! I wish I knew how to sew…I have a sewing machine but it intimidates the heck outta me!
So darling, Bev – this version, and the vintage one! I can’t decide which I love best!
I love this! I am some of the fabric, too, so I might have to give this purse a try. Thanks for the great tutorial!
Bev. Seriously. You are too much! This is absolutely gorgeous!
I love this purse, Thanks for sharing! You did an amazing job :).
Mrs. Delightful
ourdelightfulhome.blogspot.com
That is gorgeous! I’m in love with the colors you chose!
Love this! We just posted our 2nd Kitchen Fun and Crafty Friday Link Party and would love for you to share this! http://kitchenfunwithmy3sons.blogspot.com/2012/02/kitchen-fun-and-crafty-friday-link_16.html
You make this look so easy! I can’t sew at all but I might have to pin this in case I ever get brave ;-)
Thanks for the great tutorial. I am featuring this on my blog tonight.
Love this sweet clutch. You have been featured in today’s Saturday Spotlight Talent Show. XO, jen-
Lovely tutorial. Thanks!
i absolutely LOVE the clutch. i found your blog thru the grow your blog linky party and now follow!
Bev!! I don’t know what to say other than that you are AMAZING!!! The fabrics you chose are lovely, and the entire project is incredible!!
You mean….I could actually make this? I’m often daunted by sewing projects and just sit back and admire and sigh, but I’m feeling a twinge of excitement after reading your tutorial knowing that this clutch is well within my abilities (and therefore my “clutches”).
Thank you Bev!!!
What a great series! You are very talented. Great pictures too!
Love the tutorial! I started it tonight, but had a lot of trouble sewing the 3×25 piece to the 11×7 piece – specifically the corners. Do you have any tips? Tomorrow I’ll be ripping out my seams and trying again. I won’t give up!
Love it! But HELP! Any tips for the corners? I have made totes, purses and bags, but always stay away from this type of corner. I just cannot get it and end up ruining the bag before I really get started. Please! Helpful hints on the corners! Thanks!
Hi Angela! I’m so glad you like the bag! I would recommend making sure you trim the corners and clip them to allow them to turn right side out easily. That way you’ll be cutting down on the bulk in the corners and making for a nice fine point. If you need more help, feel free to send me an email! :)
May I ask a question about the Simple Clutch instructions: you say to cut one 11×8″ piece from outside fabric for the flap. However, on the 5th page (as printed), you say, “Place the two front flap pieces…” But we only cut one. Could you help me out? Thank you. Marilyn
Hi Marilyn,
One of the pieces is the outside fabric and one is the lining. There is a section about halfway through where it says to cut out the lining pieces. Hope that helps!
Thank you so much for all your help. The bag came out beautifully, and I am now ready for the wedding Saturday. Thank you again–everyone has commented on my photo of the finished bag. I’ll let them know where I got the pattern!
That’s great Marilyn! I’m so glad the bag turned out and you are happy with it! Thanks!
Sorry, one more question: pattern says to cut out the firm stabilizer, then cut out fusible for the “two long, thin rectangles and all lining pieces.” Are the two long pieces the 11×7″ pieces for the outside of the bag? Thank you. Marilyn
The long thin rectangles are the 3″ x 25″ pieces that are the sides (outside and lining) of the clutch. :)
Hello dear! First of all im really thankful you shared the tutorial. That’s so generous of u! Actually loved the clutch n went forward with the stitching.I found that the 3″ by 25″ strip, while stitching went larger than the 7″ by 11″ rectangle.I cut the excess part. Is it possible? or its a stitching mistake made by me?
Thank you for sharing, Bev! Love your clutches and love the fabric!!!