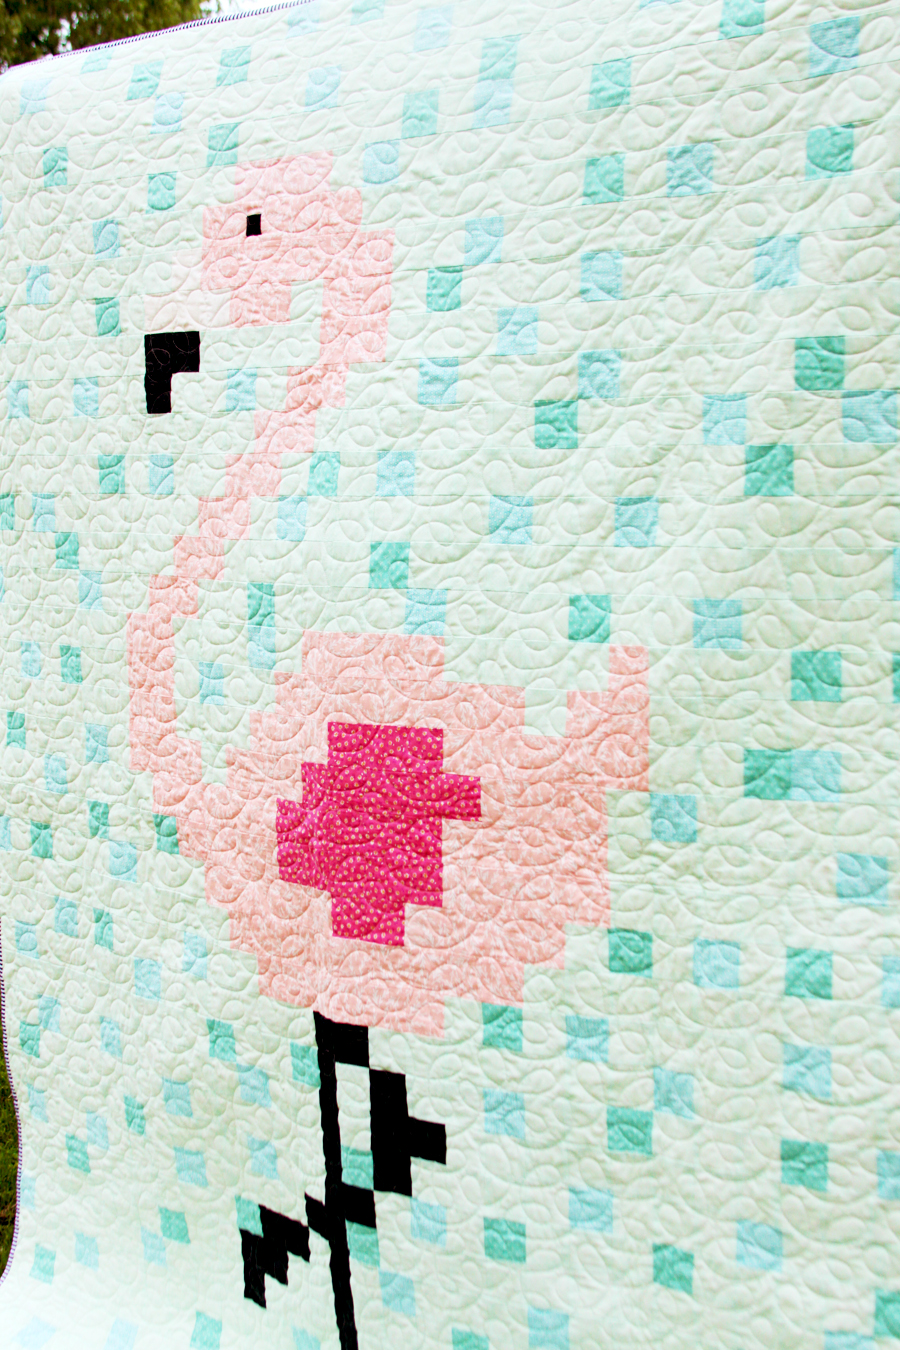
A few weeks ago I shared this fun new quilt pattern over at Fabric.com – in case you missed it I’m sharing it here. I have a fun new FREE quilt pattern for you! This Fun Flamingo Quilt with free pattern is a great project to show off your flamingo style and it’s just in time for Summer!
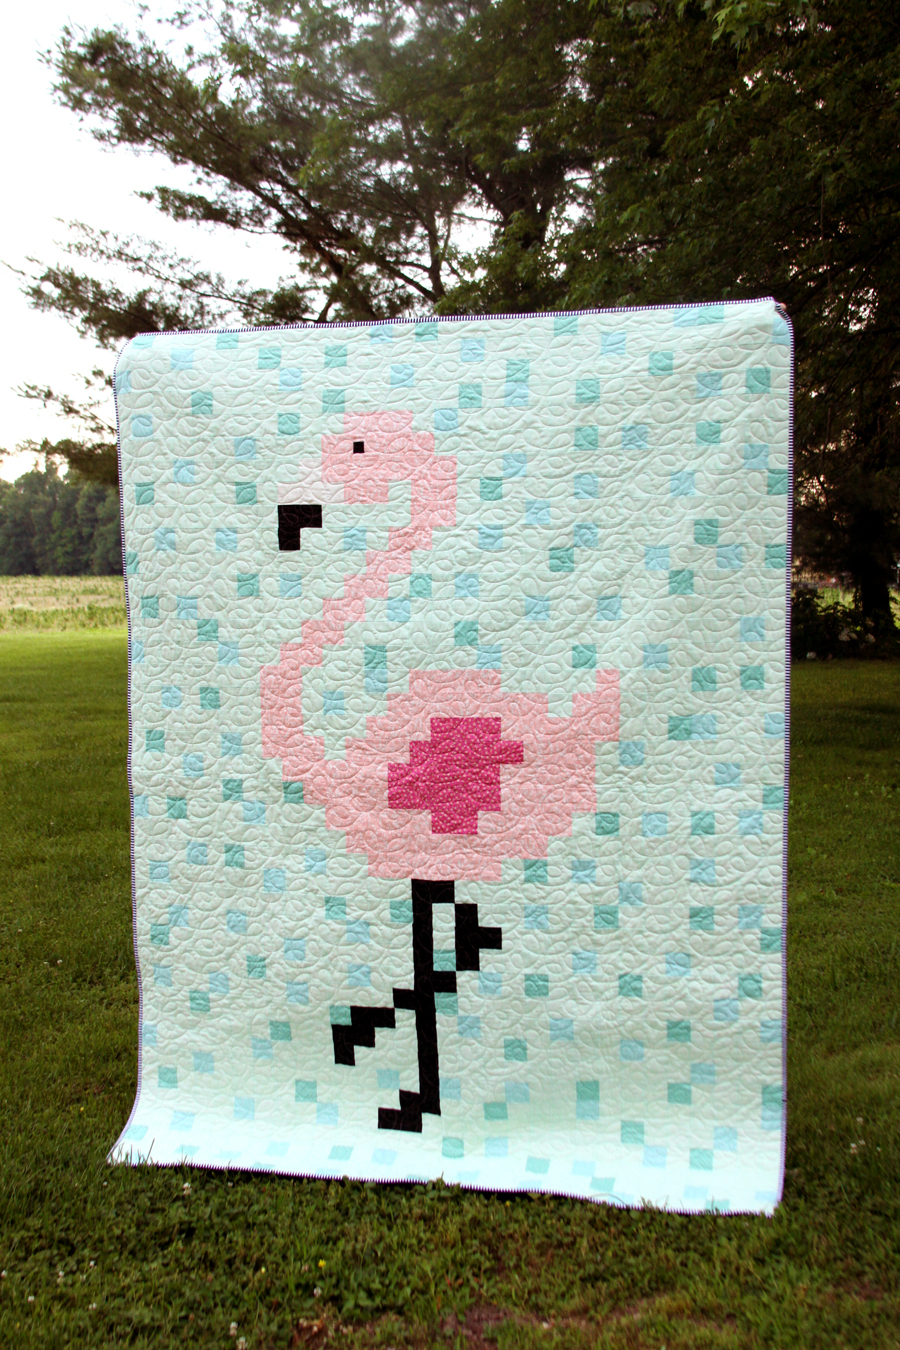
It’s a big throw quilt made up of pixellated squares so it’s super easy to sew! No special angles or complicated piecing here. Just rows of bright summer fabrics that make up this cute tropical flamingo!
I’m so in love with the aqua colors in that background – it reminds me of beaches and hot summer days. This is a great beginner quilt too! It’s made up of simple squares so if you can sew a straight line – you can sew this!
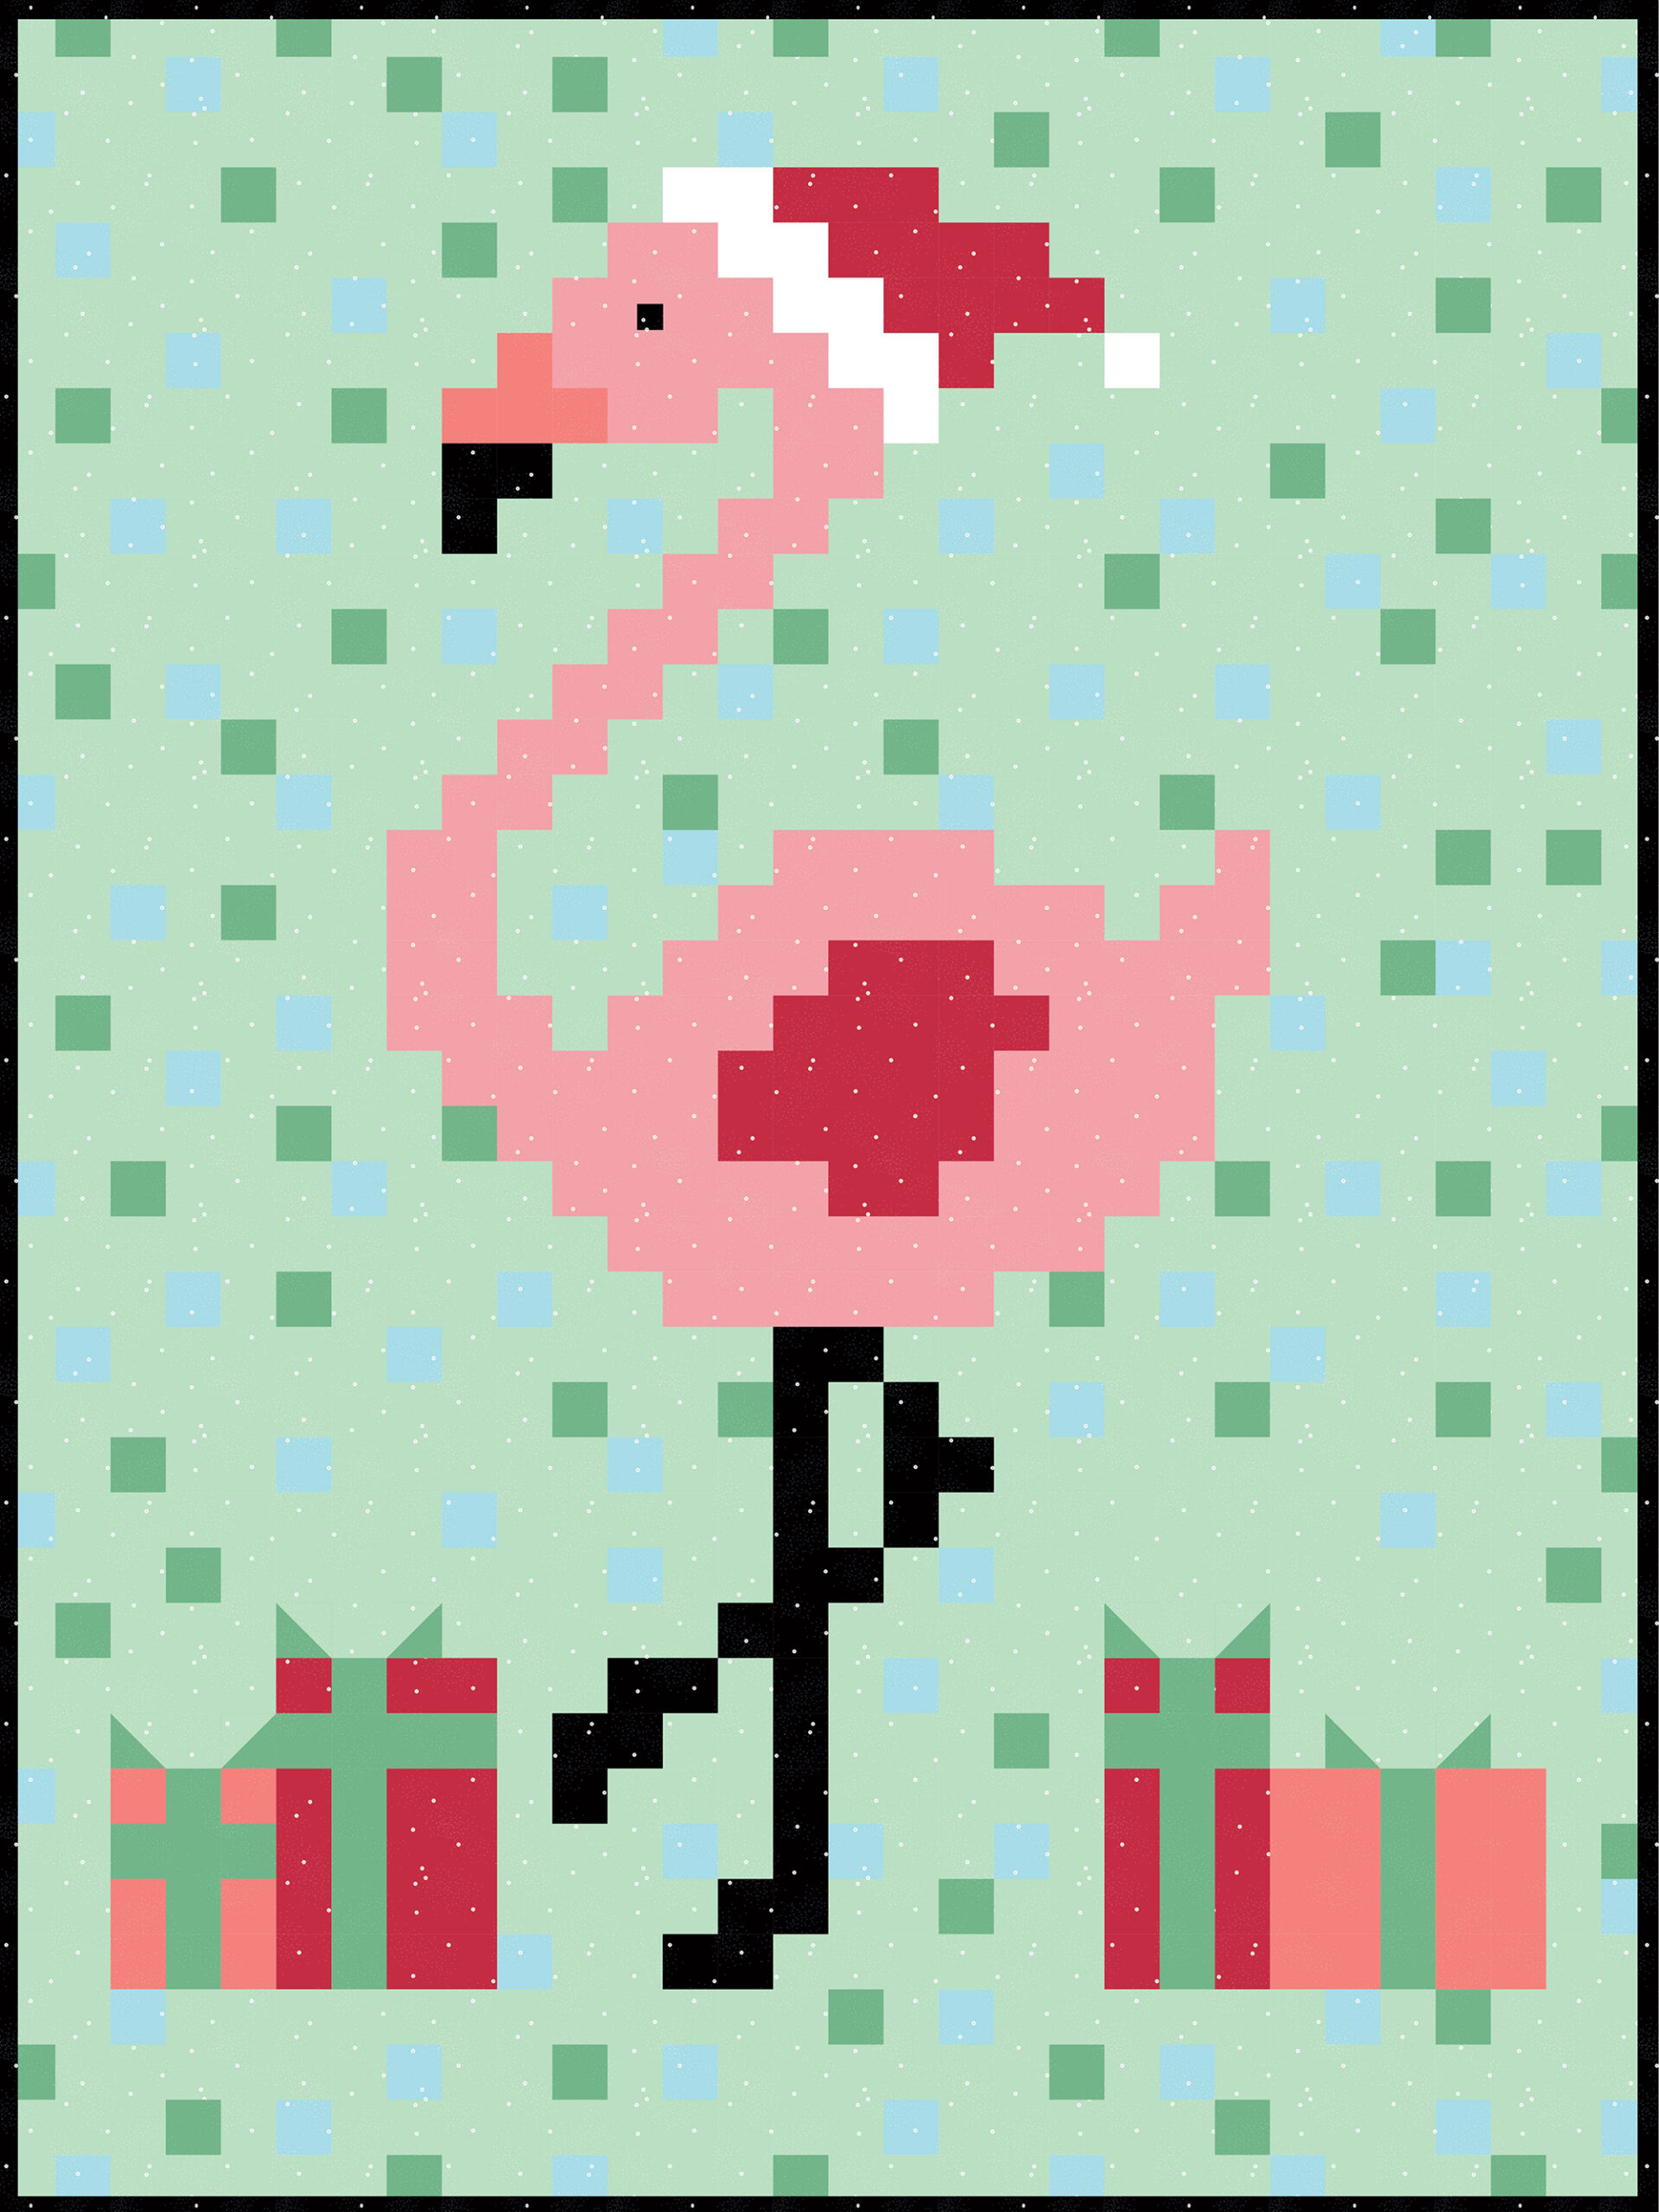
So let’s dive in!
Materials: (Finished Quilt Size – 63″ x 83″)
This fabric colors and prints are just suggestions! You’ll want a pretty light color for your background, then choose two highlighting fabrics that are a little different. Play with colors by saving swatches to the Fabric.com Design Wall – this will let you look at them all in one easy spot!
Materials list contains affiliate links.
- Main Aqua Print in Background – 3 1/2 yards
- Highlight Blue Print in Background – 1/2 yard
- Highlight Green in Background – 1/2 yard
- Medium Pink for Flamingo Body – 1/2 yard
- Dark Pink for Flamingo Wing – 1/4 yard
- Light Pink for Flamingo Beak – 1/4 yard
- Black for Beak and Legs – 1/4 yard
- Flamingo Print for Backing – 5 yards
- Black and White Stripe for Binding – 1 yard
- Batting
Click here for the free Flamingo Quilt Pattern
Or, if you would like to purchase a low cost, ad free PDF version of this pattern that is designed for easy printing, visit my shop. Thanks!
This quilt looks complicated but it’s really not – it’s just a matter of sewing the squares together in blocks, then sewing the blocks together. It takes some time but it’s totally worth it!
Print out the quilt layout before you get started. This will help you know where the different colors go and how to sew everything together. I also realllllly recommend having a rotary cutter and mat for cutting out your squares. The process will go much quicker and be way more accurate over cutting them out by hand.
Cut out of your fabrics the following 2 1/2″ x 2 1/2″ squares.
Pale Pink for Beak – 5 squares
Med Pink for Flamingo Body – 108 squares
Dark Pink for Flamingo Wing – 22 squares
Black for beak and legs – 29 squares (cut another small 1″ square for eye)
Main Aqua Background – 854 squares
Highlight Blue – 101 squares
Highlight Green – 80 squares
Keep workable stacks of your fabrics near your sewing machine so you can pull each color square as needed.
Assembly instructions: (all seams are 1/4″ seam allowance)
Start with the top left block square on the pattern. Chain stitch together the 1st and 2nd little blocks in the top five columns by stitching the blocks right sides together along the right edge.
Cut the blocks apart. Sew the column 3 blocks to the right side of the column 2 blocks.
Repeat with columns four and five. Now you should have 5 rows of 5 squares each.
Press the seams to one side on the back but alternate which side you press to for each row. For example, press the top row to the left, the second row to the right, and so on. This will help the seams nest together.
Sew row one to row two – right sides together and meeting seams. I found it easiest to pin the first and last seam, the middle two usually met up at that point. I also didn’t freak out if they were a little off. There are so many seams in this – and some of them will be off. If you adjust to that going in, you won’t worry so much when it happens. :) Continue sewing the rows together until you have a 5 x 5 block.
Press all the row seams down towards the bottom of the block. Now you’ve finished Block 1!
Repeat these steps for the next block section but press all the row seams up towards the top of the block. Continue on across the top row of the quilt until you have six 5 x 5 blocks. These are the blocks in the top row of the pattern.
Sew block one to block 3, right sides together and lining up seams. Continue sewing the blocks together until you have one long row. Press the seams you just sewed open. This is Row 1. Set this aside.
Refer to the pdf pattern and repeat these steps down each row of the quilt. Because there are so many little squares, I found it easier to assemble each row as I completed the blocks. This keeps each block in the correct row and you can make sure you have the alignment and direction correct.
Before you start piecing the rows together, applique on the eye by placing it on the flamingo and zig zag stitching around the four sides. If you have fusible webbing you can hold it in place before stitching with that. Refer to the pattern for placement.
Once you have all eight rows finished, begin sewing the rows together. Sew row one to row two, lining up the block seams and pinning. Next, sew row 3 to row 2 and so on down the quilt. Press the long row seams open and give the quilt a final pressing.
Quilt and bind as desired. Mine was quilted with an all over loopy pattern by Julie Williams. She did a great job!
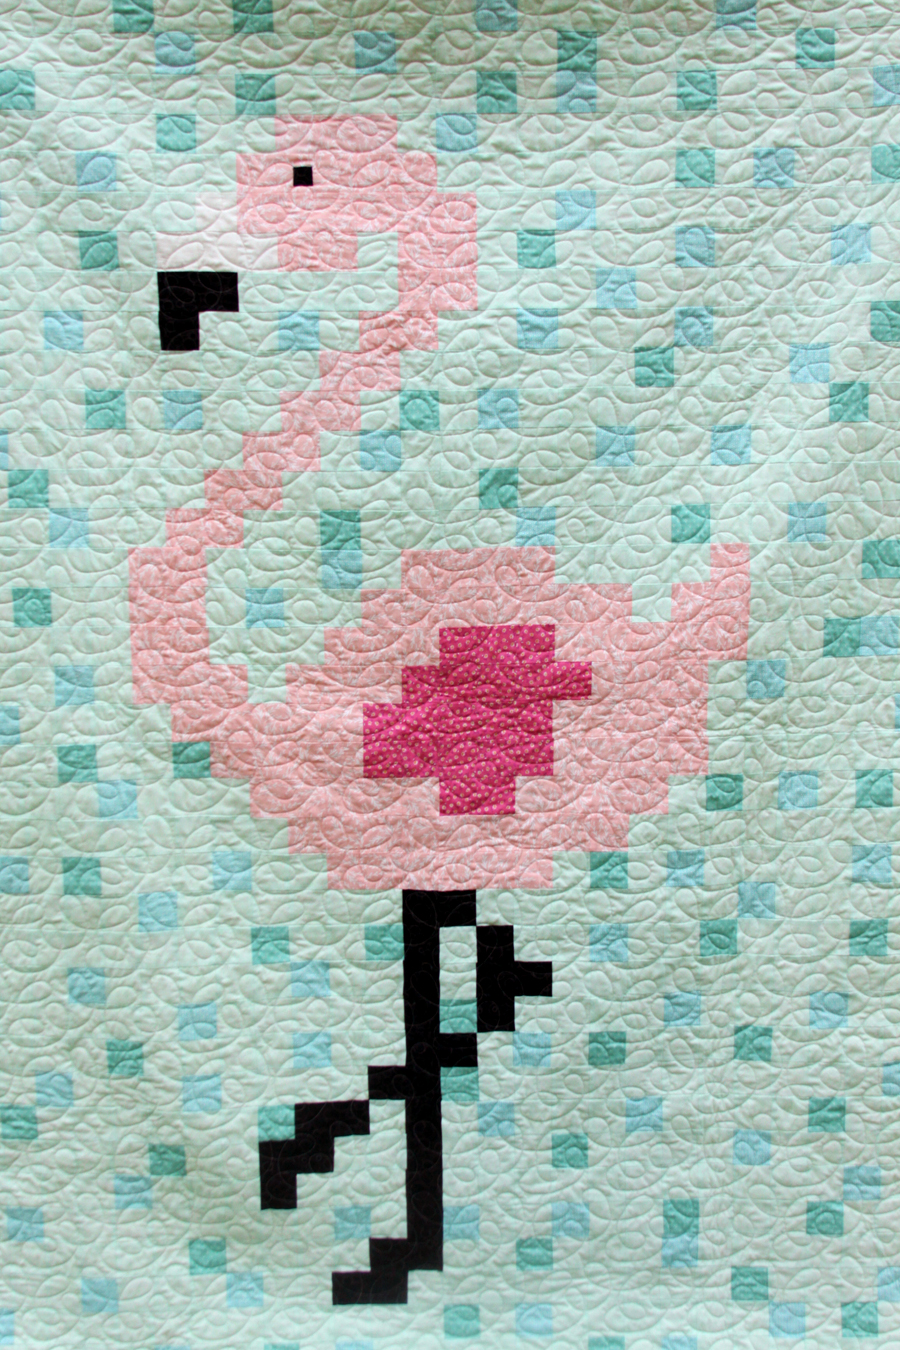
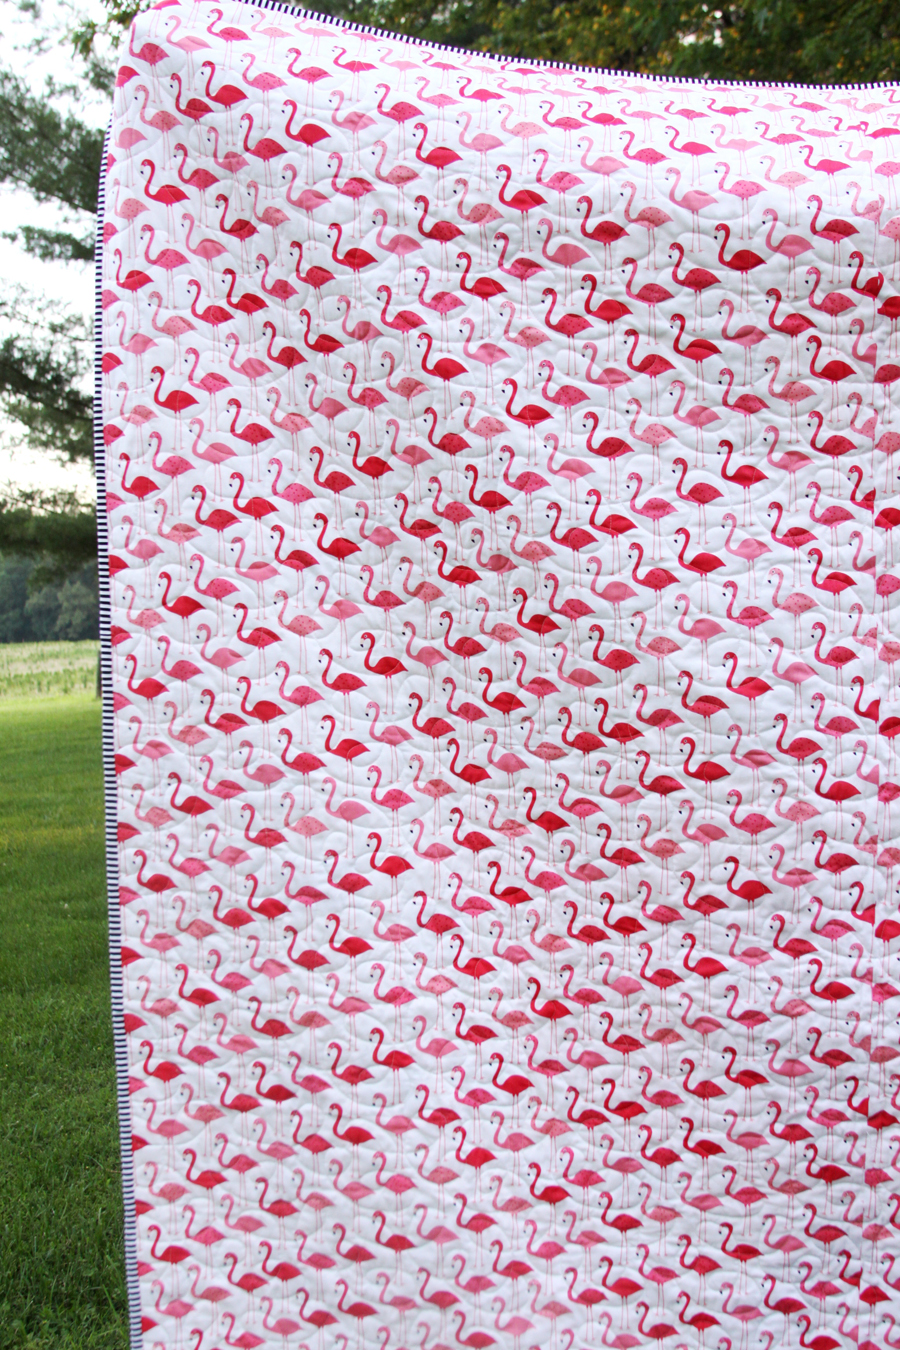
I used a fun black and white stripe for the binding and this awesome all over flamingo print for the backing. They look so great together!
Now you can show off your fun new flamingo quilt! It would be a great gift for a flamingo loving friend too!
I’d love to see a photo if you make one up!
You might also like:
Gingham Girls Dresden Mini Quilt
Its a wonderful project for me to try, something to make just for me….. I can’t estimate when I might finish but I will get a photo to you when I do. Thank you so very much for the pattern and inspiration.
Oh my goodness, that is extraordinary. so clever and yet I can see how it builds up in such a simple way.
Wow, just wow!!!
I love both sides of this amazing quilt! I can just picture snuggling up under the stars in this gorgeous creation. Thanks so much for the tutorial!
Oh my gosh! This is so fun and pretty! I don’t possess any quilting skills and I’m always amazed at those talented people like you that can make something so beautiful. Thanks for sharing at the #HomeMattersParty !
Oh WoW!! The Flamingo quilt is so fun! I just love it!
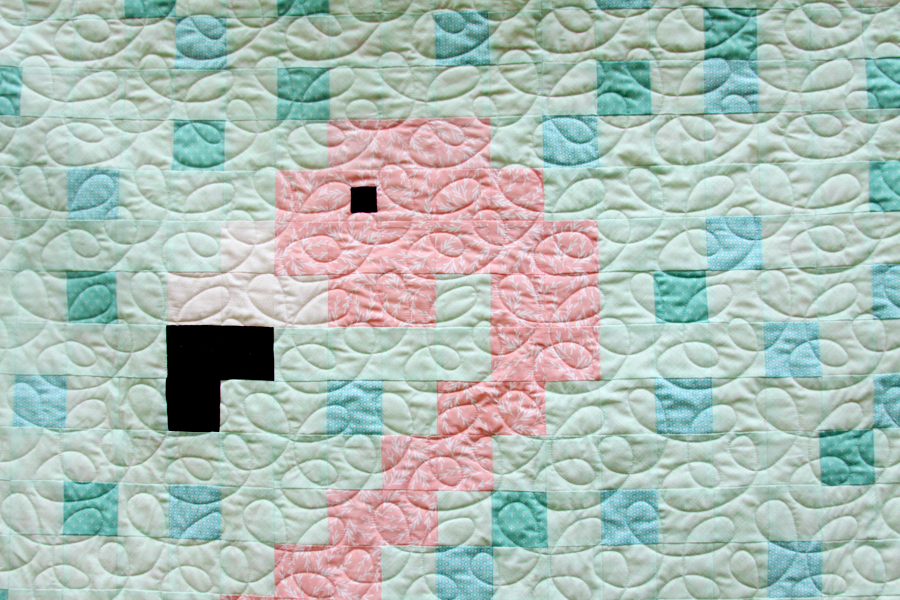
Looks wonderful, but how do you put the eye in?
I simply love flamingos, so of course I loved this too! Thank you for sharing the pattern!
Thankyou my 11year old granddaughter is going to make this
LOVE, LOVE, LOVE IT! I have a daughter that adores pink, and Flamingos! She will love this quilt! Thank you so much for sharing!
It looks like a lot of fun! Sure to make you smile!!
Hi. I’d love to purchase a paper copy if possible please. Am in Scotland and disabled and don’t currently have access to a printer. Would that be possible? I’d love to make this for my niece in NZ. Thanks. Hx
I love this! Thanks for sharing at the Mark and Jan Show Let’s Party!
Thank you for sharing this darling pattern and the Christmas version!
You will have me pondering other holidays and occasions!
This quilt is amazing! Would love to make smaller version.Cannot download it for some reason
Thank you for sharing!